
Looking for a yarn?


Comments / Questions (3)
![]() Anne wrote:
Anne wrote:
Hur stickas relieff- strukturen på rundsticka?
30.06.2025 - 20:15DROPS Design answered:
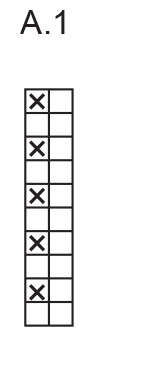
Hej Anne, ifølge diagrammet som strikkes fre retsiden når du strikker rundt. Det vil sige ret men hver 2.varv strikkes hver 2.m avig :)
01.07.2025 - 11:21
![]() Maria Angeles Lopez De La Rosa wrote:
Maria Angeles Lopez De La Rosa wrote:
Porque no se pueden guardar ahora los jerseys que te gustan por si lo quieres hacer él la próxima vez muchas gracias
28.08.2024 - 08:19
![]() Hilde Vrangsagen wrote:
Hilde Vrangsagen wrote:
Skal ermet være lengst i den minste størrelsen ? Det ser ut som oppgitt lengde på ermet er feil:
16.12.2023 - 21:53DROPS Design answered:
Hei Hilde, Vi anbefaler lengre ermer i mindre størrelser pga av smalere skuldervidde og kortere bærestykke. Men ermelengden kan justeres, så bare prøve genseren på og strikke til ønsket lengde. God fornøyelse!
18.12.2023 - 06:48
|
||||||||||
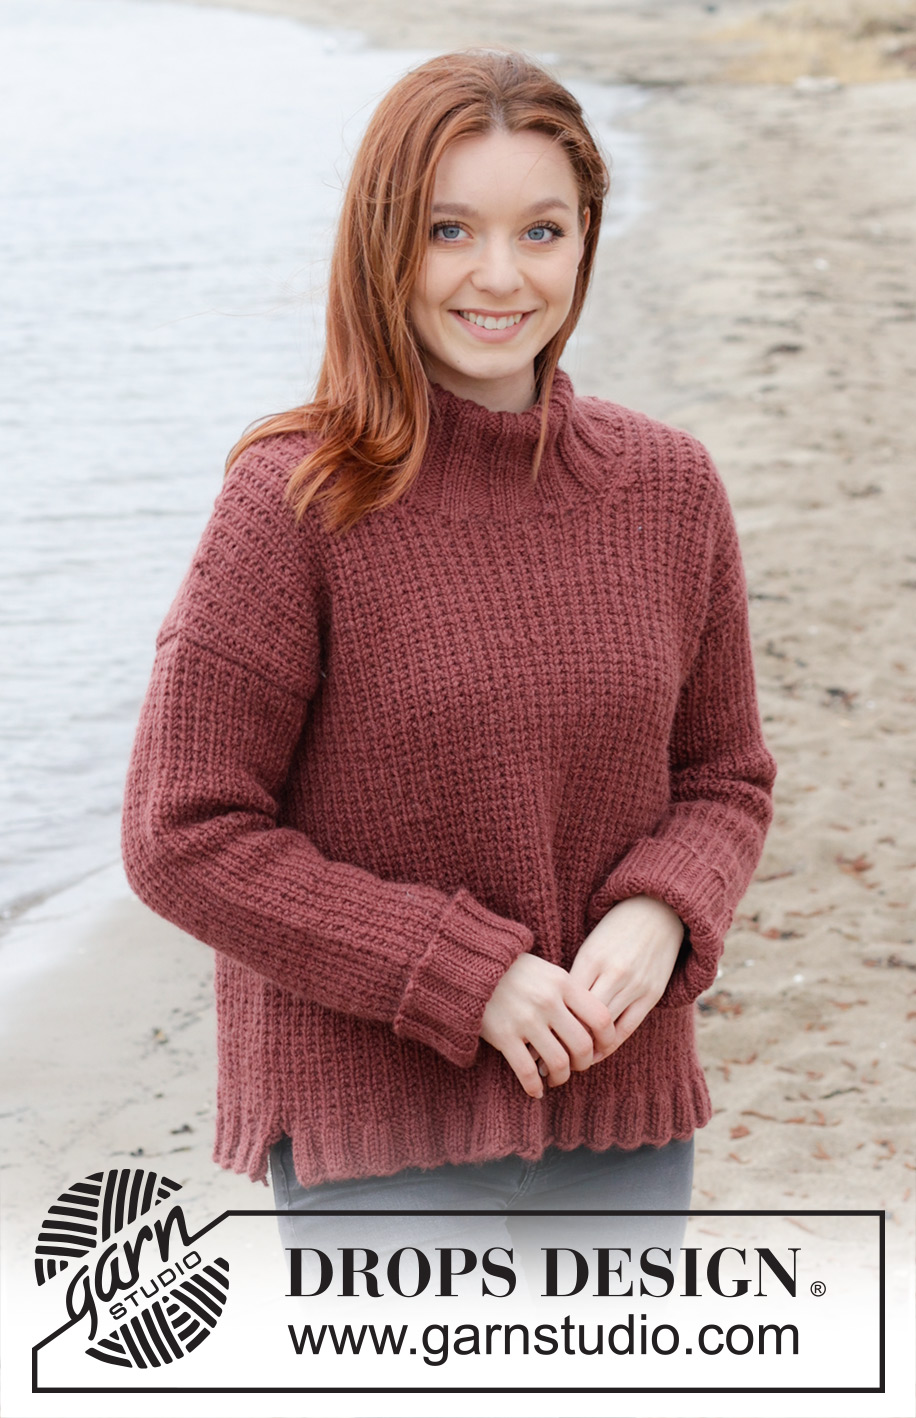
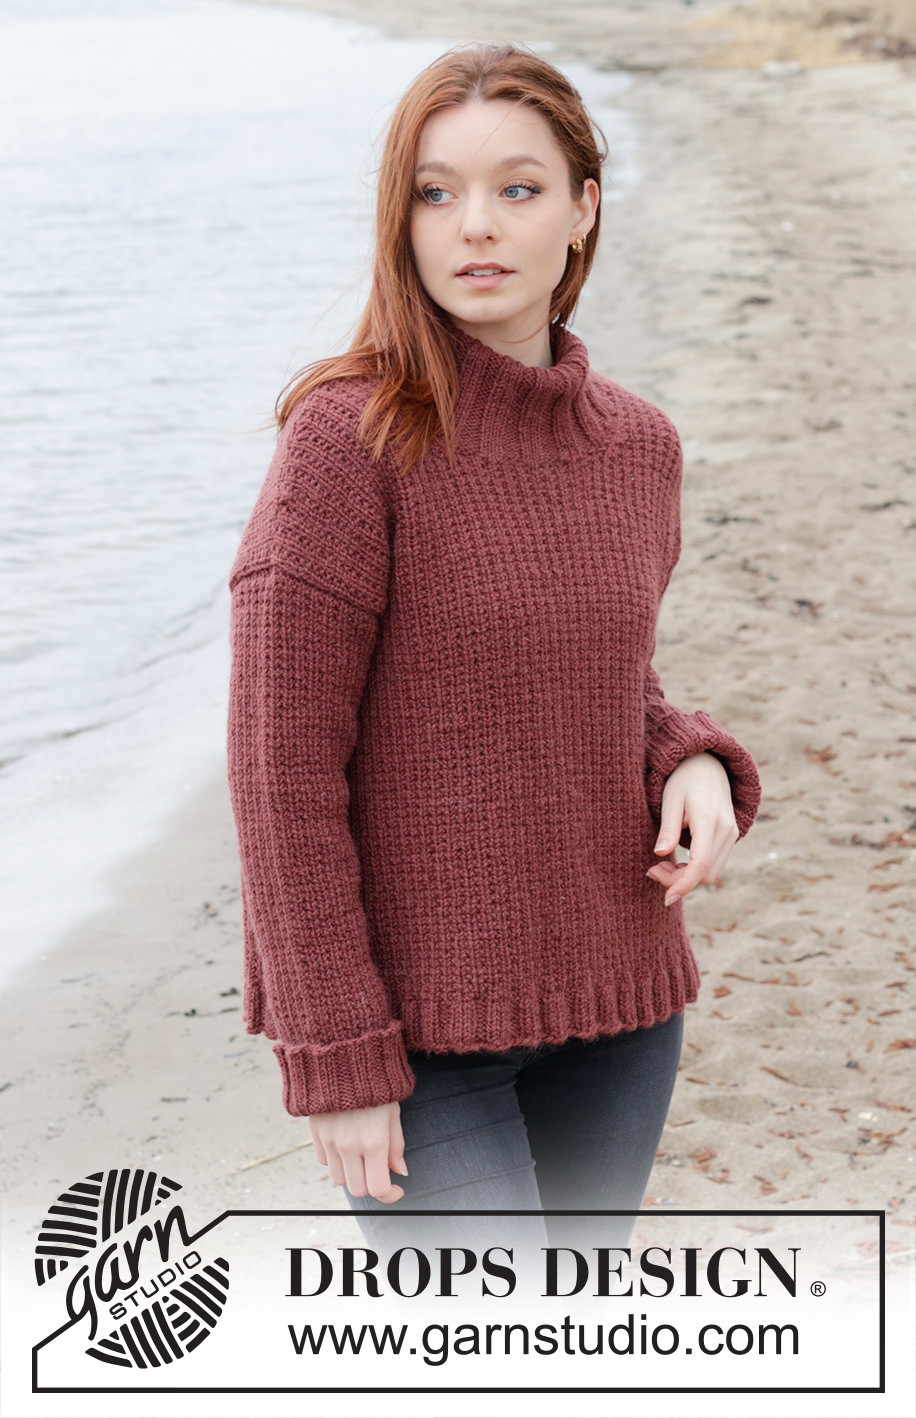
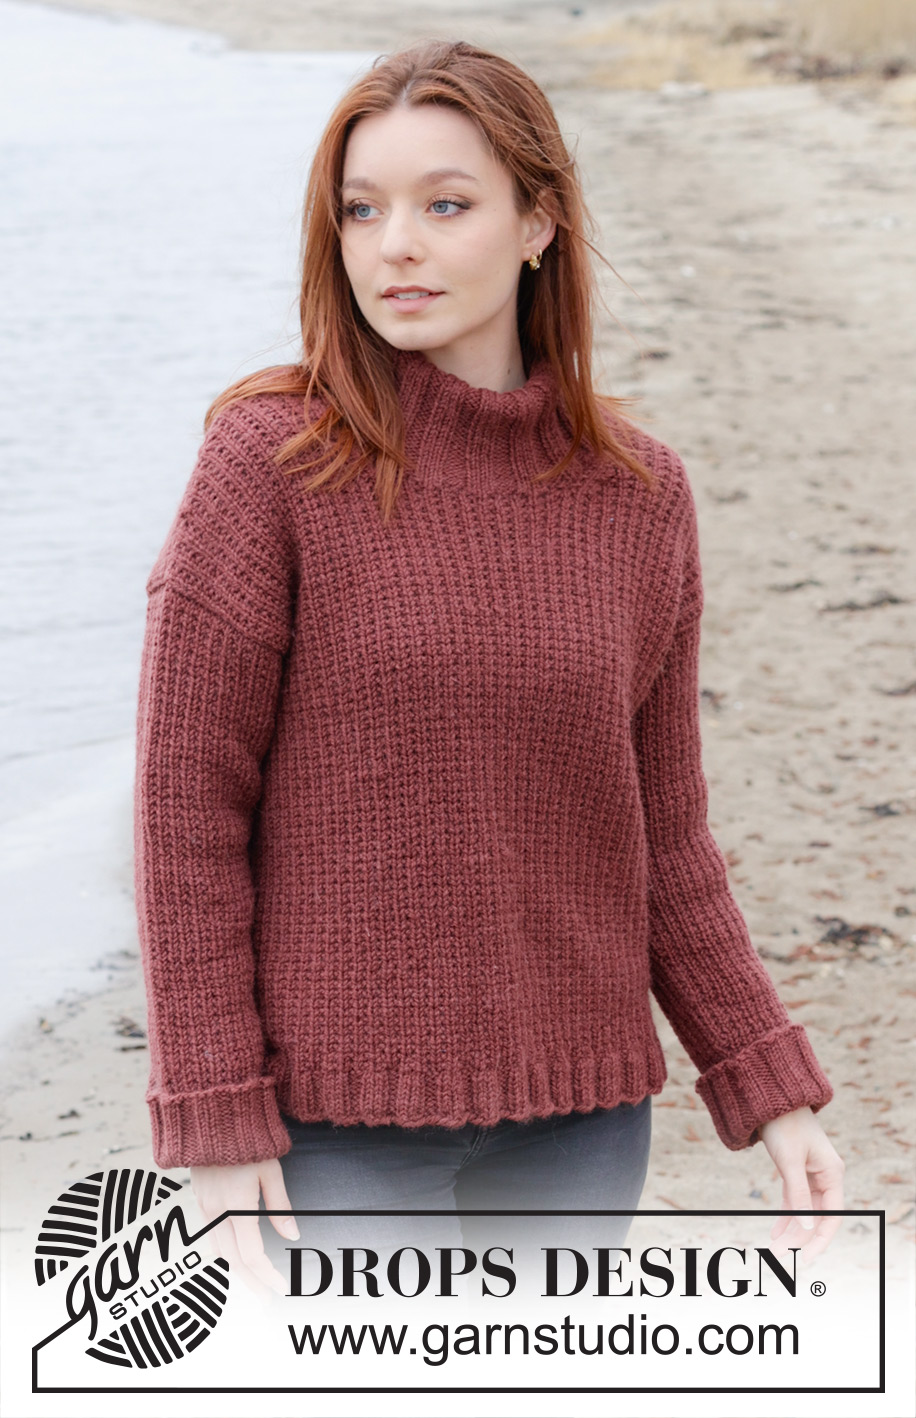
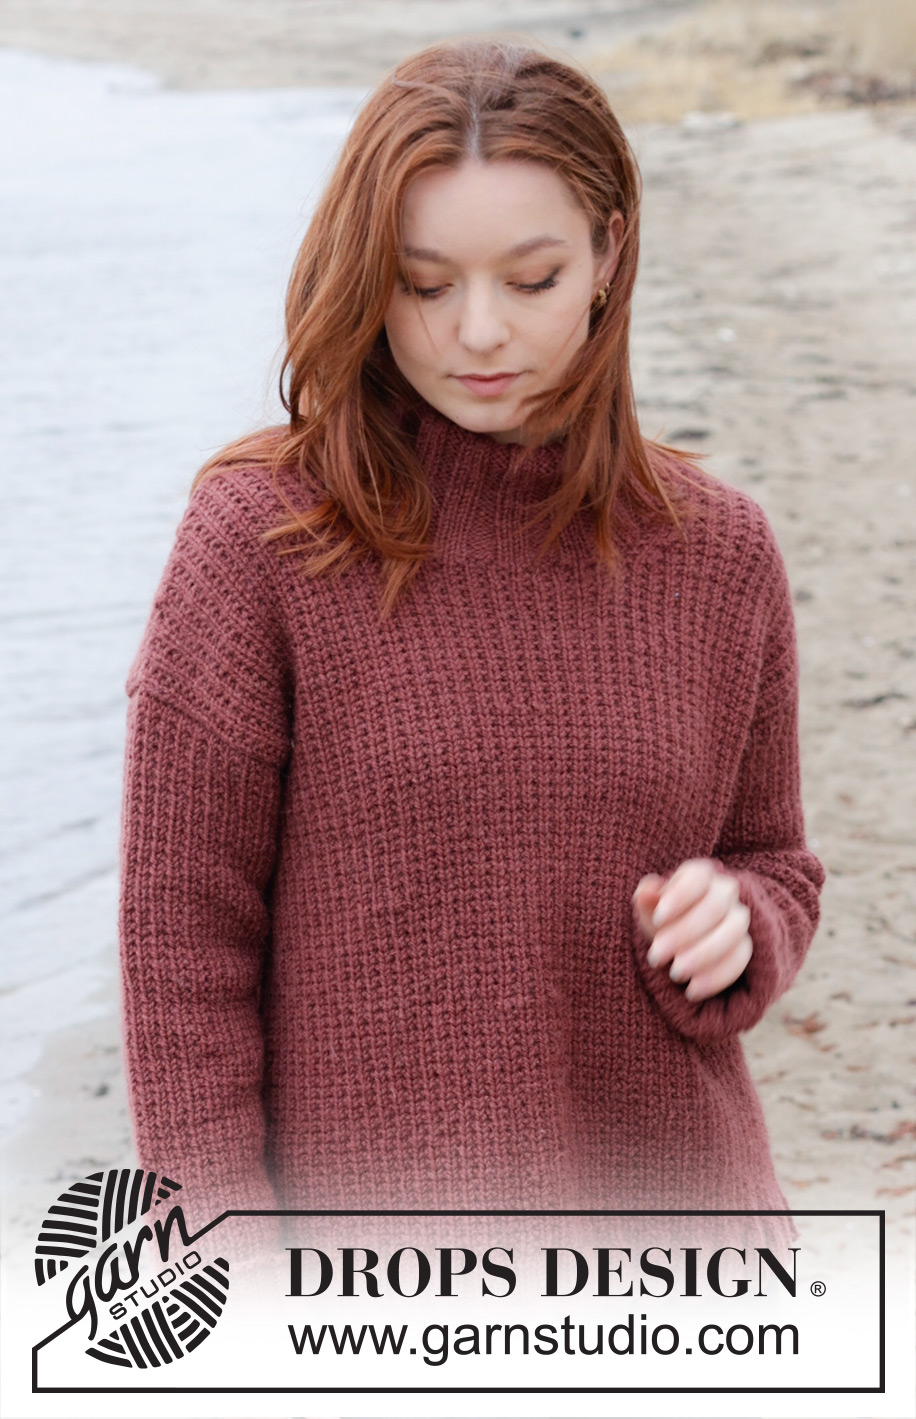
Rustic Berry Sweater#rusticberrysweater |
||||||||||
 |
 |
|||||||||
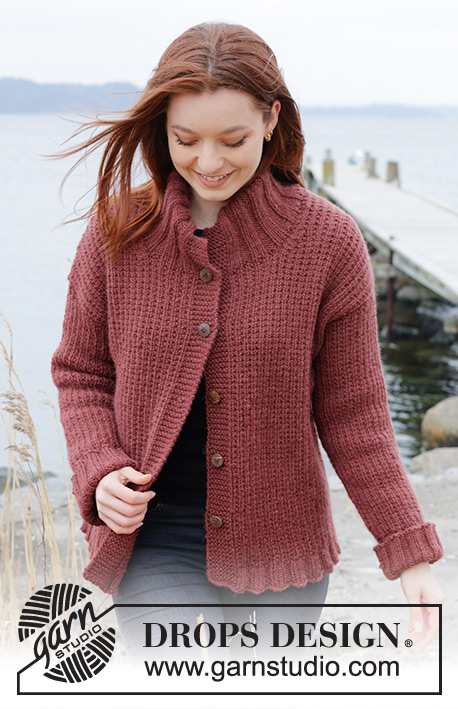
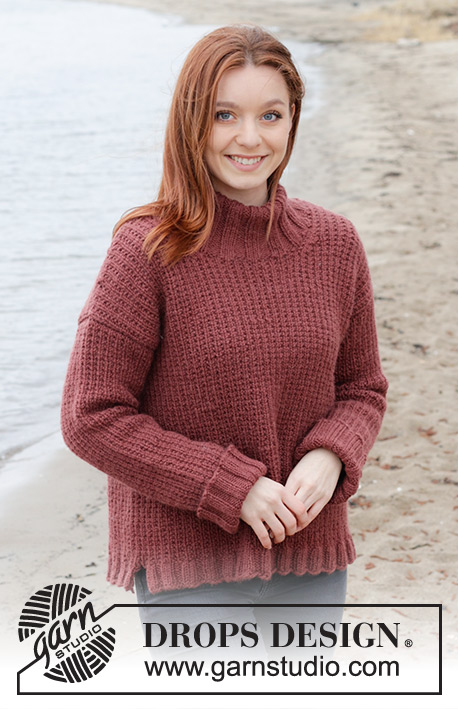
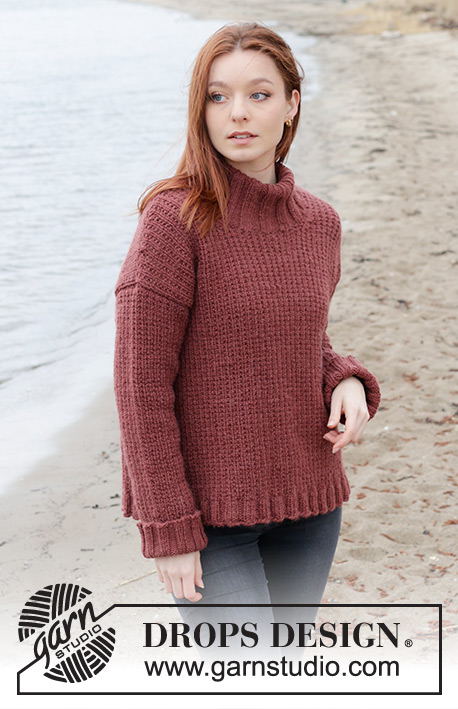
Knitted sweater in DROPS Nepal. The piece is worked bottom up with relief-pattern, diagonal shoulders and high neck. Sizes S - XXXL.
DROPS 245-26 |
||||||||||
|
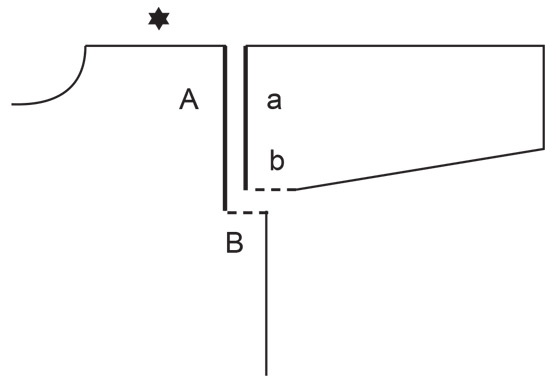
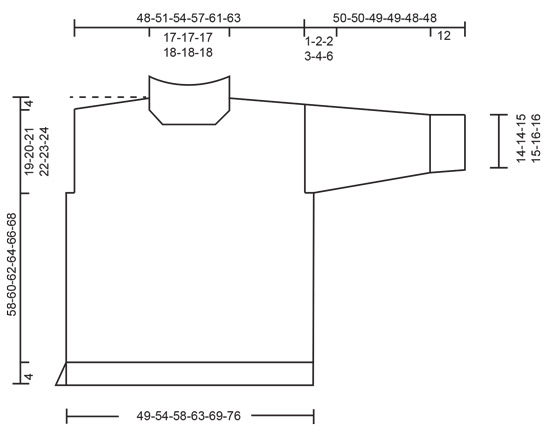
------------------------------------------------------- EXPLANATIONS FOR THE PATTERN: ------------------------------------------------------- EDGE STITCH (worked back and forth): Knit all rows. 1 ridge = knit 2 rows. PATTERN: See diagram A.1. The diagrams show all rows in the pattern from the right side. INCREASE TIP (for sleeves): Start 1 stitch before the marker thread, make 1 yarn over, knit 2 (marker thread sits between these 2 stitches), make 1 yarn over. On the next round knit the yarn overs twisted to avoid holes. Then work the new stitches into the pattern. DECREASE TIP (for neckline): All decreases are worked from the right side! Decrease inside 3 stitches by purling 2 together. ------------------------------------------------------ START THE PIECE HERE: ------------------------------------------------------- SWEATER – SHORT OVERVIEW OF THE PIECE: The back and front pieces are started separately, back and forth with circular needle, until the split in each side is finished. The pieces are joined and the body continued in the round as far as the armholes. Then the front and back pieces are finished separately. The sleeves are worked in the round with double pointed needles, bottom up. Switch to circular needle when increasing. The neck is worked to finish. BACK PIECE: Cast on 95-101-113-119-131-143 stitches with circular needle size 4 MM = US 6 and DROPS Nepal. Purl 1 row from the wrong side. Then work rib as follows: 1 edge stitch in GARTER STITCH – read description above, * knit 3, purl 3 *, work from *-* until there are 4 stitches left, knit 3 and 1 edge stitch in garter stitch. Work this rib for 4 cm = 1½", finishing after a row from the wrong side. Lay the piece to one side and work the front piece. FRONT PIECE: Cast on and work in the same way as the back piece. BODY: Place the front and back pieces on the same circular needle size 5.5 MM = US 9 = 190-202-226-238-262-286 stitches. Work 1 round, from the right side, and decrease 30-26-38-34-38-42 stitches evenly spaced (15-13-19-17-19-21 decreases on each piece) = 160-176-188-204-224-244 stitches. Insert 1 marker in each side, the first marker in the first stitch, the second marker in the 81st-89th-95th-103rd-113th-123rd stitch = 79-87-93-101-111-121 stitches between the 2 marker-stitches. Work A.1 in the round over all stitches. REMEMBER THE KNITTING GAUGE! When the body measures 35-36-37-38-39-40 cm = 13¾"-14¼"-14½"-15"-15¼"-15¾" from the cast-on edge, bind off for the armholes as follows: Start 1-3-3-5-7-10 stitches before the first marker-stitch, bind off the next 3-7-7-11-15-21 stitches (marker-stitch is the middle stitch), work 77-81-87-91-97-101 stitches, bind off the next 3-7-7-11-15-21 stitches (marker-stitch is the middle stitch), work the last 77-81-87-91-97-101 stitches. Continue working the back piece. BACK PIECE: = 77-81-87-91-97-101 stitches. Continue A.1 back and forth over all stitches until the piece measures 54-56-58-60-62-64 cm = 21¼"-22"-22¾"-23⅝"-24⅜"-25¼". On the next row bind off the middle 27-27-27-29-29-29 stitches for the neckline and finish each shoulder separately. DIAGONAL SHOULDERS: = 25-27-30-31-34-36 stitches. Continue A.1 and place the outermost stitches by the armhole on a thread (after working them to avoid having to cut the strand). Place 6-7-8-8-8-9 stitches on the thread 3 times, then the last 7-6-6-7-10-9 stitches. Place the 25-27-30-31-34-36 stitches from the thread back onto circular needle size 5.5 MM = US 9. Work 1 row stockinette stitch but, to avoid holes where you turned, pick up the strand between 2 stitches and work it together with the next stitch on the left needle. Bind off loosely. The piece measures approx. 58-60-62-64-66-68 cm = 22¾"-23⅝"-24⅜"-25¼"-26"-26¾" from the cast-on edge to the top of the shoulder. Work the other shoulder in the same way. FRONT PIECE: = 77-81-87-91-97-101 stitches. Work A.1 over all stitches until the piece measures 51-53-55-56-58-60 cm = 20"-21"-21⅝"-22"-22¾"-23⅝". On the next row bind off the middle 19-19-19-21-21-21 stitches for the neckline and finish each shoulder separately. OVERVIEW OF NEXT SECTION: You will now decrease for the neckline and place stitches on a thread for the diagonal shoulder. Read NECKLINE and DIAGONAL SHOULDERS before continuing. NECKLINE: Decrease 1 stitch by the neck 4 times on each row from the right side – read DECREASE TIP. DIAGONAL SHOULDERS: Continue A.1, AT THE SAME TIME when the piece measures 54-56-58-60-62-64 cm = 21¼"-22"-22¾"-23⅝"-24⅜"-25¼", place stitches on a thread for the shoulder in the same way as on the back piece. When all stitches have been decreased or placed on the thread, place the 25-27-30-31-34-36 stitches from the thread back on circular needle size 5.5 MM = US 9. Work 1 row in stockinette stitch but, to avoid holes where you turned, pick up the strand between 2 stitches and work it together with the next stitch on the left needle. Bind off loosely. The piece measures approx. 58-60-62-64-66-68 cm = 22¾"-23⅝"-24⅜"-25¼"-26"-26¾" from the cast-on edge to the top of the shoulder. Work the other shoulder in the same way. SLEEVES: Cast on 66-72-78-78-78-84 stitches with double pointed needles size 4 MM = US 6. Work rib in the round (knit 3, purl 3) for 12 cm = 4¾". Change to double pionted needles size 5.5 MM = US 9. Knit 1 round and decrease 22-26-30-30-28-32 stitches evenly spaced = 44-46-48-48-50-52 stitches. Insert 1 marker-thread at the beginning of the round. Continue with A.1 over all stitches. When the sleeve measures 14-14-13-14-15-13 cm = 5½"-5½"-5⅛"-5½"-6"-5⅛", increase 1 stitch on each side of the marker-thread - read INCREASE TIP. Increase like this every 4½-4-4-3-2½-2½ cm = 1⅝"-1½"-1½"-1⅛"-1"-1" a total of 8-9-9-11-11-12 times = 60-64-66-70-72-76 stitches. When the sleeve measures 49-48-47-46-44-42 cm = 19¼"-19"-18½"-18"-17¼"-16½", work the sleeve cap back and forth until the sleeve measures 50-50-49-49-48-48 cm = 19¾"-19¾"-19¼"-19¼"-19"-19", i.e., a split of 1-2-2-3-4-6 cm = ⅜"-¾"-¾"-1⅛"-1½"-2⅜" at the top of the sleeve. Work the other sleeve in the same way. ASSEMBLY: Sew the shoulder seams. Sew the sleeve cap to the armhole, inside the outermost stitch on the armhole. Then sew the split to the bottom of the armhole – see sketch. DOUBLE NECK: Start from the right side, on one shoulder, and knit up 96 to 108 stitches around the neckline with short circular needle size 4 MM = US 6. The stitch count should be divisible by 6. Work rib (knit 3, purl 3) in the round for 14 cm = 5½". Bind off a little loosely. Fold the neck double to the inside and fasten down with a couple of stitches. |
||||||||||
Diagram explanations |
||||||||||
|
||||||||||
|
||||||||||
|
||||||||||
|
||||||||||
Have you finished this pattern?Tag your pictures with #dropspattern #rusticberrysweater or submit them to the #dropsfan gallery. Do you need help with this pattern?You'll find 28 tutorial videos, a Comments/Questions area and more by visiting the pattern on garnstudio.com. © 1982-2025 DROPS Design A/S. We reserve all rights. This document, including all its sub-sections, has copyrights. Read more about what you can do with our patterns at the bottom of each pattern on our site. |
||||||||||


With over 40 years in knitting and crochet design, DROPS Design offers one of the most extensive collections of free patterns on the internet - translated to 17 languages. As of today we count 314 catalogs and 11822 patterns - 11812 of which are translated into English (US/in).
We work hard to bring you the best knitting and crochet have to offer, inspiration and advice as well as great quality yarns at incredible prices! Would you like to use our patterns for other than personal use? You can read what you are allowed to do in the Copyright text at the bottom of all our patterns. Happy crafting!
Post a comment to pattern DROPS 245-26
We would love to hear what you have to say about this pattern!
If you want to leave a question, please make sure you select the correct category in the form below, to speed up the answering process. Required fields are marked *.