
Popular categories
Looking for a yarn?


Comments / Questions (5)
![]() Ingrid Moßig wrote:
Ingrid Moßig wrote:
Hallo, bin bei den Raglanzunahmen. Nun soll an den Ärmeln nur noch in jeder 4. Reihe zugenommen werden. Welche der vier Markierer sind für die Ärmel gedacht?\r\nVielen Dank im Voraus.
01.02.2025 - 11:39DROPS Design answered:
Liebe Frau Moßig, wenn man nur für das Rumpfteil in jeder Hinreihe (und in jeder 4. Reihe bei Ärmel) zunehmen soll wird man für das linke Vorderteil nach dem 1. Mark + für Rückenteil nach dem 2. Mark + vor dem 3. Mark + für das rechte Vorderteil nach dem 4. Mark. zunehmen, so wird es nach 1./vor 2. . und nach 3./vor 4. Mark (= Ärmel) bei diesen Reihen nicht zugenommen. Viel Spaß beim Stricken!
03.02.2025 - 08:27
![]() Pierrette wrote:
Pierrette wrote:
Existe-il l'explication en commençant par le bas.? ma fille m'a donné sa laine Duvetine de chez Bergere de France qui se tricote en 6/5 (Jersez) diagrame 12 m/17 rg. Avez vous un catalogue de fils, je réside a la frontière Espagnole! j'aime beaucoup vos modèles..Merci pour votre réponse ! Cordialement . Mme Perreau
25.03.2024 - 15:20DROPS Design answered:
Bonjour Pierrette, ce gilet se tricote de haut en bas, en allers et retours sur aiguille circulaire. On va augmenter pour le raglan, puis diviser l'ouvrage et terminer le bas du gilet (en allers et retours) et les manches (en rond) séparément. Retrouvez ici tous nos modèles de gilets et vestes tricotés de bas en haut, ajoutez des filtres pour affiner votre recherche. Bon tricot!
02.04.2024 - 09:40
![]() Jutta wrote:
Jutta wrote:
For the knitting gage which needle size is used, 7 mm or 5.5?
28.01.2024 - 23:13DROPS Design answered:
Dear Jutta, the gauge is worked with the same needle that will be used for the specified pattern. The 5.5mm needles are only for the rib. A.1 is worked with the 7mm needles, so you will need to work the gauge with the 7mm needles. Happy knitting!
28.01.2024 - 23:23
![]() Birgit wrote:
Birgit wrote:
Hallo Drops-Team, Beim Stricken (Größe M) des Ärmels sind laut Anleitung von 42 Maschen schrittweise 6 Maschen abzunehmen, es bleiben 38 Maschen übrig. Lese ich die Anleitung falsch oder hat sich ein Fehler eingeschlichen? Sollen insgesamt nur 4 Maschen abgenommen werden oder bleiben 36 übrig? Hat das Auswirkungen auf die Anzahl von Maschen (14), die fürs Bündchen zugenommen werden? VG, Birgit
31.10.2023 - 20:11DROPS Design answered:
Liebe Birgit, es wird jeweils nur 1 Masche abgenommen, das erste Mal am Ende der Runde (vor der Markierung), das 2. Mal nach der Markierung (am Anfang der Runde) und noch 2 Mal so - so haben Sie 42 M - 4 M abgenommen = sind dann 38 Maschen übrig. Viel Spaß beim stricken!
01.11.2023 - 15:03
![]() Asnate wrote:
Asnate wrote:
Will try this cardigan! With nepal & air yarns ( I had them at home waiting for an autumn project) First time trying something with buttons :)
31.08.2023 - 16:38
|
|||||||
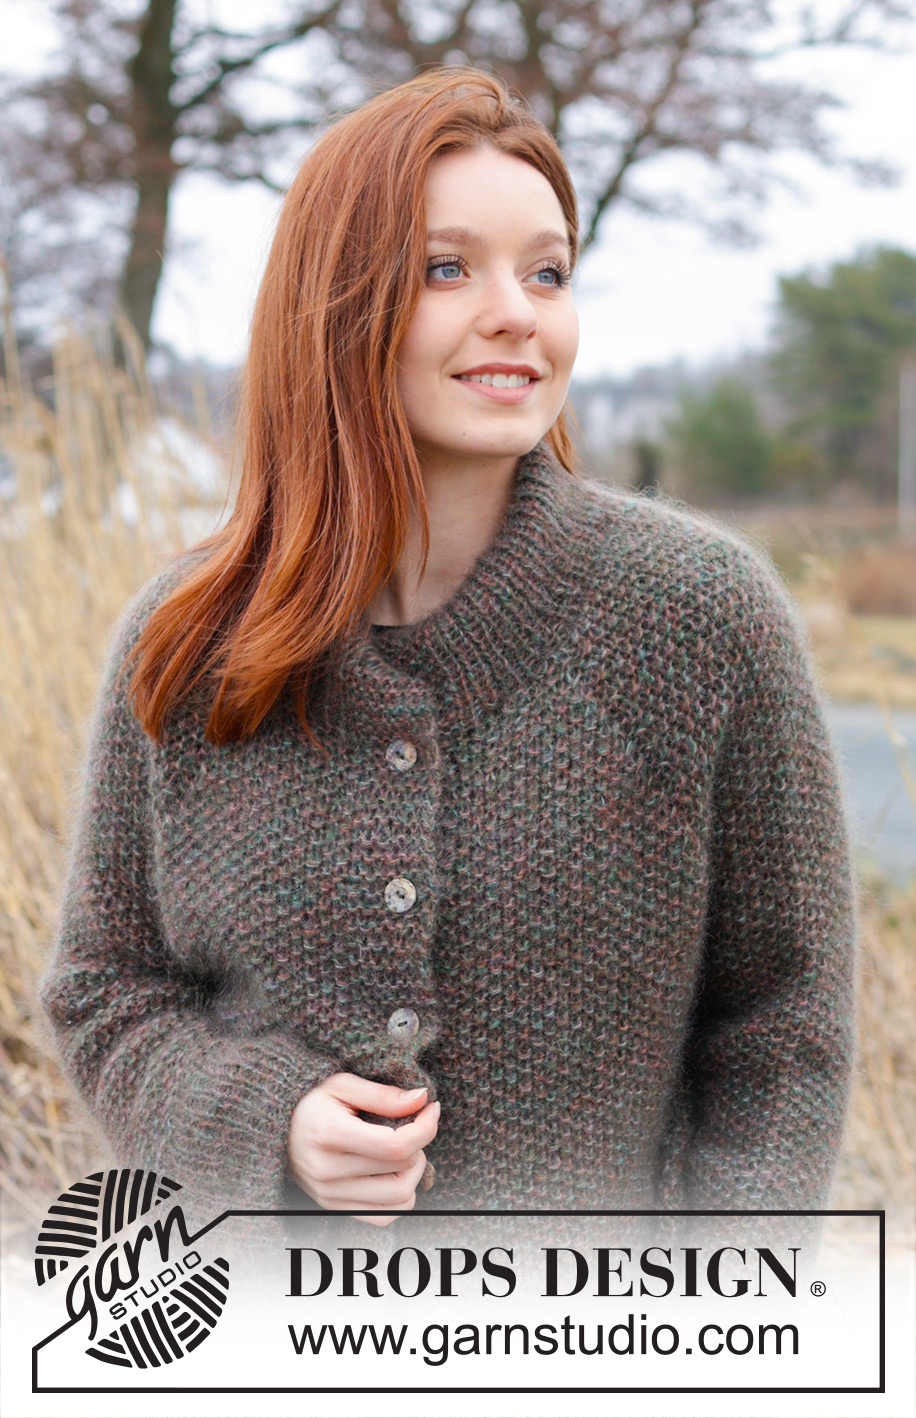
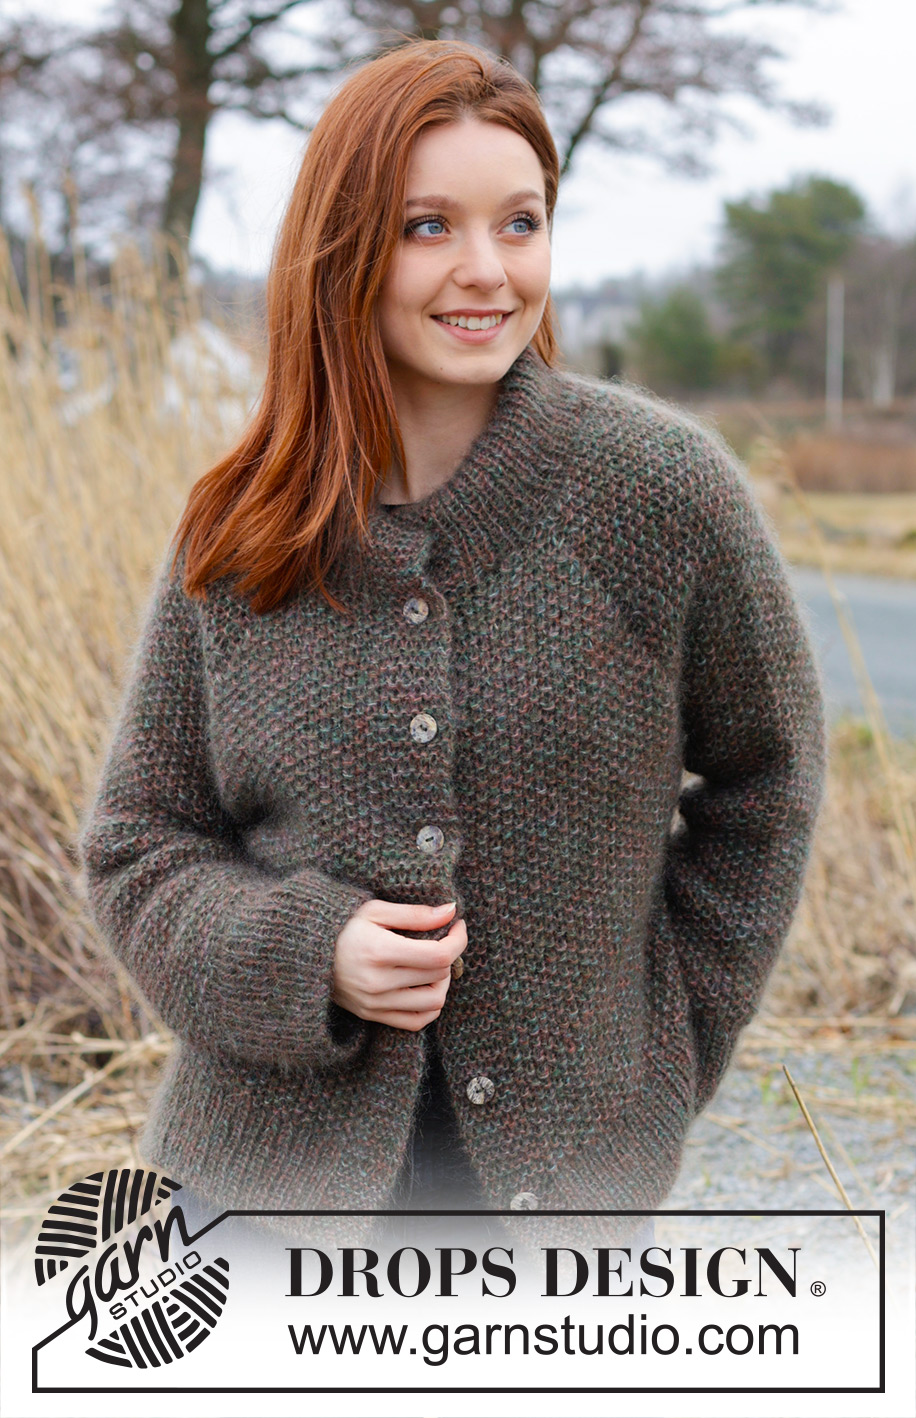
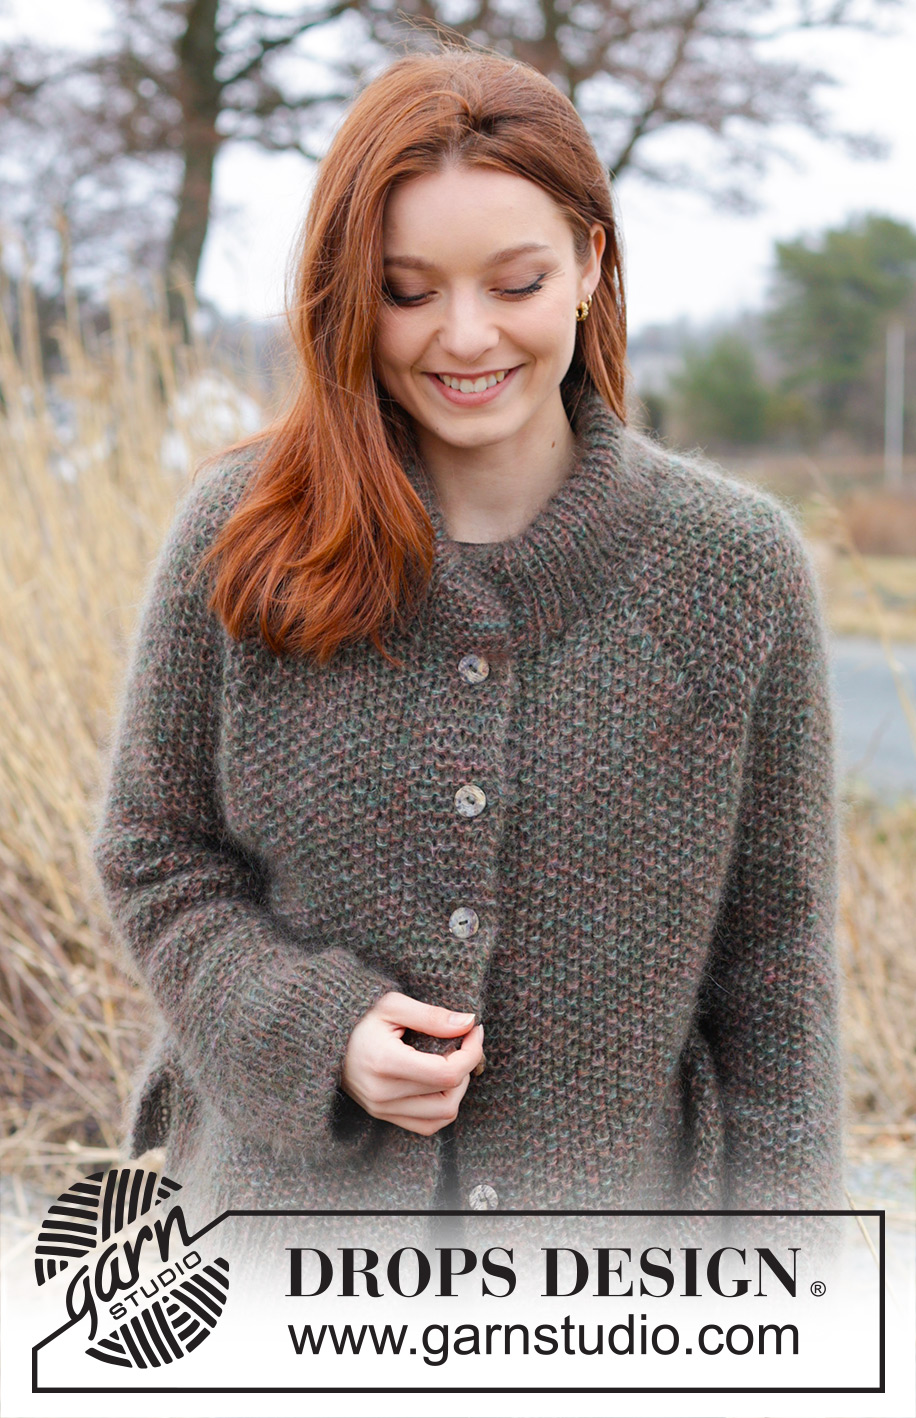
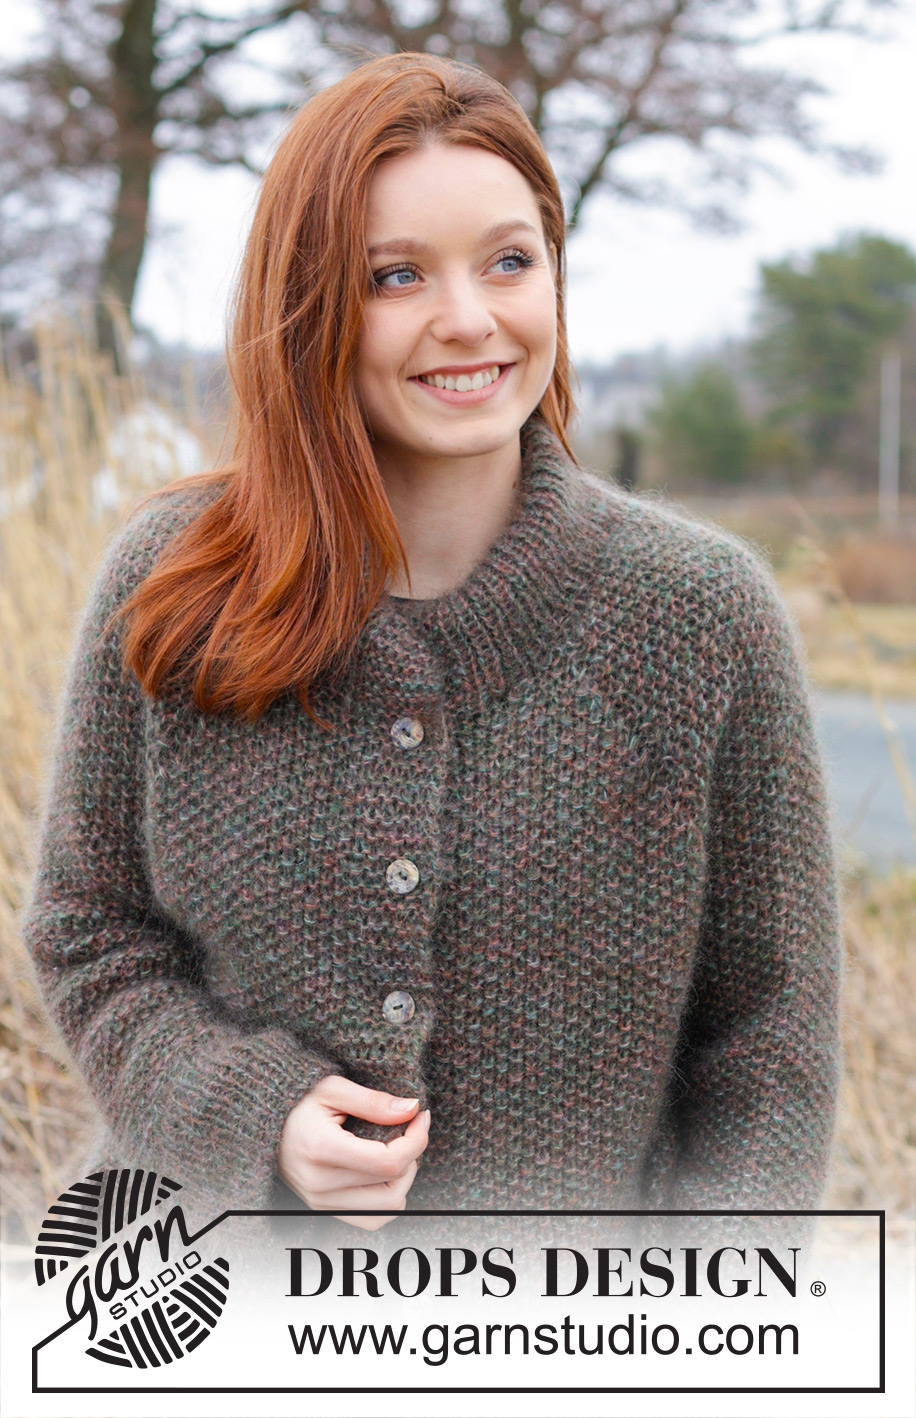
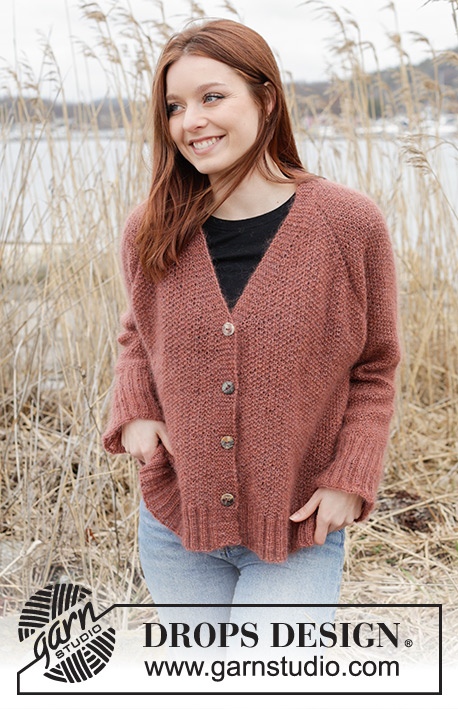
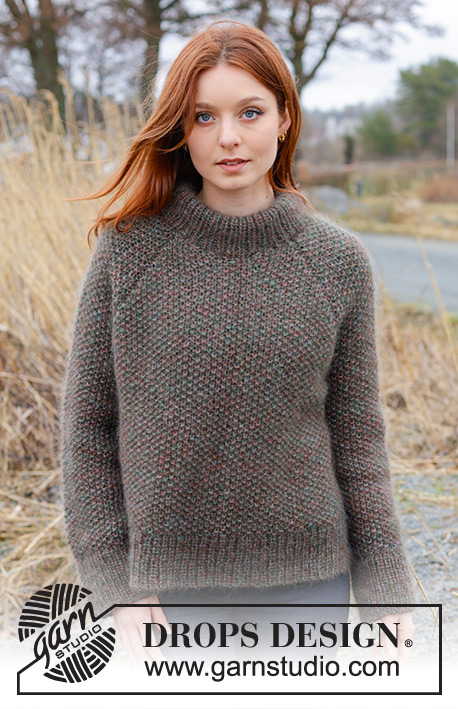
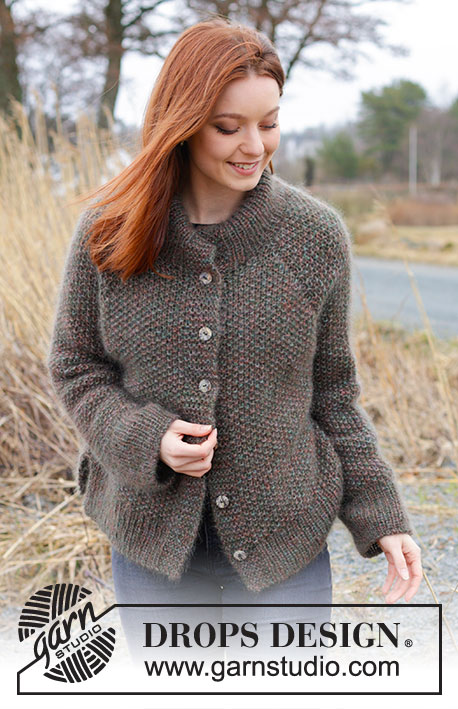
Forest Trails Cardigan#foresttrailscardigan |
|||||||
 |
 |
||||||
Knitted jacket in 4 strands DROPS Kid-Silk. The piece is worked top down with moss stitch, double neck, raglan and split in sides. Sizes S - XXXL.
DROPS 244-3 |
|||||||
|
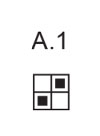
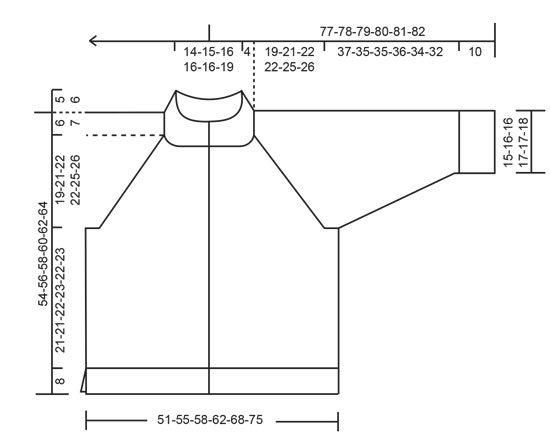
------------------------------------------------------- EXPLANATIONS FOR THE PATTERN: ------------------------------------------------------- GARTER STITCH (worked back and forth): Knit all rows. 1 ridge = knit 2 rows. PATTERN: See diagram A.1. The diagram shows all rows in the pattern from the right side. RAGLAN: All increases are worked from the right side! Increase 1 stitch before/after the 4 marker-stitches (raglan-stitches) by making 1 yarn over. The raglan-stitches are purled from the right side/knitted from the wrong side. On the next row work the yarn overs twisted as described below, then work them into A.1. Work the yarn overs from the wrong side before and after the raglan-stitches as follows: BEFORE raglan-stitch: Purl the yarn over twisted if the last stitch before the yarn over was knitted, or knit the yarn over twisted if the last stitch before the yarn over should was purled, there should be no hole. AFTER raglan-stitch: Slip the yarn over knit-wise, insert the left needle into the yarn over and place it back on the left needle (twisted), purl the yarn over if the next stitch is to be knitted or knit the yarn over if the next stitch is to be purled, there should be no hole. INCREASE TIP (evenly spaced): Increase 1 stitch by making 1 yarn over. On the next row/round work the yarn over twisted to avoid a hole. DECREASE TIP (mid-under sleeves): Decrease 1 stitch alternately before and after the marker-stitch by knitting/purling 2 together (depending on how the last/next stitch in A.1 is worked). BUTTONHOLES: Work buttonholes on the right band (when the garment is worn). Work from the right side when there are 4 stitches left on the row as follows: Make 1 yarn over, knit 2 together and knit 2. On the next row (wrong side), knit the yarn over to leave a hole. The first buttonhole is worked on the first row from the right side after the neck. Then work the other 5-5-5-6-6-6 buttonholes with approx. 8-8½-9-7½-8-8 cm between each one. ------------------------------------------------------- START THE PIECE HERE: ------------------------------------------------------- JACKET – SHORT OVERVIEW OF THE PIECE: The neck is worked back and forth with circular needle from mid-front, then a neckline is worked with short rows. The yoke is continued back and forth, divided for body and sleeves and the body finished back and forth. The sleeves are worked in the round with short circular needle/double pointed needles. The neck is folded double and sewn down. DOUBLE NECK: Cast on 69-73-75-79-81-87 stitches with circular needle size 7 mm and 1 strand of each colour DROPS Kid-Silk (4 strands). Change to circular needle size 5.5 mm and purl 1 row from the wrong side. Work the next row as follows from the right side: 1 GARTER STITCH – read description above, * knit 1, purl 1 *, work from *-* until there are 2 stitches left, knit 1 and 1 garter stitch. Continue this rib back and forth for 5-5-5-6-6-6 cm. Cast on 6 stitches at the end of the next 2 rows for the bands = 81-85-87-91-93-99 stitches. Continue the rib but now with 7 band-stitches on each side, worked in garter stitch. Work until the neck measures 10-10-10-12-12-12 cm – with the next row from the right side. Insert 4 markers as described below, without working the stitches. NOTE: In size S, M, L and XXL each marker is placed in a purl stitch, seen from the right side; in size XL and XXXL each marker is placed in a knit stitch, seen frrom the right side – the stitches with a marker are now called raglan-stitches The raglan stitches are now purled from the right side and knitted from the wrong side. Count 14-14-16-17-16-19 stitches (front piece), insert marker-1 in the next stitch, count 17-17-15-17-19-17 stitches (sleeve), insert marker-2 in the next stitch, count 15-19-21-19-19-23 stitches (back piece), insert marker-3 in the next stitch, count 17-17-15-17-19-17 stitches (sleeve), insert marker-4 in the next stitch. There are 14-14-16-17-16-19 stitches left after the last marker (front piece). Knit 1 row from the right side and decrease 4-8-2-0-4-0 stitches evenly spaced as follows: Knit past marker-1, then decrease 2-2-0-0-2-0 stitches evenly between markers 1 and 2, decrease 0-4-2-0-0-0 stitches evenly between markers 2 and 3, decrease 2-2-0-0-2-0 stitches evenly between markers 3 and 4 and work to end of row (do not decrease the marker-stitches) = 77-77-85-91-89-99 stitches. There are 15-15-15-17-17-17 stitches between markers 1 and 2 and markers 3 and 4 (sleeves) and 15-15-19-19-19-23 stitches between markers 2 and 3 (back piece). NECKLINE: Change to circular needle size 7 mm, work short rows and AT THE SAME TIME increase for raglan as described below. REMEMBER THE KNITTING TENSION. ROW 1 (wrong side): Work 7 band stitches in garter stitch, A.1 (remembering to knit all raglan-stitches from the wrong side/purl them from the right side) until you have worked 2 stitches past marker-1 (i.e., front left side of neck when the garment is worn), turn and tighten the strand. ROW 2 (right side): Work A.1 and increase for RAGLAN on each side of all 4 raglan-stitches – read description above, and until you have worked 2 stitches past marker-4 (front right of neck and 8 stitches increased), turn and tighten the strand. ROW 3 (wrong side): Work A.1 until you have worked 2 stitches past where you turned by marker-1, turn and tighten the strand. ROW 4 (right side): Work A.1 and increase for raglan on each side of all 4 raglan-stitches, and until you have worked 2 stitches past where you turned by marker-4 (= 8 stitches increased), turn and tighten the strand. ROW 5 (wrong side): Work A.1 until you have worked 2 stitches past where you turned by marker-1, turn and tighten the strand. ROW 6 (right side): Work A.1 and increase for raglan on each side of all 4 raglan-stitches and until you have worked 2 stitches past where you turned by marker-4 (= 8 stitches increased), turn and tighten the strand. ROW 7 (wrong side). Work A.1 to end of row (raglan-stitches are knitted from the wrong side and the bands are knitted). The short rows are finished and you have increased for raglan 3 times on each side of the 4 raglan-stitches = 101-101-109-115-113-123 stitches. Continue working the yoke back and forth over all stitches as described below. REMEMBER THE BUTTONHOLES on the right band – read description above. YOKE: Continue A.1 with 7 band stitches in garter stitch on each side, purling the raglan-stitches from the right side and knitting them from the wrong side. AT THE SAME TIME continue to increase for raglan as follows: Increase for raglan every 2nd row (each row from the right side) but every 2nd increase is only on the front and back pieces, i.e., increase on the front/back pieces every 2nd row and on the sleeves every 4th row (alternately 4 and 8 increased stitches). Increase like this 12-14-18-18-20-20 times on the front/back pieces and 6-7-9-9-10-10 times on the sleeves = 173-185-217-223-233-243 stitches. The increases on the sleeves are finished. Continue to increase on the front/back pieces 4-4-0-1-2-3 more times = 189-201-217-227-241-255 stitches. All raglan increases are finished. Continue working without further increases until the yoke measures 19-21-22-22-25-26 cm, measured after the neck mid-back. Now divide for the body and sleeves as follows: Work the first 34-36-38-40-42-46 stitches as before (front piece), place the next 33-35-39-41-43-43 stitches on 1 thread for the sleeve, cast on 7-7-7-9-11-13 stitches (in side under sleeve), work 55-59-63-65-71-77 stitches (back piece), place the next 33-35-39-41-43-43 stitches on 1 thread for the sleeve, cast on 7-7-7-9-11-13 stitches (in side under sleeve), work 34-36-38-40-42-46 stitches (front piece). The body and sleeves are finished separately. The piece is now measured from here! BODY: = 137-145-153-163-177-195 stitches. Insert 1 marker in the middle of the 7-7-7-9-11-13 cast-on stitches under each sleeve. Allow them to follow your work onwards – they are used when dividing for the split in each side. Continue A.1 back and forth with 7 band stitches in garter stitch on each side. When the body measures 21-21-22-23-22-23 cm from the division, divide the piece at each marker and finish the front and back separately. The marker-stitches belong to the front pieces. LEFT FRONT PIECE: = 38-40-42-44-48-52 stitches. Knit 1 row from the right side and increase 9-9-9-11-11-13 stitches evenly spaced – read INCREASE TIP (do not increase over the bands) = 47-49-51-55-59-65 stitches. Change to circular needle size 5.5 mm and work as follows from the wrong side (from the side): 1 garter stitch, * purl 1, knit 1 *, work from *-* until there are 8 stitches left, purl 1 and 7 band stitches in garter stitch. Continue this rib back and forth for 8 cm. Cast off. You can use Italian cast off – see video under Tips and Help on our web page. The piece measures approx. 54-56-58-60-62-64 cm from the shoulder. RIGHT FRONT PIECE: = 38-40-42-44-48-52 stitches. Knit 1 row from the right side and increase 9-9-9-11-11-13 stitches evenly spaced (do not increase over the bands) = 47-49-51-55-59-65 stitches. Change to circular needle size 5.5 mm and work as follows from the wrong side (from mid-front): 7 band stitches in garter stitch, * purl 1, knit 1 *, work from *-* until there are 2 stitches left, purl 1 and 1 garter stitch. Continue this rib back and forth for 8 cm. Cast off in the same way as on the left front piece. BACK PIECE: = 61-65-69-75-81-91 stitches. Knit 1 row from the right side and increase 18-20-20-20-24-24 stitches evenly spaced = 79-85-89-95-105-115 stitches. Change to circular needle size 5.5 mm and work as follows from the wrong side: 1 garter stitch, * purl 1, knit 1 *, work from *-* until there are 2 stitches left, purl 1 and 1 garter stitch. Continue this rib back and forth for 8 cm. Cast off in the same way as on the front pieces. SLEEVES: Place the 33-35-39-41-43-43 stitches from the thread on the one side of the piece on short circular needle/double pointed needles size 7 mm and knit up 1 stitch in each of the 7-7-7-9-11-13 new stitches cast on under the sleeve = 40-42-46-50-54-56 stitches. Insert a marker in the middle of the new stitches under the sleeve. Start at the marker and continue A.1 in the round. When the sleeve measures 4-4-4-4-3-3 cm from the division decrease 1 stitch before the marker – read DECREASE TIP. When the sleeve measures 12-12-8-6½-5-5 cm from the division decrease 1 stitch after the marker – remember DECREASE TIP. Decrease like this, alternately before and after the marker, every 8-8-4-3-2-2 cm a total of 4-4-8-10-14-14 times (2-2-4-5-7-7 times before the marker and 2-2-4-5-7-7 times after the marker) = 36-38-38-40-40-42 stitches. When the sleeve measures 37-35-35-36-34-32 cm from the division, knit 1 round and increase 14-14-16-16-18-18 stitches evenly spaced – remember INCREASE TIP = 50-52-54-56-58-60 stitches. Change to double pointed needles size 5.5 mm and work rib (knit 1, purl 1) for 10 cm. Cast off. You can use Italian cast off. The sleeve measures approx. 47-45-45-46-44-42 cm from the division. Work the other sleeve in the same way. ASSEMBLY: Fold the neck double to the inside and sew down. To avoid the neck being tight, it is important that the seam is elastic. Sew together the opening on the bands mid-front, with small stitches. Sew the buttons onto the left band. |
|||||||
Diagram explanations |
|||||||
|
|||||||
|
|||||||
|
|||||||
Have you finished this pattern?Tag your pictures with #dropspattern #foresttrailscardigan or submit them to the #dropsfan gallery. Do you need help with this pattern?You'll find 35 tutorial videos, a Comments/Questions area and more by visiting the pattern on garnstudio.com. © 1982-2025 DROPS Design A/S. We reserve all rights. This document, including all its sub-sections, has copyrights. Read more about what you can do with our patterns at the bottom of each pattern on our site. |
|||||||


With over 40 years in knitting and crochet design, DROPS Design offers one of the most extensive collections of free patterns on the internet - translated to 17 languages. As of today we count 314 catalogues and 11822 patterns translated into English (UK/cm).
We work hard to bring you the best knitting and crochet have to offer, inspiration and advice as well as great quality yarns at incredible prices! Would you like to use our patterns for other than personal use? You can read what you are allowed to do in the Copyright text at the bottom of all our patterns. Happy crafting!
Post a comment to pattern DROPS 244-3
We would love to hear what you have to say about this pattern!
If you want to leave a question, please make sure you select the correct category in the form below, to speed up the answering process. Required fields are marked *.