
Popular categories
Looking for a yarn?


Comments / Questions (18)
![]() Bec wrote:
Bec wrote:
I’m a beginner so apologies for what may seem a really obvious question but which length circular needles do I stay with; the 40 or the 80? Both are mentioned at the start in the needle sizes and lengths. Thank you 🙏🏻
20.03.2026 - 13:41DROPS Design answered:
Dear Mrs Bec, front and back pieces can be worked back and forth on the 80 cm needle, sleeves are worked on the 40 cm needle (first in the round then back and forth). Neckline is worked in the round with the 40 cm needle. Happy knitting!
20.03.2026 - 15:39
![]() Lisa wrote:
Lisa wrote:
Hello, in the Drops pattern #Dream In Rose# For the decreases in the back and front am I decreasing x19 stitches (for med size) over one row? Or is it so many every knit row ? Many thanks
13.03.2026 - 22:16DROPS Design answered:
Dear Lisa, after the rib you will decrease evenly 19 sts on first row stocking stitch to get 94 sts - as you need more sts for ribbing with smaller needle you need to decrease before working stocking with larger needles. Click on the small tool icon in the bottom corner on the right side to know how to decrease evenly on a row. Happy knitting!
16.03.2026 - 07:38
![]() Anna wrote:
Anna wrote:
Muss man nach dem Abketten der Maschen für die Armausschnitte weiterhin an den Rändern eine Masche kraus rechts stricken?
15.06.2025 - 15:18DROPS Design answered:
Liebe Anna, die Randmaschen können Sie entweder krausrechts oder Glattrechts stricken. Viel Spaß beim Stricken!
16.06.2025 - 08:23
![]() Erika Schmidt wrote:
Erika Schmidt wrote:
Hallo aus Bremen, ich stricke den Ärmel nicht in Runden. Wie muß ich jetzt bitte die Armkugel stricken. Einen Schlitz habe ich noch nie gestrickt. Für eine Anleitung bedanke ich mich vorab.LG, Erika
25.04.2025 - 10:23DROPS Design answered:
Liebe Frau Schmidt, in diesem Video zeigen wir, wie man so einen Ärmel (in Runden) strickt und an näht - siehe auch diese Lektion. Wenn Sie die Ärmel in Reihen stricken, setzen Sie am besten eine Markierung beidseitig nach 22-21-20-18-16-13 cm (ab Anschlagskante), so wissen Sie genau wo dieser "Schlitz" ist, wenn Sie die Ärmel an den Armausschnitte annähen. Viel Spaß beim Stricken!
25.04.2025 - 11:37
![]() Joanna wrote:
Joanna wrote:
Czesc, czy mogę prosić o i steuje jak dokładnie osobno przerabiać tył w ramionach, powyżej dekoltu?
16.03.2025 - 16:13DROPS Design answered:
Witaj Joanno, przerabiasz prawe ramię, zamykasz oczka na środku i teraz przerabiasz lewe ramię: tj. zamykasz 1 oczko na początku rzędu jak w części ZAMYKANIE OCZEK (dekolt) i przerabiasz to ramię, aż całkowita długość robótki wynosi x cm dla Twojego rozmiaru. Odcinasz nitkę. Na prawej stronie robótki dołączasz nową nitkę na prawe ramię, przerabiasz 1-szy rząd, a na jego końcu zamykasz 1 oczko (jak w części ZAMYKANIE OCZEK (dekolt)). I przerabiasz, aby to ramię miało taką samo długość jak lewe. Zakańczasz. Pozdrawiamy!
18.03.2025 - 08:30
![]() Nancy wrote:
Nancy wrote:
Can you please explain instructions for sleeve cap? I don’t understand about “going back and forth.” Thank you!
09.03.2025 - 05:23DROPS Design answered:
Dear Nancy, the sleeve was mainly worked in the round. However, after the sleeve increases, you start working back and forth (so you work in rows, instead of rounds) which will leave a small opening in the mid under the sleeve; this opening will make it easier to sew the sleeve to the armhole later on. Happy knitting!
09.03.2025 - 18:22
![]() Randi wrote:
Randi wrote:
Skal bare ha en farge, da kan vel for- og bakstykke strikkes sammen? Det står at det er riller, men det er vel vanlig vrangbord?
07.01.2025 - 11:09DROPS Design answered:
Hei Randi. Kantmaskene strikkes i riller. Om du skal strikke rundt, bare vrangbord, pass på at maskeantallet stemmer med antall masker i vrangborden. mvh DROPS Design
07.01.2025 - 16:33
![]() Britt Larsson Gårdebäck wrote:
Britt Larsson Gårdebäck wrote:
Stickas tröjan nerifrån o upp. Hoppas det.
14.12.2024 - 19:44DROPS Design answered:
Hei Britt. Slik står det i titelen: Stickad tröja i DROPS Air. Arbetet stickas nedifrån och upp med ränder, slätstickning och ¾ långa ärmar. Storlek S - XXXL. Så ja, den strikkes nedifrån och upp. mvh DROPS Design
16.12.2024 - 11:45
![]() Emilia Jansson wrote:
Emilia Jansson wrote:
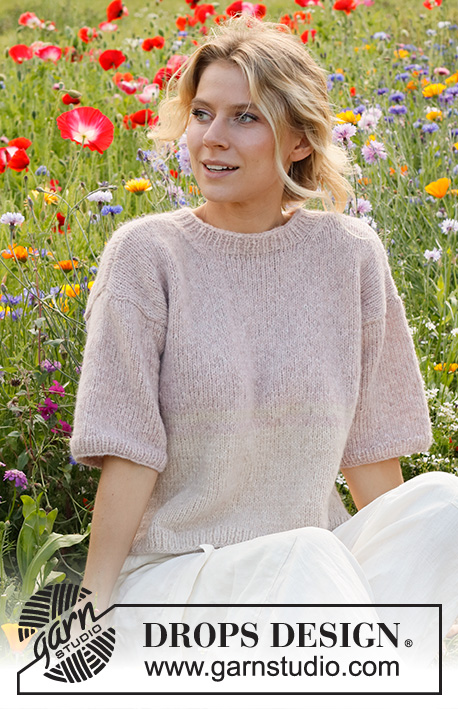
Hej! Vilken storlek har modellen på bilden?
15.07.2024 - 10:37DROPS Design answered:
Hej Emilia. Modellerna har vanligtvis storlek S eller M. Är du osäker på vilken storlek du ska välja så är det bästa att ta mått på ett plagg du redan har och sedan jämföra de måtten med måttskissen längst ner på mönstret. Mvh DROPS Design
16.07.2024 - 14:29
![]() Tove Norum wrote:
Tove Norum wrote:
Finnes det en video som viser hvordan genseren skal sys sammen?
19.04.2024 - 18:50DROPS Design answered:
Hei Tove, Her er noen videoer som kan være til hjelp: https://www.garnstudio.com/video.php?id=1764&lang=no https://www.garnstudio.com/video.php?id=1685&lang=no https://www.garnstudio.com/video.php?id=1513&lang=no Hvis du vil søke andre videoer, klikk på Tips & Hjelp på toppen av sida, og klikk på montering i menyen for å se alle videoene våre. God fornøyelse!
22.04.2024 - 06:59
|
||||
Dream in Rose#dreaminrosesweater |
||||
 |
 |
|||
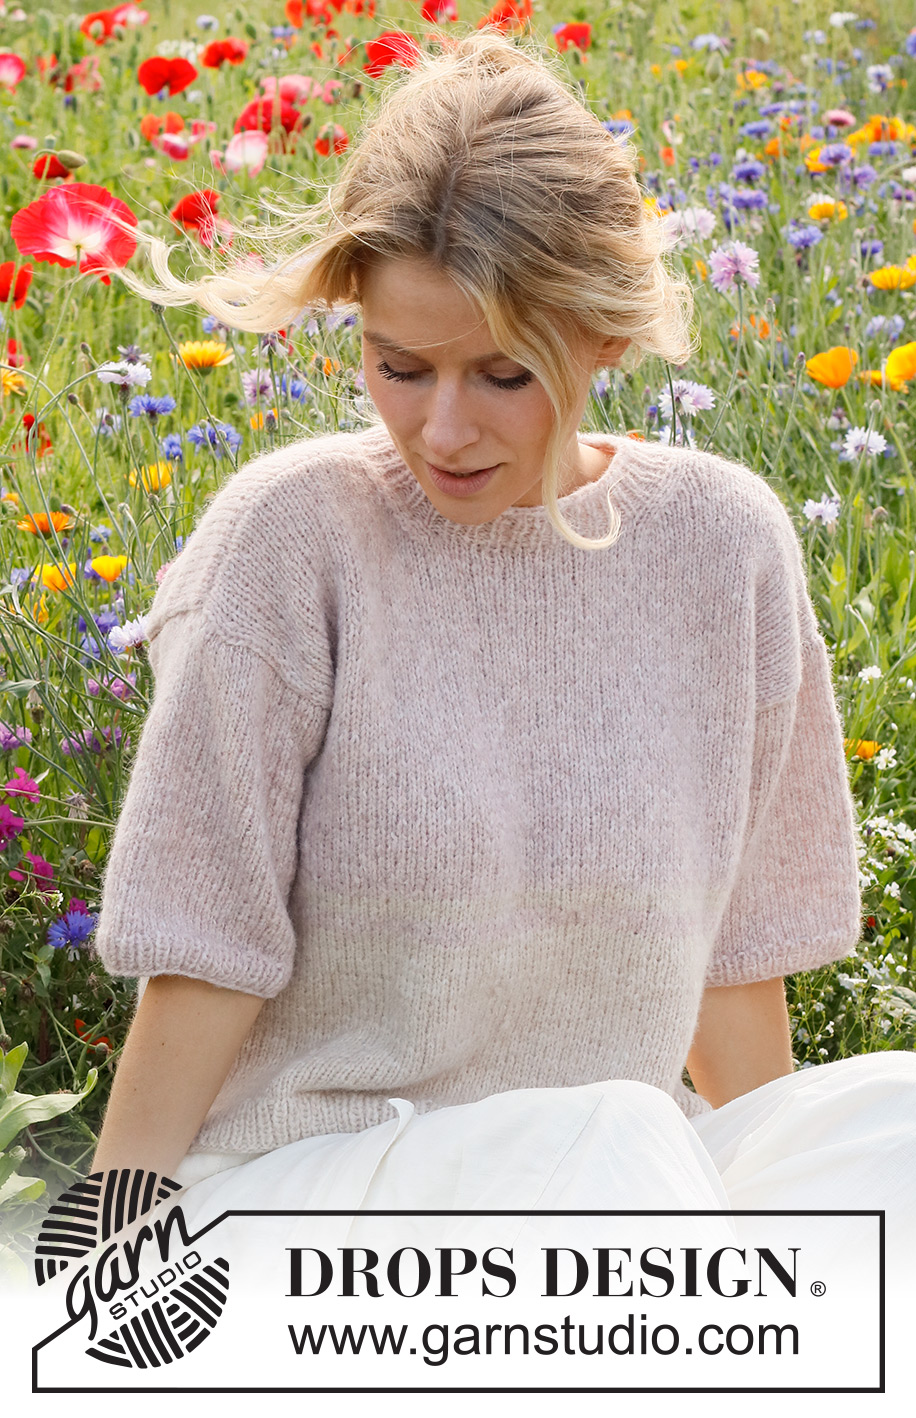
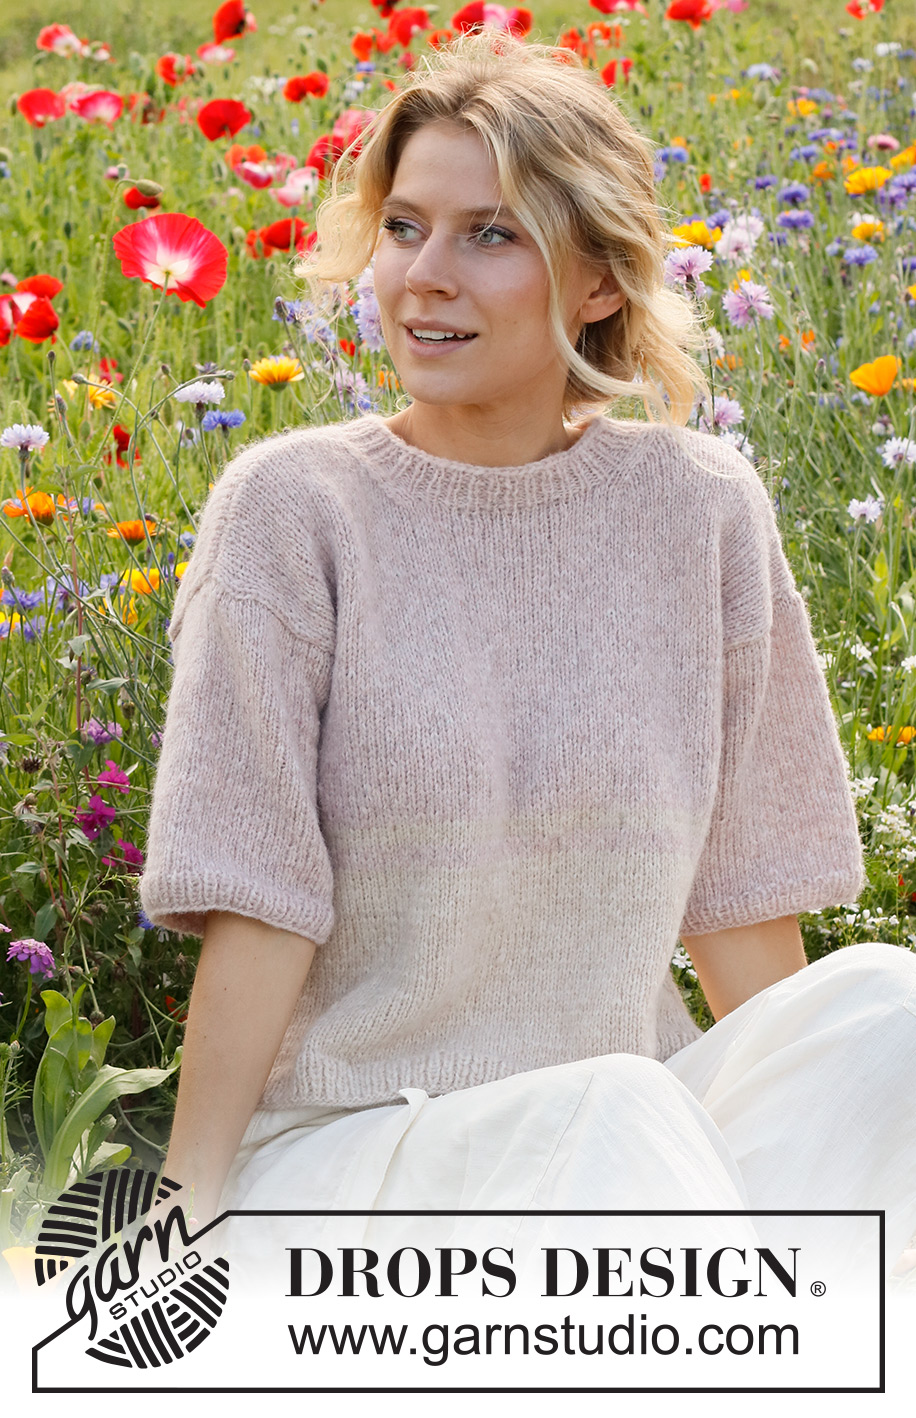
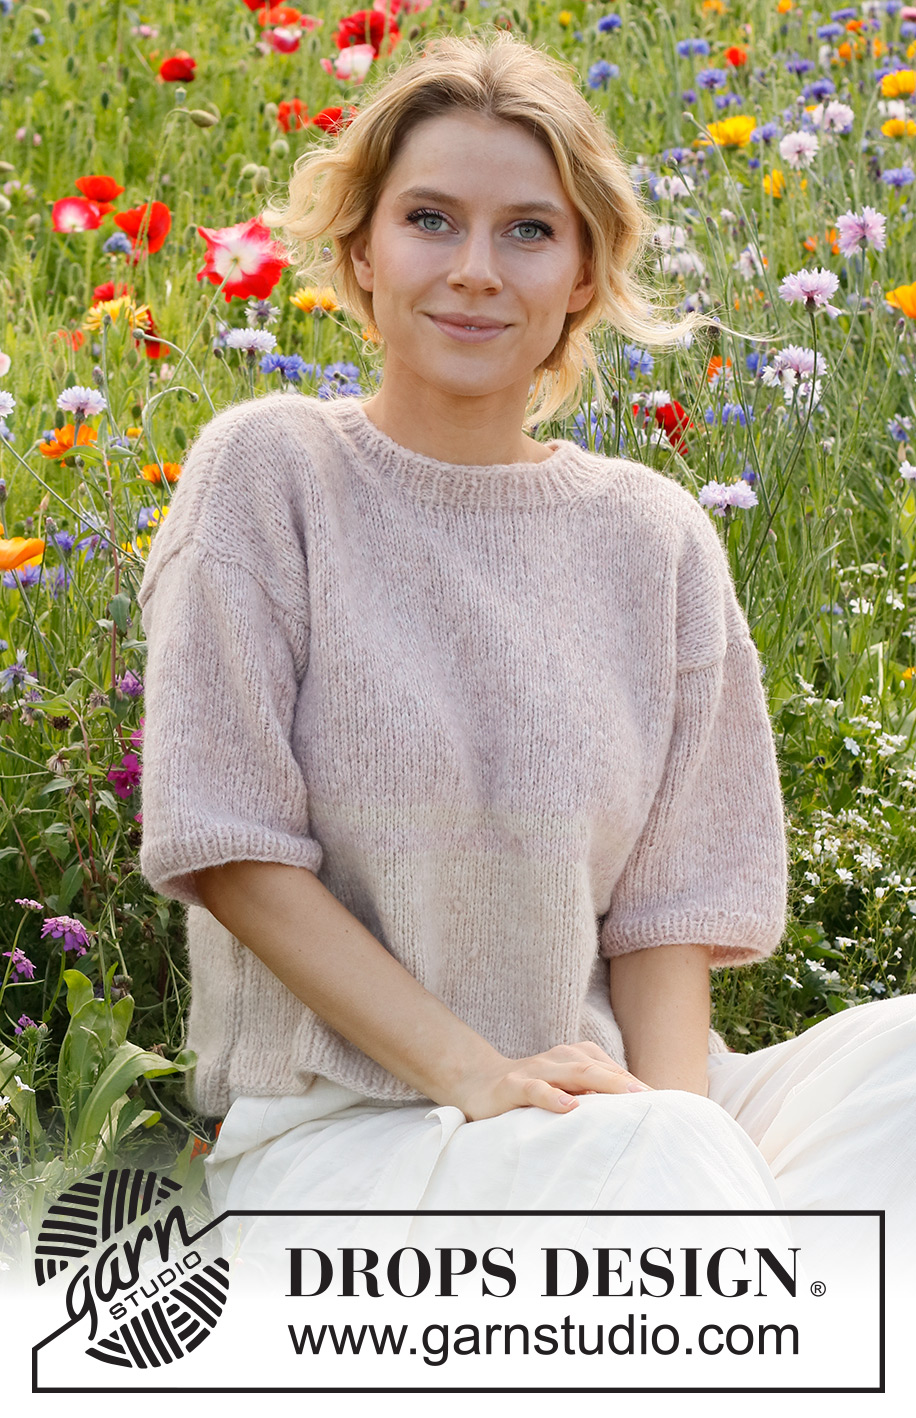
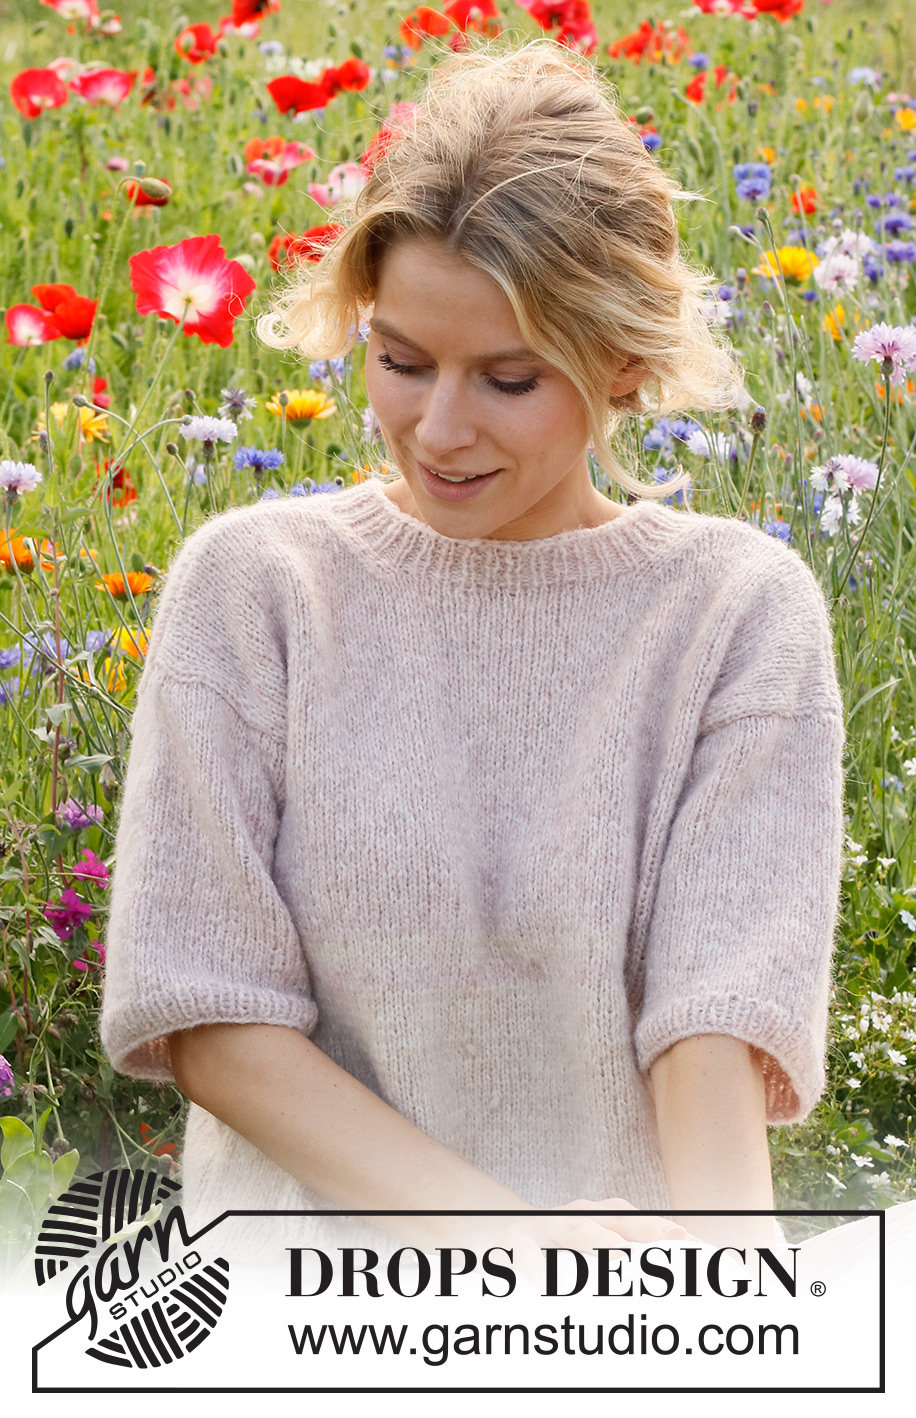
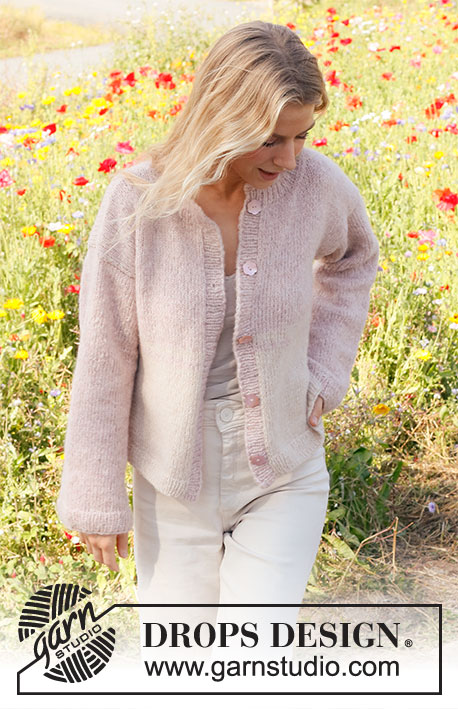
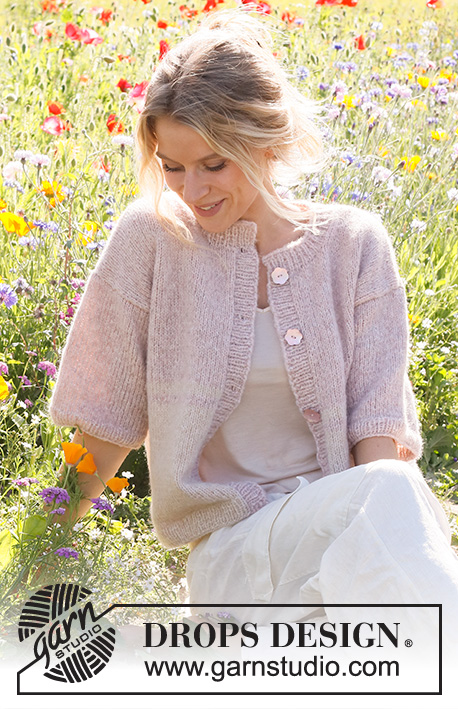
Knitted jumper in DROPS Air. The piece is worked bottom up with stripes and ¾-length sleeves. Sizes S - XXXL.
DROPS 232-13 |
||||
|
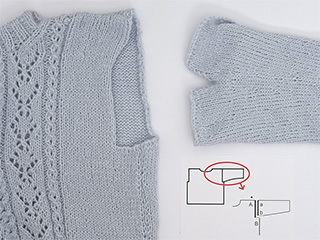
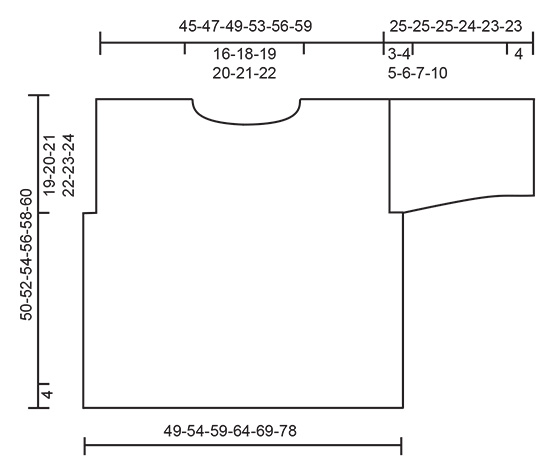
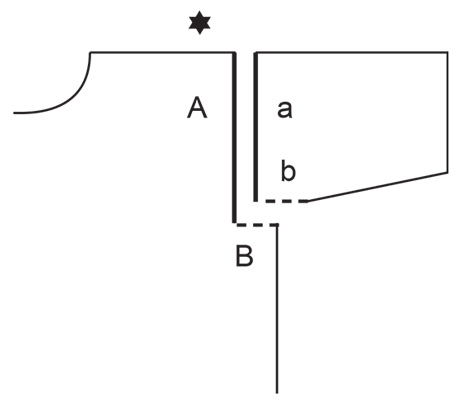
------------------------------------------------------- EXPLANATIONS FOR THE PATTERN: ------------------------------------------------------- RIDGE/GARTER STITCH (worked back and forth): Knit all rows. 1 ridge = knit 2 rows. DECREASE TIP (neck): All decreases are worked from the right side! AT THE BEGINNING OF THE ROW (right shoulder): Work 1 edge stitch in garter stitch, knit 1, slip 1 stitch as if to knit, knit 1 and pass the slipped stitch over the knitted stitch (= 1 stitch decreased). AT THE END OF THE ROW (left shoulder): Work until there are 4 stitches left, knit 2 together, knit 1 and 1 edge stitch in garter stitch (= 1 stitch decreased). INCREASE TIP (sleeves): Work until there are 2 stitches left before the marker, make 1 yarn over, knit 4 (the marker sits in the middle of these 4 stitches), 1 yarn over. On the next round knit the yarn overs twisted to avoid holes. Then work the new stitches in stocking stitch. ------------------------------------------------------- START THE PIECE HERE: ------------------------------------------------------- JUMPER - SHORT OVERVIEW OF THE PIECE: The back and front pieces are worked separately, back and forth and bottom up. The sleeves are worked in the round with short circular needle. The neck is worked to finish. BACK PIECE: Cast on 103-113-123-133-145-161 stitches with circular needle size 4 mm and DROPS Air in wheat. Knit 1 row from the wrong side. Then work rib from the right side as follows: 1 edge stitch in GARTER STITCH – read description above, * knit 1, purl 1 *, work from *-* until there are 2 stitches left, knit 1 and 1 edge stitch in garter stitch. When the rib measures 4 cm, change to circular needle size 5 mm. Work 1 row of stocking stitch where you decrease 17-19-21-23-25-27 stitches evenly spaced = 86-94-102-110-120-134 stitches. Continue with stocking stitch and 1 edge stitch in garter stitch on each side REMEMBER THE KNITTING TENSION! When the piece measures 20-21-22-23-24-25 cm, work 4 rows with colour pink sand, 4 rows with colour wheat, then finish the piece with colour pink sand. When the piece measures 31-32-33-34-35-36 cm cast off 5-7-9-10-12-17 stitches at the beginning of the next 2 rows for the armholes = 76-80-84-90-96-100 stitches. When the piece measures 46-48-50-52-54-56 cm, cast off the middle 26-28-30-32-34-36 stitches for the neck and finish each shoulder separately. Cast off 1 stitch on the next row from the neck = 24-25-26-28-30-31 stitches on the shoulder. Cast off when the piece measures 50-52-54-56-58-60 cm. Work the other shoulder in the same way. FRONT PIECE: Cast on 103-113-123-133-145-161 stitches with circular needle size 4 mm and DROPS Air in colour wheat. Knit 1 row from the wrong side. Then work rib from the right side as follows: 1 edge stitch in garter stitch, * purl 1, knit 1 *, work from *-* until there are 2 stitches left, purl 1 and 1 edge stitch in garter stitch. When the rib measures 4 cm, change to circular needle size 5 mm. Work 1 row of stocking stitch where you decrease 17-19-21-23-25-27 stitches evenly spaced = 86-94-102-110-120-134 stitches. Continue with stocking stitch and 1 edge stitch in garter stitch on each side. When the piece measures 20-21-22-23-24-25 cm, work 4 rows with colour pink sand, 4 rows with colour wheat, then finish the piece with colour pink sand. When the piece measures 31-32-33-34-35-36 cm cast off 5-7-9-10-12-17 stitches at the beginning of the next 2 rows for the armholes = 76-80-84-90-96-100 stitches. When the piece measures 44-46-47-49-50-52 cm, cast off the middle 16-18-20-22-24-26 stitches for the neck and finish each shoulder separately. Now decrease for neck on every row from the right side: 1 stitch 6 times – read DECREASE TIP = 24-25-26-28-30-31 stitches on the shoulder. Cast off when the piece measures 50-52-54-56-58-60 cm. Work the other shoulder in the same way. SLEEVES: Cast on 60-64-68-70-72-74 stitches with short circular needle size 4 mm and colour pink sand. Knit 1 round then work rib in the round (knit 1, purl 1) for 4 cm. Change to short circular needle size 5 mm and continue with stocking stitch. Insert 1 marker at the beginning of the round = mid-under sleeve. When the sleeve measures 6 cm, increase 1 stitch on each side of the marker – read INCREASE TIP. Increase like this every 10-10-10-9-4-2 cm a total of 2-2-2-2-3-4 times = 64-68-72-74-78-82 stitches. When the sleeve measures 22-21-20-18-16-13 cm, work the sleeve cap back and forth from mid-under the sleeve for 3-4-5-6-7-10 cm. Cast off. Work the other sleeve in the same way. ASSEMBLY: Sew the shoulder seams. Sew the sleeve cap to the armhole, then the split to the bottom of the armhole – see sketch. Sew the side seams inside the 1 edge stitch. NECK: Start at one shoulder seam and knit up 68 to 88 stitches around the neck with short circular needle size 4 mm and pink sand. The number of stitches should be divisible by 2. Work rib in the round (knit 1, purl 1) for 4 cm. Cast off. |
||||
Diagram explanations |
||||
|
||||
 |
||||
 |
||||
Have you finished this pattern?Tag your pictures with #dropspattern #dreaminrosesweater or submit them to the #dropsfan gallery. Do you need help with this pattern?You'll find 30 tutorial videos, a Comments/Questions area and more by visiting the pattern on garnstudio.com. © 1982-2026 DROPS Design A/S. We reserve all rights. This document, including all its sub-sections, has copyrights. Read more about what you can do with our patterns at the bottom of each pattern on our site. |
||||


With over 40 years in knitting and crochet design, DROPS Design offers one of the most extensive collections of free patterns on the internet - translated to 17 languages. As of today we count 324 catalogues and 12290 patterns translated into English (UK/cm).
We work hard to bring you the best knitting and crochet have to offer, inspiration and advice as well as great quality yarns at incredible prices! Would you like to use our patterns for other than personal use? You can read what you are allowed to do in the Copyright text at the bottom of all our patterns. Happy crafting!
Post a comment to pattern DROPS 232-13
We would love to hear what you have to say about this pattern!
If you want to leave a question, please make sure you select the correct category in the form below, to speed up the answering process. Required fields are marked *.