
Popular categories
Looking for a yarn?


Comments / Questions (69)
![]() Purcha wrote:
Purcha wrote:
Hello, in the diagram, you say "insert right needle through stitch from previous row/round, knit 1 and slip stitches off the left needle (= English rib stitch)". By "stitch from previous round", you simply mean the next stitch, that is on the left needle? Or do you mean the stitch that is in the row below ? Thanks
08.03.2026 - 17:22DROPS Design answered:
Dear Mrs Purcha, here is meant the stitch below the next stitch on left needle - see this technique in video here and see also this video, showing the beginning of the matching jacket (so also where to insert the right needle) Happy knitting!
09.03.2026 - 10:12
![]() Nedaa wrote:
Nedaa wrote:
Regarding the knitting tension you mentioned (17 stitches in width and 22 rows vertically in stocking stitch and 2 strands = 10 x 10 cm.) but you didn't mention which needle size to test, the bigger 5mm or the smaller 3mm?
07.12.2025 - 15:15DROPS Design answered:
Hi Nedaa, the bigger ones, 5 mm. Happy knitting!
07.12.2025 - 19:30
![]() Dorte Busk wrote:
Dorte Busk wrote:
Strikkes der mønster både på for- og bagstykke Mvh Dorte busk
10.11.2025 - 18:57DROPS Design answered:
Hei Dorte. Ja, det gjør det. mvh DROPS Design
17.11.2025 - 19:34
![]() Velia Elsa wrote:
Velia Elsa wrote:
Bonjour, comment dois-je tricoter les côtes en mailles anglaise sur les 14 mailles ? Dois-je continuer ou inverser ? Pourquoi c'est décalé quand je commence l'avant du pull(les mailles anglaises ne sont plus en face des mailles endroits) Merci de m'aider:) Elsa
19.05.2024 - 05:52DROPS Design answered:
Bonjour Elsa, je suis désolée je ne situe pas ces 14 mailles dont vous parlez, pouvez-vous m'en dire plus? Quelle taille tricotez-vous et à quel niveau précis en êtes vous? Merci pour votre compréhension.
21.05.2024 - 12:40
![]() Tjodun Felland wrote:
Tjodun Felland wrote:
Hei! Jeg fant dette spørsmålet i chatten under. Men dere har ikke svart. Jeg lurer på det samme. Jeg er noget til punkterne: ærmeudtagning/bærestykkeudtagning. Jeg er simpelthen blevet i tvivl, om jeg skal lave 8 udtagninger i én omgang og så lade der være en omgang helt uden udtagninger, eller om jeg skal skiftes mellem at tage ud til henholdsvis ærmerne og bærestykket? (Så der bliver taget 4 masker ud i hver omgang?) Bh. Simone
18.03.2024 - 20:06DROPS Design answered:
Hej Tjodun, det kommer an på hvilken størrelse du strikker, i den mindste størrelse tager du kun ud til ærmer, i M tager du ud 10 gange til ærmer og 7 gange til bærestykke det vil sige at de første 7 udtagninger sker samtidigt på hver 2.pind :)
19.03.2024 - 15:30
![]() Raya wrote:
Raya wrote:
Hello, as far as I can understand the front and the back of this pattern are the same. I have done other DROPS Design patterns that have the same front and back and they turn out uncomfortable for me to wear, since the back drops and pulls the front tight on the neck. Is there any tip you can offer on how to knit the pattern to fit more comfortably? Thank you!
25.01.2024 - 13:12DROPS Design answered:
Dear Raya, in this pattern neckline on front and back piece have same depth, if you rather get a higher neckline on back piece than on front piece, you can try to search a pattern with an elevation on back piece for example. Happy knitting!
26.01.2024 - 07:14
![]() Vera wrote:
Vera wrote:
Hallo, wenn man in Größe S 90 Maschen anschlägt und dann 15(A1)+13(A2)+30+(A1)+13(A2)+15(A1)strickt (=86), fehlen noch 4 Maschen. Wo müssen sie dazwischen eingebaut werden? Vielen Dank für die Hilfe
29.12.2023 - 12:31DROPS Design answered:
Liebe Vera, so wird A.1 gestrickt: 15 M A.1 dann strickt man die 2 ersten M A.1 = 17 Maschen A.1,; so wird das Muster symmetrisch, und hier sind die 4 fehlenden Maschen. Viel Spaß beim stricken!
02.01.2024 - 10:21
![]() Piia wrote:
Piia wrote:
How come are the sleeves so short (size XXL 14 cm + 9 cm, when arms are like 45-50 cm from armpit)? Or is there something I misunderstand?
05.12.2023 - 22:02DROPS Design answered:
Dear Plia, the sleeves are shorter in the larger size because shoulders and yoke are larger; the whole sleeve in XXL is 50 cm from top of sleeve to wrist (see chart). Compare all measurements to a similar garment you have and like the shape, or just try the jumper on and adjust the length of sleeve to your own measurements, ie work sleeve until 9 cm before required length, and then work A.1 for 9 cm. Happy knitting!
06.12.2023 - 08:22
![]() Hansson wrote:
Hansson wrote:
Ahh, det borde jag förstått, mitt fel! Ni har ju fantastiska mönster!
29.07.2023 - 09:55
![]() Hansson wrote:
Hansson wrote:
Jag ser på den stickade tröjans foto att det är patentmaskor längst med uppifrån och ner, men i mönstret A3 så står det ingenting om att sticka patentmaska det står bara räta maskor. Och omslagen ska ju stickas som vanliga räta så att det blir hål ...... det kanske också skulle läggas till?
24.07.2023 - 11:53DROPS Design answered:
Hei Hansson. Når du strikker etter diagram A.1 og A.2 (halskant, sadelskulder, vrangbord), strikkes det patent. Patentmasken er forklart i diagramteksten. Når du strikker bærestykket og bol strikkes det etter diagram A.3 (hullmønster). 2. maske i diagram A.3 er kun en rettmaske og siden det er vrangmasker på begge sider vil rettmasken "poppe" ut, men det er ingen patentmaske. I omgangen etter man har strikket 2 masker sammen + 1 kast, er det vist i diagrammet at på neste omgang er det to blanke ruter, da strikker man 2 rett, se diagramteksten til blank rute (altså kastet strikkes rett = hull). Da vil man få det hullmønstret man ser på bildet. mvh DROPS Design
27.07.2023 - 11:58
|
|||||||||||||||||||
White Water#whitewatersweater |
|||||||||||||||||||
 |
 |
||||||||||||||||||
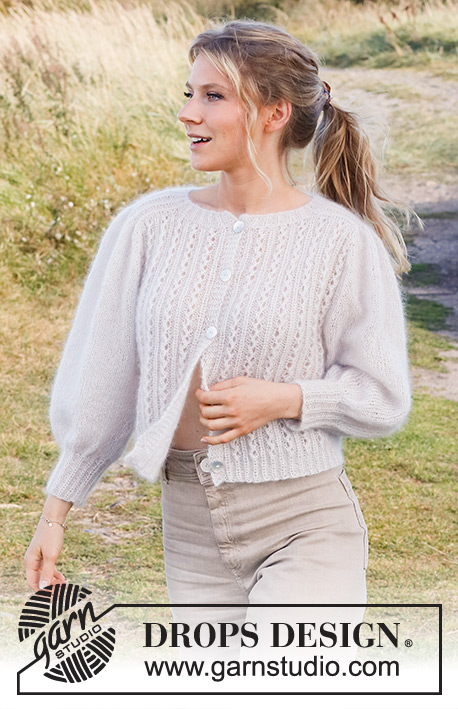
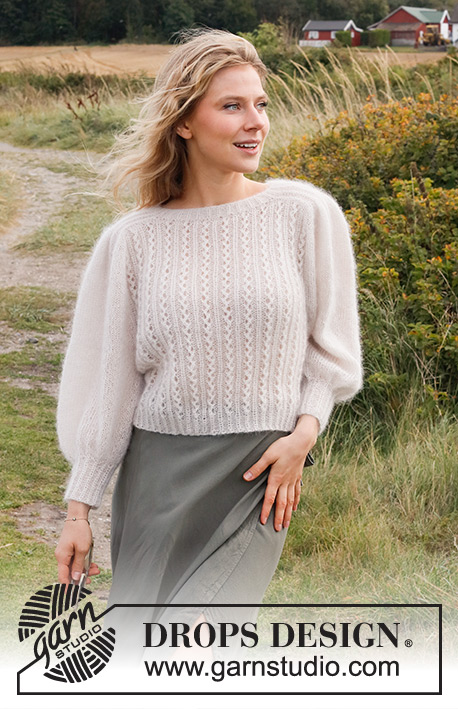
Knitted jumper in 2 strands DROPS Kid-Silk. Piece is knitted top down with round saddle shoulders, lace pattern and pouffe sleeves. Size: S - XXXL
DROPS 222-25 |
|||||||||||||||||||
|
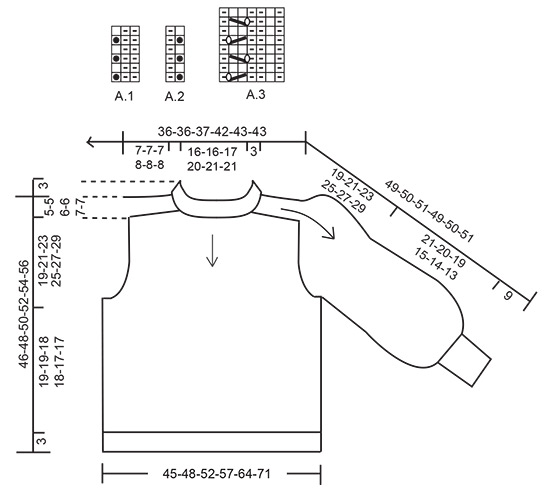
------------------------------------------------------- EXPLANATION FOR THE PATTERN: ------------------------------------------------------- PATTERN: See diagrams A.1 to A.3. Diagrams show all rows in pattern seen from the right side. INCREASE/DECREASE TIP (evenly): To calculate how to increase/decrease evenly, count the stitches to be increased/decreased (e.g. 17 stitches), and divide by stitches of increases/decreases to be done (e.g. 5) = 3.4. In this example increase by making 1 yarn over after alternately approx. every 3rd and 4th stitch. On next row work yarn overs twisted to avoid holes If decreasing knit in this example alternately approx. every 2nd and 3rd stitch and every 3rd and 4th stitch together. INCREASE TIP-1: Increase 1 stitch by making 1 yarn over. On next row (from wrong side) purl yarn over twisted to avoid holes. INCREASE TIP-2: BEFORE MARKER: The stitch is twisted towards the right. Use left needle to pick up thread between 2 stitches from round below, pick up thread from behind and knit stitch in front loop. AFTER MARKER: The stitch is twisted towards the left. Use left needle to pick up thread between 2 stitches from round below, pick up thread from front and knit stitch in back loop. CAST-OFF TIP: To avoid a tight cast-off edge you may use a larger needle size. If this also is too tight, work a 1 yarn over after approx. 3rd or every 6th stitch while casting off (cast off yarn overs as regular stitches). ------------------------------------------------------- START THE PIECE HERE: ------------------------------------------------------- JUMPER - SHORT OVERVIEW OF THE PIECE: Work neck edge in the round on circular needle from mid back, top down. Work shoulders back and forth separately. Then pick up stitches along shoulders, and work in the round over all stitches, at the same time increase for sleeves and for yoke. Now divide yoke for body and sleeves. Body is worked in the round on circular needle, top down. Work sleeves in the round on double pointed needles/short circular needle, top down. NECK EDGE: Cast on 90-90-94-106-110-110 stitches on circular needle size 3 mm with 2 strands Kid-Silk. Knit 1 round. Then work rib as follows: A.1 over the first 15-15-15-18-18-18 stitches, work the first 2 stitches in A.1 (= approx. half back piece), insert a marker here, A.2 over the next 13-13-15-15-17-17 stitches (= shoulder stitches), insert a marker, A.1 over the next 30-30-30-36-36-36 stitches, work the first 2 stitches in A.1 (= front piece), insert a marker here, A.2 over the next 13-13-15-15-17-17 stitches (= shoulder stitches), insert a marker here, A.1 over the last 15-15-15-18-18-18 stitches (= approx. half back piece). Continue in the round like this for 3 cm. Cut the yarn. Now divide the piece for back piece, front piece and saddle shoulders. Slip the first 17-17-17-20-20-20 stitches on a stitch holder (= approx. half back piece), skip the next 13-13-15-15-17-17 stitches (= saddle shoulder), slip the next 32-32-32-38-38-38 stitches on a stitch holder (= front piece), skip the next 13-13-15-15-17-17 stitches (= saddle shoulder), slip the last 15-15-15-18-18-18 stitches on a stitch holder (= approx. half back piece). Now work saddle shoulder in each side, separately. SADDLE SHOULDERS: = 13-13-15-15-17-17 stitches. Work back and forth over shoulder stitches in one side on circular needle size 3 mm, as follows: Cast on 1 stitch on row (= edge stitch), work the 13-13-15-15-17-17 stitches in pattern as before, at the same time increase all 1 purl stitch to 2 purl stitches – read INCREASE TIP-1 (= 6-6-7-7-8-8 stitches increased), cast on 1 stitch at the end of row (= edge stitch) = 21-21-24-24-27-27 stitches. Now work pattern (1 English rib stitch, purl 2) back and forth until piece measures 7-7-7-8-8-8 cm from where all 1 purl stitches were increased to 2 purl stitches, adjust so that last row is worked from wrong side. Slip stitches on a stitch holder. Work the other saddle shoulder the same way. Now work front pieces, back piece and shoulder stitch on to same circular needle size 5 mm, at the same time pick up stitches along the sides on saddle shoulders. Work as follows from right side: Begin approx. mid back and knit over the 17-17-17-20-20-20 stitches on half back piece and increase at the same time 5-5-5-5-5-5 stitches evenly – read INCREASE/DECREASE TIP (= 22-22-22-25-25-25 stitches), pick up 16-16-16-20-20-20 stitches inside edge stitch along the side on saddle shoulder, knit 1 * knit 1 in front and back loop of next stitch, make 1 yarn over *, work from *-* a total of 18-18-21-21-24-24 times, knit 1 in front and back loop of stitch, knit 1 (= 37-37-43-43-49-49 stitches increased to = 58-58-67-67-76-76 stitches on the saddle shoulder), pick up 16-16-16-20-20-20 stitches inside edge stitch along the other side of saddle shoulder, knit over the next 32-32-32-38-38-38 stitches on front piece and increase at the same time 9-9-9-9-9-9 stitches evenly (= 41-41-41-47-47-47 stitches), pick up 16-16-16-20-20-20 stitches inside edge stitch on the other saddle shoulder, knit 1, * knit 1 in front and back loop of next stitch, make 1 yarn over *, work from *-* a total of 18-18-21-21-24-24 times, knit 1 in front and back loop of stitch, knit 1 (= 37-37-43-43-49-49 stitches increased to = 58-58-67-67-76-76 stitches on the saddle shoulder), pick up 16-16-16-20-20-20 stitches inside edge stitch along the other side of saddle shoulder, knit over the 15-15-15-18-18-18 stitches on approx. half back piece and increase at the same time 4-4-4-4-4-4 stitches evenly (= 19-19-19-22-22-22 stitches). There are now 262-262-280-308-326-326 stitches on needle. Knit 1 round. YOKE: Insert a marker thread approx. mid back. NOW MEASURE PIECE FROM HERE! Now work pattern and 4 markers in the piece as follows: 1st marker: Work A.3 over the first 35-35-35-42-42-42 stitches, work the first 3 stitches in A.3, insert 1st marker in next stitch (= half back piece). 2nd marker: Work in stocking stitch over the next 56-56-65-65-74-74 stitches, insert 2nd marker in next stitch (= right sleeve). 3rd marker: Work A.3 over the next 70-70-70-84-84-84 stitches, work the first 3 stitches in A.3, insert 3rd marker in next stitch (= front piece). 4th marker: Work in stocking stitch over the next 56-56-65-65-74-74 stitches, insert 4th marker in next stitch (= left sleeve). Work A.3 over the last 35-35-35-42-42-42 stitches (= half back piece). Move these 4 markers upwards when working; increase at each of these markers. Continue in the round with pattern like this (stitches with markers are worked in stocking stitch), AT THE SAME TIME on the next round the increases for SLEEVE INCREASE and YOKE INCREASE starts, increase as follows: SLEEVE INCREASE: Work in stocking stitch on sleeves. AT THE SAME TIME on next round increase 4 stitches for sleeves as follows: Increase AFTER 1st and 3rd marker and increase BEFORE 2nd and 4th marker – read INCREASE TIP-2 (= 4 stitches increased). Increase stitches on sleeves, and work the increased stitches in stocking stitch. Increase like this every other round 7-10-7-9-6-8 times in total. YOKE INCREASE (applies to front and back piece): Work pattern as before on front pieces and back piece. AT THE SAME TIME on next round increase 4 stitches for yoke as follows: Increase BEFORE 1st and 3rd marker and increase AFTER 2nd and 4th marker – remember INCREASE TIP-2 (= 4 stitches increased). Increase on front pieces and back piece, and work the increased stitches in A.3. Increase like this every other round 0-7-7-7-14-21 times in total. When all increases are done there are 290-330-336-372-406-442 stitches on row. Work until piece measures 19-21-23-25-27-29 cm from marker after neck edge. Now divide piece for body and sleeves. Work next round as follows: Work the first 42-45-47-52-59-66 stitches as before (= back piece), slip the next 64-78-77-85-88-92 stitches on a stitch holder for sleeve, cast on 6-6-8-10-10-10 new stitches on row (= in the side under sleeve), work the next 81-87-91-101-115-129 stitches as before (= front piece), slip the next 64-78-77-85-88-92 stitches on a stitch holder for sleeve, cast on 6-6-8-10-10-10 new stitches on row (= in the side under sleeve), work the last 39-42-44-49-56-63 stitches as before (= back piece). Now finish body and sleeves separately. NOW MEASURE PIECE FROM HERE! BODY: = 174-186-198-222-250-278 stitches. Continue in the round with pattern as before, but over the 14-6-12-10-10-10 stitches in each side (i.e. the 6-6-8-10-10-10 new stitches cast on + 4-0-2-0-0-0 stitches on each side of these stitches) work in stocking stitch. Continue until piece measures 19-19-18-18-17-17 cm from division. Adjust so that the last round is worked as 2nd, 4th, 6th or 8th row in diagram A.3, and work the next round as follows: Work pattern as before, but skip yarn over in every repetition A.3 (= decrease 1 stitch in each repetition A.3), at the same time increase 4-3-6-5-5-5 stitches evenly over the 14-6-12-10-10-10 stitches knit in each side (= 20-24-24-28-32-36 stitches decreased and 8-6-12-10-10-10 stitches increased on round) = 162-168-186-204-228-252 stitches. Switch to circular needle size 3 mm. Now work rib as follows: Work the last 2 stitches in A.1, work A.1 until 1 stitch remains on round, work first stitch in A.1 – English rib stitch in A.1 should fit knit stitches in A.3. Continue rib like this for 3 cm. Cast off with knit over English rib stitches and purl over purl - read CAST-OFF TIP. Jumper measures approx. 46-48-50-52-54-56 cm from shoulder and down. SLEEVES: Slip the 64-78-77-85-88-92 stitches from stitch holder in one side back on a short circular needle/double pointed needles size 5 mm. Pick in addition up 1 stitch in each of the 6-6-8-10-10-10 new stitches under sleeve = 70-84-85-95-98-102 stitches. Work in stocking stitch in the round. When piece measures 21-20-19-15-14-13 cm from division - try the jumper on and work until desired length (approx. 9 cm rib remain until finished measurements), decrease 28-42-40-47-47-51 stitches evenly = 42-42-45-48-51-51 stitches. Switch to double pointed needles size 3 mm. Work A.1 in the round for 9 cm. Cast off with knit over English rib stitches and purl over purl - read CAST-OFF TIP. Sleeve measures approx. 30-29-28-24-23-22 cm from division. Work the other sleeve the same way. |
|||||||||||||||||||
Diagram explanations |
|||||||||||||||||||
|
|||||||||||||||||||
 |
|||||||||||||||||||
Have you finished this pattern?Tag your pictures with #dropspattern #whitewatersweater or submit them to the #dropsfan gallery. Do you need help with this pattern?You'll find 32 tutorial videos, a Comments/Questions area and more by visiting the pattern on garnstudio.com. © 1982-2026 DROPS Design A/S. We reserve all rights. This document, including all its sub-sections, has copyrights. Read more about what you can do with our patterns at the bottom of each pattern on our site. |
|||||||||||||||||||


With over 40 years in knitting and crochet design, DROPS Design offers one of the most extensive collections of free patterns on the internet - translated to 17 languages. As of today we count 324 catalogues and 12290 patterns translated into English (UK/cm).
We work hard to bring you the best knitting and crochet have to offer, inspiration and advice as well as great quality yarns at incredible prices! Would you like to use our patterns for other than personal use? You can read what you are allowed to do in the Copyright text at the bottom of all our patterns. Happy crafting!
Post a comment to pattern DROPS 222-25
We would love to hear what you have to say about this pattern!
If you want to leave a question, please make sure you select the correct category in the form below, to speed up the answering process. Required fields are marked *.