
Popular categories
Looking for a yarn?


Comments / Questions (91)
![]() Sa wrote:
Sa wrote:
Hi, I am knitting this in Big Merino, and would like to knit it from Bottom UP. I have done the body , just need a few pointers on the yoke? Or could you please suggest another pattern I can follow Bottom UP? Thanks.
03.09.2021 - 08:16DROPS Design answered:
Dear Sa, we are unfortunately not able to adjust every pattern to every single request, but you can take inspiration from another jumper for men worked bottom up with a yarn group C - such as Big Merino - see here. Thanks for your comprehension. Happy knitting!
03.09.2021 - 11:58
![]() Julie wrote:
Julie wrote:
I'd like to use the print pattern option, but the cookies button is in the way.
21.08.2021 - 01:59DROPS Design answered:
Dear Julie, click on the print icon, then clock on "continue to pattern" and then print pattern. It should give you the print pages. Happy Stitching!
30.08.2021 - 03:22
![]() Anne Mette wrote:
Anne Mette wrote:
Jeg vil gerne vide hvilken størrelse modellen på opskrift Urban Forest 219-16 er, da jeg skal strikke den uden at kunne måle gutten som skal buge den. Mvh Anne mette
17.08.2021 - 19:46DROPS Design answered:
Hei Anne Mette. Modellen bruker str. M. Har du tilgang til en genser gutten har fra før anbefaler jeg deg å ta mål av den, og sammenlign med målene i målskissen for å finne beste passform. mvh DROPS design
18.08.2021 - 15:13
![]() Pernille wrote:
Pernille wrote:
Den tilhørende video med udtagning til ærmer er misvisende. Følges den, bliver der ikke en tydelig markering af ærmet, som på foto af Urban Forest. Udtagningerne skal laves på ydersiden af forrige udtagning, og ikke på indersiden, som det vises i videoen
10.08.2021 - 21:56
![]() Pernille Larsen wrote:
Pernille Larsen wrote:
Kan man på nogen måde ændre i opskriften, så halsåbningen bliver lavere fortil? Altså forskel på ryg og forstykke. Hvorfor er der ikke forskel?
10.08.2021 - 20:22DROPS Design answered:
Hej Pernille, nej ikke denne teknik med sadelskulder. Men du kan finde en herreopskrift med forhøjning bagpå :)
11.08.2021 - 16:04
![]() Corinna wrote:
Corinna wrote:
Bei der Anleitung Urban Forest soll ich nun die Arbeit teilen, um Rumpf und Ärmel getrennt zu Ende zu stricken. Dabei sollen nach der Stilllegung des Ärmels 12 Maschen "aus der Seite unter dem Arm" zugenommen werden. Wo ist bitte "aus der Seite unter dem Arm"? Gibt es hierzu ein Video? Oder ein Foto? Herzliche Grüße
05.07.2021 - 21:16
![]() Anna wrote:
Anna wrote:
Hallo, erstmal vielen Dank für diese tolle Anleitung! Ich habe eine Verständnis Frage. Bei der Zunahme der Passe, steht dass alle Zugenommenen Maschen glatt rechts gestrickt werden. Was bedeutet das? Sollen die Zunahmen vor und nach dem Markierter dann so gestrickt werden wie im Zunahmetipp, oder sollen sie beide so gestrickt werden, dass sie sich dann nach rechts neigen? Vielen Dank! LG Anna
12.06.2021 - 12:06DROPS Design answered:
Liebe Anna, ja genau, diese Zunahmen sollen genauso wie die vorrigen gestrickt werden (wie unter ZUNAHMETIPP - glatt rechts gestrickt meint hier, daß diese Maschen rechts gestrickt werden. Viel Spaß beim stricken!
14.06.2021 - 08:37
![]() Nicolette Mörth wrote:
Nicolette Mörth wrote:
Guten Tag, ich möchte dieses Modell Stricken aber mit einem Garn, bei dem die Maschenprobe 21 Maschen für eine Breite von 10 cm ergibt. Wie kann ich es am besten anpassen?
26.05.2021 - 14:58DROPS Design answered:
Liebe Frau Mörth, leider können wir jeder Anleitung nach jedem individuellen Frage anpassen und einzelne Modelle auf individuellen Wunsch hin umrechnen. Wenn sie Hilfe damit brauchen, wenden Sie sich bitte an dem Laden wo Sie die Wolle gekauft haben, dort hilft man Ihnen gerne weiter. Danke im voraus für Ihr Verständnis. Hier finden Sie alle unsere Anleitungen für Herrenpullover mit 21 Maschen = 10 cm - es kann Ihnen vielleicht weiterhelfen. Viel Spaß beim stricken!
26.05.2021 - 15:50
![]() Judy Collins Currell wrote:
Judy Collins Currell wrote:
Just a design choice query - I note that on the Urban Forest the increases are done using M1R and M1L rather than the yarn over method of the Glacier Waters. Was this done because of the weight of the increased yarn gauge? Also re the neck, I c/o with larger needle, trans to smaller, K to length the folded up and k2tog the knit sts with corresponding c/o sts then purls the purls alone. It's too tight if you do them all. I'll go to lengths to avoid sewing
18.05.2021 - 15:39DROPS Design answered:
Dear Judy, the used increases are the designer's choice, based on a number of things, like used yarn, shape, pattern, etc. As for the neckline, you can always do what works the best for you, the one you mention is a good solution. Happy Knitting!
18.05.2021 - 23:04
![]() Catherine MacDonald wrote:
Catherine MacDonald wrote:
Please confirm: BODY: number of sts is to be INCREASED in row before ribbing. SLEEVE: the length of the SMALL is 41cm, the length of XXXL is 36cm. This seems odd.
03.05.2021 - 09:20DROPS Design answered:
Dear Catherine, the number of stitche sto be increased before the ribbing is 16-18-20-20-22-26. We do this increase so the ribbing would not pull in the piece. The sleeve of the larger sizes are shorter, because of the wider shoulders. Happy Knitting!
03.05.2021 - 09:25
|
|||||||||||||
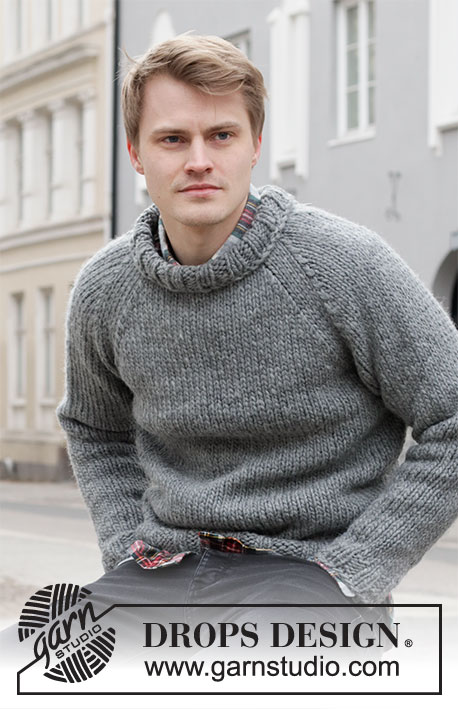
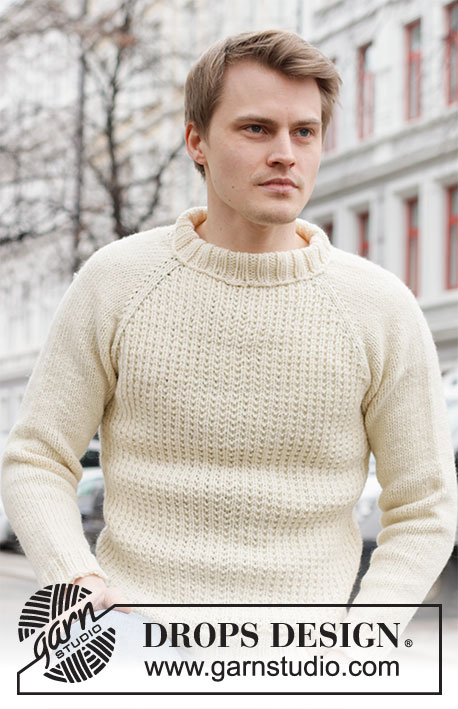
Urban Forest#urbanforestsweater |
|||||||||||||
 |
 |
||||||||||||
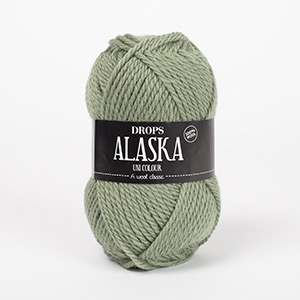
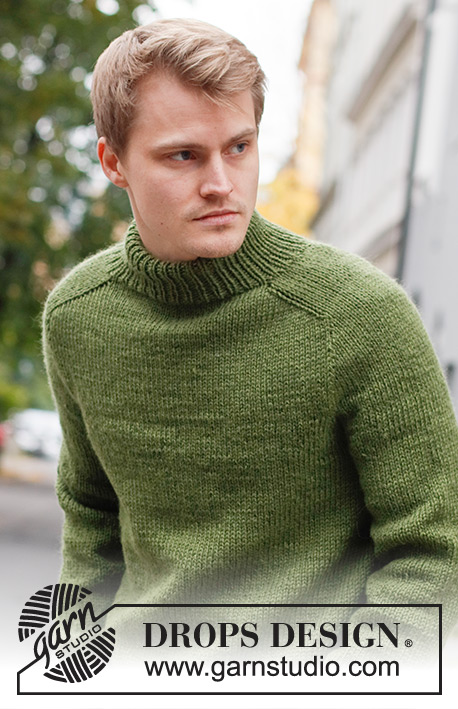
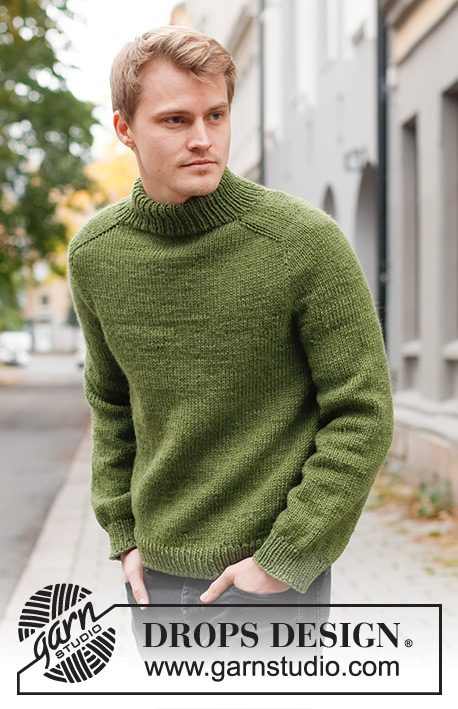
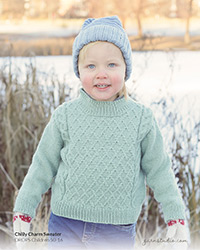
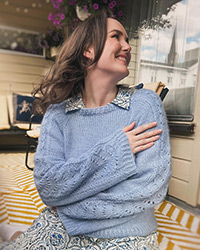
Knitted jumper for men in DROPS Alaska. The piece is worked top down, with double neck and saddle shoulders. Sizes S - XXXL.
DROPS 219-16 |
|||||||||||||
|
------------------------------------------------------- EXPLANATIONS FOR THE PATTERN: ------------------------------------------------------- INCREASE/DECREASE TIP (evenly spaced): To work out how to increase/decrease evenly, count the total number of stitches on needle (e.g. 78 stitches), and divide by the number of increases/decreases to be made (e.g. 22) = 3.5. In this example, increase by making 1 yarn over after alternately each 3rd and 4th stitch. On the next round work the yarn overs twisted to avoid holes. When decreasing, knit together alternately each 2nd and 3rd stitch and each 3rd and 4th stitch. INCREASE TIP: BEFORE MARKER: The new stitch twists to the right. Use the left needle to pick up the strand between 2 stitches from the previous round; pick up the back strand and knit in the front loop. AFTER MARKER: The new stitch twists to the left. Use the left needle to pick up the strand between 2 stitches from the previous round; pick up the front strand and knit in the back loop. DECREASE TIP (for sleeves): Decrease 1 stitch on either side of the marker thread as follows: Work until there are 3 stitches left before the marker thread, knit 2 together, knit 2 (marker thread sits between these 2 stitches), slip 1 stitch as if to knit, knit 1 and pass the slipped stitch over the knitted stitch. CASTING-OFF TIP: To avoid the cast-off edge being tight you can cast off with a larger size needle. If the edge is still tight, make 1 yarn over after approx. each 4th stitch at the same time as casting off; the yarn overs are cast off as normal stitches. ------------------------------------------------------- START THE PIECE HERE: ------------------------------------------------------- JUMPER – SHORT OVERVIEW OF THE PIECE: The neck and yoke are worked in the round with circular needle, top down from mid back. The yoke is divided for body and sleeves and the body continued in the round with circular needle. The sleeves are worked in the round with short circular needle/double pointed needles, top down. NECK: Cast on 78-82-88-92-98-102 stitches with circular needle size 4 mm and Alaska. Knit 1 round, then work rib (knit 1, purl 1) in the round for 14½ cm. Knit 1 round where you increase 22-22-32-32-34-38 stitches evenly spaced – read INCREASE/DECREASE TIP = 100-104-120-124-132-140 stitches. Change to circular needle size 5 mm. YOKE: Insert a marker at the beginning of the round (= mid-back) – THE PIECE IS MEASURED FROM HERE! In addition, insert 4 new markers as described below – without working the stitches and inserting the markers between 2 stitches. Marker 1: Start mid-back, count 17-18-20-21-21-23 stitches (= ½ back piece), insert marker before the next stitch. Marker 2: Count 16-16-20-20-24-24 stitches from marker 1 (= shoulder), insert marker before the next stitch. Marker 3: Count 34-36-40-42-42-46 stitches from marker 2 (= front piece), insert marker before the next stitch. Marker 4: Count 16-16-20-20-24-24 stitches from marker 3 (= shoulder), insert marker before the next stitch. There are 17-18-20-21-21-23 stitches left on the back piece after marker 4. Allow the markers to follow your work onwards; they are used when increasing for the shoulders. INCREASES FOR SADDLE SHOULDERS: Work stocking stitch in the round. AT THE SAME TIME, on the first round, increase 4 stitches for the shoulders as follows: Increase BEFORE markers 1 and 3 and increase AFTER markers 2 and 4 – read INCREASE TIP. Here you are only increasing on the front and back pieces and the number of shoulder stitches remains the same. Increase like this every round a total of 14-16-16-18-20-22 times = 156-168-184-196-212-228 stitches. REMEMBER THE KNITTING TENSION! After the last increase the piece measures approx. 6-7-7-8-9-10 cm from the marker on the neck. Now increase for the sleeves as follows. INCREASES FOR SLEEVES: Work stocking stitch in the round. AT THE SAME TIME, on the next round, increase 4 stitches for the sleeves as follows: Increase AFTER markers 1 and 3 and increase BEFORE markers 2 and 4 – remember INCREASE TIP. Here you are only increasing on the shoulders and the number of stitches on the front and back pieces remains the same. Increase like this every 2nd round a total of 11-13-13-15-12-12 times = 200-220-236-256-260-276 stitches. The piece should now measure 16-19-19-22-20-21 cm from the marker on the neck. In size S continue working until the piece measures 17 cm. If the length is shorter than the above in sizes M, L, XL, XXL and XXXL, continue to the correct length without further increases. Now increase for the yoke as described below. INCREASES FOR YOKE: Move the 4 markers so each marker sits in the outermost sleeve stitches on each side. There are 36-40-44-48-46-46 stitches between the marker-stitches on each sleeve. On the next round, increase 8 stitches for the yoke by increasing on both sides of all 4 marker-stitches – remember INCREASE TIP. Here you increase on the front and back pieces and on the sleeves; the increased stitches are worked in stocking stitch. Increase like this every 2nd round a total of 4-4-6-6-8-10 times = 232-252-284-304-324-356 stitches. When all the increases are finished, the piece should measure 21-23-24-27-27-30 cm. If the length is shorter than this, continue working to the correct length without further increases. Now divide the yoke for the body and sleeves on the next round as follows: Work the first 35-38-42-45-49-55 stitches (= ½ back piece), place the next 46-50-58-62-64-68 stitches on a thread for the sleeve, cast on 12-12-12-14-14-14 new stitches on the needle (= in side under sleeve), work the next 70-76-84-90-98-110 stitches (= front piece), place the next 46-50-58-62-64-68 stitches on a thread for the sleeve, cast on 12-12-12-14-14-14 new stitches on the needle (= in side under sleeve) and work the last 35-38-42-45-49-55 stitches (= ½ back piece). Body and sleeves are finished separately. THE PIECE IS NOW MEASURED FROM HERE. BODY: = 164-176-192-208-224-248 stitches. Work stocking stitch in the round. When the piece measures 29-29-29-28-29-28 cm from the division, increase 16-18-20-20-22-26 stitches evenly spaced = 180-194-212-228-246-274 stitches. Change to circular needle size 4 mm and work rib (knit 1, purl 1) for 5 cm. Cast off with knit over knit and purl over purl – read CASTING-OFF TIP. The jumper measures approx. 60-62-64-66-68-70 cm from the shoulder down. SLEEVE: Place the 46-50-58-62-64-68 stitches from the thread on the one side of the piece on double pointed needles/short circular needle size 5 mm and knit up 1 stitch in each of the 12-12-12-14-14-14 stitches cast on under the sleeve = 58-62-70-76-78-82 stitches. Insert a marker in the middle of the new stitches under the sleeve. Work stocking stitch in the round. When the sleeve measures 4 cm from the division, decrease 1 stitch on each side of the marker – read DECREASE TIP. Decrease like this every 11-6-3½-3-3-2½ cm a total of 4-6-9-11-11-13 times = 50-50-52-54-56-56 stitches. Continue working until the sleeve measures 41-39-39-37-38-36 cm from the division. Knit 1 round where you decrease 10-8-8-8-10-8 stitches evenly spaced = 40-42-44-46-46-48 stitches. Change to double pointed needles size 4 mm and work rib (knit 1, purl 1) for 5 cm. Cast off with knit over knit and purl over purl – remember CASTING-OFF TIP. Work the other sleeve in the same way. ASSEMBLY: Fold the neck double to the wrong side and sew down. To avoid the neck being tight and rolling outwards, it is important the seam is elastic. |
|||||||||||||
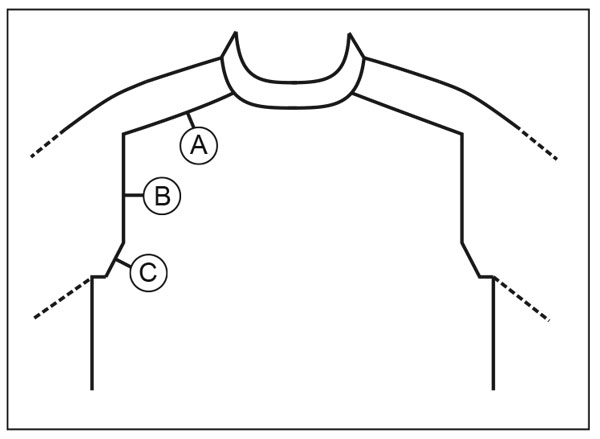
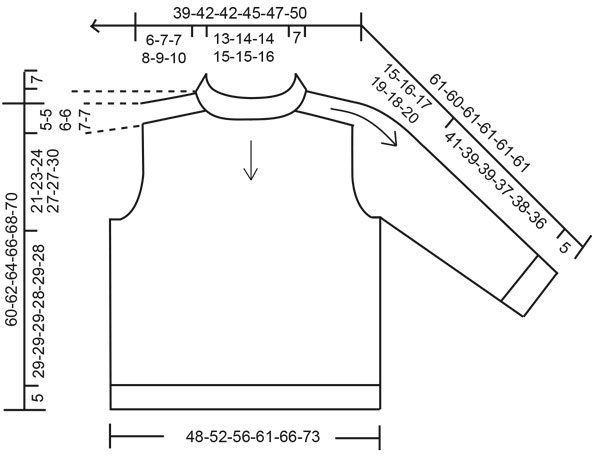
Diagram explanations |
|||||||||||||
|
|||||||||||||
 |
|||||||||||||
 |
|||||||||||||
Have you finished this pattern?Tag your pictures with #dropspattern #urbanforestsweater or submit them to the #dropsfan gallery. Do you need help with this pattern?You'll find 27 tutorial videos, a Comments/Questions area and more by visiting the pattern on garnstudio.com. © 1982-2026 DROPS Design A/S. We reserve all rights. This document, including all its sub-sections, has copyrights. Read more about what you can do with our patterns at the bottom of each pattern on our site. |
|||||||||||||

With over 40 years in knitting and crochet design, DROPS Design offers one of the most extensive collections of free patterns on the internet - translated to 17 languages. As of today we count 320 catalogues and 12110 patterns translated into English (UK/cm). 12110
We work hard to bring you the best knitting and crochet have to offer, inspiration and advice as well as great quality yarns at incredible prices! Would you like to use our patterns for other than personal use? You can read what you are allowed to do in the Copyright text at the bottom of all our patterns. Happy crafting!
Post a comment to pattern DROPS 219-16
We would love to hear what you have to say about this pattern!
If you want to leave a question, please make sure you select the correct category in the form below, to speed up the answering process. Required fields are marked *.