
Popular categories
Looking for a yarn?


Comments / Questions (34)
![]() Turid Fagerland wrote:
Turid Fagerland wrote:
Hei Dette var en nydelig jakke som jeg kunne tenkt meg å strikke. Jeg har noen problemer med å strikke mye vrangmasker, så jeg lurer på om denne kan strikkes rundt, og klippes opp.
21.10.2019 - 18:30DROPS Design answered:
Hei Turid, Det er helt mulig å strikke denne jakka rundt. Hvis du gjør det må du ha noen masker i tillegg midt foran for å sy og klippe opp i, og strikke stolpene til slutt. Lykke til og god fornøyelse!
22.10.2019 - 07:22
![]() Jane Ellegaard wrote:
Jane Ellegaard wrote:
Dejlig trøje.men jeg mangler symboler til for at strikke mønster A1.
28.09.2019 - 15:30
![]() Mflemineur wrote:
Mflemineur wrote:
Bonjour, Pourquoi 2 laines ? je ne vois si elles doivent être tricotées en même temps à un moment donné. Merci
28.09.2019 - 09:03DROPS Design answered:
Bonjour Mme Mflemineur, on tricote effectivement avec 1 fil DROPS Alpaca + 1 fil DROPS Kid-Silk, soit 1 fil de chaque qualité et ce du début à la fin- bon tricot!
30.09.2019 - 08:32
![]() Ana wrote:
Ana wrote:
Hola.. Por qué en las explicaciones recomiendan agujas del 5.5 y en el ovillo recomienda como mucho 3.5?...gracias
25.09.2019 - 21:08DROPS Design answered:
Hola Ana. Esta chaqueta se trabaja con dos hilos del grupo A , lo que significa que el grosor total de las lanas utilizadas es el del grupo C. Por lo tanto se utiliza una aguja de 5,5mm, que es apropiada para este grupo.
28.09.2019 - 23:44
![]() Valentina wrote:
Valentina wrote:
Precioso modelo. Espero que salgan pronto las instrucciones. Gracias.
01.09.2019 - 23:46
![]() Ans wrote:
Ans wrote:
Zeer mooi vest. Wanneer komt het patroon
29.08.2019 - 16:56
![]() Claudotte AUBRY wrote:
Claudotte AUBRY wrote:
Je suis impatiente d'avoir les explications de ce modèle. tout à fait ce que je recherchais, je le trouve magnifique !
26.08.2019 - 10:08
![]() Annie Louise Bauwens wrote:
Annie Louise Bauwens wrote:
J'ai bien envie de me le faire pour cet hiver...
12.08.2019 - 16:33
![]() Annie Bauwens wrote:
Annie Bauwens wrote:
Très beau modèle. Vivement les explications !
18.07.2019 - 18:33
![]() Ingrid wrote:
Ingrid wrote:
Very nice
04.07.2019 - 15:09
|
||||||||||||||||||||||
Story of Snow Jacket#storyofsnowjacket |
||||||||||||||||||||||
 |
 |
|||||||||||||||||||||
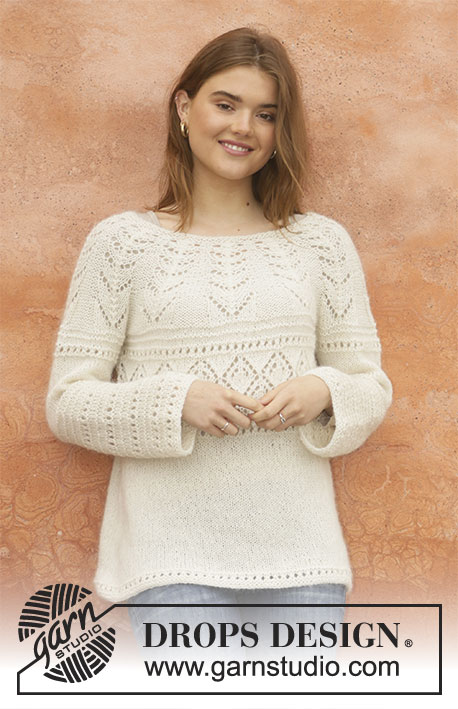
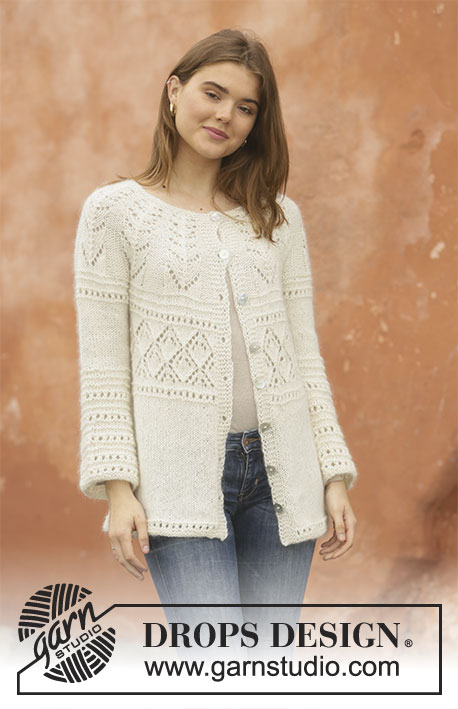
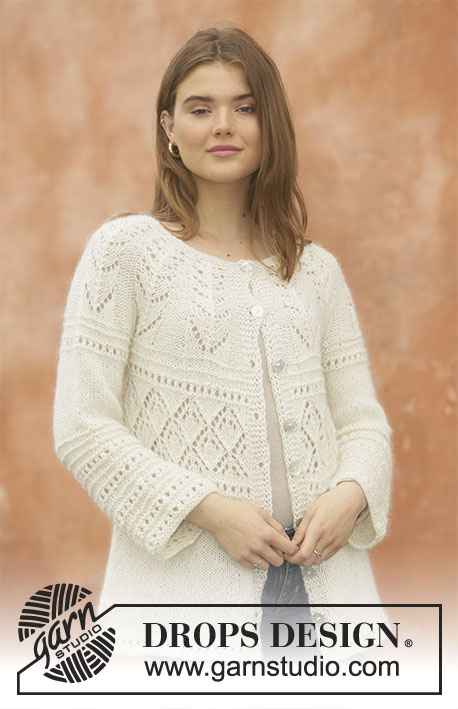
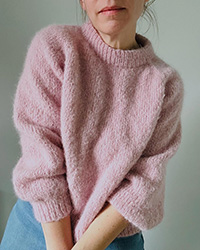
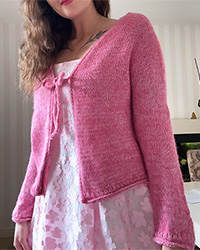
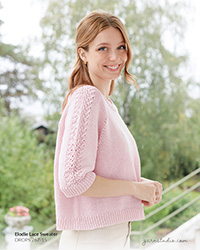
Knitted jacket with round yoke in 1 strand DROPS Alpaca and 1 strand DROPS Kid-Silk. Piece is knitted top down with lace pattern. Size S-XXXL.
DROPS 207-23 |
||||||||||||||||||||||
|
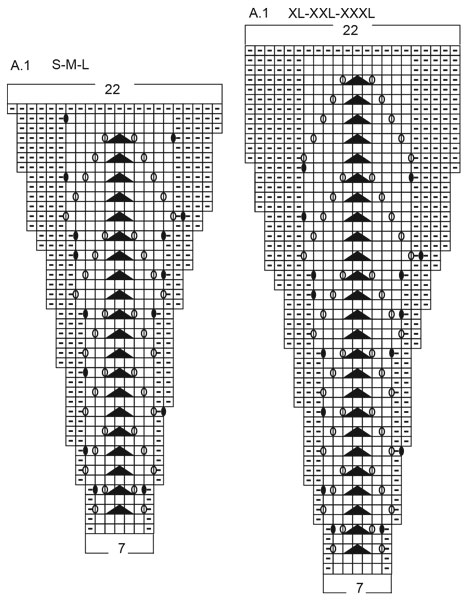
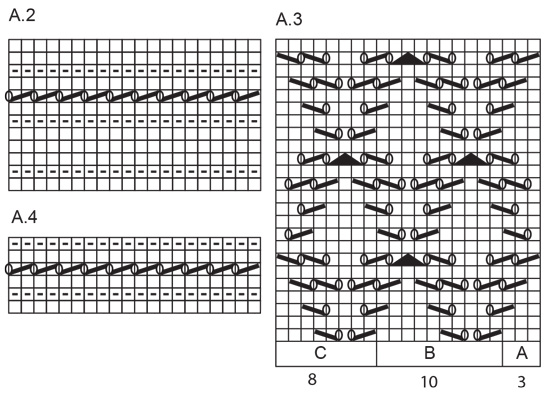
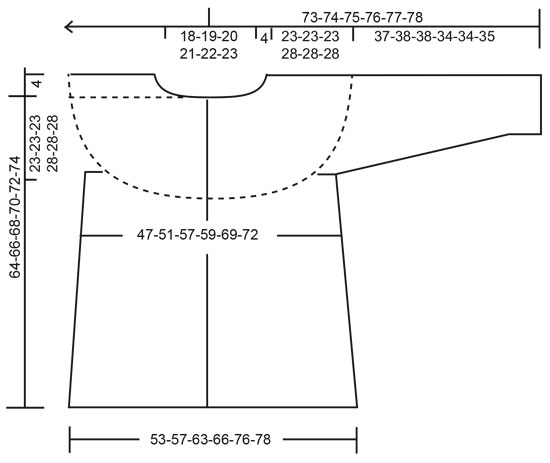
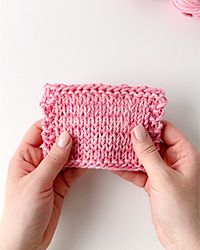
---------------------------------------------------------- EXPLANATION FOR THE PATTERN: ---------------------------------------------------------- GARTER STITCH (back and forth): Knit all rows. 1 ridge vertically = knit 2 rows. PATTERN: See diagrams A.1 to A.4. Choose diagram for your size in A.1. Diagrams show all rows seen from right side. INCREASE/DECREASE TIP (evenly): To calculate how to increase/decrease evenly, use the total number of stitches on row (e.g. 252 stitches) minus bands (e.g. 10 stitches) and divide the remaining 242 stitches by number of increases/decreases to be done (e.g. 10) = 24.2. In this example increase by making 1 yarn over after approx. every 24th stitch. Do not increase over bands. On next row work yarn overs twisted to avoid holes. If decreasing knit approx. every 23rd and 24th stitch together. INCREASE TIP (applies to sides of body): Work until 1 stitch remain before marker thread, make 1 yarn over, knit 2 (marker thread is in the middle of these 2 stitches), make 1 yarn over (= 2 stitches increased at the marker thread and 4 stitches increased in total on round.) On next row purl yarn overs twisted to avoid holes. Then work the new stitches in stocking stitch. DECREASE TIP-2 (applies to sleeves): Decrease 1 stitch on each side of marker thread as follows: Work until 3 stitches remain before marker thread and knit 2 together, knit 2 (marker thread is between these stitches), slip 1 stitch knitwise, knit 1, pass slipped stitch over stitch worked. BUTTONHOLES: Decrease for buttonholes on right band (when garment is worn). Decrease from right side when 3 stitches remain on row as follows: Make 1 yarn over, knit the next 2 stitches together, knit last stitch. On next row knit yarn over to make holes. Decrease first buttonhole when piece measures approx. 1½-2 cm. Then decrease the next 7-7-7-7-7-7, approx. 7-7-7-8-8-8 cm between each. ---------------------------------------------------------- START THE PIECE HERE: ---------------------------------------------------------- JACKET - SHORT OVERVIEW OF THE PIECE: Work yoke back and forth on circular needle from mid front, work top down. Now divide yoke for body and sleeves. Work body back and forth on circular needle from mid front, work top down. Work sleeves in the round on double pointed needles/short circular needle, top down. YOKE: Cast on 87-94-101-108-115-122 stitches on circular needle size 5.5 mm. Work 2 ridges in GARTER STITCH - see explanation above. Then work as follows from the right side: 5 band stitches in garter stitch, work A.1 (= 11-12-13-14-15-16 repetitions of 7 stitches) and finish with 5 band stitches in garter stitch. When A.1 has been worked vertically, there are 252-274-296-318-340-362 stitches on needle. Knit next row from right side, AT THE SAME TIME decrease 10-4-2-0-6-4 stitches evenly = 242-270-294-318-334-358 stitches – READ DECREASE TIP. Work next row as follows - from wrong side: Knit 5 stitches, purl 35-39-42-46-50-54 stitches (= front piece), slip the next 46-52-58-62-62-66 stitches on 1 stitch holder for sleeve, cast on 6-6-6-6-8-8 new stitches on row (= in the side under sleeve), purl 70-78-84-92-100-108 stitches (= back piece), slip the next 46-52-58-62-62-66 stitches on 1 stitch holder for sleeve, cast on 6-6-6-6-8-8 new stitches on row (= in the side under sleeve and purl the next 35-39-42-46-50-54 stitches, knit the last 5 stitches (= front piece). Now finish body and sleeves separately. NOW MEASURE THE PIECE FROM HERE! BODY: = 162-178-190-206-226-242 stitches. Work as follows - from right side: 5 stitches in garter stitch, A.2 until 5 stitches remain, work 5 stitches in garter stitch. On last row in A.2 adjust number of stitches to 161-171-191-201-231-241. Work next row as follows from right side: Work 5 stitches in garter stitch as before, A.3A (= 3 stitches), work A.3B over the next 140-150-170-180-210-220 stitches (= 14-15-17-18-21-22 repetitions), A.3C (= 8 stitches), finish with 5 stitches in garter stitch as before. When A.3 has been worked 1 time vertically, work as follows from right side: 5 stitches in garter stitch, A.4 over all stitches, 5 stitches in garter stitch. Insert 1 marker thread in each side, 43-45-50-53-60-63 stitches in from each side, back piece = 75-81-91-95-111-115 stitches. Then work in stocking stitch with 5 stitches in garter stitch in each side. When piece measures 20 cm from division, increase 1 stitch on each side of every marker thread (= 4 stitches increased) – READ INCREASE TIP! Increase every 3 cm 5 times in total = 181-191-211-221-251-261 stitches. Continue until piece measures 39-41-43-40-42-44 cm. Work as follows - from right side: 5 stitches in garter stitch, A.4 until 6 stitches remain, knit 1 and 5 stitches in garter stitch. Work A.4 1 time vertically, work 1 ridge back and forth over all stitches. Cast off. Piece measures approx. 64-66-68-70-72-74 cm from shoulder. SLEEVE: Slip the 46-52-58-62-62-66 stitches from stitch holder in one side of piece on a short circular needle or double pointed needles size 5.5 mm and pick in addition up 1 stitch in each of the 6-6-6-6-8-8 stitches cast on under sleeve = 52-58-64-68-70-74 stitches. Insert 1 marker thread in the middle of the 6-6-6-6-8-8 stitches. Marker thread marks mid under sleeve and round begins at the marker thread. Work A.2. When A.2 has been worked 1 time vertically, continue in stocking stitch. AT THE SAME TIME when piece measures 3 cm, begin decreasing stitches mid under sleeve - READ DECREASE TIP-2. Decrease every 4 cm 4 times in total in all sizes = 44-50-56-60-62-66 stitches. Continue in stocking stitch until piece measures 16 cm from division. Purl 1 round and knit 2 rounds, purl 1 round and knit 2 rounds. Then work A.2 over all stitches. Continue with A.2 until sleeve measures 37-38-38-34-34-35 cm from division (shorter sleeves in the larger sizes because of longer yoke), work 1 ridge, then cast off. Work the other sleeve the same way. ASSEMBLY: Sew the buttons on to the left band. |
||||||||||||||||||||||
Diagram explanations |
||||||||||||||||||||||
|
||||||||||||||||||||||
 |
||||||||||||||||||||||
 |
||||||||||||||||||||||
 |
||||||||||||||||||||||
Have you finished this pattern?Tag your pictures with #dropspattern #storyofsnowjacket or submit them to the #dropsfan gallery. Do you need help with this pattern?You'll find 26 tutorial videos, a Comments/Questions area and more by visiting the pattern on garnstudio.com. © 1982-2026 DROPS Design A/S. We reserve all rights. This document, including all its sub-sections, has copyrights. Read more about what you can do with our patterns at the bottom of each pattern on our site. |
||||||||||||||||||||||

With over 40 years in knitting and crochet design, DROPS Design offers one of the most extensive collections of free patterns on the internet - translated to 17 languages. As of today we count 324 catalogues and 12220 patterns translated into English (UK/cm). 12220
We work hard to bring you the best knitting and crochet have to offer, inspiration and advice as well as great quality yarns at incredible prices! Would you like to use our patterns for other than personal use? You can read what you are allowed to do in the Copyright text at the bottom of all our patterns. Happy crafting!
Post a comment to pattern DROPS 207-23
We would love to hear what you have to say about this pattern!
If you want to leave a question, please make sure you select the correct category in the form below, to speed up the answering process. Required fields are marked *.