
Looking for a yarn?


Comments / Questions (4)
![]() Nicoletta wrote:
Nicoletta wrote:
Buongiorno, non riesco a capire l'esecuzione dei bordi. Stando alle vostre spiegazioni sono uguali. Ma non dovrebbero essere speculari uno all'altro? Voglio dire : il bordo sinistro ha prima le tre maglie a legaccio e poi l'i-cord , ma il bordo dx non dovrebbe avere prima l' i- cord e poi le tre maglie a legaccio? Grazie per l'attenzione?
22.11.2025 - 23:21DROPS Design answered:
Buongiorno Nicolletta, è corretto, i bordi si lavorano a parte e poi si uniscono allo sprone. Buon lavoro!
23.11.2025 - 12:48
![]() Nicoletta Dorigoni wrote:
Nicoletta Dorigoni wrote:
Buongiorno, è possibile realizzare questo modello con un solo filo di brushed Alpaca silk (quindi ferri n. 5 , credo) in versione non "over size" . Per me potrebbe andare bene una larghezza di 48 cm e una lunghezza di 60 cm. Ho già fatto molti dei vostri modelli con ottimi risultati. Vi ringrazio per l'attenzione.
21.10.2025 - 08:11DROPS Design answered:
Buonasera Nicoletta, per questo tipo di impostazione di lavoro dovrebbe riprogrammare tutte le spiegazioni; purtroppo noi non possiamo adattare i modelli alle singole esigenze, ma lei può apportare le modifiche che preferisce. Buon lavoro!
21.10.2025 - 17:56
![]() Birgitt Jacobsen wrote:
Birgitt Jacobsen wrote:
Moin 😊, für den V-Ausschnitt soll nach den ersten 7 M (bzw. vor den letzten 7 M) je 1M zugenommen werden - zeitgleich sind aber genau dort auch die Raglanzunahmen durchzuführen. Heißt es, dass an den Stellen dann 2 M in einer R zugenommen werden? Über eine kurze Info freue ich mich sehr. Vielen Dank & Beste Grüße aus Hamburg\\r\\nBirgitt
25.09.2025 - 15:49
![]() Birgit wrote:
Birgit wrote:
Heg har fulgt oppskrift i str XL, og når jeg er ferdig med alle økninger til v-hals og ermer har jeg 268 masker - ikke 208 som det står i oppskriften. Her er mitt regnestykke m økning: 2 stolper og opplegg mellom = 52m V-hals:16 m økning Raglan: 10 x 8 m= 80 økning (hver 2. pinne) Rauland økning over 4 pinner: 10 x 12 m= 120 m Totalt 268 m. Hvor er feilen?
31.08.2025 - 20:28DROPS Design answered:
Hej Birgit. Du startar med 52 m. Ökning V-hals 16 m. Ökning raglan for og bakstycke: 4 m x 20 ganger = 80 m. Ökning raglar ermer: 4 m x 15 ganger = 60 m. 52+16+80+60= 208 m. Mvh DROPS Design
01.09.2025 - 08:02
|
|
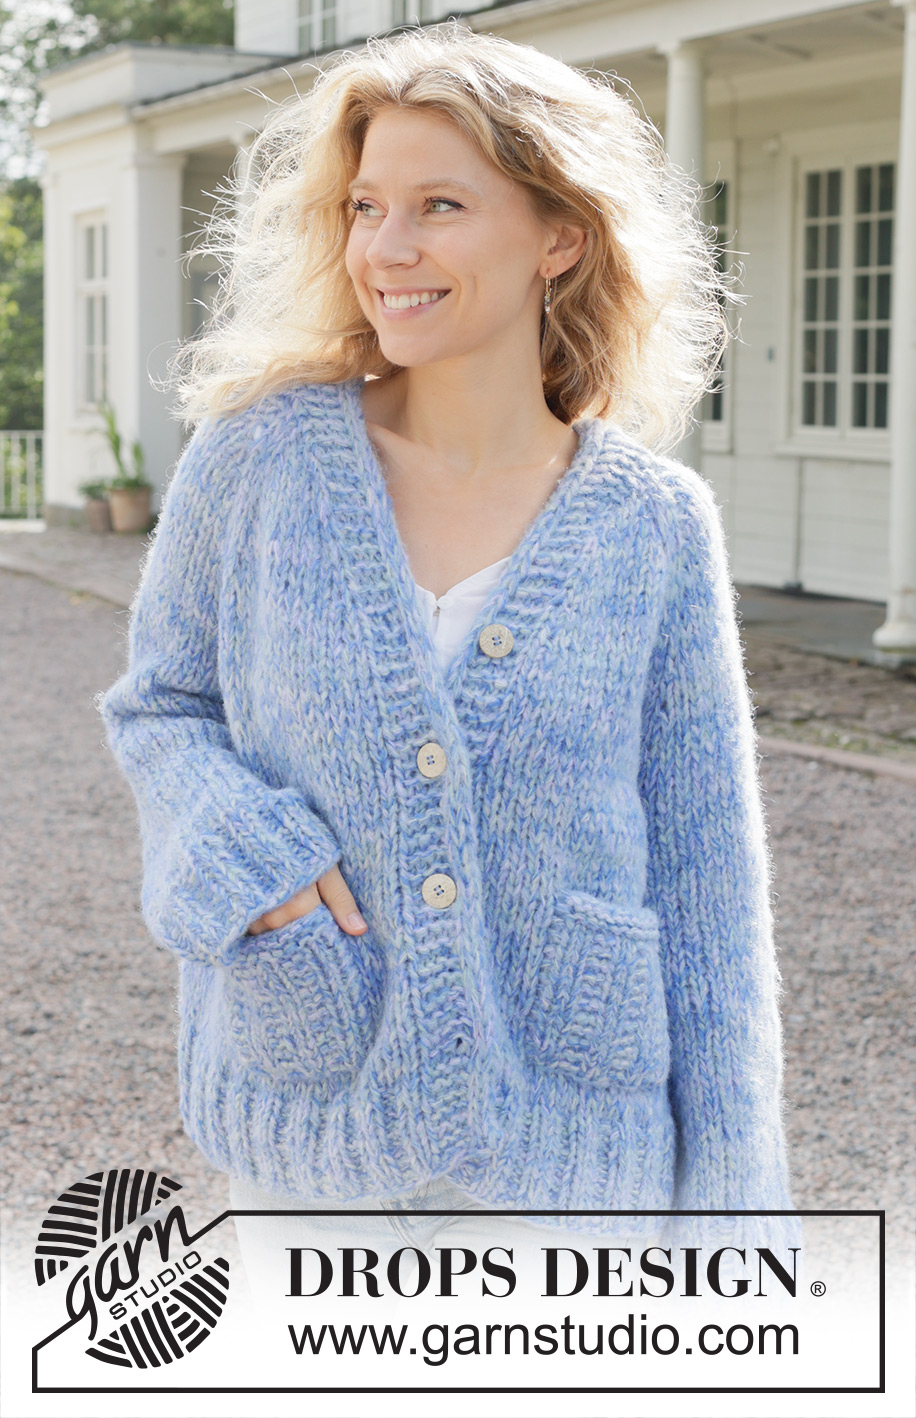
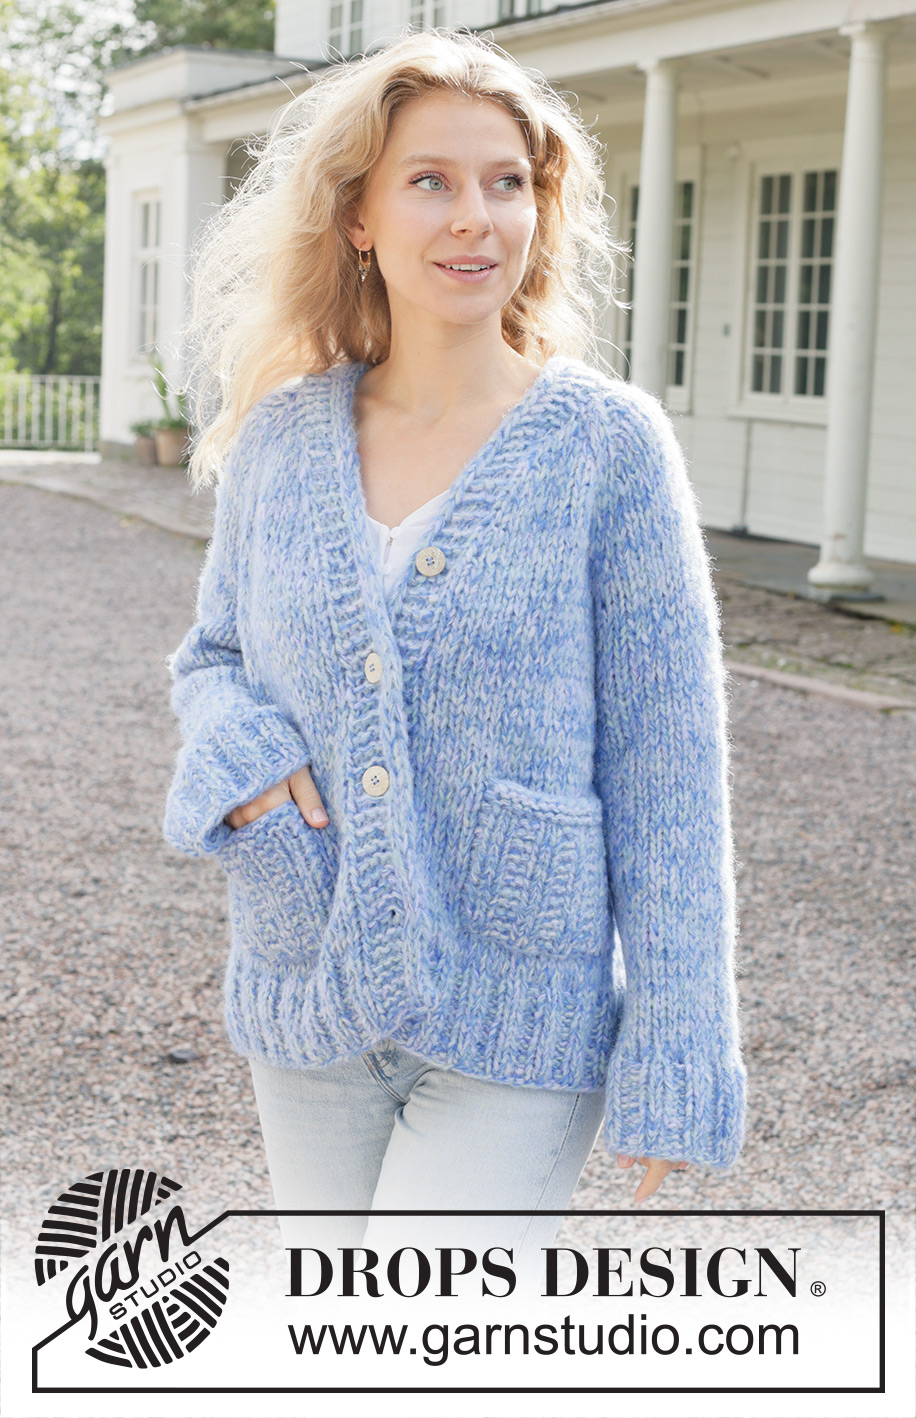
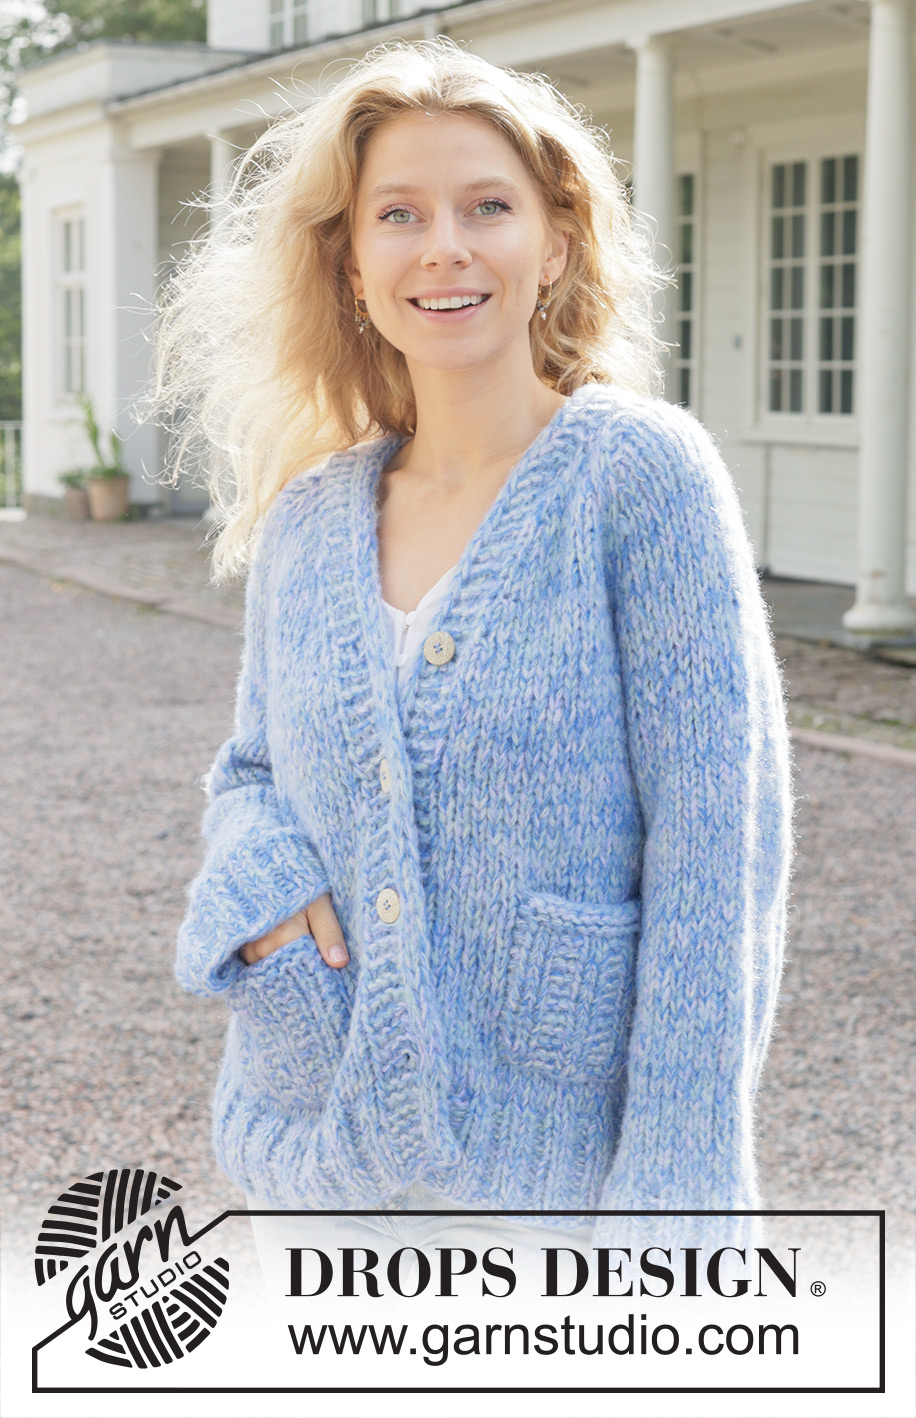
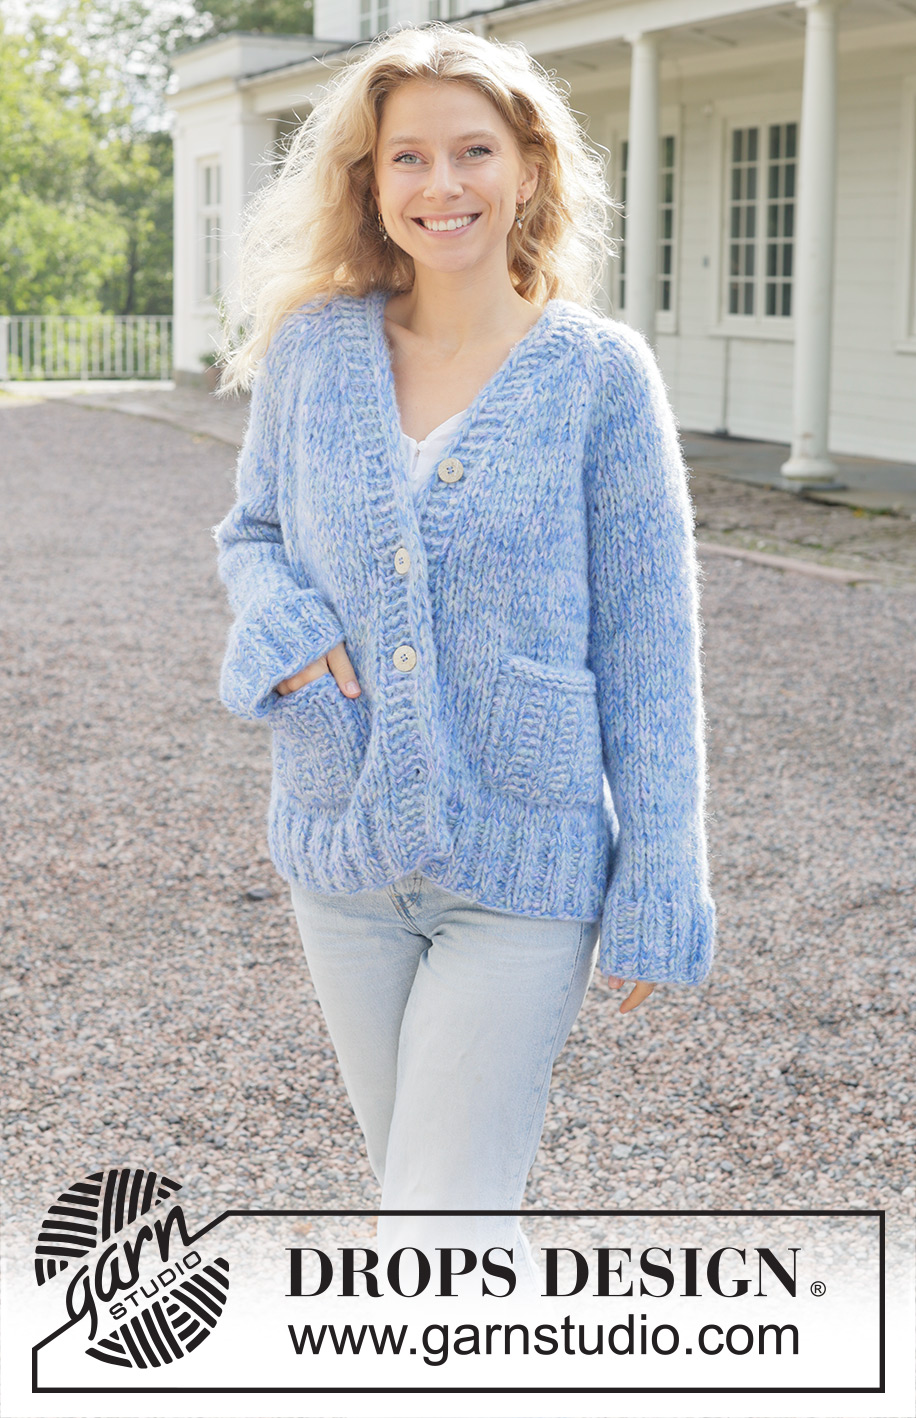
Azure Bliss Cardigan#azureblisscardigan |
|
 |
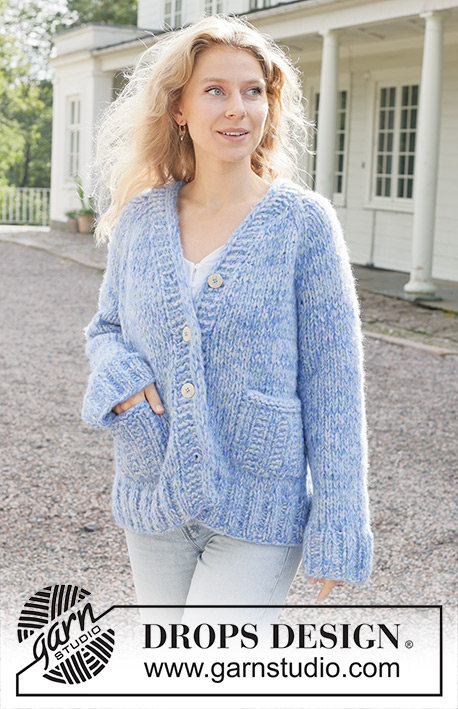 |
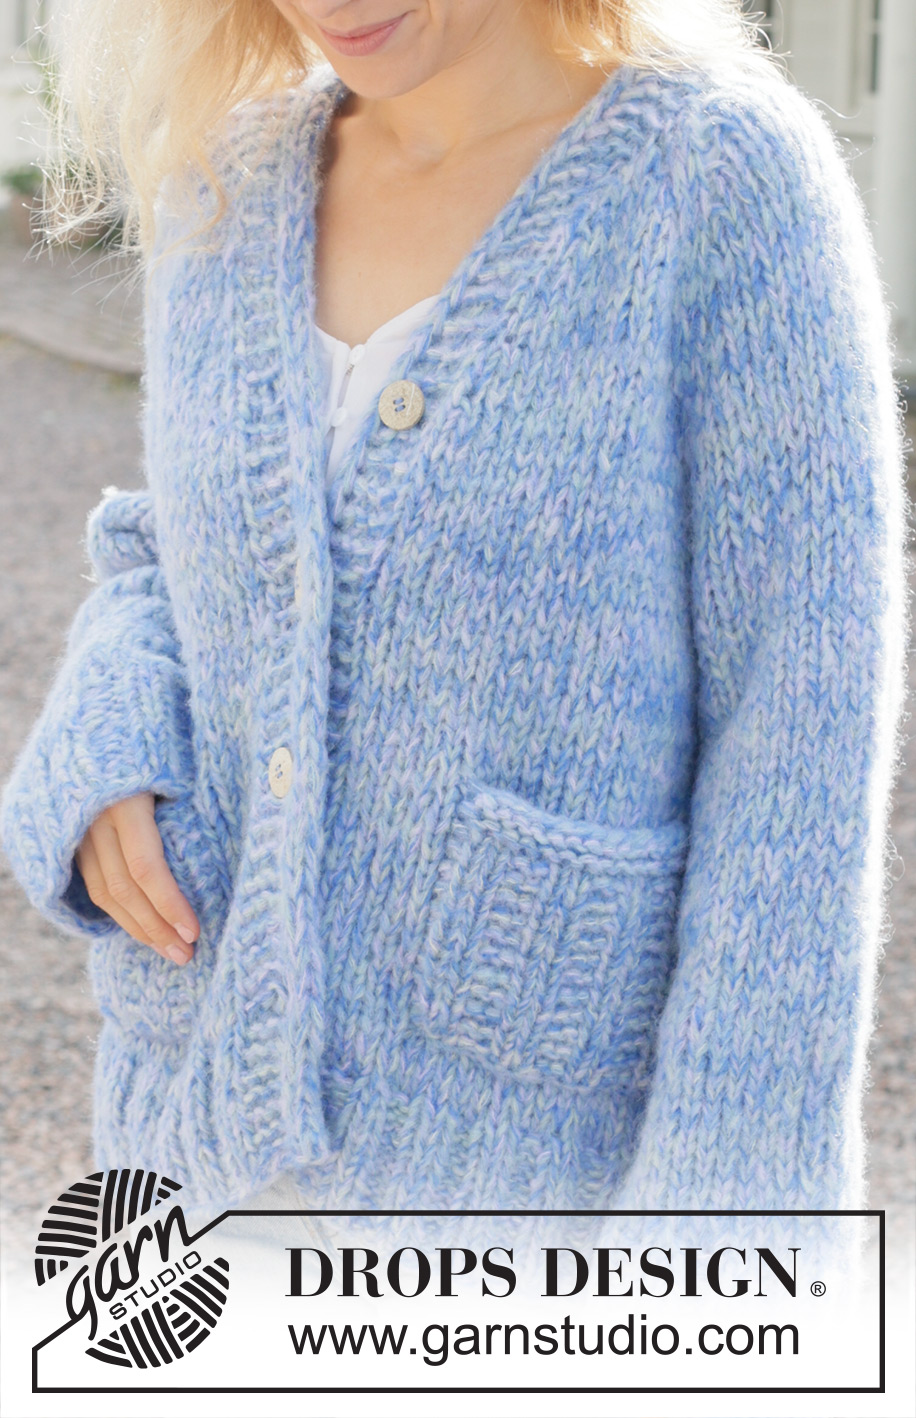
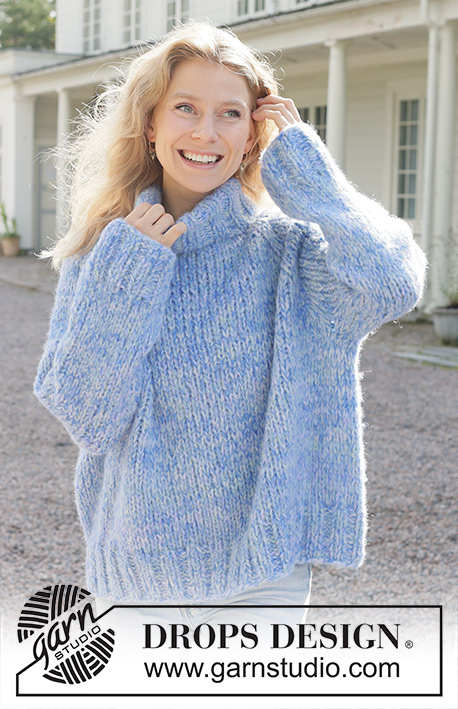
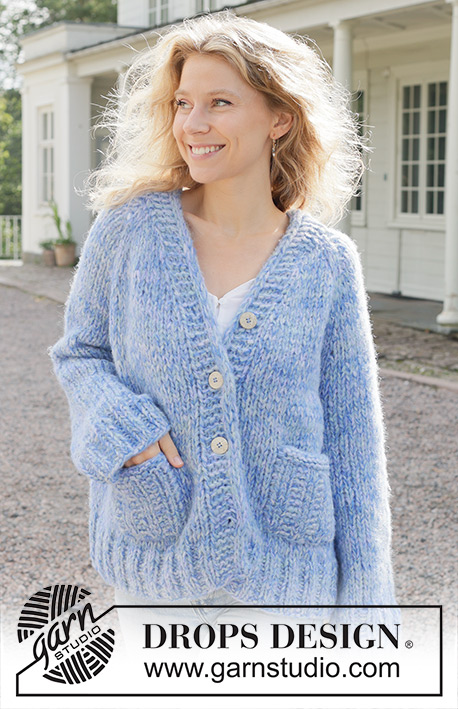
Knitted over-sized jacket in 5 strands DROPS Brushed Alpaca Silk. The piece is worked top down with raglan, pockets, I-cord and V-neck. Sizes S - XXXL.
DROPS 259-28 |
|
|
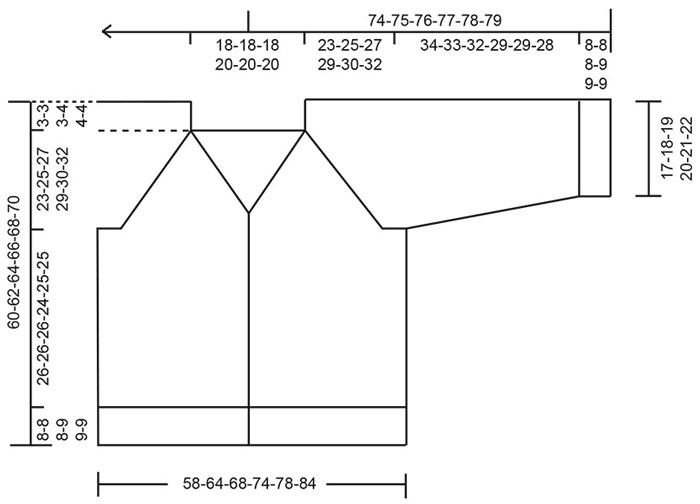
------------------------------------------------------- EXPLANATIONS FOR THE PATTERN: ------------------------------------------------------- GARTER STITCH (worked back and forth): Knit all rows, from both the right and wrong side. 1 ridge in height = knit 2 rows. INCREASE TIP-1: INCREASE 1 STITCH TOWARDS THE RIGHT: Make 1 yarn over the right needle by taking the strand from the back and forwards. On the next row purl through the front loop. Then work the new stitch in stocking stitch. INCREASE 1 STITCH TOWARDS THE LEFT: Make 1 yarn over the right needle by taking the strand in front of the needle then backwards. On the next row purl through the front loop. Then work the new stitch in stocking stitch. INCREASE TIP-2 (evenly spaced): To work out how to increase evenly, count the total number of stitches on the needle (e.g., 130 stitches) minus bands (e.g., 12 stitches) and divide the remaining stitches by the number of increases to be made (e.g., 12) = 9.8. In this example, increase by making 1 yarn over after approx. each 10th stitch. Do not increase across the bands. On the next row work the yarn overs twisted to avoid holes. BUTTONHOLES: Work the buttonholes on the fight band (when garment is worn) from the right side, when there are 5 stitches left on the row. ROW 1 (right side): Make 1 yarn over, knit 2 together, knit 1, slip 1 purl-wise with strand in front, knit 1. ROW 2 (wrong side): Work the band as before, knit the yarn over to leave a hole. The first buttonhole is worked when working the last increase for raglan on the yoke. Then work the other 3-3-4-4-4-4 buttonholes with 11-11-9-8-8½-8 cm between each one. SLEEVE TIP: When knitting up stitches under the sleeve, you can get a small hole in the transition between stitches on the body and sleeve. This hole can be closed by picking up the strand between 2 stitches and working this strand twisted together with the first stitch between body and sleeve. DECREASE TIP (for sleeves): Decrease 1 stitch on each side of the marker-thread as follows: Work until there are 3 stitches left before the marker-thread, knit 2 together, knit 2 (marker-thread sits between these 2 stitches), slip 1 stitch knit-wise, knit 1 and pass the slipped stitch over the knitted stitch (2 stitches decreased). ------------------------------------------------------- START THE PIECE HERE: ------------------------------------------------------- JACKET – SHORT OVERVIEW OF THE PIECE. The pattern uses both long and short needles; start with the length which fits the number of stitches and change when necessary. 2 loose bands are worked first, then stitches are cast on between them for the yoke. The yoke is worked back and forth with circular needle, from mid front and top down. Stitches are increased for raglan and for the V-neck. When the yoke is finished, it is divided for the body and sleeves and the body is continued back and forth, while the sleeves wait. The sleeves are worked in the round, top down. Pockets are worked and sewn to the front pieces. The bands are sewn together mid-back, then sewn to the neckline. If there is a «0» in your chosen size, skip the information and go straight to the next instruction. RIGHT BAND: Cast on 6 stitches with circular needle size 8 mm and 1 strand of each colour DROPS Brushed Alpaca Silk (= 5 strands). Work back and forth as follows: ROW 1 (right side): Work 3 GARTER STITCHES – see description above, knit 1, slip 1 stitch purl-wise with strand in front, knit 1. ROW 2 (wrong side): Slip 1 stitch purl-wise with strand in front, knit 1, slip 1 stitch purl-wise with strand in front, 3 garter stitches. Work ROWS 1 and 2 until the band measures 16-16-16-19-19-19 cm, finishing after a row from the wrong side. Cut the strand. Lay the piece to one side and work the left band. LEFT BAND: Cast on 6 stitches with circular needle size 8 mm and 1 strand of each colour DROPS Brushed Alpaca Silk (= 5 strands). Work back and forth as follows: ROW 1 (right side): Work 3 garter stitches, knit 1, slip 1 stitch purl-wise with strand in front, knit 1. ROW 2 (wrong side): Slip 1 stitch purl-wise with strand in front, knit 1, slip 1 stitch purl-wise with strand in front, 3 garter stitches. Work ROWS 1 and 2 until the band measures 16-16-16-19-19-19 cm, finishing after a row from the wrong side. YOKE: You now cast on stitches between the bands as follows: Start from the right side and work across the left band as before (= 6 stitches), cast on 34-34-34-40-40-40 stitches, work across the right band as before (= 6 stitches). There are 46-46-46-52-52-52 stitches. Purl back from the wrong side (bands as before). Insert 1 marker inside one band; the yoke is measured from here. Insert 4 marker-threads, without working the stitches and each thread inserted between 2 stitches. Count 8-8-8-8-8-8 stitches (= left front piece), insert 1 marker-thread before the next stitch, count 6-6-6-8-8-8 stitches (= sleeve), insert 1 marker-thread before the next stitch, count 18-18-18-20-20-20 stitches (= back piece), insert 1 marker-thread before the next stitch, count 6-6-6-8-8-8 stitches (= sleeve), insert 1 marker-thread before the next stitch. There are 8-8-8-8-8-8 stitches left after the last marker-thread (= right front piece). Continue with stocking stitch and bands and begin increasing for RAGLAN and the V-NECK –read the next 2 sections before continuing! V-NECK: On the first row from the right side, begin increasing for the V-neck, increasing 1 stitch after/before the outermost 7 stitches on each side. Read INCREASE TIP-1 and work as follows: Increase after the first 7 stitches by INCREASING 1 STITCH TOWARDS THE LEFT. Increase before the last 7 stitches by INCREASING 1 STITCH TOWARDS THE RIGHT. Increase every 2nd row a total of 3-3-3-4-4-4 times, then every 4th row 4-4-4-4-4-4 times (a total of 7-7-7-8-8-8 times). RAGLAN: Increase 1 stitch for raglan before and after 2 stocking stitches by each marker-thread (marker-thread sits between these 2 stitches). Read INCREASE TIP-1 and work as follows: ROW 1 (right side: Increase before and after each marker-thread (= 8 increased stitches). ROW 2 (wrong side): Work stocking stitch and bands as before, with the new stitches worked in stocking stitch – read INCREASE TIP-1. Work ROWS 1 and 2 a total of 8-9-11-10-13-14 times (16-18-22-20-26-28 rows worked). Now increase as follows: ROW 1 (right side): Increase before and after each marker-thread (= 8 increased stitches). ROW 2 (wrong side): Work stocking stitch and bands as before with the new stitches worked in stocking stitch. ROW 3 (right side): Increase before marker-thread 1, after marker-thread 2, before marker-thread 3 and after marker-thread 4, i.e., increase only on the front and back pieces, not on the sleeves (= 4 increased stitches). ROW 4 (wrong side): Work stocking stitch and bands as before with the new stitches worked in stocking stitch. Work ROWS 1 to 4 a total of 8-8-8-10-8-8 times (= 16-16-16-20-16-16 rows worked and you have increased 4-4-4-5-4-4 times on the sleeves, 8-8-8-10-8-8 times on the front and back pieces). When all the increases for raglan and V-neck are finished, you have increased 16-17-19-20-21-22 times on the front and back pieces, 12-13-13-15-17-16 times on the sleeves and 7-7-7-8-8-8 times for the V-neck. There are 172-180-196-208-220-228 stitches. Remove the marker-threads and continue working without further increases until the yoke measures 23-25-27-29-30-32 cm from the marker mid-front. Now divide for the body and sleeves. DIVIDE FOR BODY AND SLEEVES: Work 32-34-36-38-40-42 stitches as before (= front piece), place the next 28-28-32-34-36-36 stitches on a thread for the sleeve, cast on 6-8-8-10-10-12 stitches (under the sleeve), work 52-56-60-64-68-72 stitches (= back piece), place the next 28-28-32-34-36-36 stitches on a thread for the sleeve, cast on 6-8-8-10-10-12 stitches (under the sleeve), work the last 32-34-36-38-40-42 stitches as before (= front piece). The body and sleeves are finished separately. BODY: = 128-140-148-160-168-180 stitches. Continue back and forth with bands and stocking stitch until the piece measures 49-51-53-53-55-57 cm from the marker mid-front. On the next row begin the rib, AT THE SAME TIME increase 14-18-18-18-22-26 stitches evenly on the row – read INCREASE TIP-2 = 142-158-166-178-190-206 stitches, as follows: Change to circular needle size 7 mm, work the band as before, work rib (knit 2, purl 2 – remember to increase) until there are 8 stitches left, knit 2 and work the band as before. When the rib measures 8-8-8-9-9-9 cm, cast off a little loosely with knit over knit and purl over purl. The jacket measures approx. 57-59-61-62-64-66 cm from the marker mid-front and 60-62-64-66-68-70 cm from top of shoulder. SLEEVES: Place the 28-28-32-34-36-36 sleeve-stitches from one thread on circular needle size 8 mm and knit up 1 stitch in each of the 6-8-8-10-10-12 stitches cast on under the sleeve – read SLEEVE TIP = 34-36-40-44-46-48 stitches. Insert a marker-thread in the middle of the 6-8-8-10-10-12 stitches under the sleeve. Start at the marker-thread and work stocking stitch in the round. AT THE SAME TIME, when the sleeve measures 2 cm, decrease 2 stitches under the sleeve – read DECREASE TIP. Decrease like this every 0-0-2-2-2-2 cm a total of 0-0-1-2-2-2 times = 34-36-38-40-42-44 stitches. Continue working until the sleeve measures 34-33-32-29-29-28 cm from the division. Change to double pointed needles size 7 mm. Work rib (knit 2, purl 2), AT THE SAME TIME increase 2-4-2-4-6-4 stitches evenly on the first round = 36-40-40-44-48-48 stitches. When the rib measures 8-8-8-9-9-9 cm, cast off slightly loosely with rib. The sleeve measures approx. 42-41-40-38-38-37 cm. POCKETS: Cast on 16-16-18-18-20-20 stitches with circular needle size 7 mm and 1 strand of each colour DROPS Brushed Alpaca Silk (= 5 strands) – leave an end of 30-40 cm (used when assembling). Work back and forth as follows: ROW 1 (wrong side): Work 1-1-2-2-1-1 garter stitches, * purl 2, knit 2 *, work from *-* until there are 3-3-4-4-3-3 stitches left, purl 2 and 1-1-2-2-1-1 garter stitches. ROW 2 (right side): Knit. Work ROWS 1 and 2 until the pocket measures 11-11-12-12-13-13 cm, finishing after a row from the wrong side. Knit 4 rows (= 2 ridges). Cast off with knit from the right side. Leave an end of 30-40 cm (used for assembly). Work 1 more pocket in the same way. ASSEMBLY: Sew 1 pocket onto each front piece, approx. 2 cm above the rib and in the middle of each front piece. Sew the bands together mid-back and sew each band to the neckline. Sew the buttons onto the left band. |
|
 |
|
Have you finished this pattern?Tag your pictures with #dropspattern #azureblisscardigan or submit them to the #dropsfan gallery. Do you need help with this pattern?You'll find 32 tutorial videos, a Comments/Questions area and more by visiting the pattern on garnstudio.com. © 1982-2025 DROPS Design A/S. We reserve all rights. This document, including all its sub-sections, has copyrights. Read more about what you can do with our patterns at the bottom of each pattern on our site. |
|


With over 40 years in knitting and crochet design, DROPS Design offers one of the most extensive collections of free patterns on the internet - translated to 17 languages. As of today we count 320 catalogues and 12091 patterns translated into English (UK/cm). 12091
We work hard to bring you the best knitting and crochet have to offer, inspiration and advice as well as great quality yarns at incredible prices! Would you like to use our patterns for other than personal use? You can read what you are allowed to do in the Copyright text at the bottom of all our patterns. Happy crafting!
Post a comment to pattern DROPS 259-28
We would love to hear what you have to say about this pattern!
If you want to leave a question, please make sure you select the correct category in the form below, to speed up the answering process. Required fields are marked *.