
Popular categories
Looking for a yarn?


Comments / Questions (6)
![]() Susanne wrote:
Susanne wrote:
Liebes Drops Team, ab welchem Markierer werden die erforderlichen Zentimeter ab A1 gemessen? Bleibt es immer der Markierer der vorderen Mitte? Wenn ich es richtig verstehe wird nach dem erreichen der Zentimeter die Maschen der Zunahme gleichmäßig verteilt. Freue mich auf Eure Antwort, Susanne
15.09.2025 - 11:36DROPS Design answered:
Liebe Susanne, Sie messen durchweg ab dem Markierer nach der Halsblende (an der vorderen Mitte), also immer ab der gleichen Stelle. Viel Spaß beim Stricken!
25.10.2025 - 21:50
![]() Julie Bellew wrote:
Julie Bellew wrote:
Hi, is the tension worked on straight needles or as if in the round please? Thank you
06.04.2025 - 18:42DROPS Design answered:
Dear Julie, the gauge should form a square, so you need to work back and forth. Remember to use the exact same needles as if you were working the piece (so if you use circular needles you use those same needles for the gauge, working back and forth). Happy knitting!
06.04.2025 - 19:36
![]() Stefania Bernareggi wrote:
Stefania Bernareggi wrote:
Buongiorno, forse nella descrizione del motivo A4 non è corretto il numero di aumenti da eseguire? Perché mi pare che il totale delle maglie da raggiungere non corrisponda. Io ho considerato corretto il numero delle maglie totali. Grazie.
01.12.2024 - 15:35DROPS Design answered:
Buonasera Stefania, il numero è corretto, c'è un aumento in A.4. Buon lavoro!
13.12.2024 - 23:14
![]() Stefania Bernareggi wrote:
Stefania Bernareggi wrote:
Buongiorno, forse nella descrizione del motivo A4 non è corretto il numero di aumenti da eseguire? Perché mi pare che il totale delle maglie da raggiungere non corrisponda. Io ho considerato corretto il numero delle maglie totali. Grazie.
20.11.2024 - 10:04DROPS Design answered:
Buonasera Stefania, il numero è corretto, c'è un aumento in A.4. Buon lavoro!
13.12.2024 - 23:15
![]() Tze Moi Ang wrote:
Tze Moi Ang wrote:
I noticed that the sweater showed a lower front panel than back panel but I don’t see any short row shaping in the pattern. How do I make the back piece higher than the front? Thank you.
31.10.2024 - 20:32DROPS Design answered:
Dear Mrs Tse Moi, in this pattern neckline is as height on back as on front piece; to get a higher neck on back piece you can work some short rows as shown in this video. Happy knitting!
01.11.2024 - 08:30Mamé wrote:
Bonjour. Avec quelle laine plus fine peut on le faire ? Peut on avoir les explications en français ?
18.10.2024 - 14:16DROPS Design answered:
Bonjour Mme Mamé, retrouvez les explications en français en cliquant sur le menu déroulant à côté de l'icône imprimante pour changer de langue, ou bien retrouvez tous nos modèles de pulls tricotés de haut en bas, avec empiècement arrondi, toute tension confondue ici, pensez à ajouter le filtre de l'échantillon souhaité pour filtrer votre recherche. Bon tricot!
18.10.2024 - 15:55
|
||||||||||
Chestnut Season#chestnutseasonsweater |
||||||||||
 |
 |
|||||||||
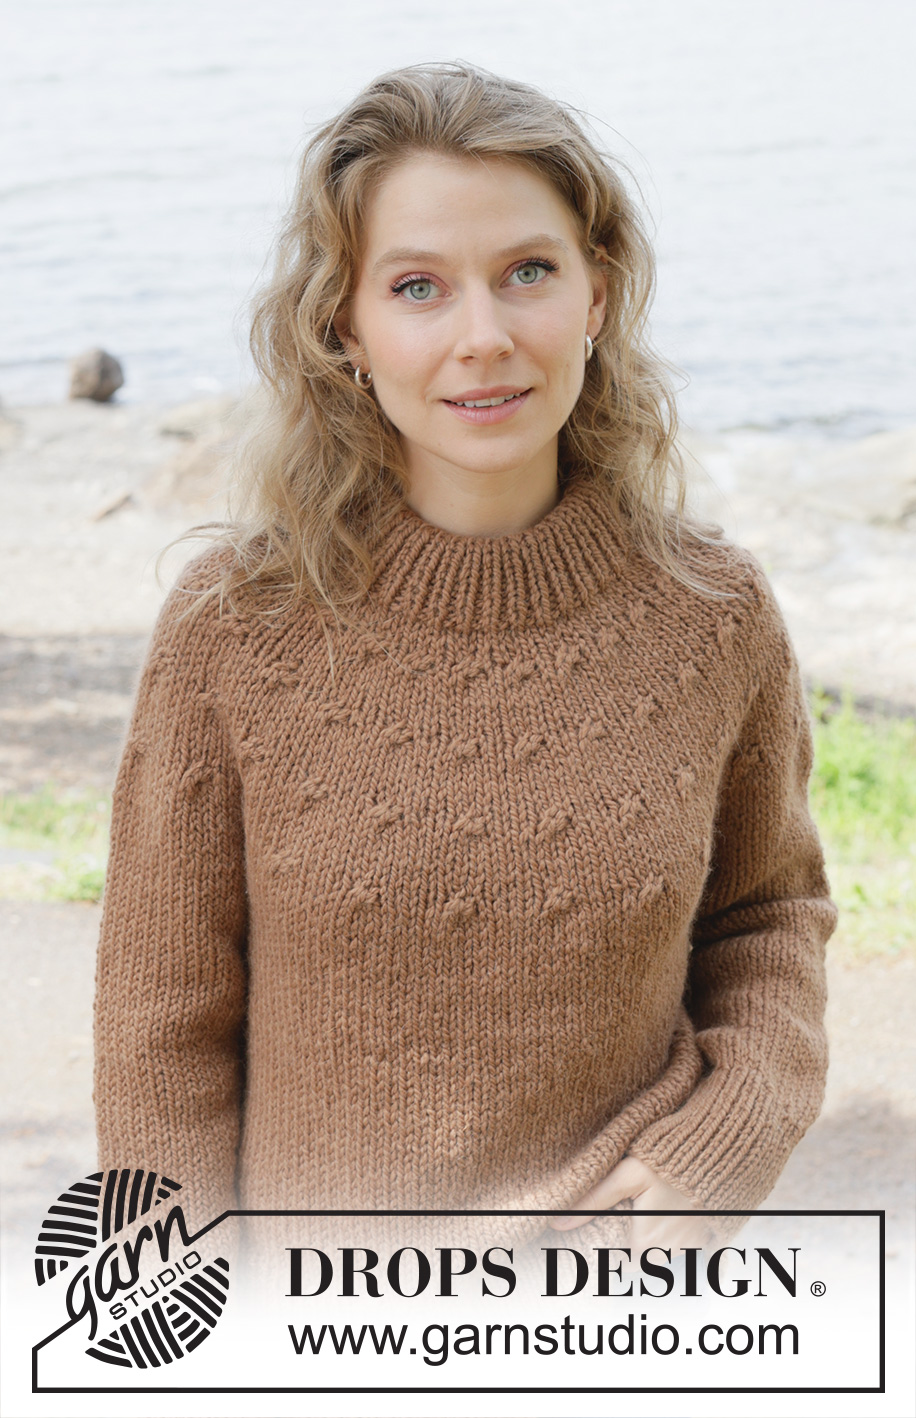
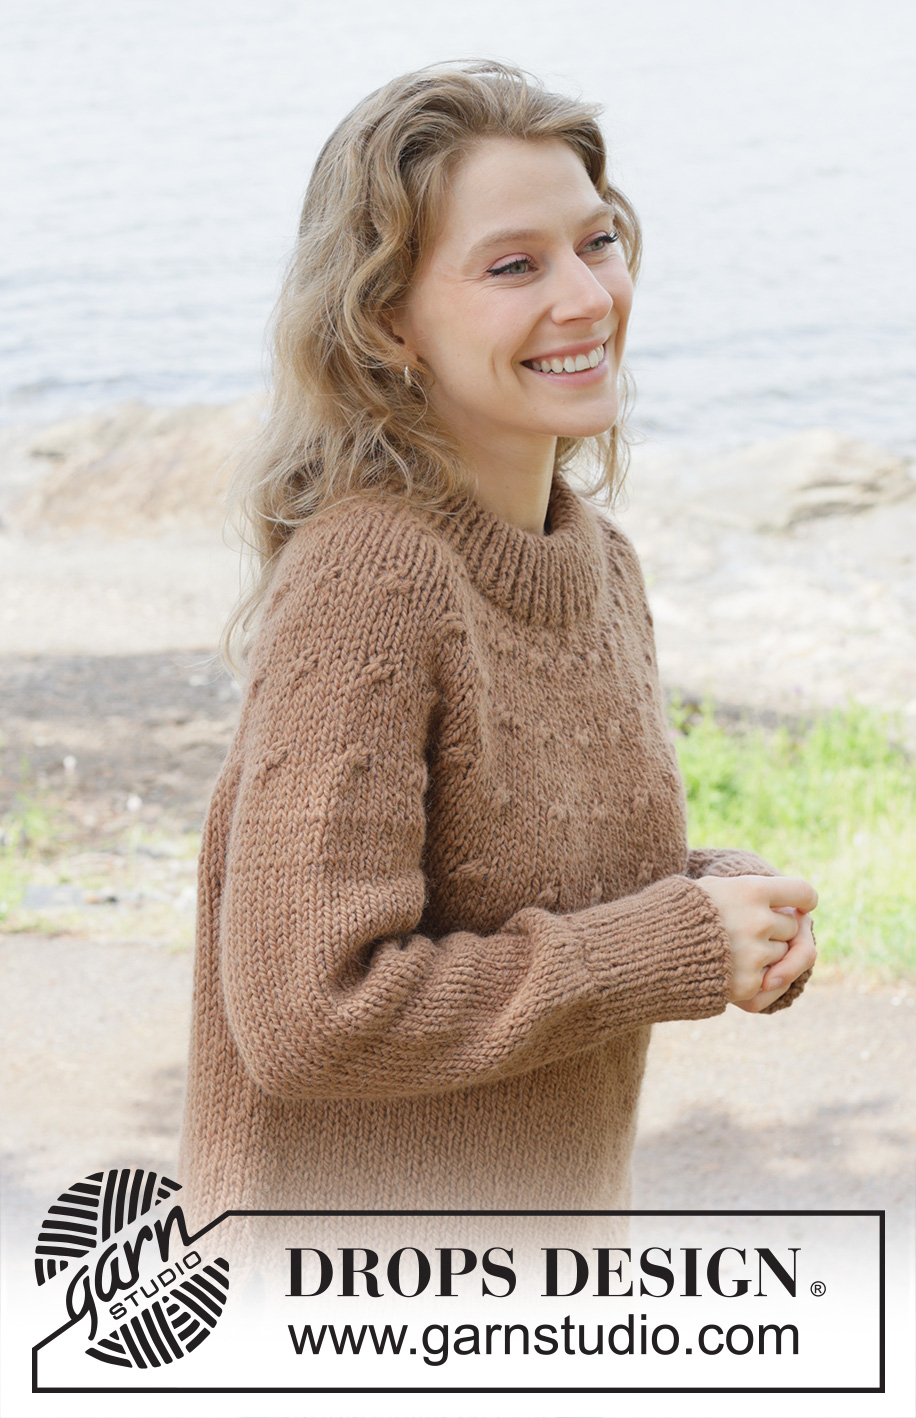
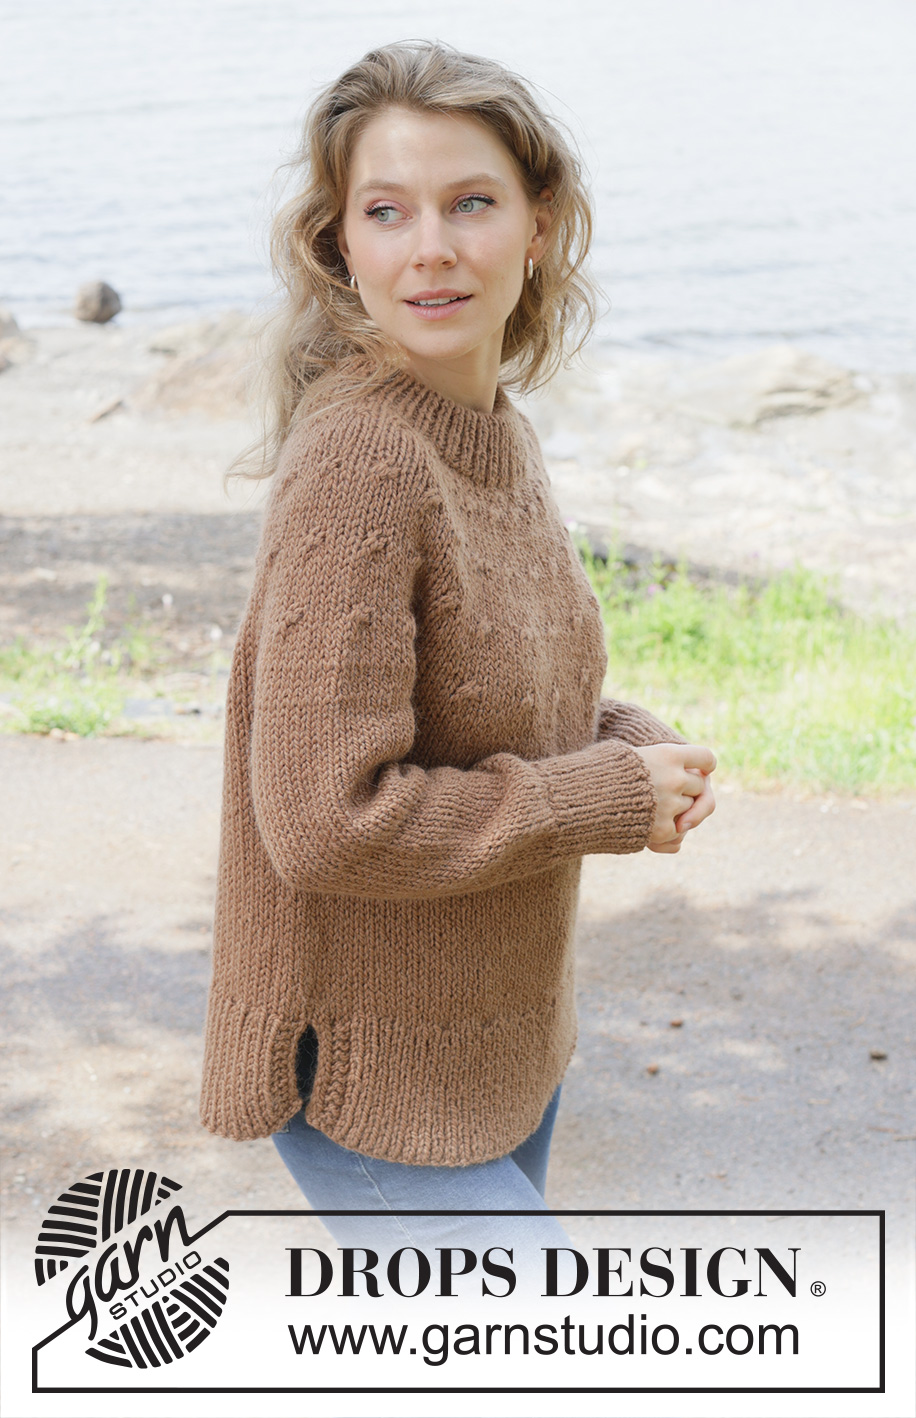
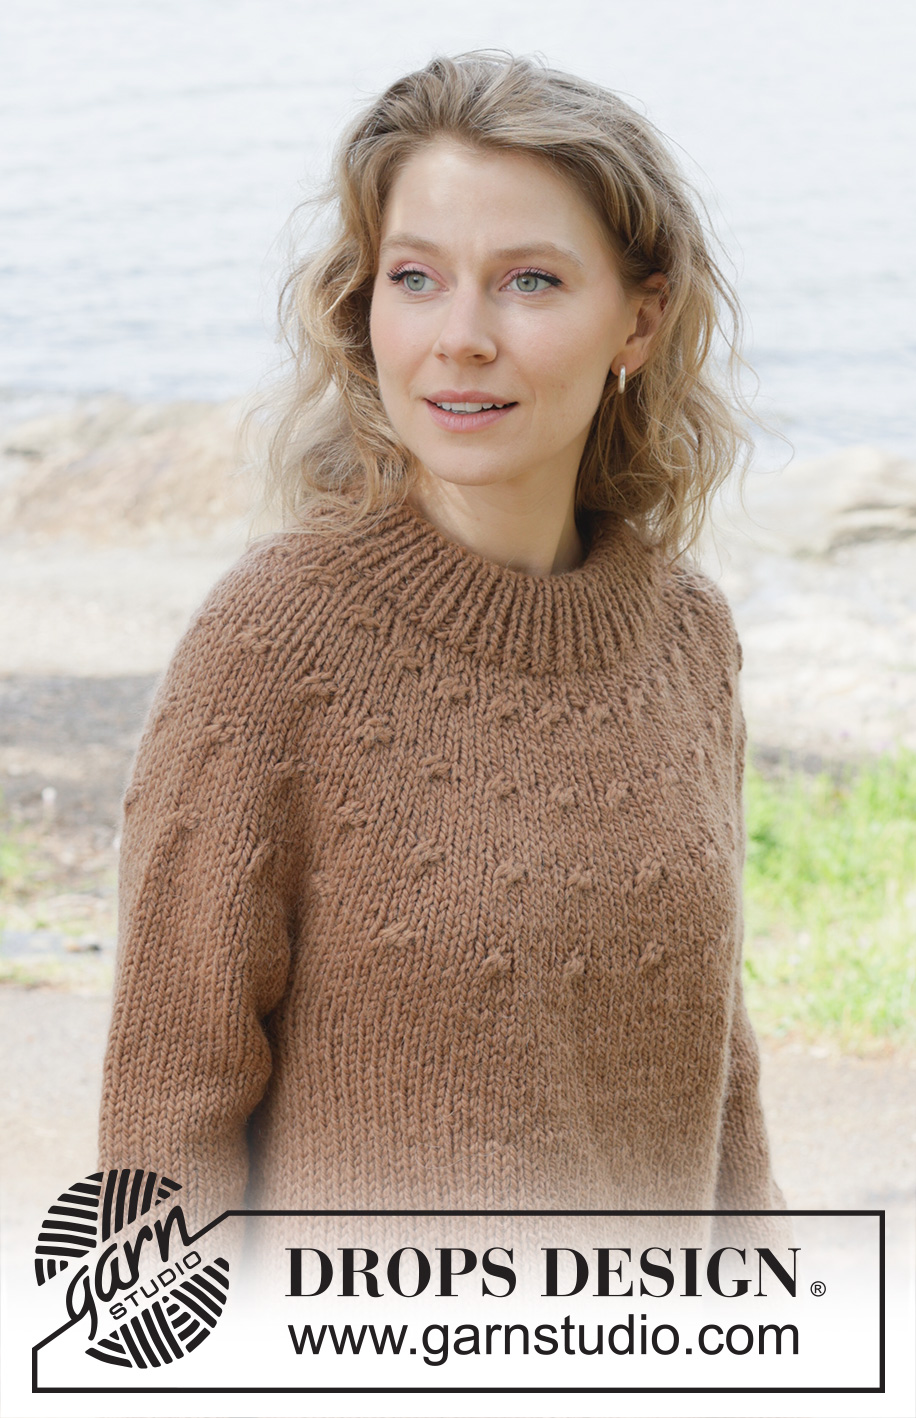
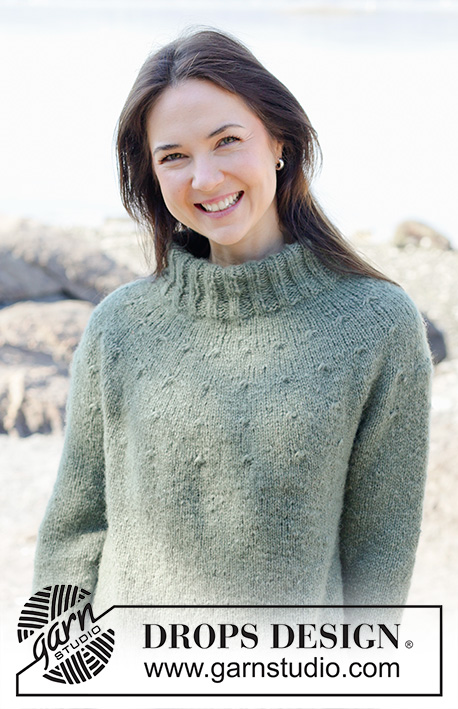
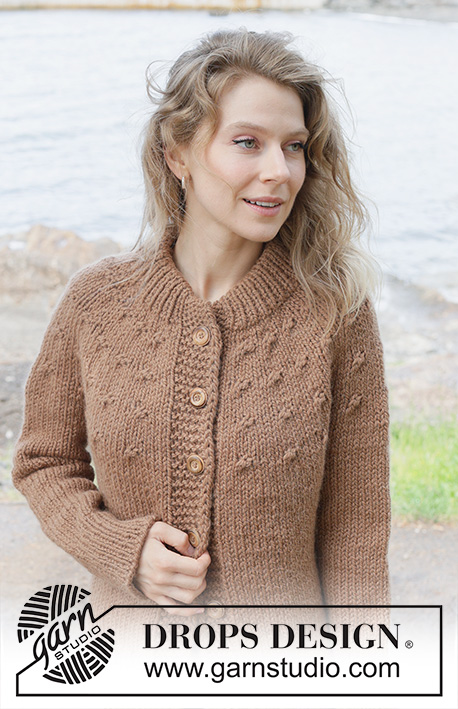
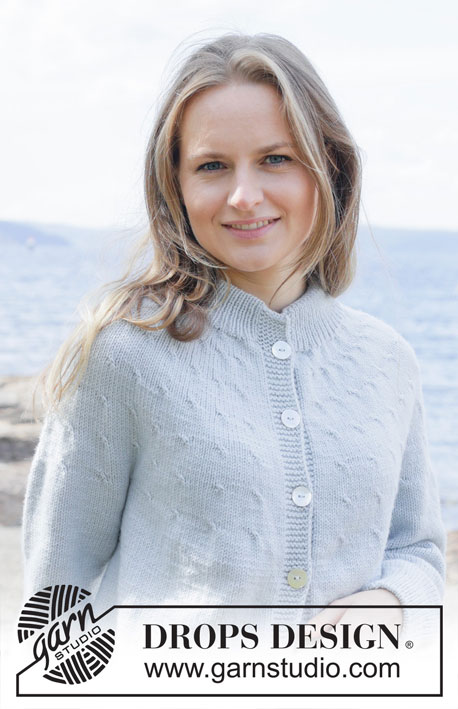
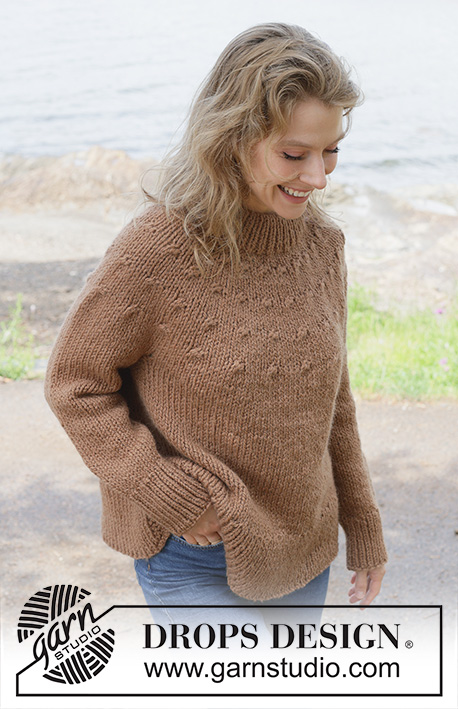
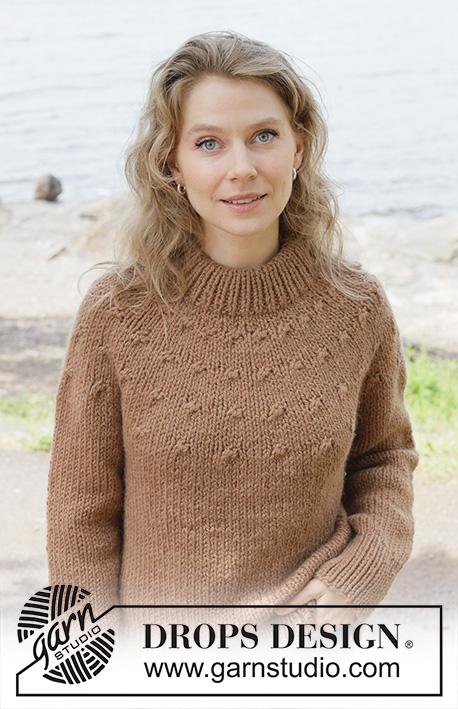
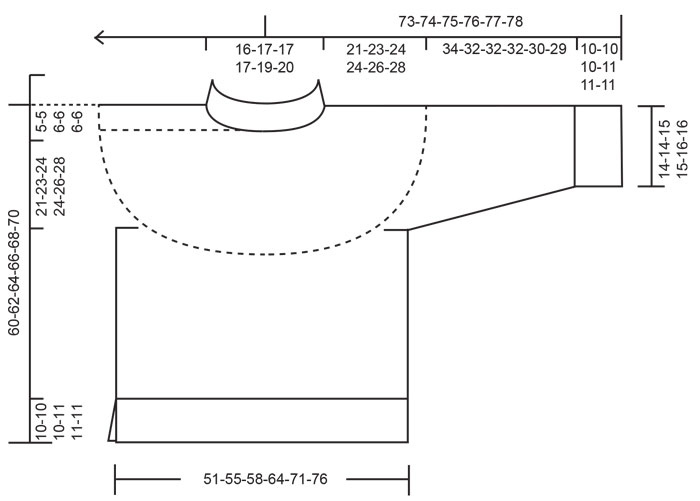
Knitted jumper in DROPS Andes or DROPS Snow. The piece is worked top down with stocking stitch, round yoke, double neck, I-cord and split in sides. Sizes S - XXXL.
DROPS 255-30 |
||||||||||
|
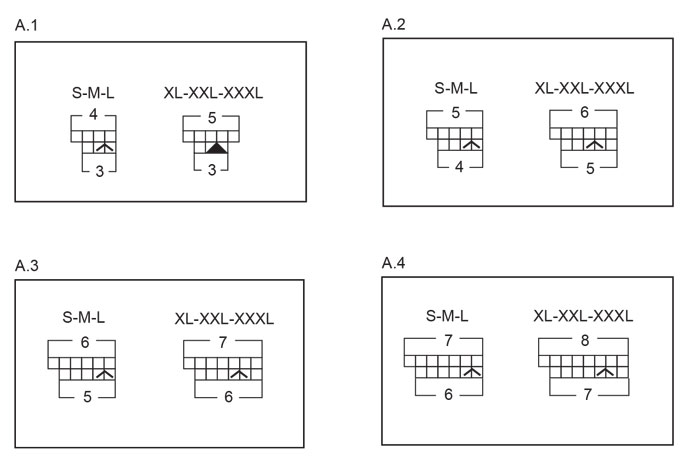
------------------------------------------------------- EXPLANATIONS FOR THE PATTERN: ------------------------------------------------------- PATTERN: See diagrams A.1 to A.4. Choose diagram for your size. GARTER STITCH (worked back and forth): Knit all rows, from both the right and wrong side. 1 ridge in height = knit 2 rows. I-CORD: FIRST 2 STITCHES: Worked on all rows: Slip 1 stitch purl-wise, with yarn in front, knit 1. LAST 2 STITCHES: Worked on all rows. Work until there are 2 stitches left on the row, slip 1 stitch purl-wise with yarn in front, knit 1. INCREASE (evenly spaced): To work out how to increase evenly, count the total number of stitches on needle (e.g., 76 stitches), and divide by the number of increases to be made (e.g., 8) = 9.5. In this example, increase by making 1 yarn over after alternately each 9th and 10th stitch. The yarn overs are worked twisted on the next round to avoid holes. DECREASE TIP (for mid-under sleeves): To get the decreases alternately on the right and left-hand side of the marker-thread, decrease alternately before and after the marker-thread on the decrease-round as follows. BEFORE MARKER-THREAD: Work until there are 3 stitches left before the marker-thread, knit 2 together, knit 1 (= 1 stitch decreased). AFTER MARKER-THREAD: Knit 1, slip 1 stitch knit-wise, knit 1 and pass the slipped stitch over the knitted stitch (= 1 stitch decreased). ------------------------------------------------------- START THE PIECE HERE: ------------------------------------------------------- JUMPER – SHORT OVERVIEW OF THE PIECE: The pattern uses both long and short needles; start with the length which fits the number of stitches and change when necessary. The neck and yoke are worked in the round with circular needle, top down and from the right back shoulder. When the yoke is finished, it is divided for the body and sleeves and the body continued in the round, while the sleeves wait. The body is divided each side for the split and the front and back pieces finished separately, back and forth. The sleeves are worked top down, in the round. The neck is folded double and fastened to the inside. NECK: Cast on 62-64-70-70-74-76 stitches with circular needle size 8 mm and DROPS Andes or DROPS Snow. Change to circular needle size 6 mm (casting on with a larger needle size makes the cast-on edge elastic). Work rib in the round (knit 1, purl 1) for 13-13-13-15-15-15 cm. The neck is later folded double to give a neck-height of approx. 6-6-6-7-7-7 cm. The beginning of the round is on the right back shoulder. Insert 1 marker after the first 21-22-24-24-25-25 stitches (approx. mid-front). The piece is now measured from here. YOKE: Change to circular needle size 8 mm. Work stocking stitch and increase 1-5-2-2-4-8 stitches evenly on the first round – read INCREASE TIP = 63-69-72-72-78-84 stitches. Continue with stocking stitch. Remember to maintain the knitting tension. When the yoke measures 3-3-4-4-4-4 cm from the marker, increase while working PATTERN as follows – read description above: A.1: Work the first round in A.1, 21-23-24-24-26-28 times around the yoke = 84-92-96-120-130-140 stitches. Work stocking stitch until the yoke measures 8-8½-9½-9½-9½-9½ cm from the marker. Work the next round as follows: A.2: Work the first round in A.2, 21-23-24-24-26-28 times around the yoke = 105-115-120-144-156-168 stitches. Work stocking stitch until the yoke measures 13-14-15-15-16-16 cm from the marker. Work the next round as follows: A.3: Work the first round in A.3, 21-23-24-24-26-28 times around the yoke = 126-138-144-168-182-196 stitches. Work stocking stitch until the yoke measures 18-19½-20½-20½-22½-22½ cm from the marker. Work the next round as follows: A.4: Work the first round in A.4, 21-23-24-24-26-28 times around the yoke = 147-161-168-192-208-224 stitches. Work stocking stitch, AT THE SAME TIME increase 5-3-4-4-0-0 stitches evenly on the first round = 152-164-172-196-208-224 stitches. When the yoke measures 21-23-24-24-26-28 cm from the marker mid-front, divide for the body and sleeves. DIVIDE FOR BODY AND SLEEVES: Place the first 28-30-32-38-38-40 stitches on a thread for the sleeve, cast on 8-8-10-10-12-12 stitches (in side mid-under sleeve), knit 48-52-54-60-66-72 (= front piece), place the next 28-30-32-38-38-40 stitches on a thread for the sleeve, cast on 8-8-10-10-12-12 stitches (in side mid-under sleeve), knit the last 48-52-54-60-66-72 stitches (= back piece). The body and sleeves are finished separately. BODY: = 112-120-128-140-156-168 stitches. Insert 1 marker-thread in the middle of the 8-8-10-10-12-12 cast-on stitches under each sleeve. Allow the threads to follow your work onwards; they are used when working the split in each side. Work to the first marker-thread. The round now starts here. Continue with stocking stitch in the round until the piece measures 44-46-47-48-50-52 cm from the marker mid-front. Work the next round as follows: Start 1 stitch before the beginning of the round, place 1 stitch on the cable needle behind the piece, knit 1, replace the marker-thread on the needle, knit 1 from the cable needle, work until there is 1 stitch left before the second marker-thread, place 1 stitch on the cable needle in front of the piece, knit 1, replace the marker-thread on the needle, knit 1 from the cable needle, work to end of round. The piece measures approx. 45-47-48-49-51-53 cm from the marker mid-front. Divide at the marker-threads for the split in each side. Place the back piece stitches on a stitch holder and work the front piece. FRONT PIECE: = 56-60-64-70-78-84 stitches. On the first row (= right side) begin the rib, AT THE SAME TIME as increasing 23-25-27-29-33-35 stitches evenly on the row as follows = 79-85-91-99-111-119 stitches: Change to circular needle size 6 mm, work 2 stitches according to I-CORD, 2 GARTER STITCHES – read description above, work rib (knit 1, purl 1 – remember to increase) until there are 4 stitches left, work 2 garter stitches and 2 stitches in I-cord. When the rib measures 10-10-10-11-11-11 cm, cast off. The jumper measures approx. 55-57-58-60-62-64 cm from the marker mid-front and 60-62-64-66-68-70 cm from top of shoulder. BACK PIECE: Work in the same way as the front piece. SLEEVES: Place the 28-30-32-38-38-40 sleeve-stitches from the thread on one side of the piece on circular needle size 8 mm and knit up 1 stitch in each of the 8-8-10-10-12-12 stitches cast on under the sleeve = 36-38-42-48-50-52 stitches. Insert a marker-thread in the middle of the 8-8-10-10-12-12 stitches under the sleeve. Start at the marker-thread and work stocking stitch in the round. When the sleeve measures 4-4-3-2-2-2 cm, decrease under the sleeve – read DECREASE TIP. Decrease alternately before and after the marker-thread every 5-3½-3-1½-1½-1½ cm a total of 6-8-10-16-16-18 times = 30-30-32-32-34-34stitches. Continue working until the sleeve measures 34-32-32-32-30-29 cm from the division. Change to double pointed needles size 6 mm. Work rib (knit 1, purl 1), AT THE SAME TIME increase 8-8-10-10-10-10 stitches evenly on the first round = 38-38-42-42-44-44 stitches. When the rib measures 10-10-10-11-11-11 cm, cast off. The sleeve measures approx. 44-42-42-43-41-40 cm. ASSEMBLY: Fold the neck double to the inside and sew down. To avoid the neck being tight and rolling outwards, it is important that the seam is elastic. |
||||||||||
Diagram explanations |
||||||||||
|
||||||||||
 |
||||||||||
 |
||||||||||
Have you finished this pattern?Tag your pictures with #dropspattern #chestnutseasonsweater or submit them to the #dropsfan gallery. Do you need help with this pattern?You'll find 34 tutorial videos, a Comments/Questions area and more by visiting the pattern on garnstudio.com. © 1982-2026 DROPS Design A/S. We reserve all rights. This document, including all its sub-sections, has copyrights. Read more about what you can do with our patterns at the bottom of each pattern on our site. |
||||||||||


With over 40 years in knitting and crochet design, DROPS Design offers one of the most extensive collections of free patterns on the internet - translated to 17 languages. As of today we count 324 catalogues and 12290 patterns translated into English (UK/cm). 12290
We work hard to bring you the best knitting and crochet have to offer, inspiration and advice as well as great quality yarns at incredible prices! Would you like to use our patterns for other than personal use? You can read what you are allowed to do in the Copyright text at the bottom of all our patterns. Happy crafting!
Post a comment to pattern DROPS 255-30
We would love to hear what you have to say about this pattern!
If you want to leave a question, please make sure you select the correct category in the form below, to speed up the answering process. Required fields are marked *.