
Popular categories
Looking for a yarn?


Comments / Questions (60)
![]() Turrin wrote:
Turrin wrote:
Le modèle que je souhaite réaliser est en kid silk mohair et Alpaca. Je souhaiterai remplacer l'alpaca par la drops nord. Même groupe A et même longueur. Puis-je commander le même nombre de pelotes ?
30.10.2024 - 16:19DROPS Design answered:
Bonjour Mme Turrin, comme Alpaca et Flora n'ont pas le même métrage, mieux vaut utiliser le convertisseur pour connaître la quantité nécessaire en Flora pour remplacer Alpaca (il vous faudra ici tricoter aussi avec Kid-Silk = 2 fils). Bon tricot!
30.10.2024 - 16:34
![]() Anne Marie wrote:
Anne Marie wrote:
Hej! Om jag vill byta garn garn - måste jag använda 2 trådar eller går det att byta till 1 grövre? Vill stickad den i Papegojgrönt garn - Fabel t ex. Men med dubbla trådar då?
25.10.2024 - 00:35DROPS Design answered:
Hej Anne Marie. Du kan sticka denna med 1 tråd från ett garn i garngrupp C (t.ex. DROPS Air), eller 2 trådar i ett garn ur garngrupp A (t.ex. DROPS Fabel). Du hittar en översikt över våra garngrupper här. Se bara till att du får den stickfasthet som uppges i mönstret och beräkna riktig garnåtgång. Mvh DROPS Design
25.10.2024 - 08:11
![]() Françoise LELARGE wrote:
Françoise LELARGE wrote:
Bonjour j'ai bien relue le modèle , chez moi 33 cm +19 cm + 6 cm = 58 cm Donc pour aller à 62 cm pour le corps il manque 4 cm ce qui fait pour la taille XXXL il faut 23 cm depuis la séparation avant les côtes et non 19 cm
13.10.2024 - 17:28DROPS Design answered:
Bonjour Mme Lelarge, regardez bien dans le schéma, dans la hauteur totale, on va prendre en compte également 4 cm d'épaules, on va ainsi avoir: 4 cm d'épaules + 33 cm d'empiècement + 19 cm de jersey après la division + 6 cm de côtes =62 cm de hauteur totale - cf réponse précédente pour ajuster la longueur. Bon tricot!
14.10.2024 - 09:04
![]() Françoise LELARGE wrote:
Françoise LELARGE wrote:
Combien de cm puis-je rallongé avant les côtes pour le corp et les manches car l'ouvrage terminé je le trouve trop cour. merci et bonne journée
12.10.2024 - 14:49DROPS Design answered:
Bonjour Mme Lelarge, essayez le pull à la longueur indiquée pour votre taille, calculez qu'il y aura 6 cm de côtes en plus et tricotez en jersey jusqu'à la hauteur souhaitée, moins les 6 cm de côtes. Prenez en compte qu'il vous faudra davantage de laine, votre magasin pourra vous aider si besoin. Bon tricot!
14.10.2024 - 07:56
![]() Françoise LELARGE wrote:
Françoise LELARGE wrote:
Bonjour pour augmenter 1 maille à la fin de chaque section en maille envers avec 1 jeté dois-je faire toutes les 2 mailles ou à chaque tour pour obtenir 144 mailles Merci pour votre aide qui me sera très précieuse
09.09.2024 - 16:55DROPS Design answered:
Bonjour Mme Lelarge, vous allez effectivement augmenter toutes les 2 mailles, après chaque maille envers ainsi: tricotez (1 m end, 1 maille envers, 1 jeté), répétez de (à) tout le tour, et, au tour suivant, tricotez le jeté torse à l'envers pour continuer en côtes ainsi: (= 1 m end, 2 m env), répétez de (à) tout le tour. Bon tricot!
10.09.2024 - 09:03
![]() Karin wrote:
Karin wrote:
När resåren är stickad och man ska öka, vilken ökningsmetod ska jag använda?
19.07.2024 - 21:40
![]() Sara wrote:
Sara wrote:
Ved afslutningen af rib i halsen tages 33 (str. XL) ud, hvorefter der skiftes til pind 5. Skal de udtagne masker strikkes drejet ret (så hullerne bliver mindre) eller bare almindelig ret på næste omgang?
04.07.2024 - 13:12DROPS Design answered:
Hei Sara. Ville ha strikket kastene drejet ret :) mvh DROPS Design
08.07.2024 - 08:43
![]() Fatma wrote:
Fatma wrote:
Bonjour ce modèle ressemble beaucoup au modèle withmoor sweatshirt
28.06.2024 - 16:08
![]() Decharne Karin wrote:
Decharne Karin wrote:
Bonjour, Au 10 ème rang de A1. Il y a une case ( une maille ) en plus de chaque côté du diagramme ( 2 augmentations) . Comment doit\'on les tricoter? Merci
28.04.2024 - 17:03DROPS Design answered:
Bonjour Mme Decharne, ces mailles supplémentaires sont celles augmentées au 9ème tour de A.1, autrement dit, vous tricotez le 10ème tour comme indiqué: 1 m envers (comme avant) et 11 mailles endroit = vous avez maintenant 12 mailles dans chaque A.1). Bon tricot!
29.04.2024 - 09:39
![]() Seija wrote:
Seija wrote:
Tuleeko lisättyjen silmikoiden määrä siitä että kuviossa lisätään tasaisin välein aina 2 kummallekin puolelle kuviota. Millä tyylillä lusäykset tehdään ? Vai tulevatko ne kuvion sisältä langankiertoina?
17.04.2024 - 07:57DROPS Design answered:
Lisäykset tehdään langankierroin piirroksen A.1 mukaisesti, eli jokaiseen mallikertaan lisätään 8 silmukkaa.
17.04.2024 - 17:37
|
|||||||||||||
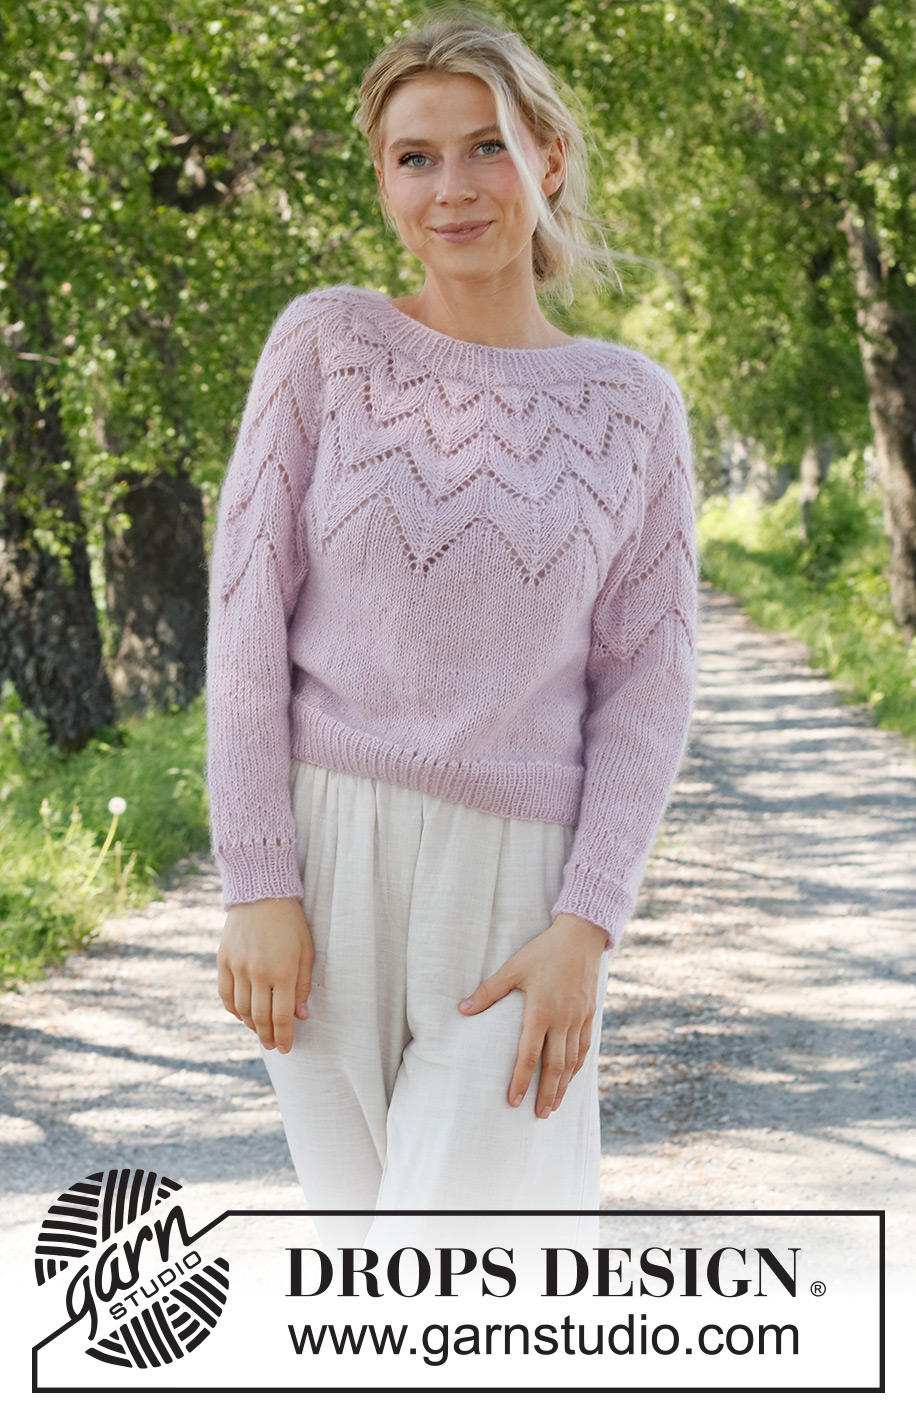
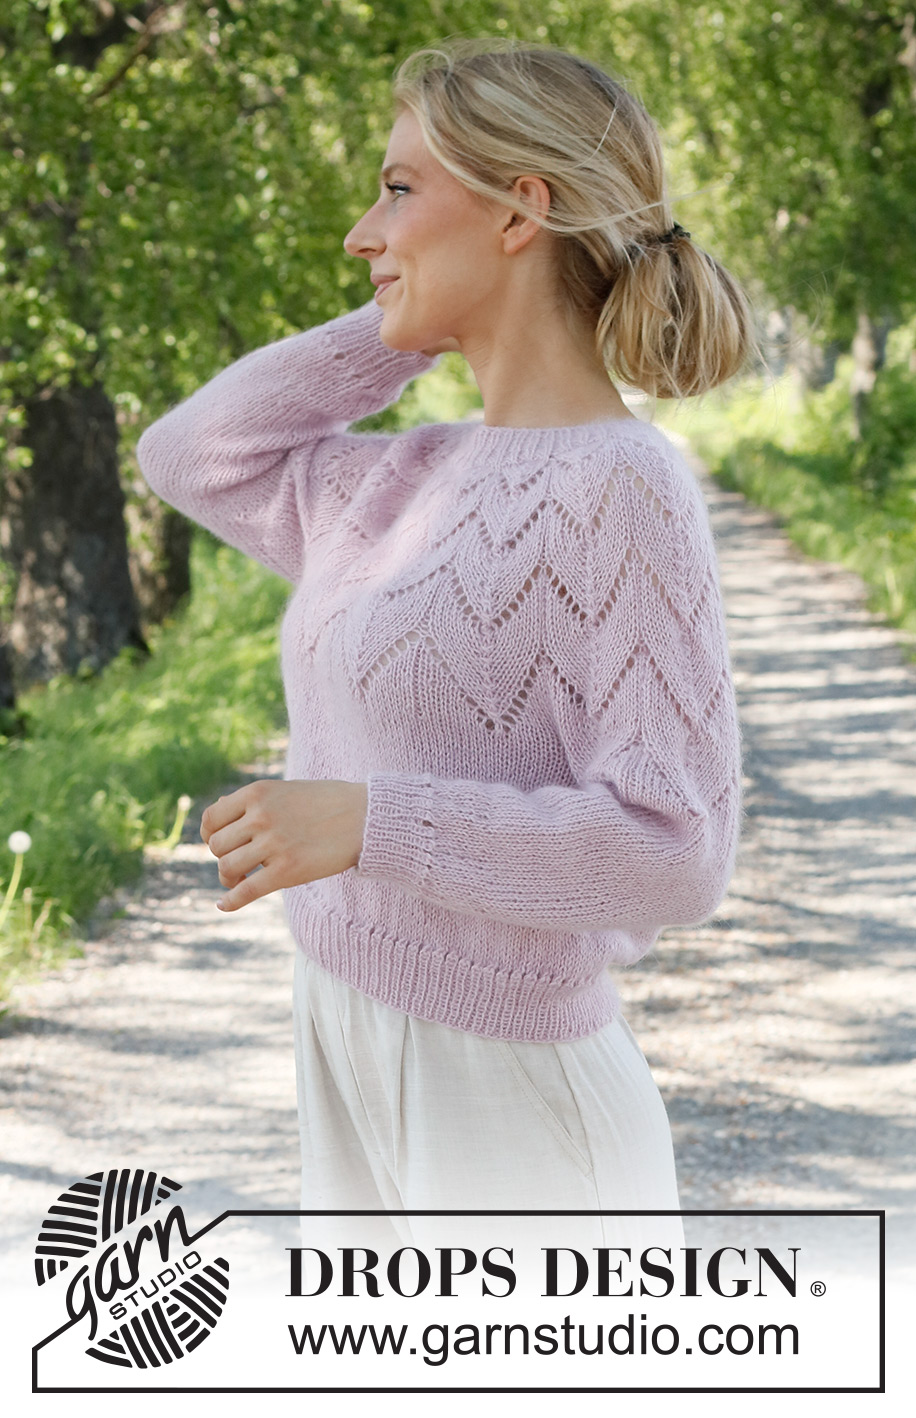
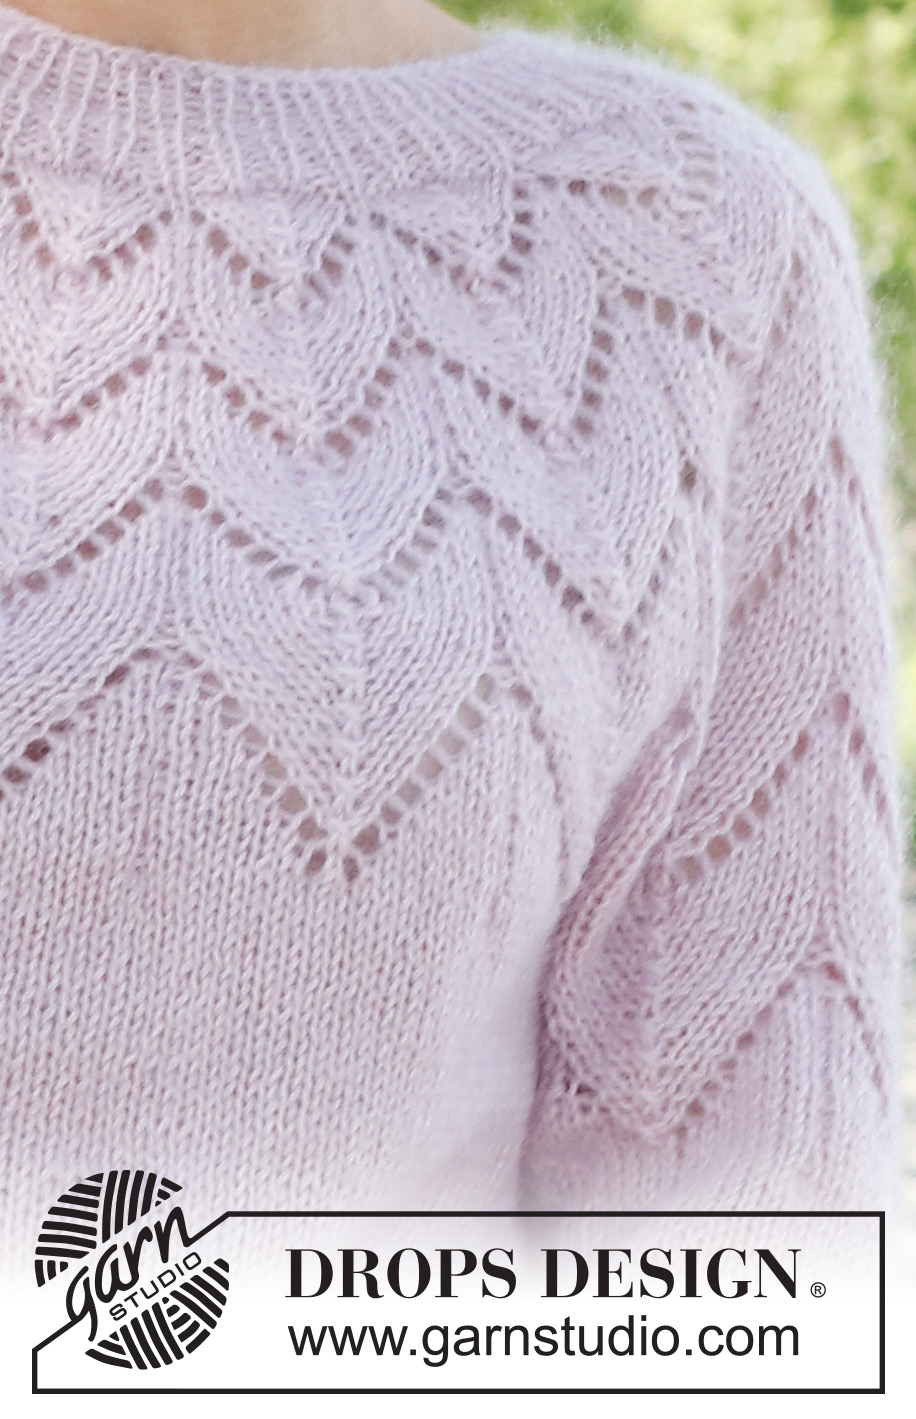
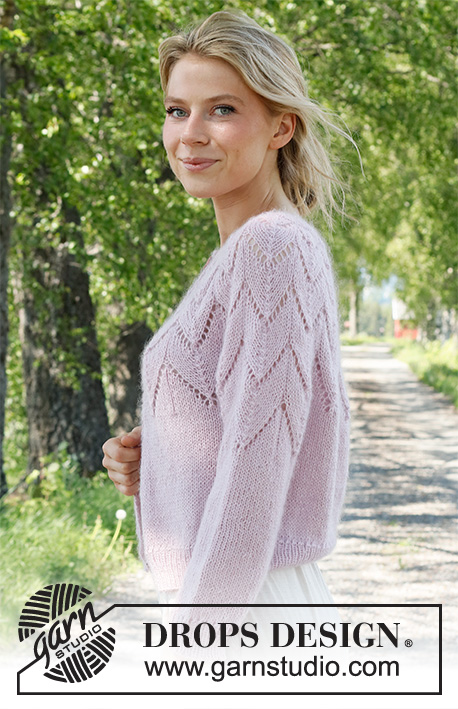
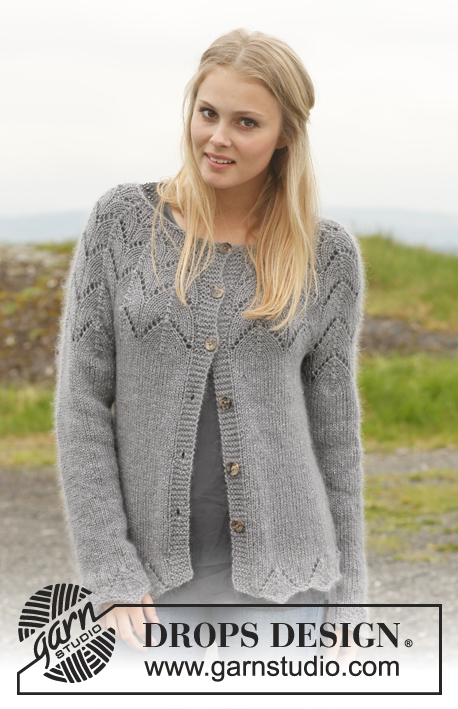
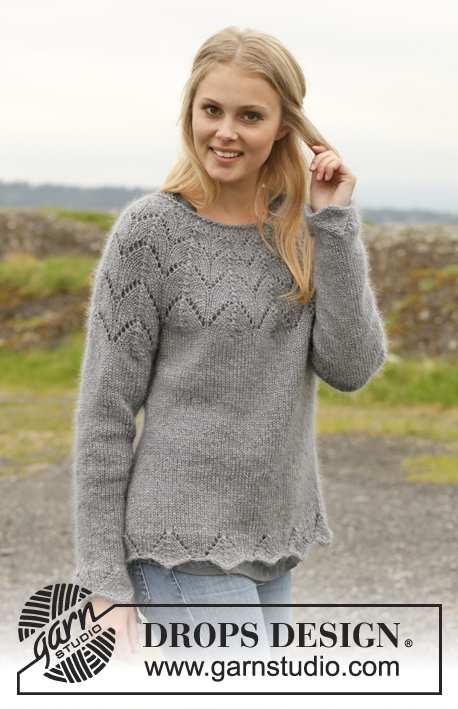
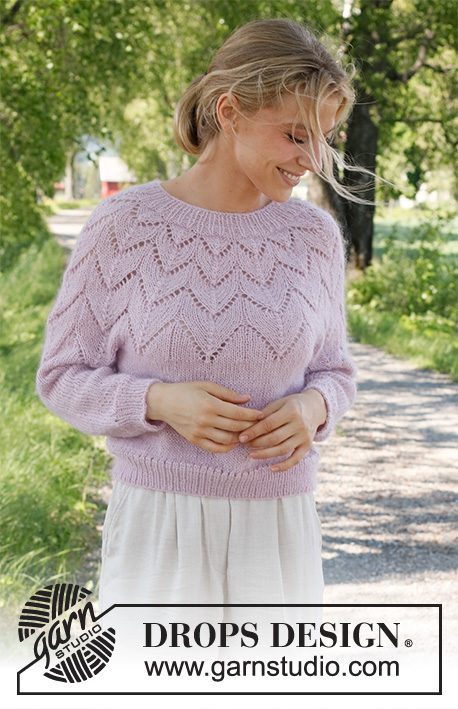
Wishing Well#wishingwellsweater |
|||||||||||||
 |
 |
||||||||||||
Knitted jumper in DROPS Alpaca and DROPS Kid-Silk. The piece is worked top down with round yoke and lace pattern. Sizes S - XXXL.
DROPS 231-9 |
|||||||||||||
|
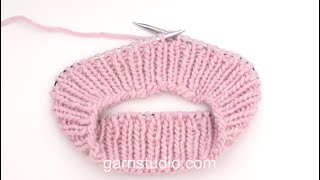
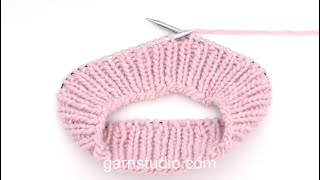
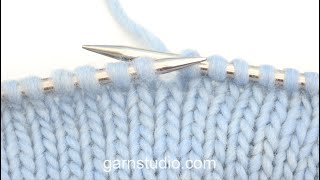
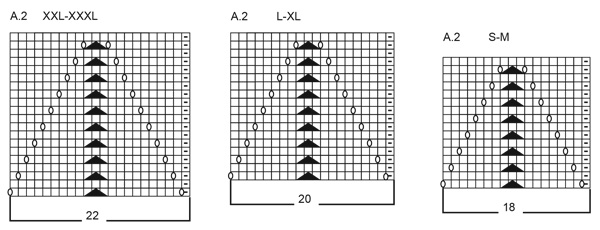
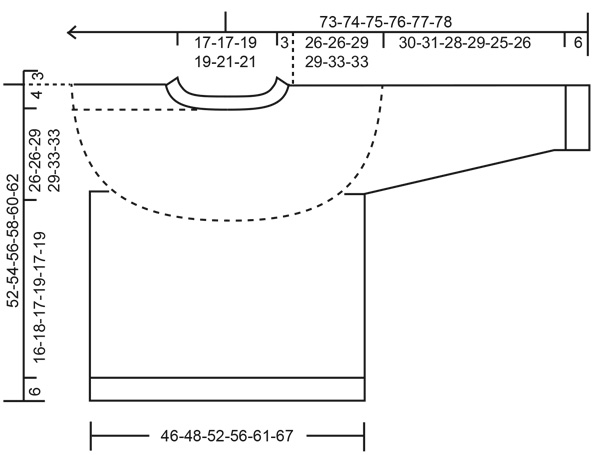
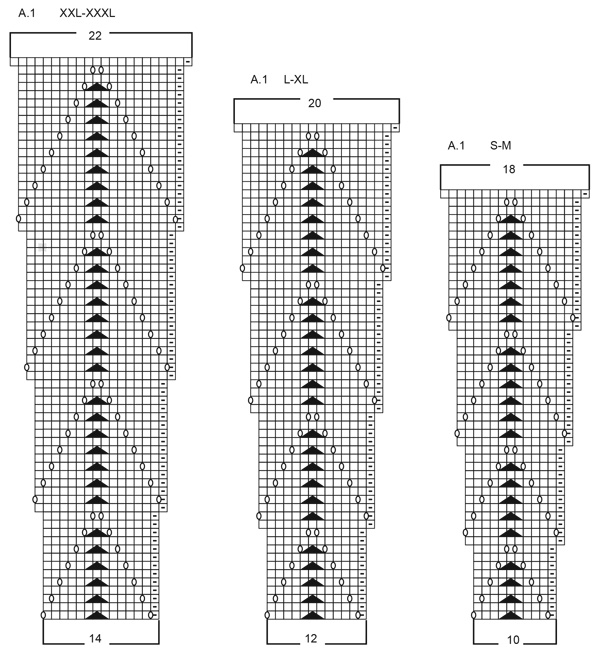
------------------------------------------------------- EXPLANATIONS FOR THE PATTERN: ------------------------------------------------------- PATTERN: See diagrams A.1 and A.2. Choose diagram for your size. DECREASE TIP (sleeves): Decrease 1 stitch on either side of the marker as follows: Work until there are 3 stitches left before the marker, knit 2 together, knit 2 (marker sits between these 2 stitches), slip 1 stitch as if to knit, knit 1 and pass the slipped stitch over the knitted stitch. ------------------------------------------------------- START THE PIECE HERE: ------------------------------------------------------- JUMPER – SHORT OVERVIEW OF THE PIECE. The neck and yoke are worked in the round with circular needle, top down. The yoke is divided for body and sleeves and the body is continued in the round. The sleeves are worked in the round with double pointed needles/short circular needle, top down. NECK/YOKE: Cast on 84-84-90-90-96-96 stitches with short circular needle size 4 mm and 1 strand DROPS Kid-Silk and 1 strand DROPS Alpaca. Knit 1 round, then work rib in the round (knit 1, purl 1) for 3 cm. Insert 1 marker at the beginning of the round; the yoke is measured from this marker! The round starts in the transition between the left shoulder and the back piece. REMEMBER THE KNITTING TENSION! On the next round increase 1 stitch at the end of each purled section by making 1 yarn over. On the next round purl the yarn overs twisted = 126-126-135-135-144-144 stitches. Continue the new rib (knit 1, purl 2) until the neck measures 5 cm. Knit 1 round where you increase 14-14-33-33-52-52 stitches evenly spaced = 140-140-168-168-196-196 stitches. Change to circular needle size 5 mm. Knit 1 round. Work A.1 in the round. When A.1 has been completed in height there are 252-252-280-280-308-308 stitches. The piece measures 26-26-29-29-33-33 cm from the marker. Now divide for the body and sleeves as follows: Work the first 72-72-80-80-88-88 stitches (back piece), place the next 54-54-60-60-66-66 stitches on a thread for the sleeve, cast on 6-8-8-10-10-14 stitches (in side under sleeve), work 72-72-80-80-88-88 stitches (front piece), place the next 54-54-60-60-66-66 stitches on a thread for the sleeve, cast on 6-8-8-10-10-14 stitches (in side under sleeve). The body and sleeves are finished separately. BODY: = 156-160-176-180-196-204 stitches. Work stocking stitch in the round and increase 0-2-0-8-10-24 stitches evenly on the first round = 156-162-176-188-206-228 stitches. When the piece measures 16-18-17-19-17-19 cm from the division, work the next round as follows: * Knit 2 together, 1 yarn over *, work from *-* over all stitches. Change to circular needle size 4 mm and work rib (knit 1, purl 1) for 6 cm. Cast off. The jumper measures approx. 52-54-56-58-60-62 cm from the shoulder down. SLEEVES: Place the 54-54-60-60-66-66 stitches from the thread on the one side of the piece on double pointed needles/short circular needle size 5 mm and knit up 1 stitch in each of the 6-8-8-10-10-14 stitches cast on under the sleeve = 60-62-68-70-76-80 stitches. Insert a marker in the middle of the 6-8-8-10-10-14 stitches under the sleeve. Allow the marker to follow your work onwards; it will be used when decreasing under the sleeve. Start at the marker and work 3-4-4-5-5-7 stitches in stocking stitch, A.2 over the next 54-54-60-66-66 stitches and 3-4-4-5-5-7 stitches in stocking stitch. When A.2 has been completed in height continue with stocking stitch over all stitches. When the sleeve measures 4 cm decrease 2 stitches under the sleeve – read DECREASE TIP. Decrease like this every 3½-3½-2½-2½-1½-1½ cm a total of 8-8-10-10-12-13 times = 44-46-48-50-52-54 stitches. Continue working until the sleeve measures 30-31-28-29-25-26 cm from the division. Work the next round as follows: * Knit 2 together, 1 yarn over *, work from *-* over all stitches. Change to double pointed needles size 4 mm. Work rib (knit 1, purl 1) for 6 cm. Cast off. The sleeve measures approx. 36-37-34-35-31-32 cm from the division. Work the other sleeve in the same way. |
|||||||||||||
Diagram explanations |
|||||||||||||
|
|||||||||||||
 |
|||||||||||||
 |
|||||||||||||
 |
|||||||||||||
Have you finished this pattern?Tag your pictures with #dropspattern #wishingwellsweater or submit them to the #dropsfan gallery. Do you need help with this pattern?You'll find 35 tutorial videos, a Comments/Questions area and more by visiting the pattern on garnstudio.com. © 1982-2026 DROPS Design A/S. We reserve all rights. This document, including all its sub-sections, has copyrights. Read more about what you can do with our patterns at the bottom of each pattern on our site. |
|||||||||||||


With over 40 years in knitting and crochet design, DROPS Design offers one of the most extensive collections of free patterns on the internet - translated to 17 languages. As of today we count 324 catalogues and 12245 patterns translated into English (UK/cm). 12245
We work hard to bring you the best knitting and crochet have to offer, inspiration and advice as well as great quality yarns at incredible prices! Would you like to use our patterns for other than personal use? You can read what you are allowed to do in the Copyright text at the bottom of all our patterns. Happy crafting!
Post a comment to pattern DROPS 231-9
We would love to hear what you have to say about this pattern!
If you want to leave a question, please make sure you select the correct category in the form below, to speed up the answering process. Required fields are marked *.