
Popular categories
Looking for a yarn?


Comments / Questions (53)
![]() Liisi wrote:
Liisi wrote:
Jag stickar strlk L. Har stickar ärmen diagram A2 klart. I mönstret står det att jag ska sticka rätt tills ärmen mäter 4 cm efter delningen, men ärmen mäter redan 7 cm efter mönstret. Skulle minskningen göras mitt i diagramet, eller ska jag nu sticka 4 cm?
14.06.2025 - 21:05DROPS Design answered:
Hei Liisi. Du skal strikke A.2 1 gang i høyden, men når arbeidet måler 4 cm fra delingen, felles det 2 masker midt under ermet. Altså du feller 1.gang før du har kommet halvveis i diagrammet, og du feller ca 2 ganger til før diagrammet er ferdig strikket. mvh DROPS Design
16.06.2025 - 13:16
![]() Jenny-Lee wrote:
Jenny-Lee wrote:
Hallo, ich habe eine Frage zu den Ärmeln. Wird die erste Reihe schon im Muster A2 gestrickt oder soll die erste Reihe in glatt rechts gestrickt werden? Denn wenn ich direkt mit A2 beginne, entsteht unter dem Arm ein großes Loch, wegen dem Umschlag. Liebe Grüße
20.02.2025 - 01:20DROPS Design answered:
Liebe Jenny-Lee, A.2 sollen Sie nach der Passe weiterstricken, damit es nicht "gebrochen" wird, so je nach der letzten Reihe A.2 bei der Passe gestrickt, stricken Sie entweder alle Maschen glattrechts oder mit Muster wie zuvor. Beachten Sie, daß die mittleren Maschen under den Ärmel glattrechts gestrickt werden (je 3 bis 7 M beidseitig der Mitte unter den Ärmel). Viel Spaß beim Stricken!
20.02.2025 - 11:40
![]() Marianne wrote:
Marianne wrote:
Hvor finder jeg en størrelsesguide?
18.02.2025 - 15:20DROPS Design answered:
Hej Marianne, du finder tøjets måleskitse nederst i opskriften. Når du følger strikkefastheden i opskriften får du målene på måleskitsen. Vælg den størrelse med de mål du synes om at have på :)
19.02.2025 - 07:24
![]() Maria Leuschner wrote:
Maria Leuschner wrote:
Hallo, ich habe eine Frage zu den Ärmeln. Bis wohin wird der Markierungsfaden mitgeführt und ab wann nicht mehr? Ich habe das Muster A2 gestrickt, dann ca. 4cm glatt rechts und dann die Abnahmen begonnen (bei Gr. M 8x)Dann bin ich doch aber insgesamt schon weit über einer Ärmellänge von 31cm. Ist das Richtig? 4cm+(8x3,5cm)+Mustersatz Ich bin jetzt bei ca. 35cm, also beginne ich jetzt direkt das Bündchen?
16.02.2025 - 09:50DROPS Design answered:
Liebe Frau Leuschner, in M wird die letzte Abnahme nach 28,5 cm bearbeitet werden (1. nach 4 cm, 2. nach 7,5, 3. nach 11, 4. nach 14,5, 5. nach 18, 6. nach 21,5, 7. nach 25 und 8. nach 28,5 cm); dann stricken Sie bis die Arbeit 31 cm misst und beginnen dann das Bündchen. Markierung können Sie bis zur Ende behalten, sie zeigt Übergang zwischen Runden. Viel Spaß beim Stricken!
17.02.2025 - 09:29
![]() Catrien Daems wrote:
Catrien Daems wrote:
Ik heb de oplossing op mijn vraag al gevonden.fout gemaakt met tellen. excuses
14.02.2025 - 14:20DROPS Design answered:
Dag Catrien,
Mooi dat je het gevonden hebt! Bedankt voor de terugkoppeling en veel breiplezier!
15.02.2025 - 10:42
![]() Catrien Daems wrote:
Catrien Daems wrote:
Goedemorgen, blijven de averechte steken in het breiwerk boven elkaar?
14.02.2025 - 11:08
![]() Marina wrote:
Marina wrote:
Liebes Drops Design Team, ich habe eine Frage zum Ärmel. In der Anleitung steht: "Wenn A.2 1 x in der Höhe gestrickt wurde, glatt rechts über alle Maschen weiterstricken. Bei einer Länge von 4 cm ab der Teilung 2 Maschen an der unteren Ärmelmitte abnehmen." Das Muster A.2 habe ich soweit gestrickt. Versteh ich es richtig, dass ich im Anschluss 4 cm glatt rechts weiter stricke und dann abnehme? Mir ist leider nicht ganz klar was mit Teilung gemeint ist. Vielen Dank. :)
25.01.2025 - 09:09DROPS Design answered:
Liebe Marina, die Abnahmen unter Ärmel beginnen nach 4 cm ab Verteilung, dh auch wenn man A.2 strickt, so beide Muster und Abnahmen entstehen gleichzeitig: A.2 über alle Maschen stricken und, gleichzeitig, wenn die Arbeit 4 cm nach Verteilung misst, dann die Abnahmen beginnen, das Muster passt nicht mehr under den Ärmel aber A.2 immer in der Höhe wie zuvor weiterstricken. Viel Spaß beim Stricken!
27.01.2025 - 09:03
![]() Jean François Guttharl wrote:
Jean François Guttharl wrote:
Il n y a pas de rang raccourci pour l encolure est ce normal Merci beaucoup
19.01.2025 - 13:10DROPS Design answered:
Bonjour Mr Guttharl, tout à fait, dans ce modèle, il n'y a pas de réhausse, autrement dit, l'encolure devant et l'encolure dos seront identiques. Bon tricot!
20.01.2025 - 08:01
![]() Sofia wrote:
Sofia wrote:
Bonjour pouvez vous clarifier l’expression « a la fin de chaque section » s’agissant des premières augmentations faites après les 3 cm de cotes 1/1 de lencolure merci
10.01.2025 - 23:32DROPS Design answered:
Bonjour Sofia, augmentez après chaque maille envers = à la fin de chaque section en mailles envers, ainsi: tricotez 1 maille endroit, 1 maille envers, augmentez 1 maille, répétez tout le tour = vous avez des côtes 2/2 maintenant. Bon tricot!
13.01.2025 - 08:37
![]() Turrin wrote:
Turrin wrote:
Pouvez-vous me dire si je dois tricoter les rangs impairs à l'endroit dans le diagramme A1 ?
14.11.2024 - 20:41DROPS Design answered:
Bonjour Mme Turin, comme on tricote les diagrammes en rond, on va toujours les lire de droite à gauche, tous les tours, autrement dit, vous aurez tous les rangs impairs (1 m env, le point ajouré) et tous les rangs pairs (1 m env, des mailles endroit jusqu'au A.1 suivant). Bon tricot!
15.11.2024 - 09:09
|
|||||||||||||
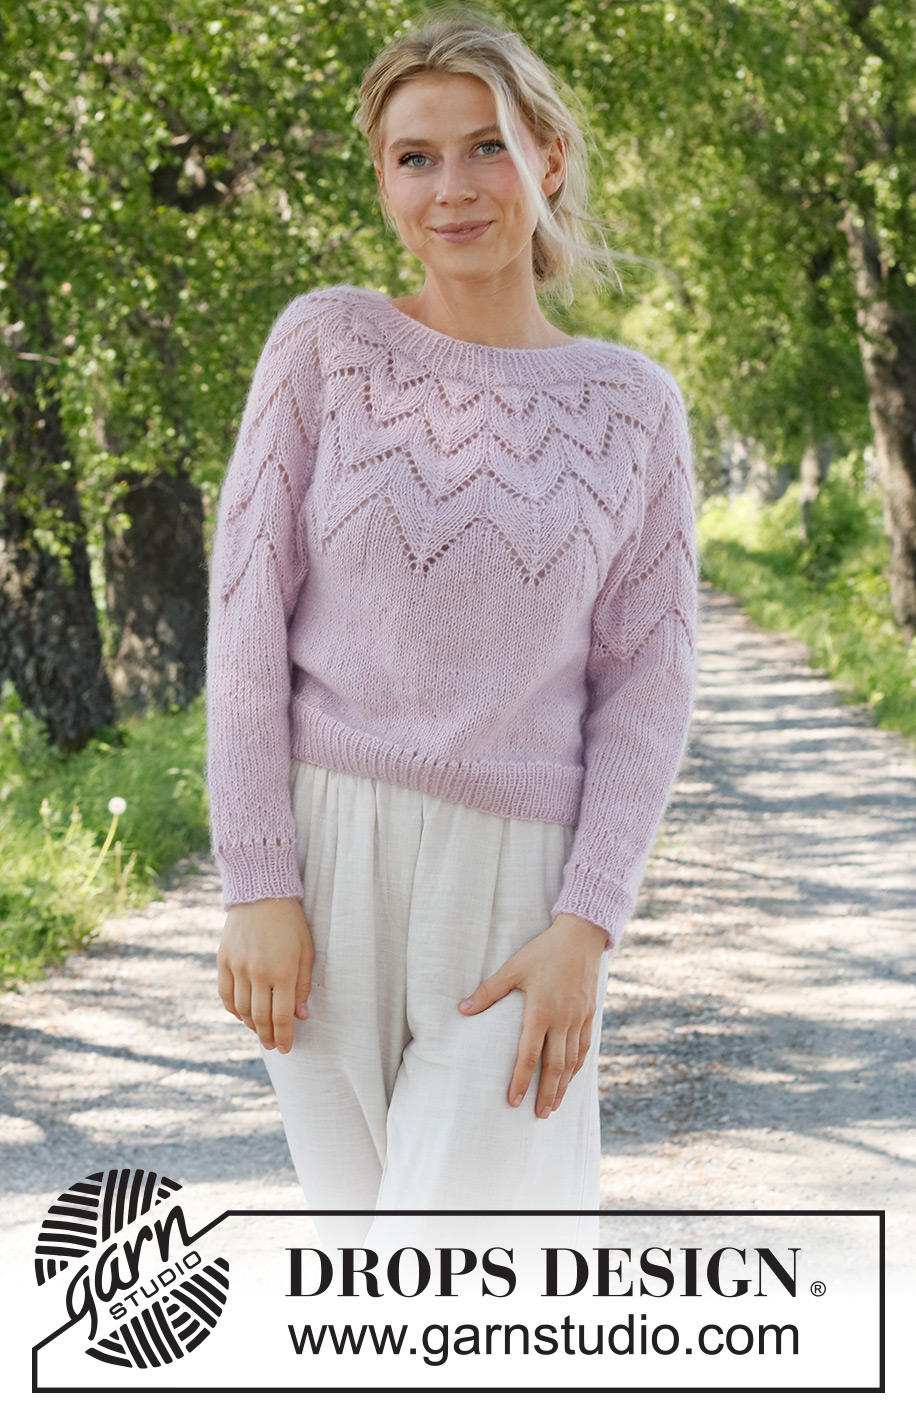
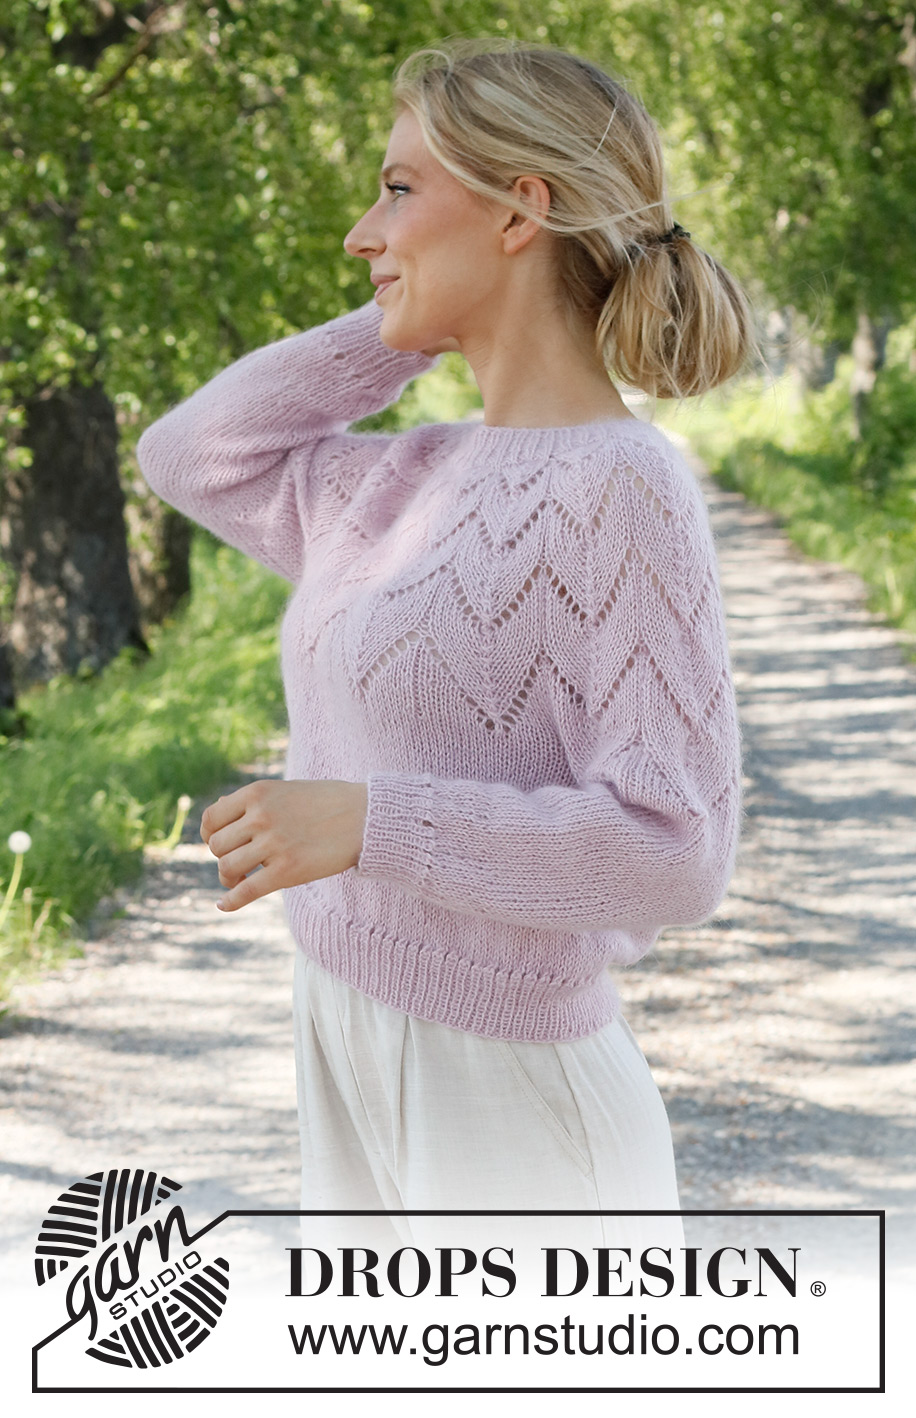
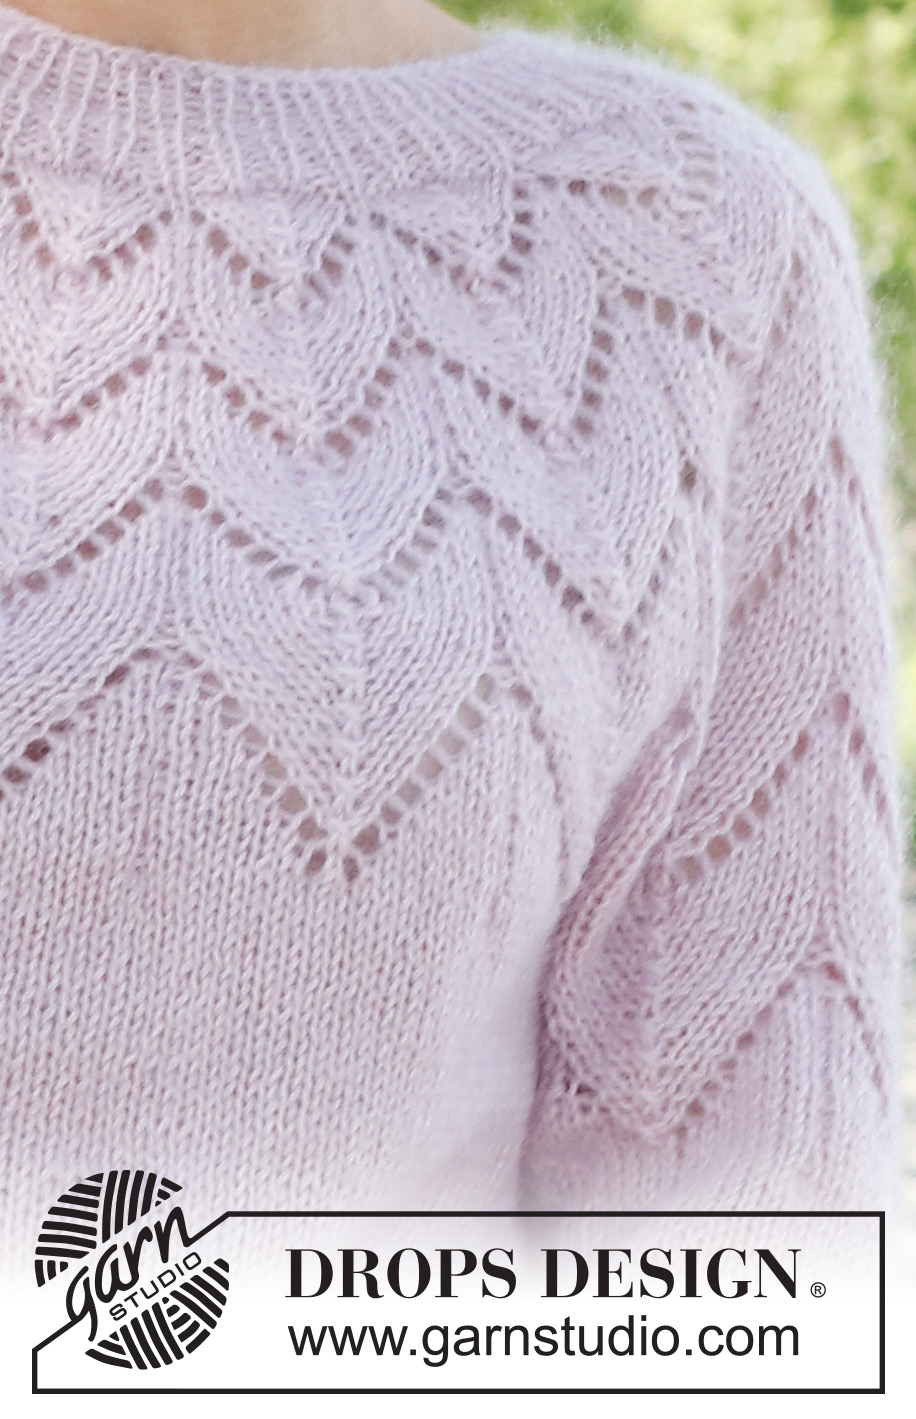
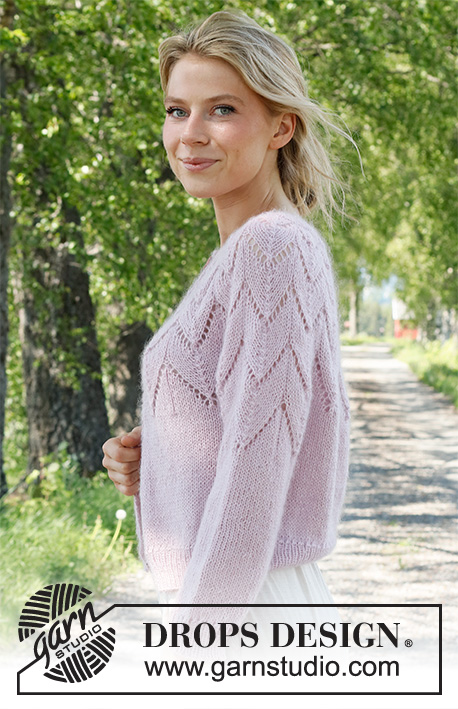
Wishing Well#wishingwellsweater |
|||||||||||||
 |
 |
||||||||||||
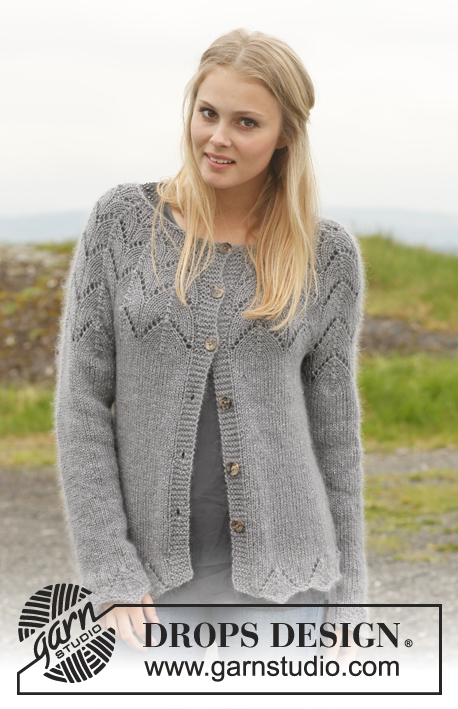
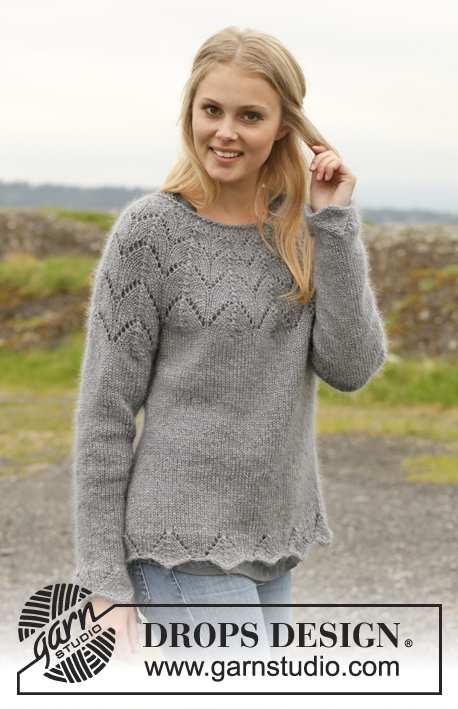
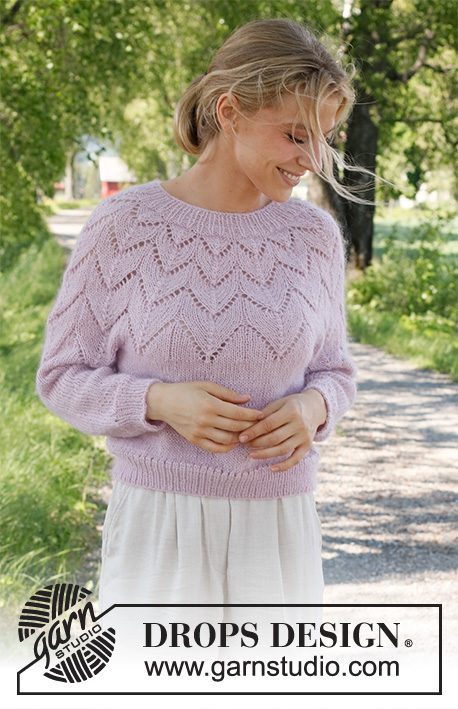
Knitted jumper in DROPS Alpaca and DROPS Kid-Silk. The piece is worked top down with round yoke and lace pattern. Sizes S - XXXL.
DROPS 231-9 |
|||||||||||||
|
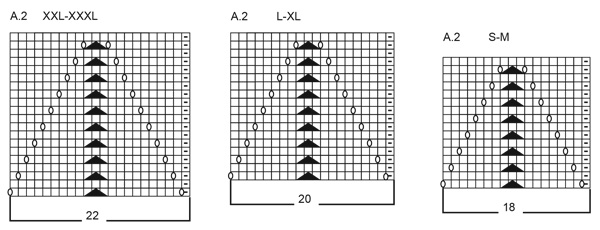
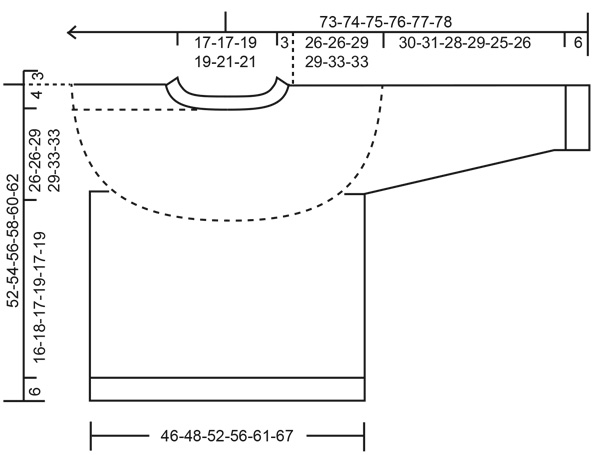
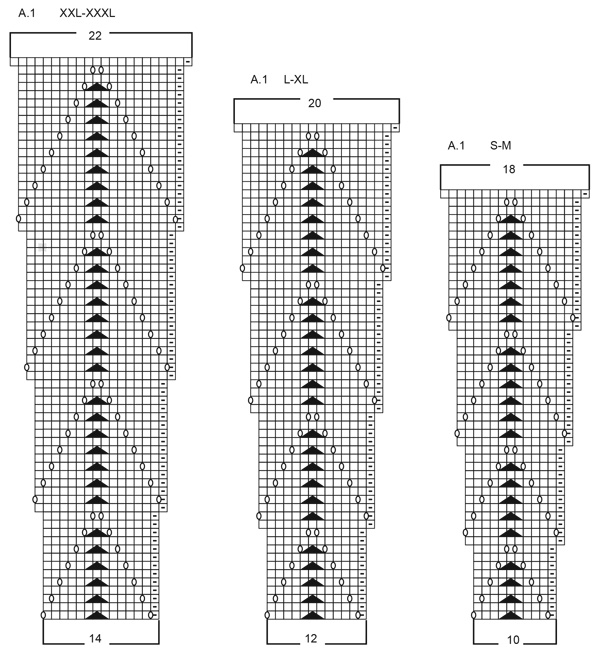
------------------------------------------------------- EXPLANATIONS FOR THE PATTERN: ------------------------------------------------------- PATTERN: See diagrams A.1 and A.2. Choose diagram for your size. DECREASE TIP (sleeves): Decrease 1 stitch on either side of the marker as follows: Work until there are 3 stitches left before the marker, knit 2 together, knit 2 (marker sits between these 2 stitches), slip 1 stitch as if to knit, knit 1 and pass the slipped stitch over the knitted stitch. ------------------------------------------------------- START THE PIECE HERE: ------------------------------------------------------- JUMPER – SHORT OVERVIEW OF THE PIECE. The neck and yoke are worked in the round with circular needle, top down. The yoke is divided for body and sleeves and the body is continued in the round. The sleeves are worked in the round with double pointed needles/short circular needle, top down. NECK/YOKE: Cast on 84-84-90-90-96-96 stitches with short circular needle size 4 mm and 1 strand DROPS Kid-Silk and 1 strand DROPS Alpaca. Knit 1 round, then work rib in the round (knit 1, purl 1) for 3 cm. Insert 1 marker at the beginning of the round; the yoke is measured from this marker! The round starts in the transition between the left shoulder and the back piece. REMEMBER THE KNITTING TENSION! On the next round increase 1 stitch at the end of each purled section by making 1 yarn over. On the next round purl the yarn overs twisted = 126-126-135-135-144-144 stitches. Continue the new rib (knit 1, purl 2) until the neck measures 5 cm. Knit 1 round where you increase 14-14-33-33-52-52 stitches evenly spaced = 140-140-168-168-196-196 stitches. Change to circular needle size 5 mm. Knit 1 round. Work A.1 in the round. When A.1 has been completed in height there are 252-252-280-280-308-308 stitches. The piece measures 26-26-29-29-33-33 cm from the marker. Now divide for the body and sleeves as follows: Work the first 72-72-80-80-88-88 stitches (back piece), place the next 54-54-60-60-66-66 stitches on a thread for the sleeve, cast on 6-8-8-10-10-14 stitches (in side under sleeve), work 72-72-80-80-88-88 stitches (front piece), place the next 54-54-60-60-66-66 stitches on a thread for the sleeve, cast on 6-8-8-10-10-14 stitches (in side under sleeve). The body and sleeves are finished separately. BODY: = 156-160-176-180-196-204 stitches. Work stocking stitch in the round and increase 0-2-0-8-10-24 stitches evenly on the first round = 156-162-176-188-206-228 stitches. When the piece measures 16-18-17-19-17-19 cm from the division, work the next round as follows: * Knit 2 together, 1 yarn over *, work from *-* over all stitches. Change to circular needle size 4 mm and work rib (knit 1, purl 1) for 6 cm. Cast off. The jumper measures approx. 52-54-56-58-60-62 cm from the shoulder down. SLEEVES: Place the 54-54-60-60-66-66 stitches from the thread on the one side of the piece on double pointed needles/short circular needle size 5 mm and knit up 1 stitch in each of the 6-8-8-10-10-14 stitches cast on under the sleeve = 60-62-68-70-76-80 stitches. Insert a marker in the middle of the 6-8-8-10-10-14 stitches under the sleeve. Allow the marker to follow your work onwards; it will be used when decreasing under the sleeve. Start at the marker and work 3-4-4-5-5-7 stitches in stocking stitch, A.2 over the next 54-54-60-66-66 stitches and 3-4-4-5-5-7 stitches in stocking stitch. When A.2 has been completed in height continue with stocking stitch over all stitches. When the sleeve measures 4 cm decrease 2 stitches under the sleeve – read DECREASE TIP. Decrease like this every 3½-3½-2½-2½-1½-1½ cm a total of 8-8-10-10-12-13 times = 44-46-48-50-52-54 stitches. Continue working until the sleeve measures 30-31-28-29-25-26 cm from the division. Work the next round as follows: * Knit 2 together, 1 yarn over *, work from *-* over all stitches. Change to double pointed needles size 4 mm. Work rib (knit 1, purl 1) for 6 cm. Cast off. The sleeve measures approx. 36-37-34-35-31-32 cm from the division. Work the other sleeve in the same way. |
|||||||||||||
Diagram explanations |
|||||||||||||
|
|||||||||||||
|
|||||||||||||
|
|||||||||||||
|
|||||||||||||
Have you finished this pattern?Tag your pictures with #dropspattern #wishingwellsweater or submit them to the #dropsfan gallery. Do you need help with this pattern?You'll find 30 tutorial videos, a Comments/Questions area and more by visiting the pattern on garnstudio.com. © 1982-2025 DROPS Design A/S. We reserve all rights. This document, including all its sub-sections, has copyrights. Read more about what you can do with our patterns at the bottom of each pattern on our site. |
|||||||||||||


With over 40 years in knitting and crochet design, DROPS Design offers one of the most extensive collections of free patterns on the internet - translated to 17 languages. As of today we count 314 catalogues and 11822 patterns translated into English (UK/cm).
We work hard to bring you the best knitting and crochet have to offer, inspiration and advice as well as great quality yarns at incredible prices! Would you like to use our patterns for other than personal use? You can read what you are allowed to do in the Copyright text at the bottom of all our patterns. Happy crafting!
Post a comment to pattern DROPS 231-9
We would love to hear what you have to say about this pattern!
If you want to leave a question, please make sure you select the correct category in the form below, to speed up the answering process. Required fields are marked *.