
Popularne kategorie
Szukasz włóczki?


Komentarze / Pytania (78)
![]() Dominique napisała::
Dominique napisała::
On-dit. glisser attente 0 fois 0 mailles sur arrêt maille je ne comprends pas. Toute cette partie pour biais épaules est incompréhensible. "Rabattre une m au rg suivant à partir de l'encolure " on rabattre une seule fois? Merci de reformuler vos explications . Je suis en attente pour faire ce modèle. Merci
02.04.2025 - 19:31Odpowiedź DROPS Design :
Bonjour Dominique, s'il y a un 0 dans votre taille, vous n'êtes juste pas concernée par cette information; les m des épaules sont mises en attente en début de rg qui commence par l'emmanchure vers l'encolure (ex dos: sur l'end pour l'épaule droite / sur l'env pour l'épaule gauche); et on rabat les m de l'encolure en début de rg à partir de l'encolure vers l'emmanchure (ex dos: sur l'end pour l'épaule gauche, sur l'env pour l'épaule droite). Cette vidéo d'un autre modèle pourrait vous aider à visualiser comment faire. Bon tricot!
03.04.2025 - 08:35
![]() Sandra Schradiek napisała::
Sandra Schradiek napisała::
Wie werden am Ärmloch die Abnahmen gemacht
27.01.2025 - 18:42Odpowiedź DROPS Design :
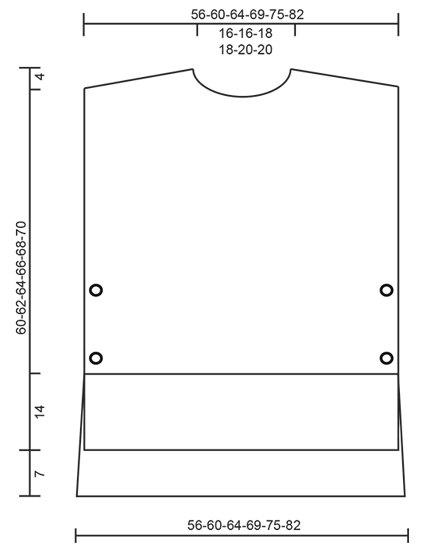
Liebe Frau Schradiek, es wird hier keine Maschen für die Armlöcher abgekettet - siehe Maßskizze. Viel Spaß beim Stricken!
28.01.2025 - 09:01
![]() Ann napisała::
Ann napisała::
Als ik 93 steken heb en voor de schouders 28 st. aan elke kant op een hulpdraad moet zetten, hoe kan het dan dat ik de middelste 18 st. moet afkanten voor de nek? Ik heb dan toch een oneven aantal steken over?
14.12.2024 - 15:38
![]() Christine DUPRE napisała::
Christine DUPRE napisała::
Pourquoi la plupart de vos modèles se tricote en aiguilles circulaires ? Pour ma part, je renonce à chaque fois pour réaliser vos modèles car je n'arrive pas à travailler en aiguille circulaire ? Il serait bien d'avoir plus de choix en aiguilles droites
04.12.2024 - 08:23Odpowiedź DROPS Design :
Bonjour Mme Dupre, les aiguilles circulaires en Scandinavie et en Europe du Nord sont très fréquemment utilisées, raison pour laquelle nombre de nos modèles en utilise, toutefois, vous pouvez souvent facilement adapter les explications sur aiguilles droites - cf cette leçon; pour ce modèle par ex, il suffit simplement de tricoter le devant et le dos comme indiqué (= séparément, en allers et retours), puis de coudre une seule des épaules pour relever les mailles du col, puis faire la couture de la 2ème épaule et du col. Bon tricot!
04.12.2024 - 16:03
![]() Marij napisała::
Marij napisała::
Beste mensen. Ik vind het erg moeilijk om met een rondbreinaald te werken. Hoe kan ik het patroon veranderen als ik gewoon 2 naalden gebruik??? Dat lukt mij het beste. Hopelijk kunt u mij helpen. Gr. Marij
06.11.2024 - 08:35Odpowiedź DROPS Design :
Dag Marij,
Om een patroon aan te passen om op rechte naalden te breien hebben we een instructie gemaakt. Deze vind je hier.
06.11.2024 - 13:44
![]() Cheryl Dillinger napisała::
Cheryl Dillinger napisała::
How many stitches and rows for the gauge?
29.10.2024 - 19:25Odpowiedź DROPS Design :
Dear Mrs Dillinger, you will find the tension for both needle size under header, together with needle size, sizes, amount of yarn and buttons. Happy knitting!
30.10.2024 - 08:08
![]() Ann Marie napisała::
Ann Marie napisała::
Vill ha beskrivningen till denna fina väst
24.10.2024 - 10:08
![]() Kirsten Sørensen napisała::
Kirsten Sørensen napisała::
Ønsker opskriften på den flotte vest
22.10.2024 - 15:14
![]() Paola napisała::
Paola napisała::
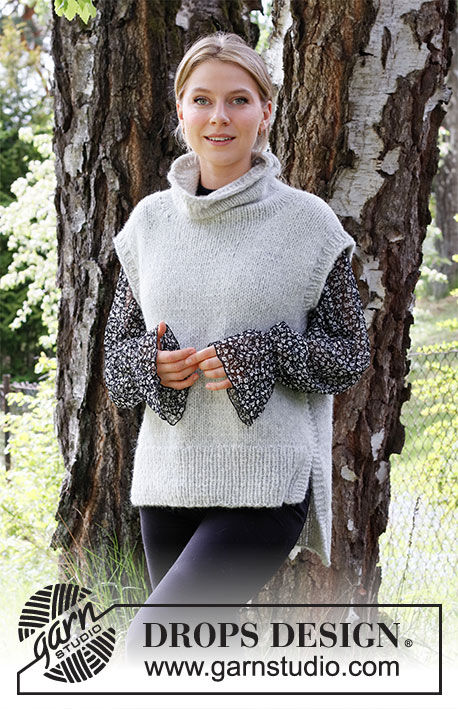
Buongiorno. Come faccio a fare questo modello con il collo alto. Grazie
13.09.2024 - 13:31Odpowiedź DROPS Design :
Buonasera Paola, per un aiuto così personalizzato può rivolgersi al suo rivenditore DROPS di fiducia. Buon lavoro!
13.09.2024 - 21:04
![]() Bec napisała::
Bec napisała::
Thank you so much for your recent feedback. I think I've done it correctly. The next step has me puzzled - I've just bound of my 1 stitch on the neck, my K1 row will be on the RS, not the WS, am I missing something? TIA
12.08.2024 - 04:33Odpowiedź DROPS Design :
Hi Bec, The knitted row after binding off the 1 stitch is from the wrong side (so work as normal from the right side before knitting from the wrong side if necessary). Regards, Drops Team.
12.08.2024 - 06:33
|
|
Winter is Coming#winteriscomingslipover |
|
 |
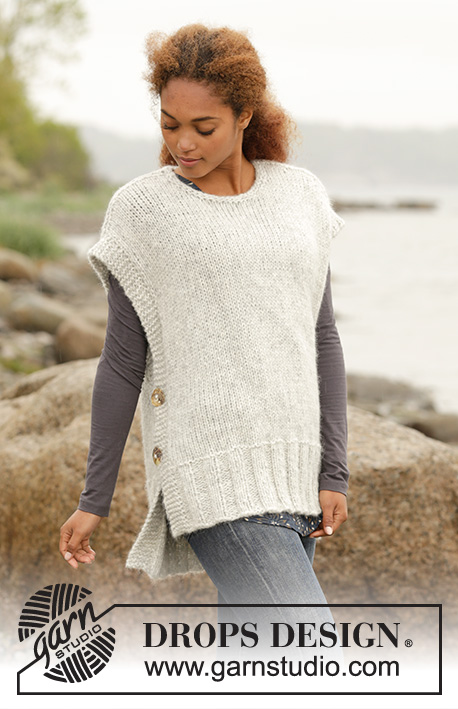 |
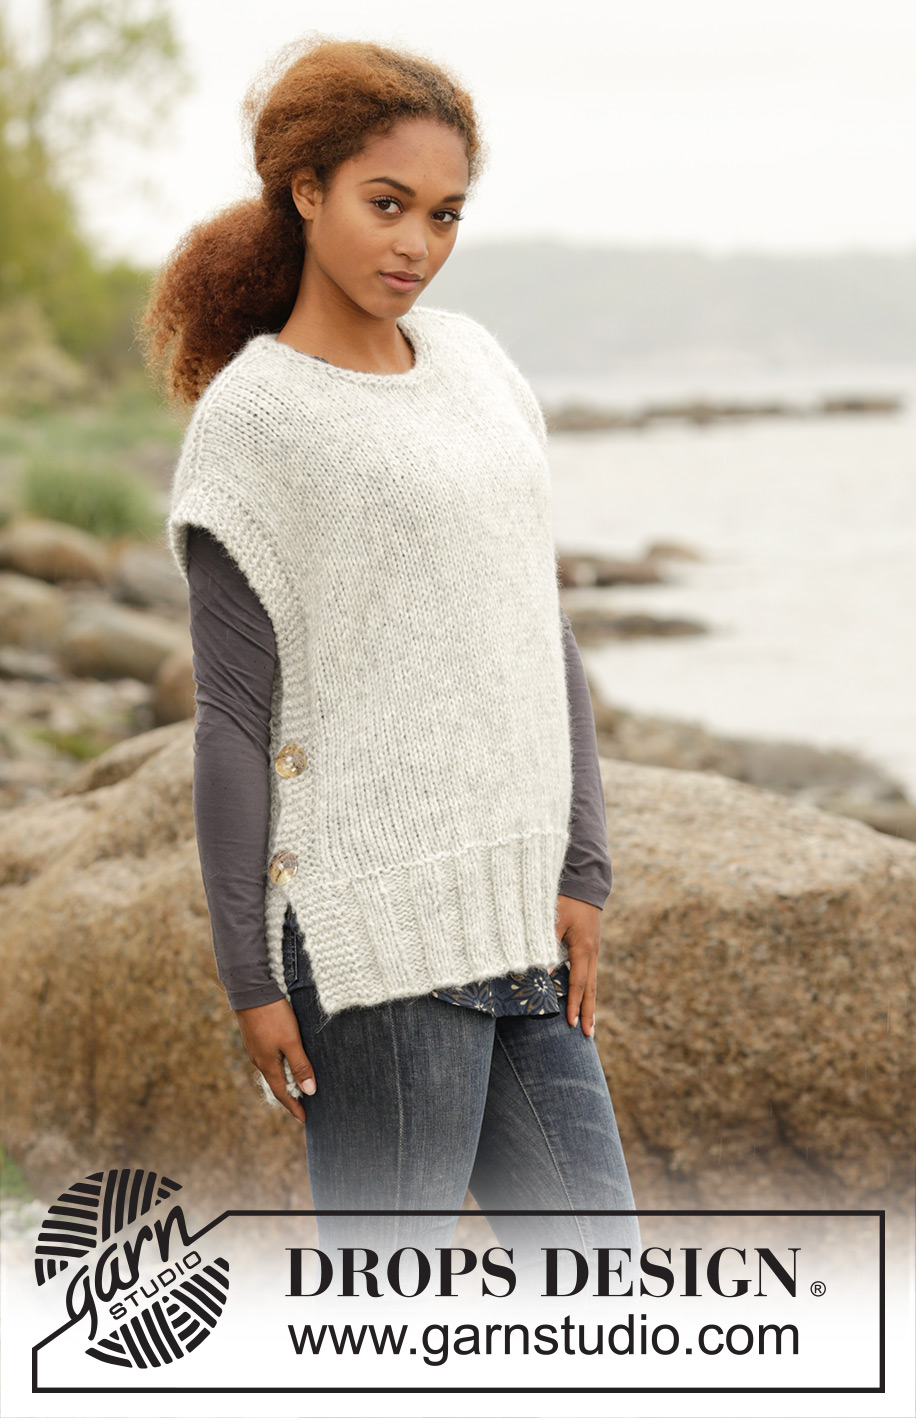
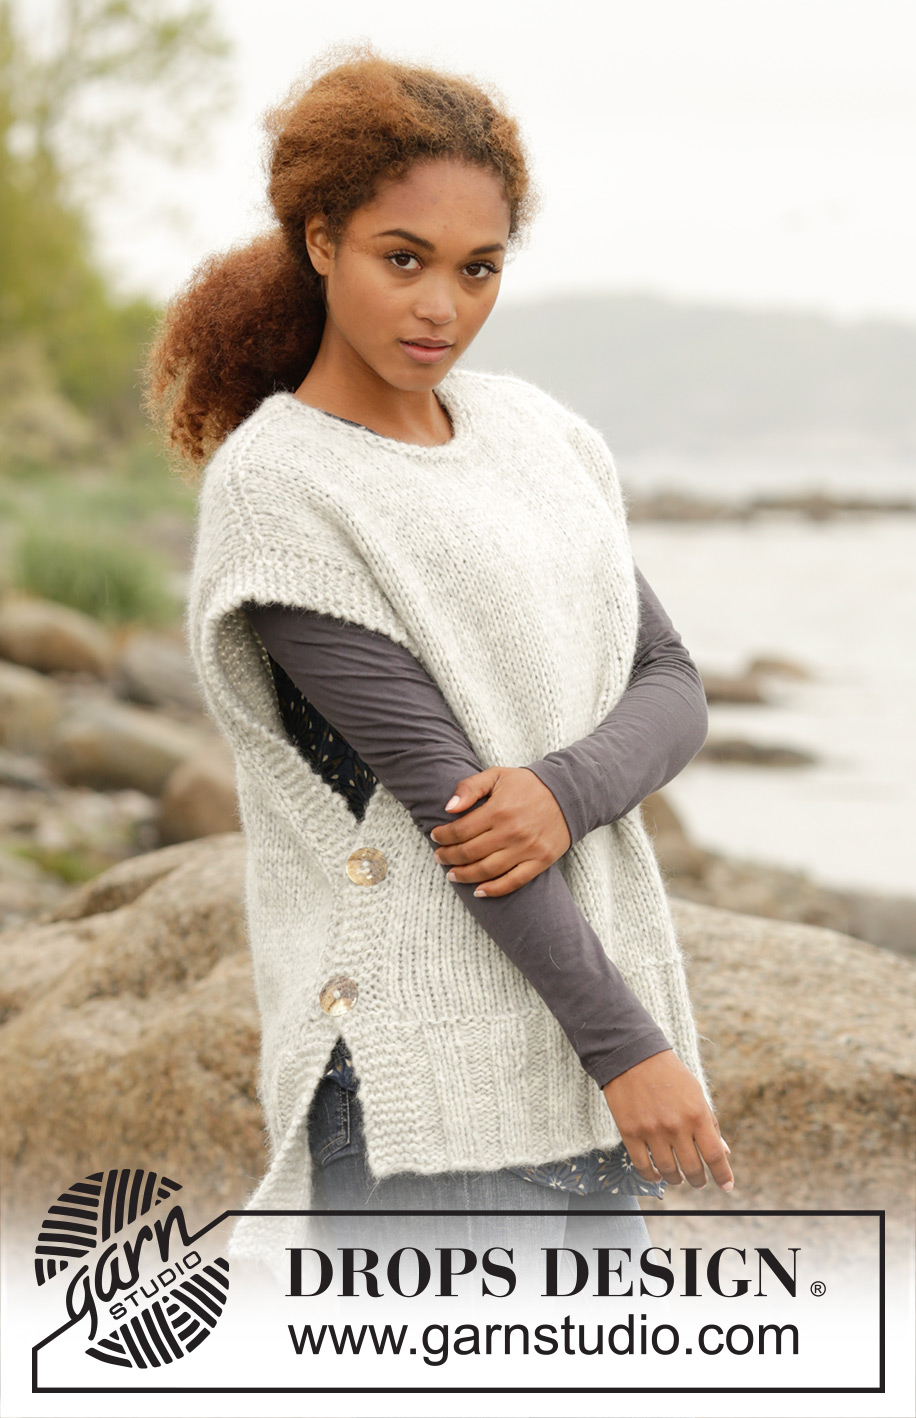
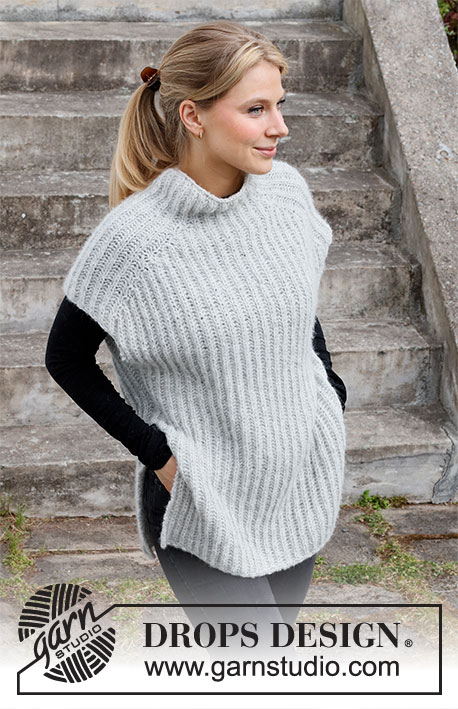
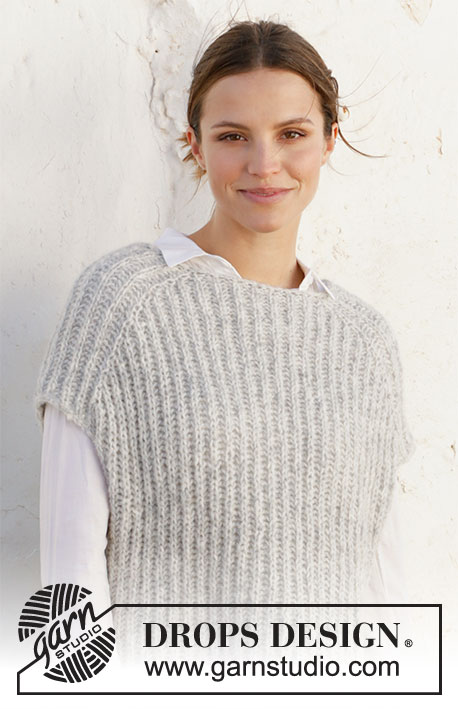
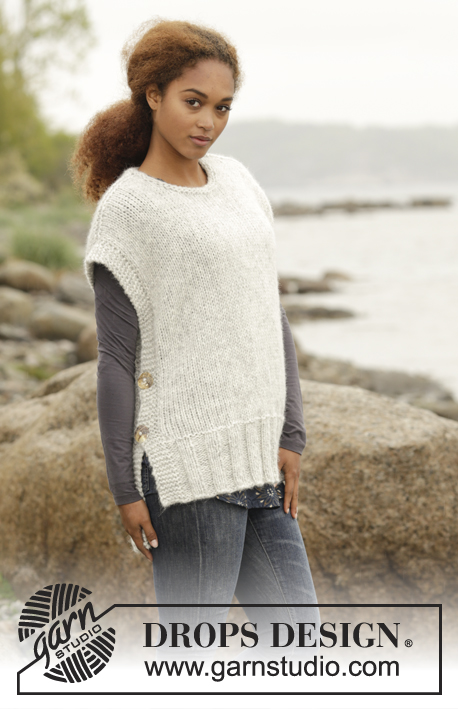
Kamizelka DROPS z okrągłym dekoltem, z pęknięciami na bokach, 1 nitką włóczki Cloud, 1 nitką włóczki Wish lub 2 nitkami włóczki Air. Od S do XXXL.
DROPS 173-47 |
|
|
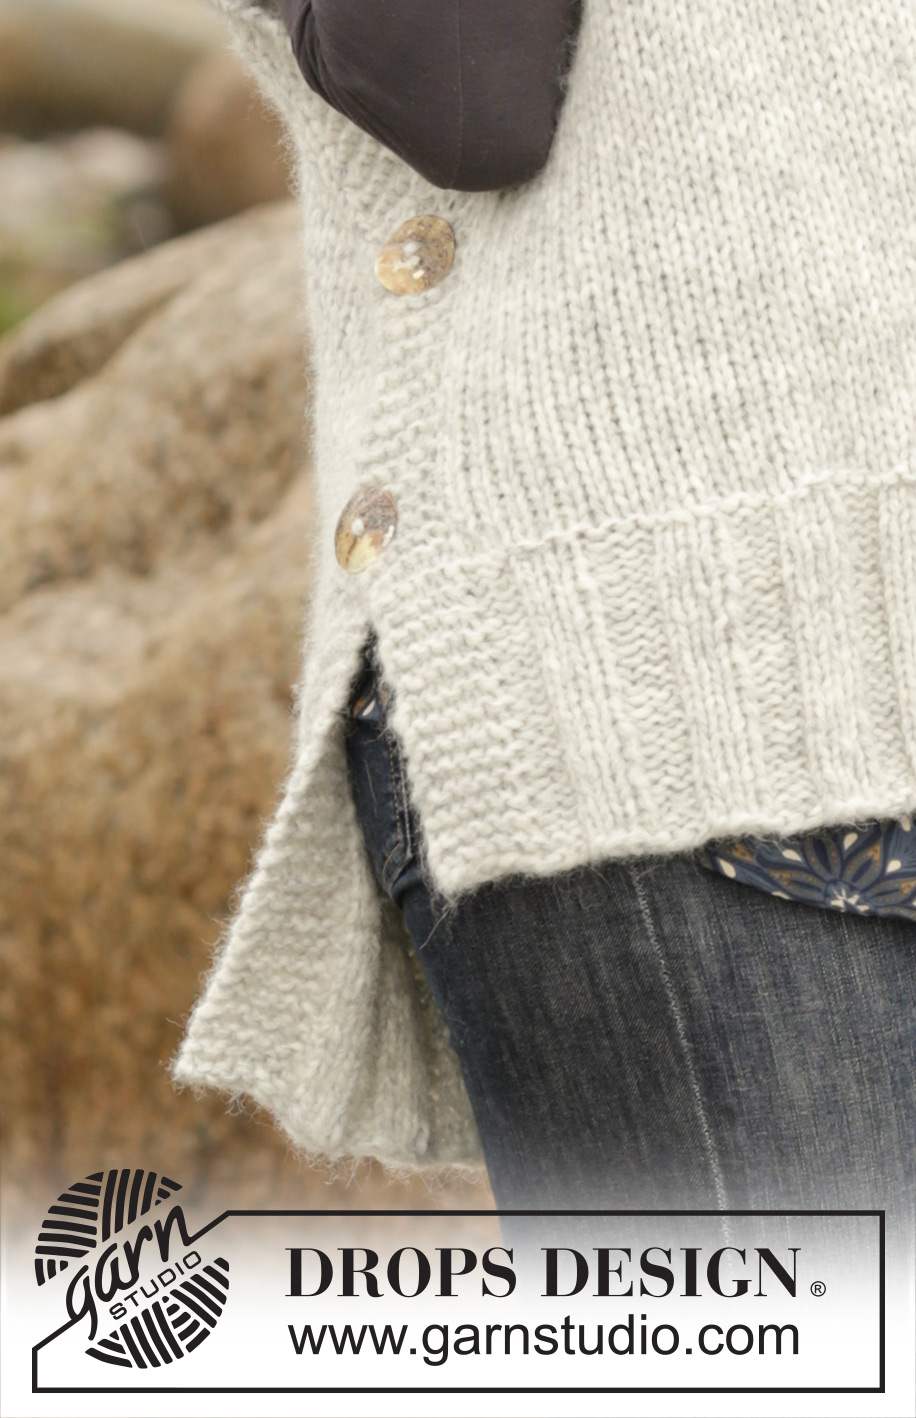
ŚCIEG FRANCUSKI (w tę i z powrotem): Przer. wszystkie rzędy na prawo. 1 „ściągacz” francuski = 2 rz. na prawo. ZAMYKANIE OCZEK: Aby obliczyć gdzie zamykać o., należy wziąć ogólną liczbę o. (np. 75 o.) pomniejszoną o liczbę o. obszyć przodów (np. 12) i podzielić ją przez liczbę o., która ma być zamknięta (np. 13) = 4,8. To oznacza, że w naszym przykładzie przerabiamy razem na prawo ok. każde 4-te i 5-te o. Nie zamykać o. ponad obszyciami przodów. DZIURKI NA GUZIKI: Wykonać po 2 dziurki na guziki z każdej strony przodu. 1 dziurka na guzik = zamknąć 3-cie i 4-te o. od brzegu, a w nast. rzędzie nabrać 2 o. ponad zamkniętymi o. Wykonywać dziurki na guziki, gdy dł. robótki wynosi 16 i 26 cm we wszystkich rozmiarach (albo wg uznania). ---------------------------------------------------------- KAMIZELKA: Przerabiana w tę i z powrotem na drutach z żyłką, w 2 częściach. Na końcu zszyć ramiona. TYŁ: Na drutach z żyłką nr 7 nabrać 75-81-87-93-99-105 o. (w tym 6 o. brzeg. z każdej strony) 1 nitką włóczki Cloud, 1 nitką włóczki Wish lub 2 nitkami włóczki Air. Przer. 1 rz. na lewo na lewej stronie robótki, dalej kolejny rząd na prawej stronie robótki następująco: 6 o. brzeg. ściegiem francuskim - patrz powyżej - *3 o.l., 3 o.p.*, powt. od *-* aż zostaje 9 o. i zakończyć przerabiając 3 o.l. i 6 o. brzeg. ściegiem francuskim. Dalej przer. ściągacz tak samo, aż dł. robótki wynosi 21 cm. W nast. rzędzie na lewej stronie robótki zmienić druty na druty z żyłką nr 8 i w tym samym czasie równomiernie zamknąć 13-15-17-17-17-15 o. - PATRZ ZAMYKANIE OCZEK = 62-66-70-76-82-90 o. Przerabiać dżersejem z 6 o. brzeg. ściegiem francuskim z każdej strony. ZACHOWAĆ TAKIE SAME NAPRĘŻENIE NICI JAK W PRZYPADKU PRÓBKI! Na wys. 63-65-67-69-71-73 cm od dołu robótki zdjąć na drut pomocniczy oczka na pocz. każdego rzędu z każdej strony na skosy ramion następująco (UWAGA: aby nie trzeba było odcinać nitki, przer. oczka przed ich zdjęciem na drut pomocniczy): zdjąć na drut pomocniczy 2-3-2-2-3-2 razy 7-8-8-9-10-11 o. i 1-0-1-1-0-1 razy 8-0-9-10-0-12 o. z każdej strony. W TYM SAMYM CZASIE gdy dł. robótki wynosi 65-67-69-71-73-75 cm zamknąć 16-16-18-18-20-20 o. środk. na dekolt i kończyć każde ramię osobno. W nast. rzędzie zamknąć 1 o. od strony dekoltu. Gdy wszystkie o. zostały zamknięte/ przełożone na drut pomocniczy, jest 22-24-25-28-30-34 o. na drucie pomocniczym na ramię, a dł. robótki wynosi ok. 67-69-71-73-75-77 cm mierząc od góry ramienia do dołu. Wziąć z powrotem o. z drutu pomocniczego na druty z żyłką nr 7 i przer. 1 rz. na prawo na lewej stronie robótki (aby uniknąć dziur w miejscach przejść miedzy o. zdejmowanymi na drut pomocniczy, nabrać oczko z nitki między 2 o. i je przer. przekręcone na prawo razem z nast. oczkiem na lewym drucie). Następnie zamknąć LUŹNO wszystkie o. na prawo na prawej stronie robótki. Powt. to samo na drugie ramię. PRZÓD: Nabrać o. i przer. jak tył, ale gdy wys. ściągacza ma 14 cm równomiernie zamykać o. jak z tyłu (przód jest o 7 cm krótszy niż tył). Przer. jak tył, ale gdy dł. robótki wynosi 16 i 26 cm wykonać DZIURKI NA GUZIKI z każdej strony - patrz powyżej! Dalej przer., aż dł. robótki wynosi 53-55-57-58-60-62 cm. Zdjąć teraz 10-10-12-12-14-14 o. środk. na drut pomocniczy na dekolt i kończyć każde ramię osobno. Zamykać jeszcze na dekolt na pocz. każdego rzędu od strony dekoltu: 1 raz 2 o. i 2 razy 1 o. W TYM SAMYM CZASIE gdy dł. robótki wynosi 56-58-60-62-64-66 cm zdjąć o. na drut pomocniczy na skosy ramion jak z tyłu. Gdy wszystkie oczka zostaną zamknięte / zdjęte na drut pomocniczy jest 22-24-25-28-30-34 o. na drucie pomocniczym na ramię, a dł. robótki wynosi ok. 60-62-64-66-68-70 cm, mierząc od góry ramienia do dołu. Wziąć z powrotem o. na druty z żyłką nr 7 i przer. 1 rz. na prawo na lewej stronie robótki jak z tyłu, zamknąć wszystkie o. na prawo na prawej stronie robótki. Powt. to samo na drugie ramię. WYKOŃCZENIE: Zszyć ramiona – pamiętać, aby szew nie był zbyt ścisły. Ułożyć brzeg ściegiem francuskim z dziurkami na guziki (przód) z jednej strony kamizelki ponad brzegiem ściegiem francuskim z tyłu i przyszyć guziki. Powt. z drugiej strony. WYKOŃCZENIE DEKOLTU: Na krótkich drutach z żyłką nr 7 nabrać na prawej stronie robótki ok. 46-58 wokół dekoltu (w tym o. na drucie pomocniczym) 1 nitką włóczki Cloud, 1 nitką włóczki Wish lub 2 nitkami włóczki Air. Przer. 1 okr. na lewo, 1 okr. na prawo i 1 okr. na lewo i zamykać LUŹNO o. na prawo. |
|
 |
|
Skończyłaś ten wzór?Otaguj swoje zdjęcia #dropspattern #winteriscomingslipover lub prześlij je do #dropsfan gallery. Potrzebujesz pomocy w związku z tym wzorem?Zobacz 21 instrukcje video, sekcję Komentarze/Pytania i jeszcze więcej, wchodząc na stronę wzoru na garnstudio.com © 1982-2026 DROPS Design A/S. Wszelkie prawa zastrzeżone. Ten dokument, w całości, jest chroniony prawem. Zobacz co możesz robić z naszymi wzorami na dole każdego wzoru na naszej stronie. |
|


Posiadając 40 lat doświadczenia w projektowaniu wzorów na druty i szydełko, DROPS Design oferuje jedną z największych kolekcji bezpłatnych wzorów w internecie – przetłumaczonych na 17 języków. Obecnie jest dostępnych 324 katalogów i 12290 wzorów w języku polskim.
Dokładamy wszelkich starań, aby oferować Wam druty i szydełka, inspiracje, fachowe porady oraz doskonałej jakości włóczki w najlepszych cenach! Zamierzasz wykorzystać nasze wzory inaczej niż tylko do osobistego użytku? Przeczytaj jakie masz prawa w Copyright, który znajdziesz na końcu każdego wzoru. Miłej pracy!
Dodaj komentarz do modelu DROPS 173-47
Chcielibyśmy się dowiedzieć co masz do powiedzenia o tym wzorze!
Jeśli chcesz zadać pytanie i szybko uzyskać odpowiedź, upewnij się, że została wybrana właściwa kategoria w formularzu poniżej. Pola obowiązkowe są oznaczone *.