
Popular categories
Looking for a yarn?


Comments / Questions (100)
![]() Giorgia wrote:
Giorgia wrote:
Buongiorno, seguendo lo schema le spalle mi risultano asimmetriche. È corretto? Mi pare molto strano e ho l'impressione che non siano corretti gli aumenti...
23.02.2024 - 23:13DROPS Design answered:
Buongiorno Giorgia, non ci sono errori nella lavorazione delle spalle. Buon lavoro!
25.02.2024 - 15:29
![]() Jutta wrote:
Jutta wrote:
Bei A1 sind 2 Reihen übereinander mit Hinrunden bezeichnet. Man soll in 1. Hinrunde die 1.M rechts und die 2. Umschlag u d 1links abheben. In 2. Hinrunde direkt darüber die vorher rechte jetzt links mit Umschlag abheben und die vorher links abgehobene mit dem U rechts zusammen Stricken. Da man ja in runden strickt, ist dann nicht mehr links über links und rechts über rechts. Und warum in jedem mustersatz 2 hinreichen übereinander?
22.01.2024 - 18:01DROPS Design answered:
Liebe Jutta, ja stimmt, so strickt man Patentmuster in der Runde, das kann man auch in diesem Video sehen. Viel Spaß beim stricken!
23.01.2024 - 07:19
![]() Tmi Näppituntuma / Tuija Heikura Heikura wrote:
Tmi Näppituntuma / Tuija Heikura Heikura wrote:
Hei ! Ihana malli Easyover ! Neulotaanko yksin- vai kaksinkertaisesta langasta (drops air)? Kiitos jo etukäteen !
02.01.2024 - 08:52DROPS Design answered:
Työ neulotaan yksinkertaisella DROPS Air-langalla.
02.01.2024 - 12:37
![]() Lene wrote:
Lene wrote:
Jeg har fundet ud af det
26.12.2023 - 17:24
![]() Lene Madsen wrote:
Lene Madsen wrote:
Jeg forstår ikke maske antal. Jeg strikker str S. efter 1.pind har man 56 masker. Så skal der tages ud på A2 og A3 i alt 9 gange. Det er en forøgelse på 4x 18 masker. Hvilket svarer til 72 masker. Disse masker lagt sammen med de 56 masker fra start giver et samlet maskeantal på 128. I opskriften står der at man nu har 144 masker. Venligst forklar hvordan man kommer frem til 144 masker.
22.12.2023 - 14:00
![]() Lisbeth Kakeberget wrote:
Lisbeth Kakeberget wrote:
Skal bak- og forstykke være like lange? På bildene ser det slik ut. En dame har strikket denne vesten for meg og hun har tolket at det skal være ulik lengde på bak- og forstykke.
26.11.2023 - 17:25DROPS Design answered:
Hei Lisbeth. Vi har mange modeller der bakstykket er lengre en forstykket, men på denne vesten er for -og bakstykket like lange. Det ser man også på bildet, slik du skriver og man kan også se det på målskissen - kun 1 mål på lengden. mvh DROPS Design
27.11.2023 - 09:58
![]() Vivian Nielsen wrote:
Vivian Nielsen wrote:
Hvorfor har jeg flere masker, når jeg har strikket halskanten, når der kun skal bruges 60 i opskriften når den skal deles til bærestykke? Hvad gør jeg forkert, har 88 masker.
05.09.2023 - 19:15DROPS Design answered:
Hei Vivian. Usikker på hvorfor du har så mange masker. Kanskje økte der du ikke skulle ha økt. Ta en titt på hjelpevideoene til denne vesten, da får du en veilledning på hvordan det skal økes. mvh DROPS Design
11.09.2023 - 15:08
![]() Christine Bourguignon wrote:
Christine Bourguignon wrote:
Je ne comprends pas. J'ai refait plusieurs fois sans succès. Lorsque je fais A1 pour le col dès le 3eme rang je ne retombe pas sur les bonnes mailles.
15.02.2023 - 19:55DROPS Design answered:
Bonjour Mme Bourguignon, au 1er rang de A.1 tricotez (1 m end, faites 1 jeté, glissez la m suivante à l'envers) et répétez de (à) tout le tour; au début du tour suivant, vous devez faire 1 jeté, glisser la m endroit à l'envers et tricoter ensemble à l'envers la maille suivante et son jeté. Au 3ème tour, vous allez tricoter ensemble à l'endroit le jeté et la m endroit, et faire 1 jeté, glisser la m suivante à l'env. Vous devez répéter ces 2 derniers tours. Regardez les côtes anglaises avec jetés ici en vidéo. Bon tricot!
16.02.2023 - 11:50
![]() Elsy Blomberg wrote:
Elsy Blomberg wrote:
Hej, jag skulle skrivit att jag har 90 maskor när jag gjort halsen, men i mönstret står det 60 maskor, jag har tittat på vidoarna, men får inget svar, i beskrivningen lägger upp 70 maskor minskar 10 =60, sedan när man stickar a1 första raden så är det en rät maska plus ett omslag och en maska som man för över, det blir en ökning på varannan maska, blir då 90 maskor, och sedan stämmer det inte när jag går vidare på oket med antalet maskor.
31.01.2023 - 16:22DROPS Design answered:
Hej Elsy, omslaget hör ihop med den maskan du lyfter, så du ökar inte i A.1. dvs du har 60 maskor Sticka mönster så här: Sticka A.1 (= 2 maskor) över de första 6 maskorna (= halva bakstycket), A.2 (= 2 maskor), A.1 över 14 maskor, A.3 (= 2 maskor) (= axel), A.1 över 12 maskor (= framstycke), A.2 över 2 maskor, A.1 över 14 maskor, A.3 över 2 maskor (= axel), och A.1 över de sisa 6 maskorna (= halva bakstycket). 6+2+14+2+12+2+14+2+6=60 m + ökningarna enligt diagrammen - exakt som vi visar i videon :)
03.02.2023 - 10:54
![]() Elsy Blomberg wrote:
Elsy Blomberg wrote:
Hej, jag frågade om mask antalet på stickbeskrivning 217-13, storlek medium. Skickade mail för ca en vecka sedan och ni svarade. men jag får det fortfarande inte att stämma. när jag har gjort oket, så har jag 90 maskor. Räknar ni inte omslagen som maskor?
31.01.2023 - 13:34DROPS Design answered:
Hej Elsy, har du set alle 3 videoer som vi har lavet til denne opskrift? Det giver svar på de fleste frågor :)
31.01.2023 - 15:14
|
||||||||||||||||||||||||||||
Easy Over#easyovervest |
||||||||||||||||||||||||||||
 |
 |
|||||||||||||||||||||||||||
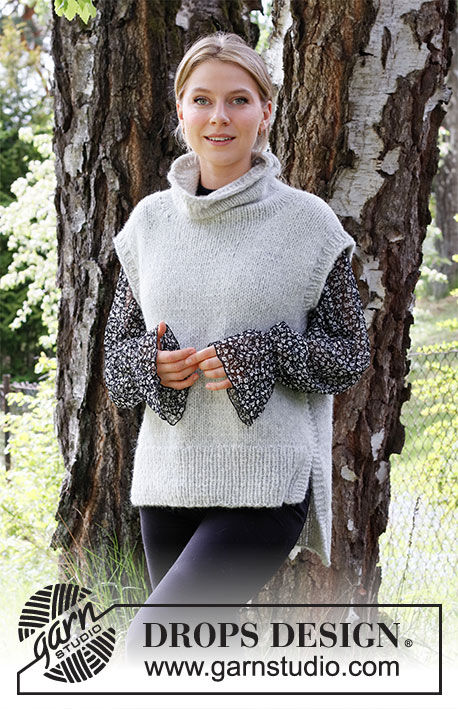
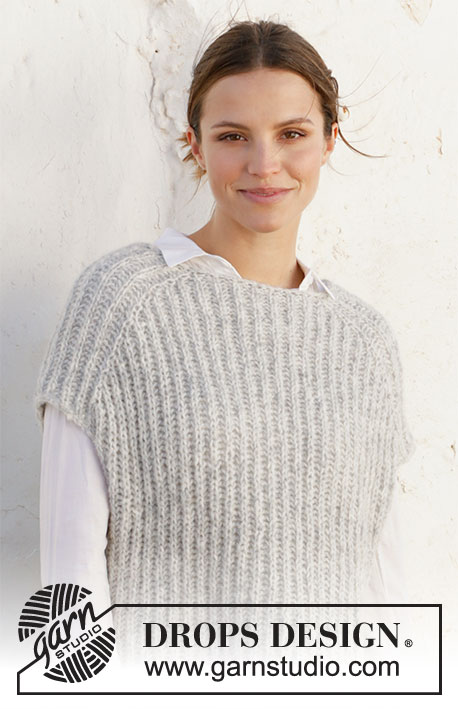
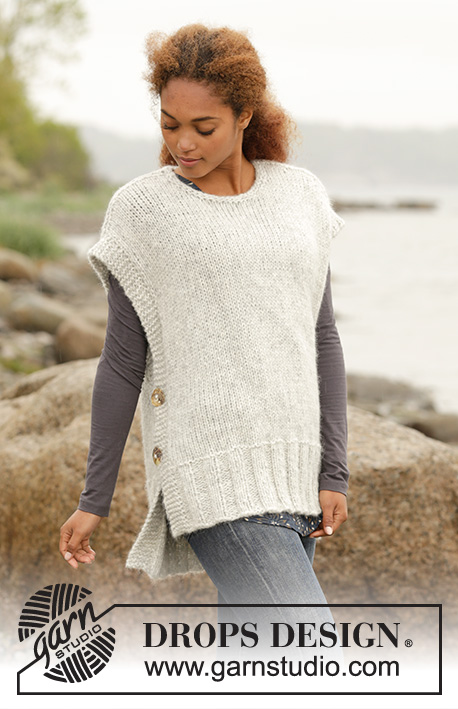
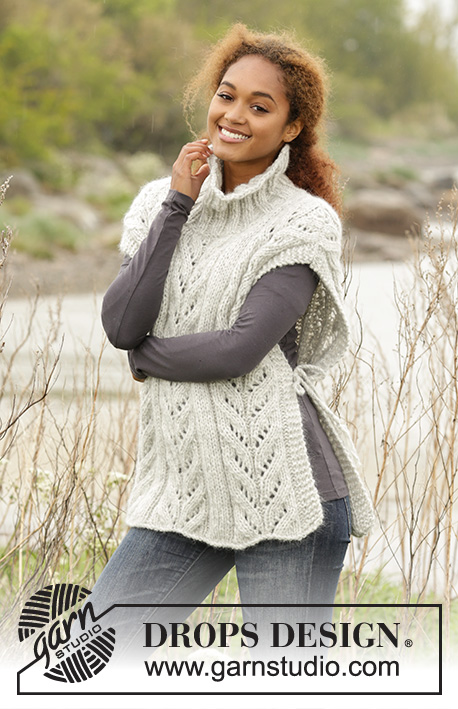
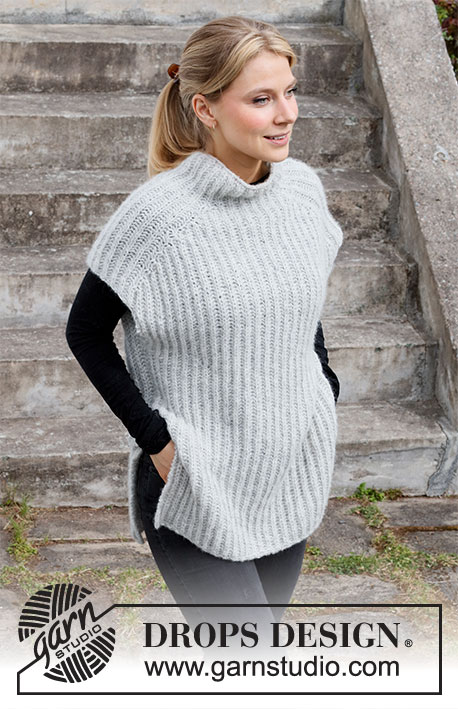
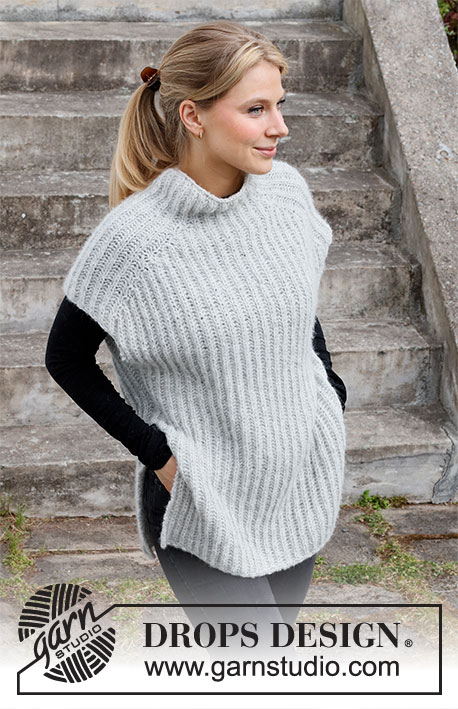
Knitted vest / slipover with English rib in DROPS Air. Worked top down. Size: XS - XXL
DROPS 217-13 |
||||||||||||||||||||||||||||
|
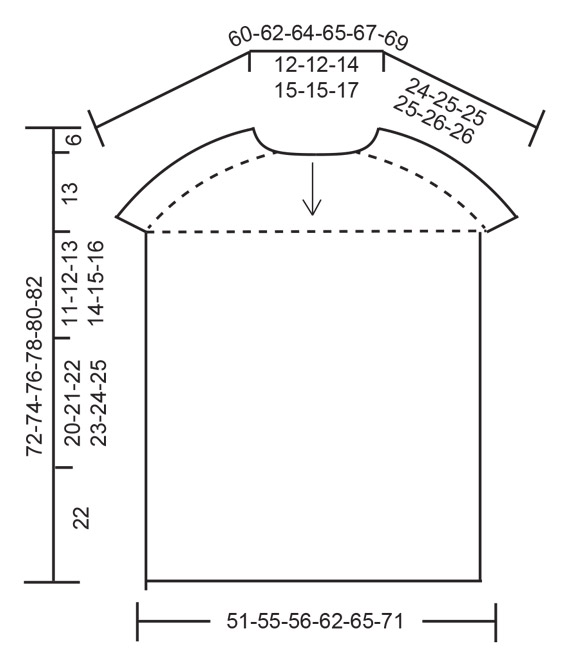
------------------------------------------------------- EXPLANATION FOR THE PATTERN: ------------------------------------------------------- GARTER STITCH (back and forth): Knit all rows. 1 ridge vertically = knit 2 rows. PATTERN: See diagrams A.1 to A.4 (worked in English rib). DECREASE TIP (evenly): To calculate how to decrease evenly, use the total number of stitches on round (e.g. 62 stitches) and divide stitches by number of decreases to be done (e.g. 10) = 6.2. In this example decrease by purling approx. every 5th and 6th stitch together. ------------------------------------------------------- START THE PIECE HERE: ------------------------------------------------------- VEST - SHORT OVERVIEW OF THE PIECE: Work neck edge and yoke in the round on circular needle from mid back, top down. Increase stitches for shoulder on yoke before dividing the piece, and work front and back piece separately until finished measurements. NECK EDGE: Cast on 66-66-70-74-74-78 stitches on circular needle size 6 mm with Air. Purl 1 round and decrease 10 stitches evenly – read DECREASE TIP = 56-56-60-64-64-68 stitches. Switch to circular needle size 7 mm. Work A.1 over all stitches. Continue until piece measures 9 cm. YOKE: Work pattern as follows: Work A.1 (= 2 stitches) over the first 6-6-6-8-8-8 stitches (= half back piece), A.2 (= 2 stitches), A.1 over 14 stitches, A.3 (= 2 stitches) (= shoulder), A.1 over 10-10-12-14-14-16 stitches (= front piece), A.2 over 2 stitches, A.1 over 14 stitches, A.3 over 2 stitches (= shoulder), and A.1 over the last 4-4-6-6-6-8 stitches (= half back piece). REMEMBER THE KNITTING TENSION! When A.1 has been worked 1 time vertically, repeat A.1a vertically. When A.2 and A.3 have been worked 1 time vertically, repeat A.2a and A.3a vertically, i.e. continue increases every 6th round, work the increased stitches in English rib. When A.2a and A.3a have been worked 8-9-9-10-11-12 times vertically in total, there are 136-144-148-160-168-180 stitches on needle. Work A.1a over all stitches until piece measures 24-25-25-25-26-26 cm on the longest (i.e. measured along the shoulder), adjust so that next round is a purl round. Now divide piece into front and back piece and cast off shoulder stitches as follows: Work 26-28-28-32-34-36 stitches in English rib, 1 stitch in GARTER STITCH – read explanation above (= half back piece), cast off the next 15 stitches (cast off yarn overs as separate stitches), 1 stitch in garter stitch, work 51-55-57-63-67-73 stitches in English rib, 1 stitch in garter stitch (= front piece), cast off the next 15 stitches (cast off yarn overs as separate stitches), 1 stitch in garter stitch and work English rib over the last 25-27-29-31-33-37 stitches (= half back piece). Cut the yarn. Let the stitches on front piece sit on needle. BACK PIECE: = 53-57-59-65-69-75 stitches. Work as follows from right side: Work 1 stitch in garter stitch, A.4 (= 2 stitches) until 1 stitch remains (i.e. English rib begins and ends with 1 purl English rib stitch), and finish with 1 stitch in garter stitch. Continue pattern back and forth. When piece measures 11-12-13-14-15-16 cm from division, insert 1 marker in each side, use this for side seam later. When piece measures 66-68-70-72-74-76 cm from the neck, cast off by knitting, cast off yarn overs as separate stitches (this is done to avoid a tight cast-off edge). FRONT PIECE: Work the 53-57-59-65-69-75 stitches on front piece as on back piece. ASSEMBLY: Begin at the marker in the side and sew back and front piece together from marker and approx. 20-21-22-23-24-25 cm downwards. Bottom 22 cm = vent. |
||||||||||||||||||||||||||||
Diagram explanations |
||||||||||||||||||||||||||||
|
||||||||||||||||||||||||||||
 |
||||||||||||||||||||||||||||
 |
||||||||||||||||||||||||||||
Have you finished this pattern?Tag your pictures with #dropspattern #easyovervest or submit them to the #dropsfan gallery. Do you need help with this pattern?You'll find 19 tutorial videos, a Comments/Questions area and more by visiting the pattern on garnstudio.com. © 1982-2026 DROPS Design A/S. We reserve all rights. This document, including all its sub-sections, has copyrights. Read more about what you can do with our patterns at the bottom of each pattern on our site. |
||||||||||||||||||||||||||||


With over 40 years in knitting and crochet design, DROPS Design offers one of the most extensive collections of free patterns on the internet - translated to 17 languages. As of today we count 324 catalogues and 12290 patterns translated into English (UK/cm). 12290
We work hard to bring you the best knitting and crochet have to offer, inspiration and advice as well as great quality yarns at incredible prices! Would you like to use our patterns for other than personal use? You can read what you are allowed to do in the Copyright text at the bottom of all our patterns. Happy crafting!
Post a comment to pattern DROPS 217-13
We would love to hear what you have to say about this pattern!
If you want to leave a question, please make sure you select the correct category in the form below, to speed up the answering process. Required fields are marked *.