
Popular categories
Looking for a yarn?


Comments / Questions (7)
![]() Henriette Oest Lensbøl wrote:
Henriette Oest Lensbøl wrote:
Hej Drops Jeg har problemer med indtagningerne på tommelfingeren! Kan det virkelig passe, at indtagningerne ikke er helt jævnt fordelt (mærke i 11. og 24. maske) og så er jeg usikker på, hvor omggangsstarten egentlig er? Håber I kan hjælpe, så jeg kan komme videre med strikkepindene. Venlig hilsen Henriette
01.03.2025 - 17:35DROPS Design answered:
Hej Henriette, jo men de bliver jævnt fordelt når du følger diagrammerne, se diagrammerne for tommelfinger nederst i opskriften :)
06.03.2025 - 14:25
![]() Marta wrote:
Marta wrote:
Hej, chciałabym wykonać te rękawiczki z włóczki drops karisma, jak powinnam przeliczyć oczka?
31.10.2024 - 12:27DROPS Design answered:
Witaj Marto, do przeliczenia oczek użyj któregoś z naszych projektów z grupy włóczek B, wzory na rękawiczki z jednym palcem z takich włóczek znajdziesz TUTAJ. Pozdrawiamy!
31.10.2024 - 13:18
![]() Inkeri Koski-Lammi wrote:
Inkeri Koski-Lammi wrote:
Kun kärkikavennukset alkavat, niin silmukoitahan on 54 eikä 56!? Peukaloon ohjeistetaan käyttämään puikkoja nro 3!? Meinaan käyttää 2,5😘
30.10.2022 - 16:34
![]() Lotta wrote:
Lotta wrote:
I mönstret står att man ska stickor nr 3 till tummen, vilket väl måste vara fel eftersom det är 2 eller 2,5 för resten av vanten!?
24.01.2021 - 17:20
![]() Cindy Grosse wrote:
Cindy Grosse wrote:
How do you manage so that the pattern is straight even where you start a new round? All my patterns look uneven...
06.11.2019 - 22:36DROPS Design answered:
Dear Mrs Grosse, you can try with the technique for stripes in the round, and at the same time, depending on the rounds, try to tighten the yarn somewhat to try to make it more even. Your store might have more tipps for you, do not hesitate to contact them. Happy knitting!
07.11.2019 - 09:08
![]() Tanja Martinovic wrote:
Tanja Martinovic wrote:
Hallo, Wat wordt bedoeld met de "drie zwarte vierkanten in A.1" waarna de duim begint? Ik snap niet waar ik met de duim moet beginnen... Groetjes, Tanja
28.07.2019 - 23:53DROPS Design answered:
Dag Tanja,
In A.1 zie je een zwarte, staande balk van een breedte van 3 steken en ongeveer 21 naalden hoog. Op deze plek brei je de duim, dus in naald 7 van A.1, als je bij de zwarte balk bent, pak je telpatroon A.2 erbij, welke dan over die 3 steen breit.
11.08.2019 - 16:29
![]() Marianne Frenning Olsen wrote:
Marianne Frenning Olsen wrote:
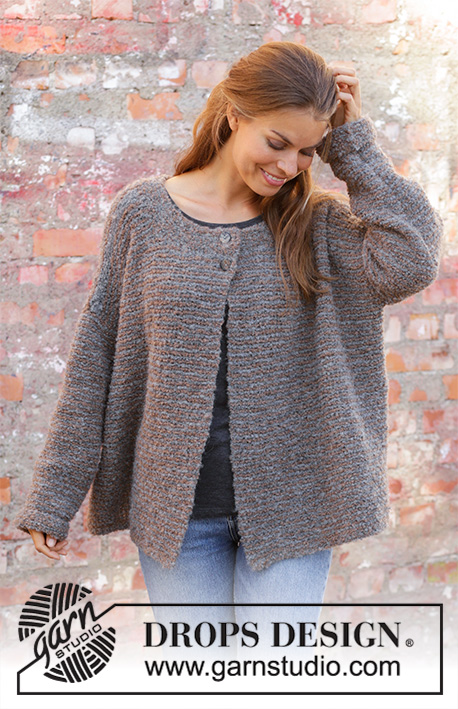
Ikke direkte spørsmål, men det var jo en jakke i dette mønsteret da det var oversikt over forslag til mønstre vi kunne stemme på. Er det noen som helst sjans for at jakkemønsteret dukker opp ila. høsten? Jeg forelsket meg totalt :)
20.09.2018 - 07:40DROPS Design answered:
Hei Marianne. Ja, oppskrift på jakken kommer også i løpet av høsten. Følg med på sidene våre så går du ikke glipp av det. God fornøyelse.
27.09.2018 - 08:34
|
||||||||||||||||||||||||||||
Talvik Mittens#talvikmittens |
||||||||||||||||||||||||||||
 |
 |
|||||||||||||||||||||||||||
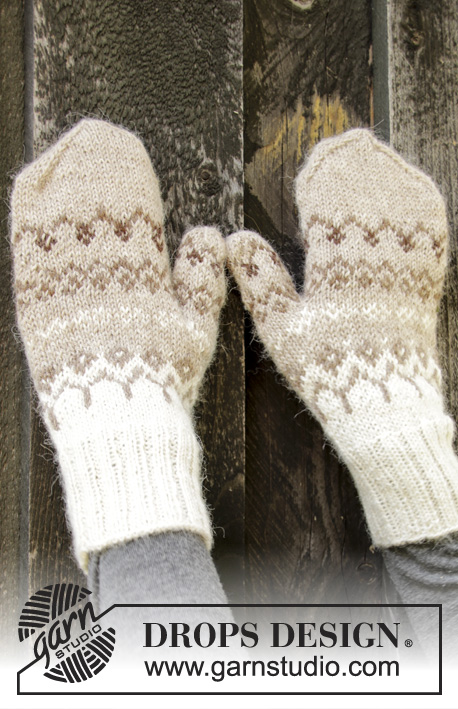
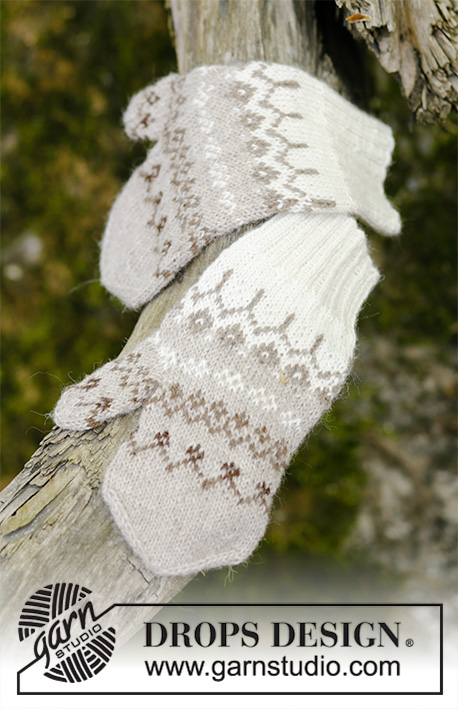
Knitted mittens with Nordic pattern in DROPS Alpaca. Size S/M.
DROPS 197-12 |
||||||||||||||||||||||||||||
|
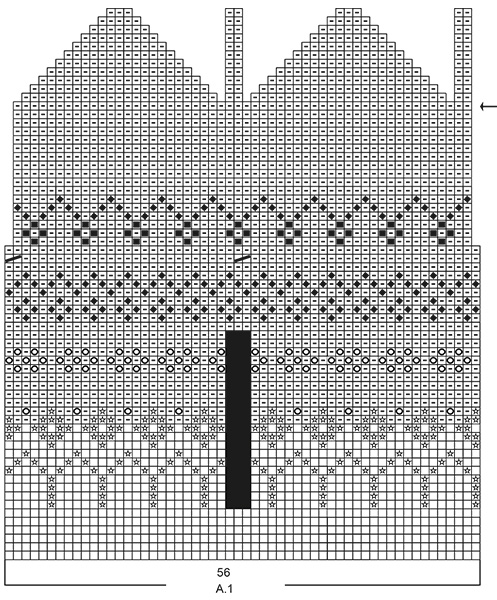
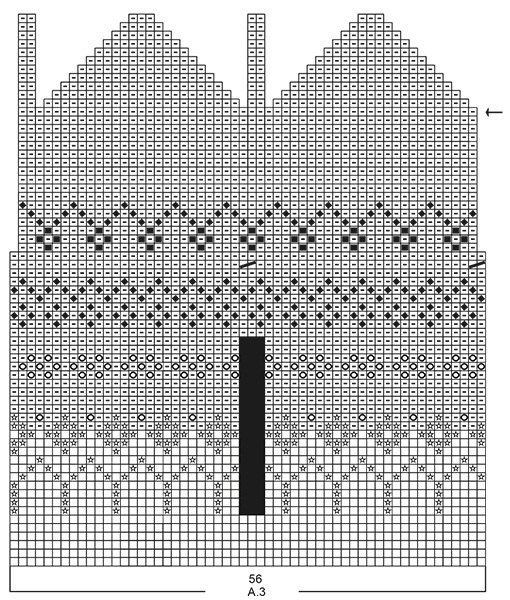
EXPLANATIONS FOR THE PATTERN: ------------------------------------------------------- PATTERN: See diagrams A.1 to A.3. All stitches are worked in stocking stitch. NOTE: There are 2 different symbols used for the stitches worked in off white in the diagrams. DECREASE TIP (evenly spaced): To work out how to decrease evenly, count the total number of stitches on the needle (e.g. 64 stitches) and divide by the number of decreases to be made (e.g. 8) = 8. In this example, decrease by knitting each 7th and 8th stitch together. ------------------------------------------------------- START THE PIECE HERE: ------------------------------------------------------- MITTENS - SHORT OVERVIEW OF THE PIECE: The piece is worked in the round with double pointed needles. LEFT MITTEN: Cast on 64 stitches with double pointed needles size 2 mm and off white. Knit 1 round. Now work rib (knit 2, purl 2) until the piece measures 6 cm. Change to double pointed needles size 2.5 mm and work pattern A.1, AT THE SAME TIME as you decrease 8 stitches evenly on the first round in the diagram – read DECREASE TIP, = 56 stitches. REMEMBER THE KNITTING TENSION! When you have worked as far as the 3 black squares in A.1 work A.2 (= thumb) over these 3 squares (the other stitches are worked in A.1 as before). Increase in A.2 as shown in the diagram. When you have increased 6 times (there are now 15 stitches on the thumb gusset) work 1 round without increasing (as shown in A.2), then place the 15 thumb-stitches on 1 thread. Cast on 3 new stitches behind the stitches on the thread = 56 stitches. Continue working according to A.1. When you have worked as far as the round with an arrow in A.1 insert a marker thread after stitches 1 and 28 in A.1. Then decrease on each side of the marker threads as follows (= 4 stitches decreased on round): Decrease 1 stitch as follows before the marker thread: Knit 2 together. Decrease 1 stitch as follows after the marker thread: Slip 1 stitch as if to knit, knit 1 and pass the slipped stitch over the knitted stitch. After all the decreases there are 10 stitches left on the round. Cut the strand, pull it through the remaining stitches, pull tight and fasten well. THUMB: Place the 15 thumb-stitches back on double pointed needles size 2.5 mm. Knit up 9 stitches in the edge behind the thumb = 24 stitches. Continue in the round according to A.2. When you have worked as far as the arrow in A.2 insert a marker thread in the 11th stitch and the last stitch in A.2. Then decrease on each side of the stitches with marker threads as follows (= 4 stitches decreased on round): Decrease 1 stitch as follows before the stitch with marker thread: Knit 2 together. Decrease 1 stitch as follows after the stitch with marker thread: Slip 1 stitch as if to knit, knit 1 and pass the slipped stitch over the knitted stitch After all decreases there are 8 stitches left on needle. Cut the strand, pull it through the remaining stitches, pull tight and fasten well. RIGHT MITTEN: Cast on and work as for left mitten, but work A.3 instead of A.1. When you have worked as far as the round with an arrow in A.3 insert marker threads after the 26th stitch and after the next-to-last stitch in A.3. |
||||||||||||||||||||||||||||
Diagram explanations |
||||||||||||||||||||||||||||
|
||||||||||||||||||||||||||||
 |
||||||||||||||||||||||||||||
 |
||||||||||||||||||||||||||||
 |
||||||||||||||||||||||||||||
Have you finished this pattern?Tag your pictures with #dropspattern #talvikmittens or submit them to the #dropsfan gallery. Do you need help with this pattern?You'll find 20 tutorial videos, a Comments/Questions area and more by visiting the pattern on garnstudio.com. © 1982-2026 DROPS Design A/S. We reserve all rights. This document, including all its sub-sections, has copyrights. Read more about what you can do with our patterns at the bottom of each pattern on our site. |
||||||||||||||||||||||||||||


With over 40 years in knitting and crochet design, DROPS Design offers one of the most extensive collections of free patterns on the internet - translated to 17 languages. As of today we count 324 catalogues and 12290 patterns translated into English (UK/cm). 12290
We work hard to bring you the best knitting and crochet have to offer, inspiration and advice as well as great quality yarns at incredible prices! Would you like to use our patterns for other than personal use? You can read what you are allowed to do in the Copyright text at the bottom of all our patterns. Happy crafting!
Post a comment to pattern DROPS 197-12
We would love to hear what you have to say about this pattern!
If you want to leave a question, please make sure you select the correct category in the form below, to speed up the answering process. Required fields are marked *.