
Popular categories
Looking for a yarn?


Comments / Questions (3)
![]() Julia wrote:
Julia wrote:
Bonjour, j'ai un petit problème pour réaliser les épaules, vous dites de mettre en attendre deux mailles chaque côté en attente, jusque là, pas de soucis. Mais vous inscrivez qu'il reste 7 mailles pour le col, hors 19m-4m, ca m'en fait 15, je rabats 4m de chaque côté ? Merci de votre reponse
17.11.2019 - 06:49DROPS Design answered:
Bonjour Julia, les explications ont été corrigées, on doit mettre en attente pour les épaules les 5-6-6-6-6 m de chaque côté, vous aviez 17 m (après 1 m rabattu pour les emmanchures de chaque côté) - 5 m de chaque côté en attente = il reste 7 m. Bon tricot!
18.11.2019 - 10:10
![]() Gurli Lis Pedersen wrote:
Gurli Lis Pedersen wrote:
Hvilken garn vil du anbefale mig at strikke, drops 91-25 i, som ikke fælder? Vh. Gurli Lis Pedersen.
10.07.2018 - 16:08DROPS Design answered:
Hei Gurli. Vienna tilhører garngruppe D. Det gjør også Melody, men om du vil ha et garn som ikke er «hårete» kan du strikke med 2 tråder av garn fra garngruppe B. For eksempel kan du strikke med 2 tråder Sky, eller 2 tråder eskimo. Du kan lese mer om alternative garn her. God fornøyelse
13.07.2018 - 10:48
![]() KERRY NANCE wrote:
KERRY NANCE wrote:
See comment below
05.11.2014 - 15:17
|
|||||||||||||
DROPS 91-25 |
|||||||||||||
|
|
|||||||||||||
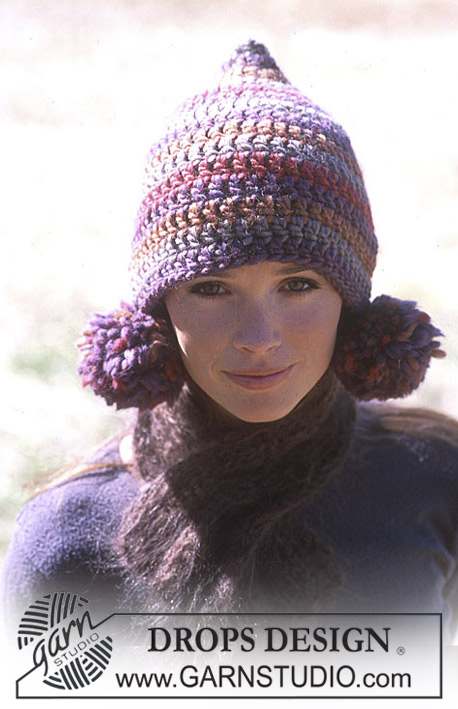
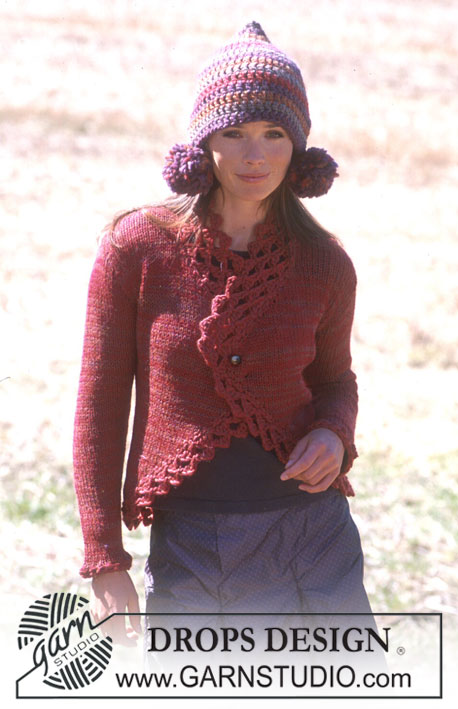
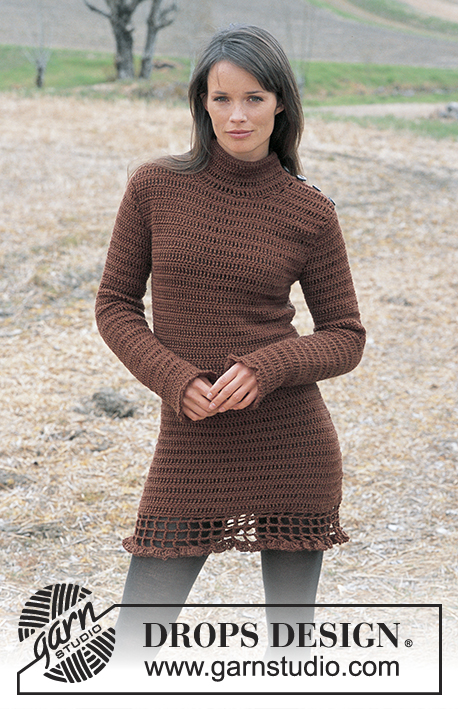
DROPS Loosely knitted dress in Vienna and crochet hat with pom-poms in Snow.
DROPS 91-25 |
|||||||||||||
|
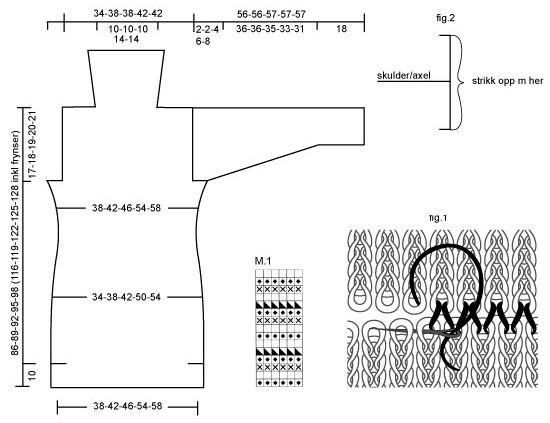
Knitting Gauge: 5 sts x 6 rows on needles size 20 mm in stocking sts. = 10 x 10 cm. Rib: *K3, P3*, repeat from *-* Decreasing tips (for the sides at the front and back piece and the sleeves): Do all dec. from the right side, inside of the 2 seam sts at the sides. Dec as follows after the 2 seam sts: Slip 1 st as if to K, K1, psso. Dec as follows before the 2 seam sts: K2 tog. Increasing tips (for the neck only): Inc as follows: K 2 in 1 st. Measurement tips: Do all the measures holding up your knitting, otherwise your garment may be too long. Front piece: Cast on 19-21-23-27-29 sts on 2 needles size 20 with Vienna (use 2 needles to make the edge more stretchy). Remove 1 needle and continue in stocking sts with 2 seam sts knitted in garter sts each side. Remember to check your knitting gauge! When the piece measures 20 cm attach the tassels along the bottom edge. This is done to give the correct weight in the dress when it is measured. Tassels: 1 tassel = 2 threads of Vienna + 3 threads of Snow (= 5 threads) each 60 cm long. Fold the threads in half and pull the folded end through the outer st. of 1 side of the bottom edge of the dress making a loop. Pull the ends through the loop. Attach another tassel at the other side and then distribute the rest of the tassels evenly along the bottom edge (approx. 6 cm space in between). When the piece measures 40 cm – read measurement tips – bind off 1 st at each side – see decreasing tips = 17-19-21-25-27 sts. When the piece measures 60 cm inc. 1 st at each side inside the seam sts as follows: Pick up 1 st from the previous row and K it = 19-21-23-27-29 sts. When the piece measures 69-71-73-75-77 cm bind off 1-1-2-3-4 sts each side for armhole. When the piece measures 86-89-92-95-98 cm put the outer most 5-6-6-6-6 sts at each side on a thread for shoulder = 7-7-7-9-9 sts left (= neck) Neck: Continue in stocking sts with 2 sts of garter sts each side – at the same time inc. 3-3-4-4-4 sts evenly on the first row – see inc. tips. NB: Do not increase over the 2 garter sts each side. Continue to inc. on every other row as follows: 4-4-4-4-5 sts 1 time, 3 sts 1 time = 17-17-18-20-21 sts. Continue until the neck measures 30-32-32-34-34 cm, then K 1 row from the wrong side and bind off loosely. To make sure the edge doesn't become too tight, make a yo after each 3rd st (the yo’s are knitted and bound off as sts). Back piece: Cast on and knit as front piece (remember the tassels), but bind off 1 st at each side when the piece measures 30 cm and inc. 1 st at each side when the piece measures 50 cm. Bind off for armhole and continue until finished measurements as for the front piece. Assembly: Sew the shoulder seams tog. with invisible sts – see fig.1. Sleeve: Pick up sts around the armhole and knit the sleeve from top to bottom – see fig. Pick up 17-18-19-20-21 sts loosely on needle size 20 with Vienna. (do not pick up any sts on the 1-1-2-3-4 sts bound off for the armhole on the front and back piece). Knit in stocking sts. When the sleeve measures 2-2-4-6-8 cm insert a marking thread at each side (marks where the sleeve has to be attached to the front and back piece) – all measurements are now done from this point onward. Continue in stocking sts with 2 seam sts each side in garter sts. At the same time when the piece measures 2-2-2-5-3 cm bind off 1 st at one side – see decreasing tips. When the piece measures 9-9-8.5-9-7 cm bind off 1 st at the other side. Continue to bind off one side at a time a total of 2-2-2-3-3 times on every 7-7-6.5-4-4 cm (= 14-14-13-8-8 cm in between the decreases on both sides) = 11-12-13-12-13 sts. Continue in stocking sts until the piece measures 54-54-53-51-49 cm and bind off loosely. To make sure the edge will not be too tight, make a yo after each 3rd st (the yo’s are knitted and bound off as sts). Further assembly: Sew the neck together in the outer part of the most outer st, but at one side only sew up 8 cm so there will be a slit. Sew the side seams tog. in the outer part of the most outer sts until 10 cm is left at the bottom part of the front and back piece (=slit) – make sure the seam is not too tight. Sew the sleeve tog. up to the marking thread – sew in the outer part of the most outer sts - and sew the sleeve to the back and front piece where you bound off for armhole. Make sure the marking thread on the sleeve fits to the side seam on the front and back so the seam is not too tight. Decoration buttons: Crochet on hook side 6 with Snow as follows: 2 ch, crochet 5 dc in the 1st ch crochet and finish with a sl st in the 1st dc (=1st round). 2nd round: 1 ch, 2 dc in each dc and finish with a sl st in the 1st dc from beginning off round. 3rd round: 1 ch, 1 dc in each dc and finish with a sl st in the 1st dc from beginning off round. 4th round: 1 ch, 1 dc in every other dc and finish with a sl st in the 1st dc from beginning off round. Sew around the opening of the flower and pull tog – do not attach a button, as the flower would otherwise be too heavy. Make one more and sew them on to the neck. Hat: Size: one-size Materials: Snow 50 g colour no. 23, dark beige 50 g colour no. 32, dark lilac mix 50 g colour no. 33, red mix 50 g colour no. 34, rust mix Drops crochet hook size 7 Crochet Gauge: 9 tr x 6.5 rows on hook size 7 = 10 x 10 cm. Crochet info: Replace the 1st tr on each round with 3 ch. Finish each round with a sl st in the 3rd ch from beginning of row. Stripes: See diagram M.1. 1 row in diagram equals 1 round on hat. Hat: Crochet 3 ch. on hook size 7, in Snow 23-dark beige and form a ring with a sl st. Continue to crochet as described below – at the same time making stripes as described in M.1 1st row: Crochet 8 tr in loop. 2nd row: *1 tr in the 1st tr, 2 tr in next tr* repeat from *-* = 12 tr 3rd row: *1 tr in the 1st tr, 2 tr in next tr* repeat from *-* = 18 tr 4th row: *1 tr in the first 2 tr, 2 tr in next tr* repeat from *-* = 24tr 5th row: *1 tr in the first 3 tr, 2 tr in next tr* repeat from *-* = 30tr 6th row: *1 tr in the first 2 tr, 2 tr in next tr* repeat from *-* = 40tr 7th row; *1 tr in the next 4 tr, 2 tr in next tr* repeat from *-* = 48tr Continue to crochet 1 tr in each tr until M.1 is finished. The hat now measures approx. 23 cm from the top Pom-poms: Make 2 big pom-poms with Snow yarn in 32 dark purple-mixac mix, 33 red-mix and 34 rust-mix. The pom-poms should be 8-9 cm in diameter. Attach the pom-poms to the hat at the edge on each side (see picture). |
|||||||||||||
Diagram explanations |
|||||||||||||
|
|||||||||||||
 |
|||||||||||||
Have you finished this pattern?Tag your pictures with #dropspattern or submit them to the #dropsfan gallery. Do you need help with this pattern?You'll find 26 tutorial videos, a Comments/Questions area and more by visiting the pattern on garnstudio.com. © 1982-2026 DROPS Design A/S. We reserve all rights. This document, including all its sub-sections, has copyrights. Read more about what you can do with our patterns at the bottom of each pattern on our site. |
|||||||||||||


With over 40 years in knitting and crochet design, DROPS Design offers one of the most extensive collections of free patterns on the internet - translated to 17 languages. As of today we count 324 catalogues and 12290 patterns translated into English (UK/cm). 12290
We work hard to bring you the best knitting and crochet have to offer, inspiration and advice as well as great quality yarns at incredible prices! Would you like to use our patterns for other than personal use? You can read what you are allowed to do in the Copyright text at the bottom of all our patterns. Happy crafting!
Post a comment to pattern DROPS 91-25
We would love to hear what you have to say about this pattern!
If you want to leave a question, please make sure you select the correct category in the form below, to speed up the answering process. Required fields are marked *.