
Popular categories
Looking for a yarn?


Comments / Questions (29)
![]() Marianne wrote:
Marianne wrote:
Jag skulle vilja ha mönstret till modell bm-094 kan jag.få detta utskrivet på papper?
11.02.2026 - 17:23DROPS Design answered:
Hej Marianne, ja, du kan spørge i butikken hvor du køber garnet om du kan få dem til at skrive en opskrift ud, eller så kan de hjælpe dig på biblioteket :)
12.02.2026 - 10:08
![]() Monica wrote:
Monica wrote:
Hei, Jeg lurte på om jeg skulle strikke denne rundt etter vrangborden og dele den fra under armen. Tenkte da å strikke de 2 kantmaskene på hver side sammen etter vrangbordene, strikke rundt til arb. deles og felle 1m under hver arm og fortsette derfra frem og tilbake. Vil dette bli bra resultat eller hvordan ville dere løst dette? Monica
11.02.2026 - 07:46DROPS Design answered:
Hej Monica, det kan lade sig gøre, så det må du gerne. Men vi kan desværre ikke hjælpe dig med at skrive opskriften om :)
11.02.2026 - 14:48
![]() Anita wrote:
Anita wrote:
Ich hätte gerne eine Anleitung zu obigem Pullunder Drops 231-48.
25.09.2025 - 14:44
![]() Anne wrote:
Anne wrote:
Hvad betyder “parpinde” og hvor finder jeg dissse på jeres side? ☺️ Kan der ikke bruges rundpinde på hvor der skal bruges parpinde eller er det helt dumt? 🫣 Jeg er helt ny i strik, så derfor mit dumme spørgsmål.
22.04.2025 - 13:28DROPS Design answered:
Hej Anne. Det är denne pinde vi menar, men du kan också bruke rundpinde och sticka fram och tillbaka på den. Mvh DROPS Design
25.04.2025 - 10:55
![]() Perthuis wrote:
Perthuis wrote:
Bonjour,qu'entendez vous par diminutions : 2fois(taille S ) tous les 2 rangs sur l'endroit mentionné dans le bas de encolure V.????
27.02.2025 - 21:54DROPS Design answered:
Bonjour Mme Perthuis, diminuer tous les 2 rangs sur l'endroit correspond à diminuer tous les 4 rangs (1 rang de diminutions sur l'endroit, 3 rangs sans diminuer (1 sur l'envers, 1 sur l'endroit, 1 sur l'envers). Bon tricot!
28.02.2025 - 09:48
![]() Saleembo wrote:
Saleembo wrote:
Hi, pourriez vous m'expliquer dans le détail, pas à pas, comment tricoter le point fantaisie car je ne comprend pas le diagramme. d'avanve merci
27.01.2025 - 18:59DROPS Design answered:
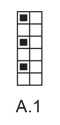
Bonjour Mme Saleembo, le diagramme A.1 consiste en des côtes 1 maille jersey, 1 maille point mousse, autrement dit, on va tricoter ainsi (1 m jersey = 1 ère maille de A.1, à tricoter à l'endroit sur l'endroit et à l'envers sur l'envers / 1 m point mousse = 2ème maille de A.1, à tricoter à l'endroit sur l'endroit et à l'endroit sur l'envers). Au 1er rang, tricotez (2 m end), au 2ème rang, on lit de gauche à droite et on tricote: (1 m end, 1 m env). Bon tricot!
28.01.2025 - 09:09
![]() Leonie Wellerdieck wrote:
Leonie Wellerdieck wrote:
Kunt u mij uitleggen hoe ik moet minderen voor de armsgaten. Ik begrijp de uitleg niet. Moet er aan de goede kant worden geminderd, eerst drie steken voor de eerste naald, en dan nog twee steken? En dit ook aan het einde van de naald? Kortom ik snap dit niet, nu ben ik ook een beginnende breier. Als ik de uitleg opvolg, dan hou ik geen steek over....
10.12.2024 - 21:42DROPS Design answered:
Dag Leonie,
Je kant steeds een het begin van elke naald af. Eerst kant je 3 steken af, dus op de eerste naald aan de goede kant 3 steken aan het begin afkanten en op de teruggaande naald aan de verkeerde ook 3 steken afkanten). Dit doe je 1-1-1-2-2 keer. Daarna kant je aan beide kanten 2 steken af en dit doe je 1-1-2-2-4-4 keer. Tot slot kant je aan beide kanten 1 steek af en dit doe je 4-8-7-8-7-8 keer, maar dit doe op iedere 4e naald.
11.12.2024 - 08:42
![]() Billy wrote:
Billy wrote:
Hi, i have a question about the gauge guide, i don't see the recommended needle size for that gauge, is it 3.0mm or 2.5mm needle? sorry for my broke english T T.
18.11.2024 - 10:21DROPS Design answered:
Dear Billy, use needle size 3 mm for the gauge. Happy knitting!
18.11.2024 - 16:12
![]() Roussel wrote:
Roussel wrote:
Bonjour mon premier rang de cote se tricote est un rang endroit donc je tricote à l’endroit je ne comprends pas pourquoi il faut faire un rang envers sur l’envers au premier rang pouvez vous m’aider merci Cordialement
11.11.2024 - 19:43DROPS Design answered:
Bonjour Mme Roussel, dans ce modèle, on veut que le côté du montage sur l'endroit ne soit pas le 1er rang de l'ouvrage mais le 2ème, ainsi on tricote d'abord un rang envers sur l'envers avant de commencer les côtes, on obtient ainsi 1 rang jersey avant les côtes. Bon tricot!
12.11.2024 - 16:24
![]() Stéphanie K wrote:
Stéphanie K wrote:
Bonjour y a t il un moyen de tricoter ce pull avec une aiguille circulaire? Merci pour votre réponse
28.04.2024 - 14:30DROPS Design answered:
Bonjour Stéphanie, probablement, tricotez chaque partie séparément pendant 6 cm pour les fentes des côtés puis tricotez en rond jusqu'aux emmanchures (pensez bien à adapter la lecture du diagramme en conséquence) et terminez ensuite le devant et le dos séparément. Bon tricot!
29.04.2024 - 09:27
|
|||||||
Poetry Night#poetrynightslipover |
|||||||
 |
 |
||||||
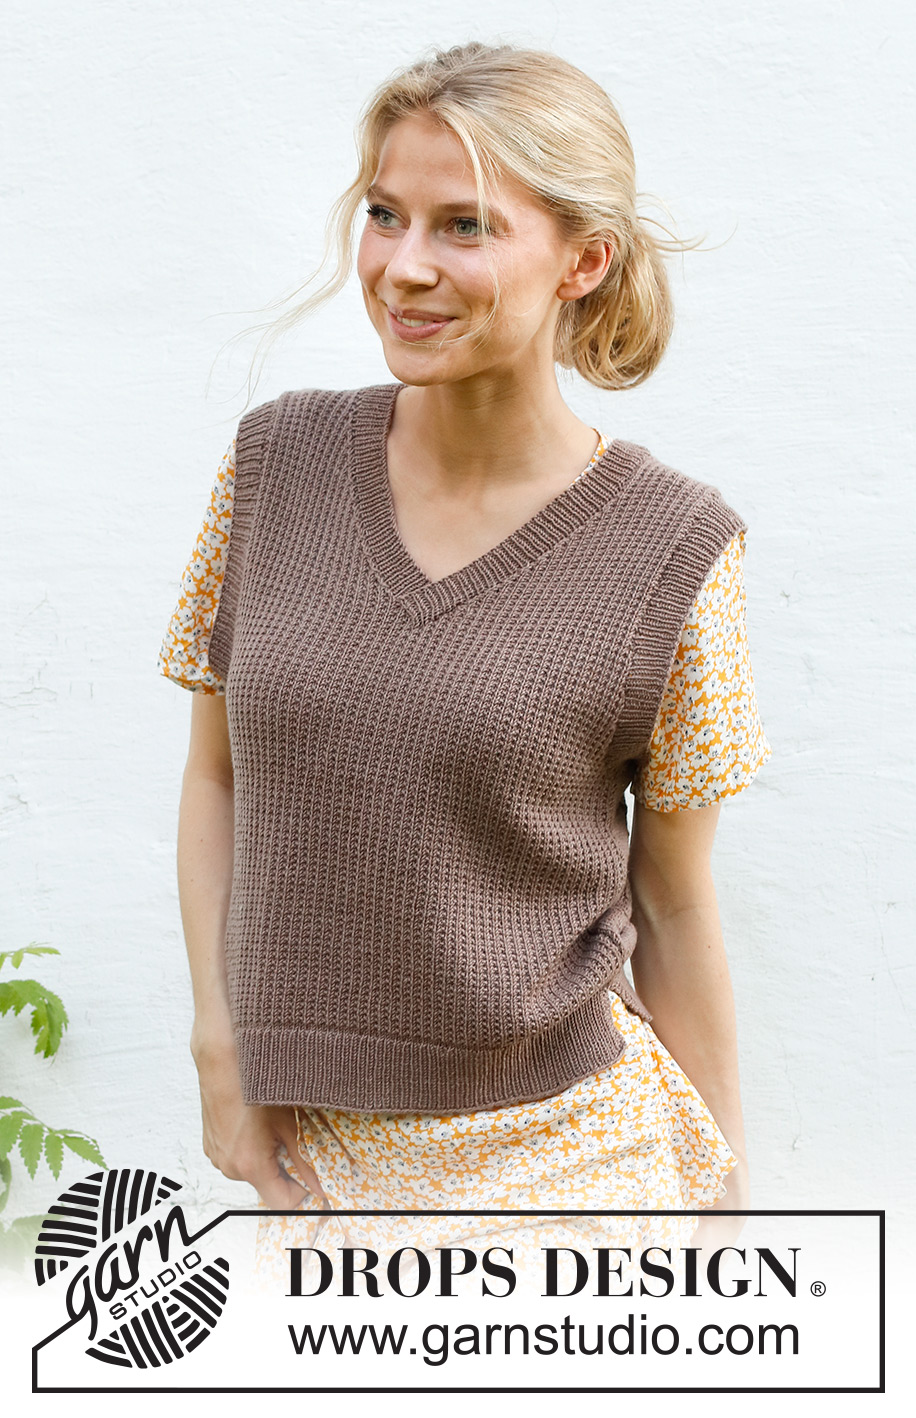
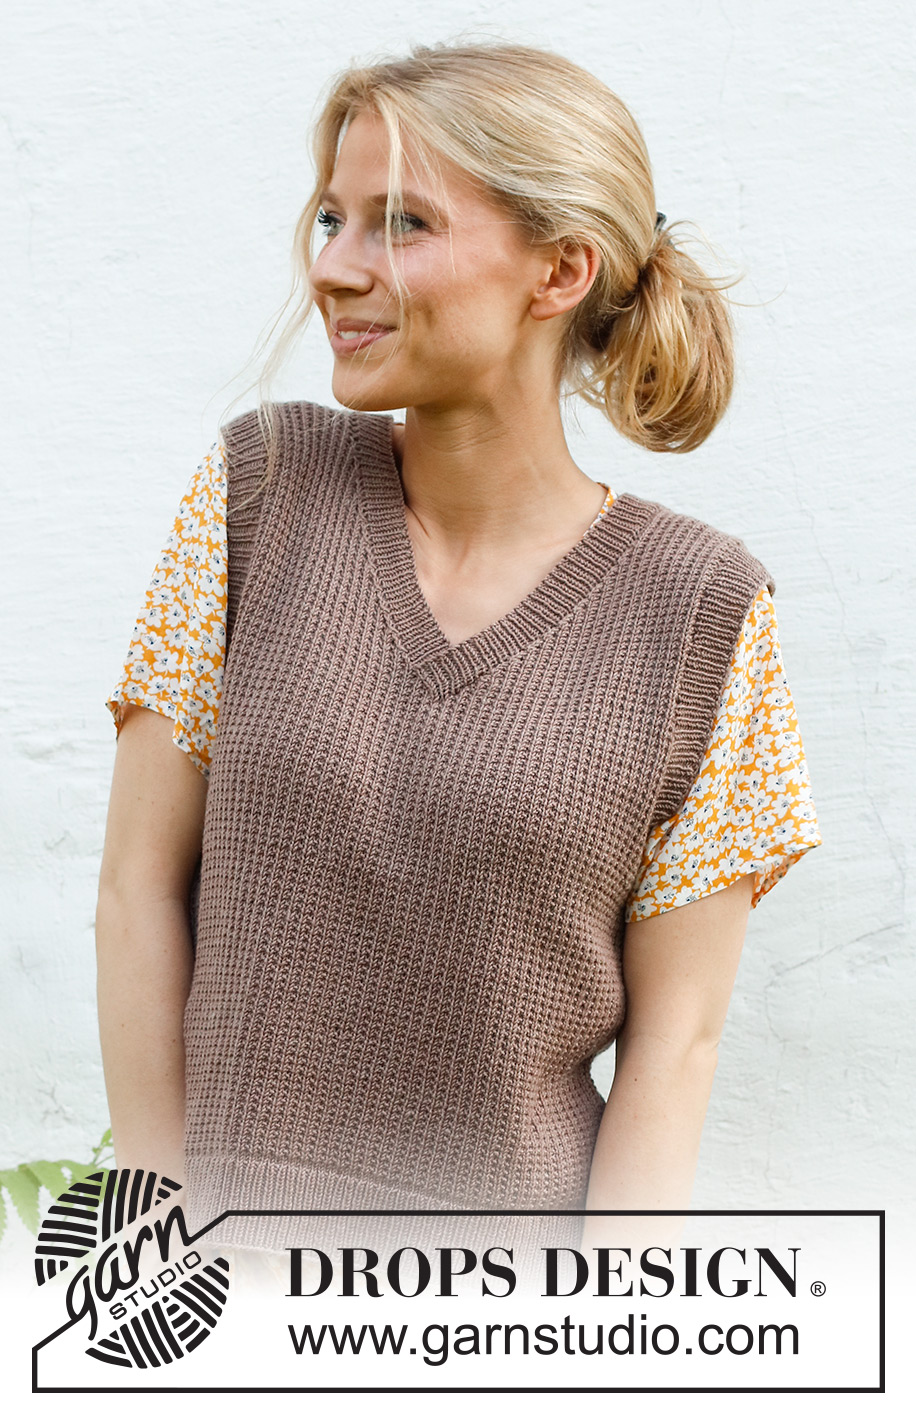
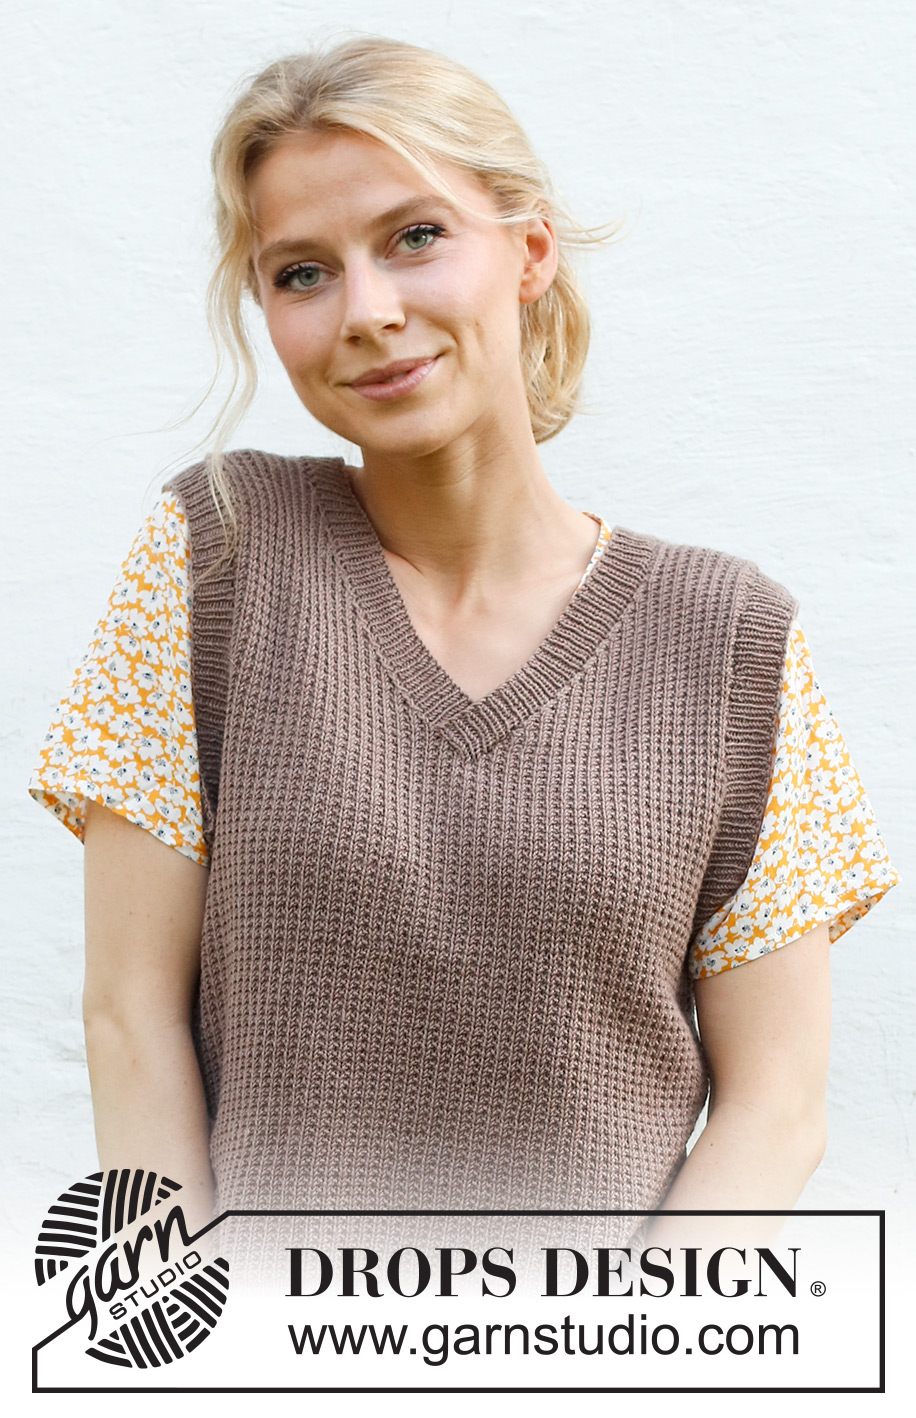
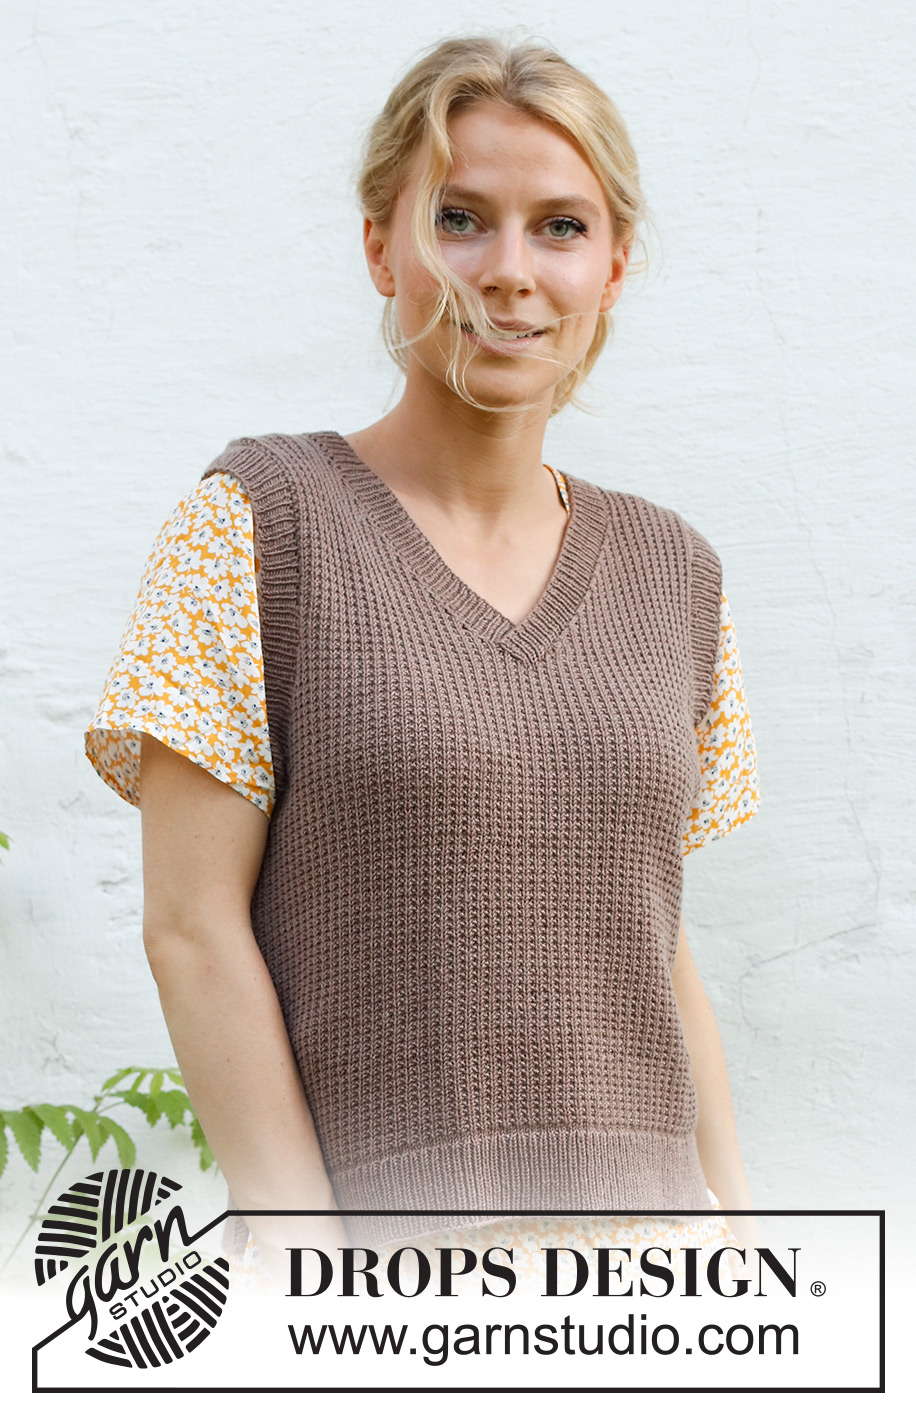
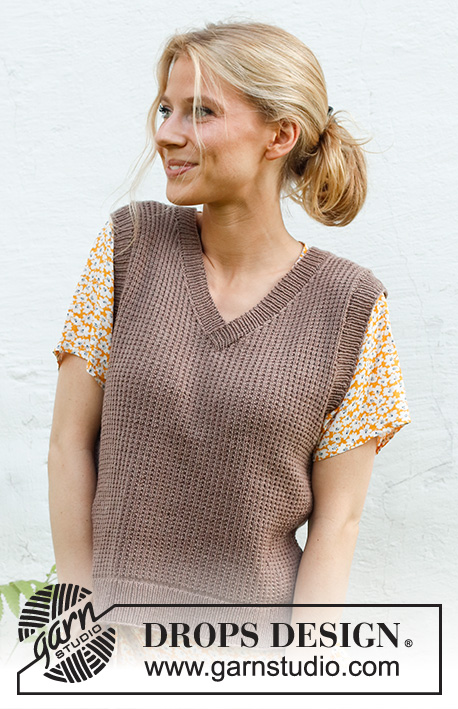
Knitted vest in DROPS BabyMerino. The piece is worked bottom up with relief-pattern, V-neck and split in the sides. Sizes XS - XXL.
DROPS 231-48 |
|||||||
|
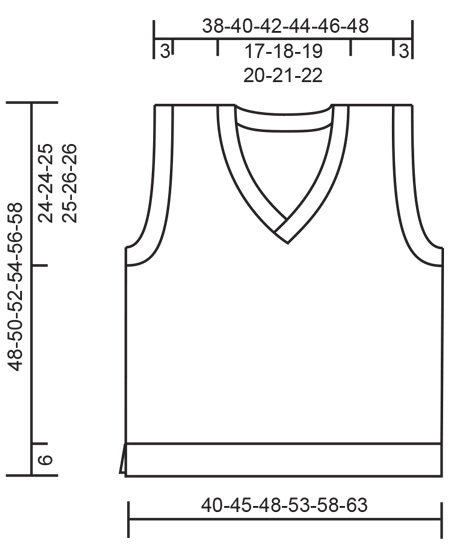
------------------------------------------------------- EXPLANATIONS FOR THE PATTERN: ------------------------------------------------------- RIDGE/GARTER STITCH (worked back and forth): Knit all rows. 1 ridge = knit 2 rows. PATTERN: See diagram A.1. The diagram shows all rows in the pattern from the right side. DECREASE TIP (for V-neck): All decreases are worked from the right side! DECREASE 1 STITCH AT BEGINNING OF ROW (from right side): 1 edge stitch in garter stitch, slip 1 stitch as if to knit, knit 1 and pass the slipped stitch over the knitted stitch, work to end of row. DECREASE 1 STITCH AT END OF ROW (from right side): Work until there are 3 stitches left, knit 2 together, 1 edge stitch in garter stitch. ------------------------------------------------------- START THE PIECE HERE: ------------------------------------------------------- VEST – SHORT OVERVIEW OF THE PIECE: The back and front pieces are worked separately, back and forth and bottom up. The piece is sewn together and the neck and sleeve-edges are worked to finish. BACK PIECE: Cast on 115-129-139-153-167-181 stitches with circular needle size 2.5 mm and DROPS Baby Merino. Purl 1 row from the wrong side. Work the next row from the right side as follows: 3 stitches in garter stitch, * knit 1, purl 1 *, work from *-* until there are 4 stitches left, knit 1 and 3 stitches in garter stitch. Continue this rib back and forth for 6 cm. Knit 1 row from the right side where you decrease 20-22-24-26-28-30 stitches evenly spaced = 95-107-115-127-139-151 stitches. Change to needle size 3 mm. Purl 1 row from the wrong side with 1 edge stitch in garter stitch on each side. Work the next row from the right side as follows: 1 edge stitch in garter stitch, work A.1 until there are 2 stitches left, work the first stitch in A.1 so the pattern is symmetrical, and 1 edge stitch in garter stitch. Continue this pattern back and forth. When the piece measures 24-26-27-29-31-32 cm, cast off for the armholes every 2nd row as follows: 3 stitches 1-1-1-2-2-3 times and 2 stitches 1-1-2-2-4-4 times on each side. Then cast off 1 stitch every 4th row 4-8-7-8-7-8 times on each side = 77-81-87-91-97-101 stitches. Continue working until the piece measures 45-47-49-51-53-55 cm. On the next row cast off the middle 37-39-41-43-47-49 stitches for the neck and finish each shoulder separately. Continue as before and cast off 2 stitches on the next row from the neck = 18-19-21-22-23-24 stitches on the shoulder. Continue working until the piece measures 48-50-52-54-56-58 cm. Cast off. Work the other shoulder in the same way. FRONT PIECE: Cast on and work in the same way as the back until the front piece measures 24-26-27-29-30-32 cm. Insert 1 marker in the middle stitch on the row (a knitted stitch seen from the right side). You will now cast off for the armholes and later decrease for the V-neck. Read ARMHOLES and V-NECK before continuing. ARMHOLES: Cast off for the armholes every 2nd row: 3 stitches 1-1-1-2-2-3 times and 2 stitches 1-1-2-2-4-4 times on each side. Then cast off 1 stitch every 4th row 4-8-7-8-7-8 times on each side. V-NECK: AT THE SAME TIME when the piece measures 30-32-33-35-36-38 cm, cast off the middle stitch as follows, working from the right side: Work as far as the marker-stitch and place the worked stitches on an extra needle (Part-1), cast off the marker-stitch, work to end of row as before (Part-2). Work the stitches in Part-2 as before and decrease for the neck at the beginning of each row from the right side 18-19-20-20-22-23 times – read DECREASE TIP. Then decrease every 2nd row from the right side 2-2-2-3-3-3 times. After all the decreases for the armhole and neck there are 18-19-21-22-23-24 stitches on the shoulder. Continue working until the piece measures 48-50-52-54-56-58 cm from the cast-on edge. Cast off. PART-1: Place the stitches from Part-1 on needle size 3 mm. Continue the pattern back and forth, casting off and decreasing for the armhole and neck in the same way as in Part-2 but work the decreases for the neck at the end of each row from the right side. After all the cast off for the armhole and decreases for neck there are 18-19-21-22-23-24 stitches on the shoulder. Continue working until the piece measures 48-50-52-54-56-58 cm from the cast-on edge. Cast off. ASSEMBLY: Sew the shoulder seams. Sew the side seams in the outermost loop of the outermost stitch. Start under the armhole and work down, leaving a split of 6 cm at the bottom. NECK: The neck is worked back and forth with circular needle. Start from the right side at the bottom of the V-neck, from the right side and knit up inside the 1 edge stitch approx. 138-140-148-150-158-162 stitches around the neck with circular needle size 2.5 mm – start and finish mid-front. Purl 1 row from the wrong side where you increase evenly to 159-161-171-173-181-185 stitches (number must be divisible by 2 + 1). Work the next row from the right side: 1 edge stitch in garter stitch, * knit 1, purl 1 *, work from *-* until there are 2 stitches left, knit 1, 1 edge stitch in garter stitch. Continue this rib back and forth for 3 cm. Cast off a little loosely. Lay one side of the neck on top of the other mid-front – see photo, and sew together. SLEEVE-EDGES: Start from the right side at the bottom of the armhole and knit up inside the 1 edge stitch approx. 124-124-130-130-136-136 stitches around the armhole, using short circular needle size 2.5 mm. Knit 1 round where you increase evenly to 144-144-150-150-156-156 stitches (number must be divisible by 2). Work rib in the round (knit 1, purl 1) for 3 cm. Cast off a little loosely. Work the other sleeve-edge in the same way. |
|||||||
Diagram explanations |
|||||||
|
|||||||
 |
|||||||
 |
|||||||
Have you finished this pattern?Tag your pictures with #dropspattern #poetrynightslipover or submit them to the #dropsfan gallery. Do you need help with this pattern?You'll find 23 tutorial videos, a Comments/Questions area and more by visiting the pattern on garnstudio.com. © 1982-2026 DROPS Design A/S. We reserve all rights. This document, including all its sub-sections, has copyrights. Read more about what you can do with our patterns at the bottom of each pattern on our site. |
|||||||


With over 40 years in knitting and crochet design, DROPS Design offers one of the most extensive collections of free patterns on the internet - translated to 17 languages. As of today we count 324 catalogues and 12291 patterns translated into English (UK/cm). 12291
We work hard to bring you the best knitting and crochet have to offer, inspiration and advice as well as great quality yarns at incredible prices! Would you like to use our patterns for other than personal use? You can read what you are allowed to do in the Copyright text at the bottom of all our patterns. Happy crafting!
Post a comment to pattern DROPS 231-48
We would love to hear what you have to say about this pattern!
If you want to leave a question, please make sure you select the correct category in the form below, to speed up the answering process. Required fields are marked *.