Comments / Questions (18)
![]() Mia wrote:
Mia wrote:
En saa kaaviossa A1 koko L ensimmäisellä rivillä silmukkamäärää täsmäämään. Onko kaaviossa virhe? Voisiko tästä saada videon sivustolle?
31.01.2026 - 09:02
![]() Yolanda Maria Loggen wrote:
Yolanda Maria Loggen wrote:
Bij het breien van het lijf,moet ik voor de boord juist niet steken minderen? In de beschrijving staat dat er gemeerderd moet worden. Is dit juist?
24.02.2025 - 09:27DROPS Design answered:
Dag Yolanda,
Je meerdert inderdaad steken. Dit is om te voorkomen dat de boordsteek het werk samentrekt.
14.04.2025 - 07:00
![]() Yolanda Perez wrote:
Yolanda Perez wrote:
Waar begint m'n eerste naald bij mijn rondbreiwerk trui van boven naar beneden. Het gaat om een telpatroon. Waarbij een markeerdraad het middenvoor van het werk aanduid
29.01.2025 - 22:11DROPS Design answered:
Dag Yolanda,
Het begin van de naald is steeds waar je de toer begint en eindigt en dit is in dit geval midden achter.
19.02.2025 - 09:56
![]() Doris wrote:
Doris wrote:
Liebes Drops Team, gerade verzweifle ich weil die Maschen mit dem Muster nach den 13 Reihen A zum Weiterstricken bis die 20 cm Höhe erreicht sind nicht aufgeht. Ich habe bei mir keinen Fehler entdeckt und auch das korrigierte Diagramm verwendet. Nach den 2 rechten Raglanmaschen müsste nach den Zunahmen jeweils das "Dreieck" (3 M) gestrickt werden, es sind aber nur 2 Maschen bei mir vorhanden. Was kann ich tun? Danke fürs Antworten.
21.10.2024 - 13:54DROPS Design answered:
Liebe Doris, wenn A.1 / A.2 fertig ist stricken Sie und nehmen Sie so zu: A.3A (5 ersten Maschen A.2), A.3B wiederholen bis 6 Maschen vom A.2 übrig sind und mit A.3C das Muster enden - das Muster sollte so schön anpassen. Viel Spaß beim Stricken!
21.10.2024 - 15:59
![]() Tove Morskogen wrote:
Tove Morskogen wrote:
Hei.Jeg finner ikke rettelsen til mønstret.Har prøvd å strikke,men mønstret går ikke opp.Er det mulig å få tilsendt riktig mønster? Mvh.Tove Morskogen
15.03.2024 - 11:25DROPS Design answered:
Hej Tove, jo det er de nye diagrammer som ligger her på nettet :)
19.03.2024 - 11:01
![]() Monique wrote:
Monique wrote:
Hallo,ich soll für Grösse M A3 13 mal in der Höhe stricken bevor ich die Ärmel abteile? Das ist doch viel zu oft?
21.12.2023 - 20:16DROPS Design answered:
Liebe Monique, in M muss man 13 Mal in der Höhe zunehmen, dh 13 Mal in jeder 2. Runde = 26 Runden mit 8 Zunahmen in jeder 2. Runde: 76 Maschen + (13 Mal 8 Zunahmen) = 180 Maschen. Viel Spaß beim stricken!
22.12.2023 - 08:30
![]() Jeanine HO-YOU- FAT wrote:
Jeanine HO-YOU- FAT wrote:
Sur le modèle 195-36 Je ne comprends pas la marche à suivre au niveau des diagrammes. Pouvez vous m éclairer ?
03.12.2022 - 21:39DROPS Design answered:
Bonjour Mme Ho-You-Fat, parlez-vous de ce châle? Peut-être que cette leçon est alors celle qu'il vous faut pour comprendre comment lire les diagrammes; n'hésitez pas à préciser votre question en la posant bien dans la rubrique de ce modèle. Bon tricot!
06.12.2022 - 09:04
![]() Heiða wrote:
Heiða wrote:
Hæ hæ ég er alls ekki að skilja hvað eg á að gera þegar ég er búin með útaukningu og kominn með 180 lykkjur og er í munstri 3a sem sagt hvaða línur af munstrinu á eg að nota fyrir restina af peysunni þannig að ég auki ekki endalaust út kv Heiða
28.11.2022 - 01:44DROPS Design answered:
Blessuð Heiða. Þú prjónar án útaukningar (heldur áfram með með mynstur eins og A.3B). Gangi þér vel.
06.01.2023 - 10:25
![]() Ann wrote:
Ann wrote:
Hej. Med hänvisning till denna del i beskrivningen (ÄRM): "Sticka utan ökningar (fortsätt med mönster som förut) till arbetet mäter 18-20-21-23-25-27 cm från markören mitt fram. " Jag är nybörjare inom stickning och förstår inte riktigt hur jag ska sticka mönstret utan ökningar då ökningar är intecknade i mönstret. Tacksam för hjälp.
13.07.2022 - 10:06DROPS Design answered:
Hej Ann. Du fortsätter då mönstret som du stickat tidigare, men utan ökningar, dvs utan de yttersta delarna av diagrammet. Se bara till att mönstret passar ihop med det du stickat innan. Mvh DROPS Design
13.07.2022 - 13:37
![]() Simone wrote:
Simone wrote:
Hi there, Thank you so much for providing all those beautiful patterns. If the pattern says: 11 stitches in width and 15 rows in height with stocking stitch and lace pattern = 10 x 10 cm. How do I know how many rows of stocking Stich I need and how many of the lace pattern? Thank you for your help, Simone
01.02.2022 - 09:39DROPS Design answered:
Dear Simone, if your swatch is correct in stocking stitch, then it should be correct also in the lace pattern - just make sure to keep same tension. Happy knitting!
01.02.2022 - 11:43
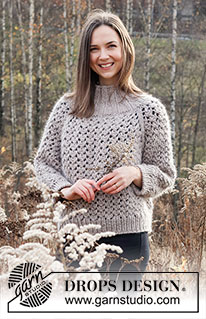
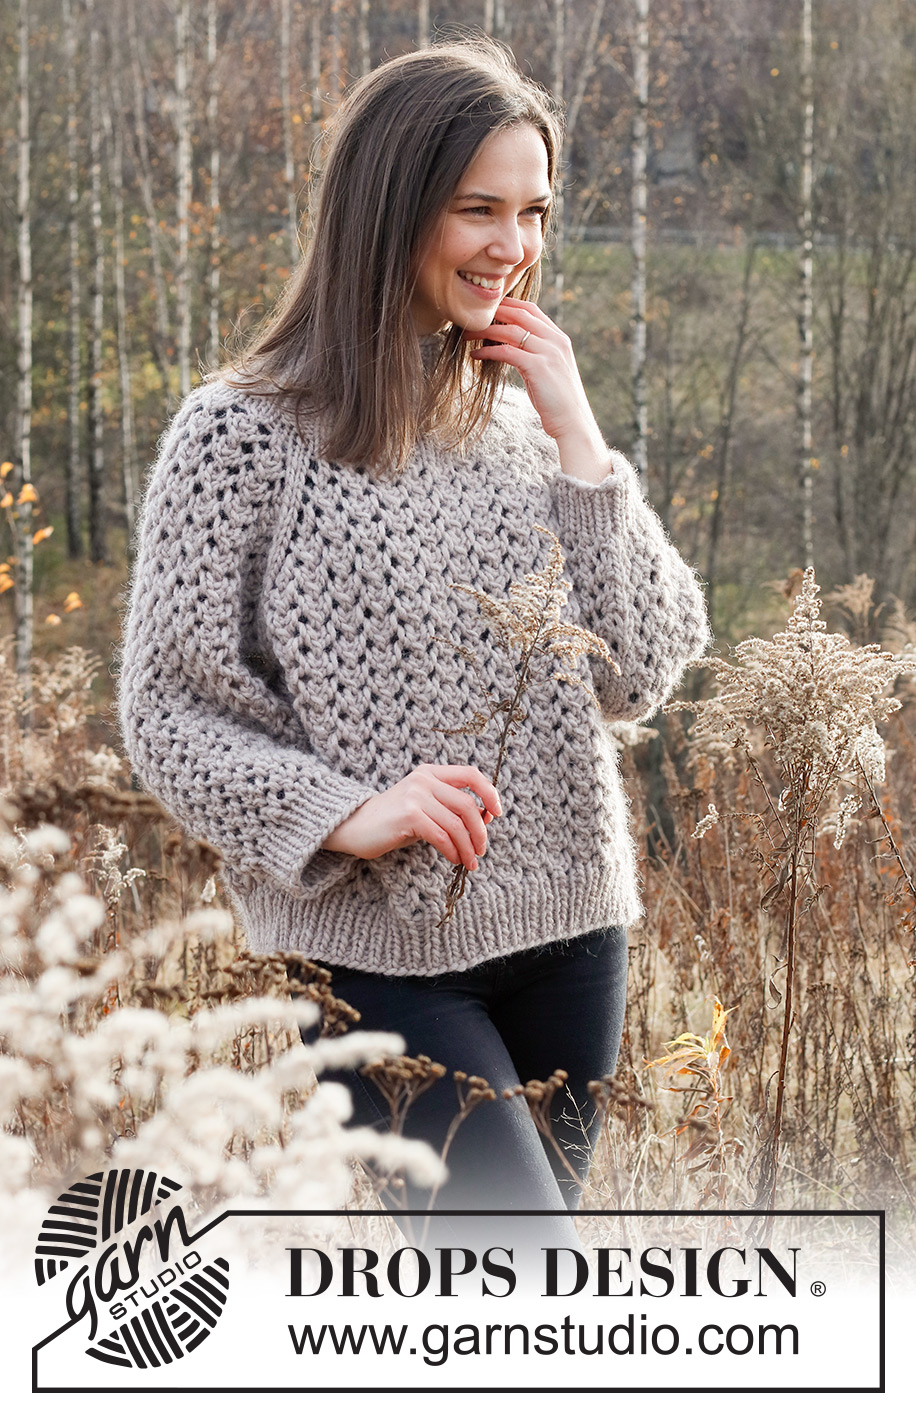
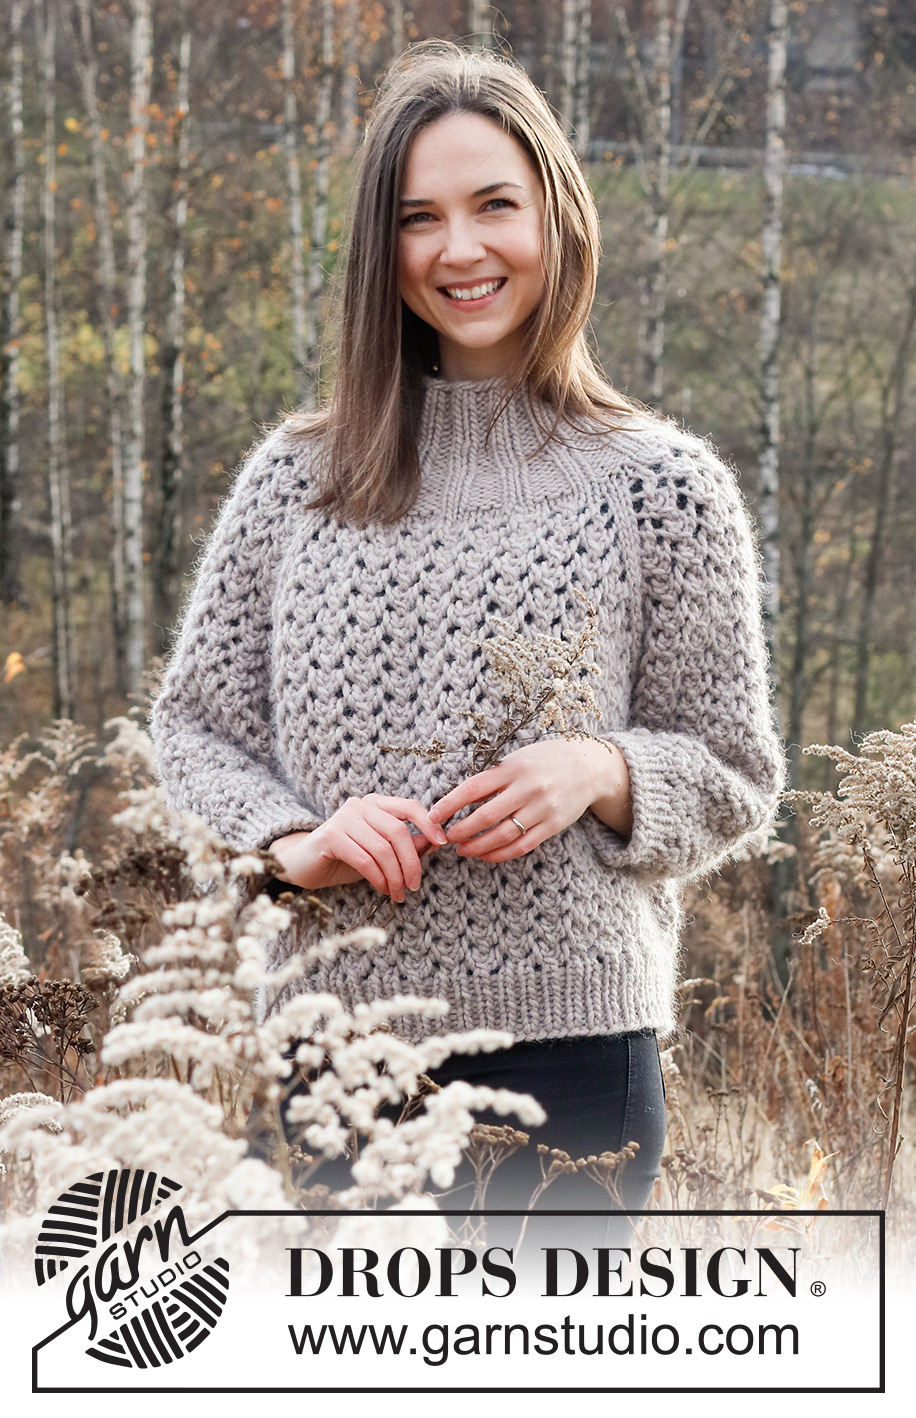
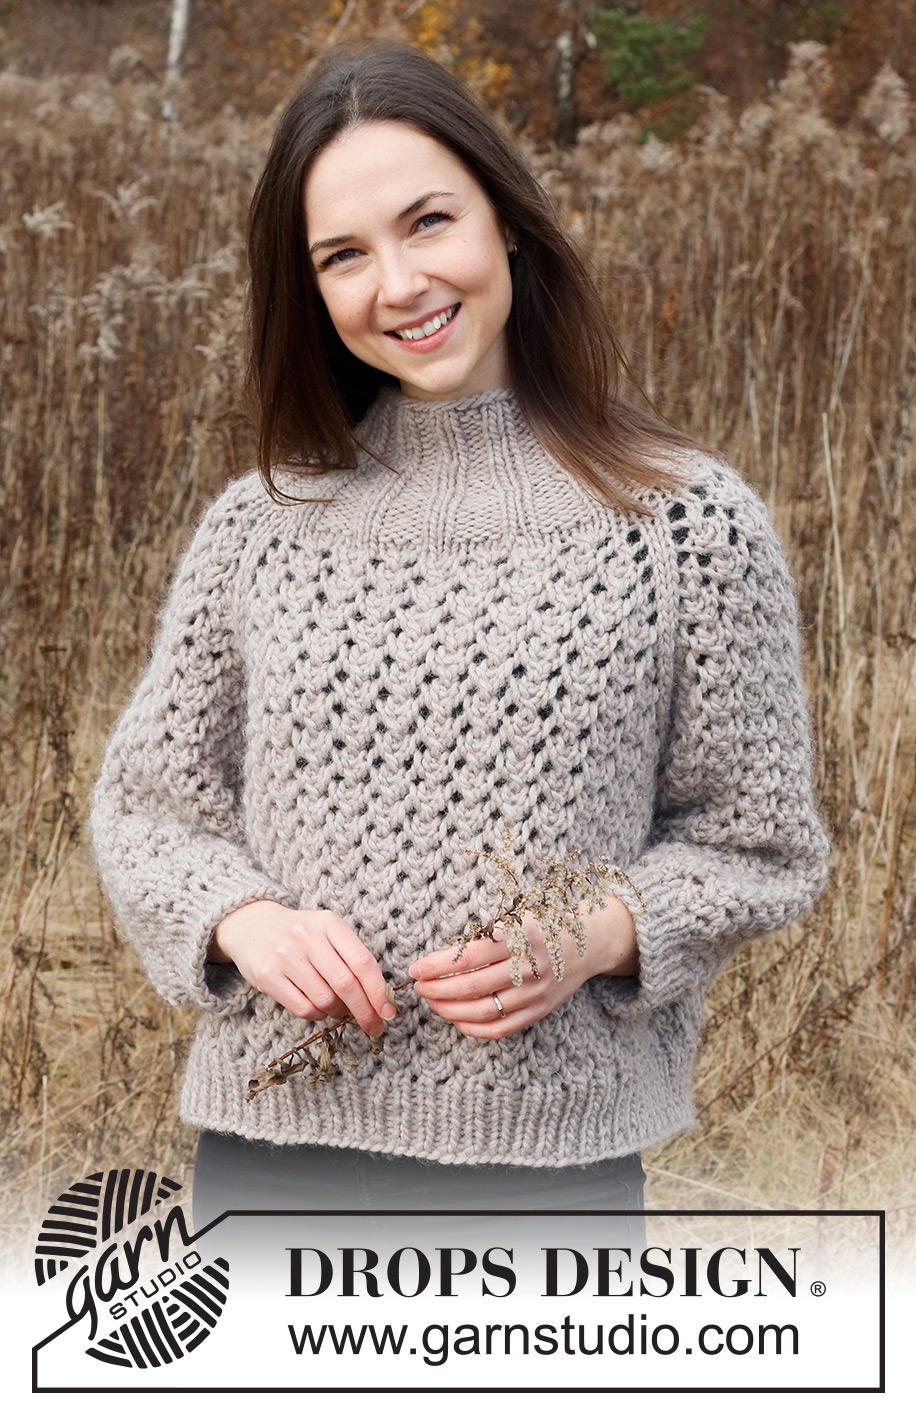
Rocky Shores Sweater#rockyshoressweater |
|||||||||||||||||||
 |
 |
||||||||||||||||||
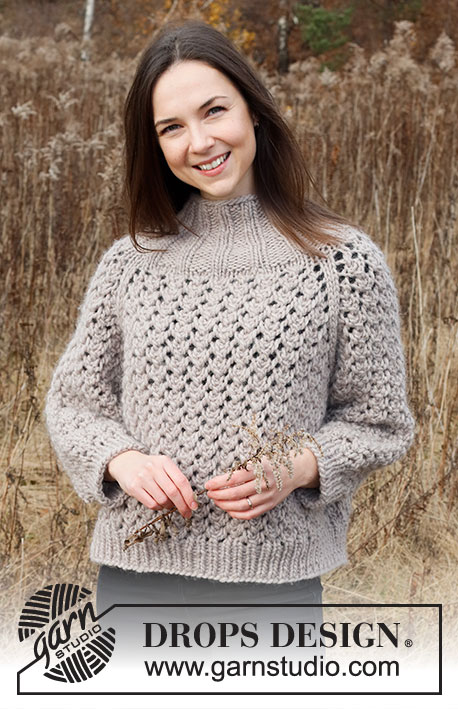
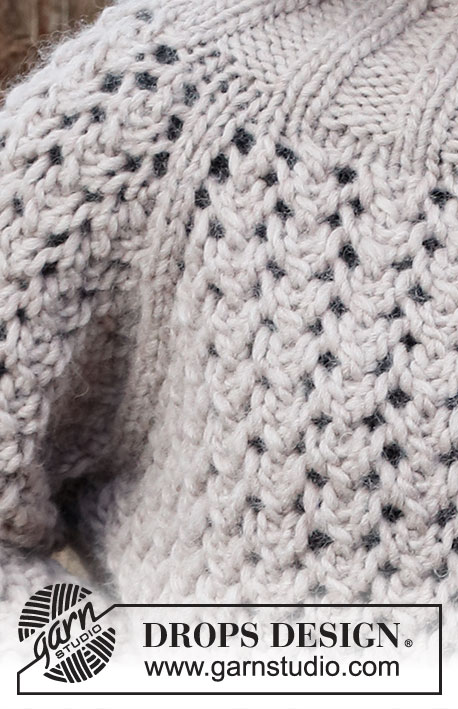
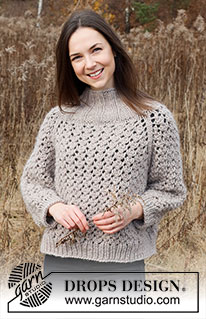
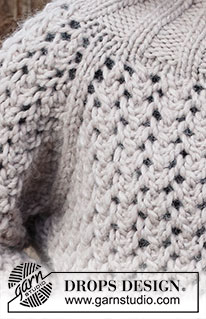
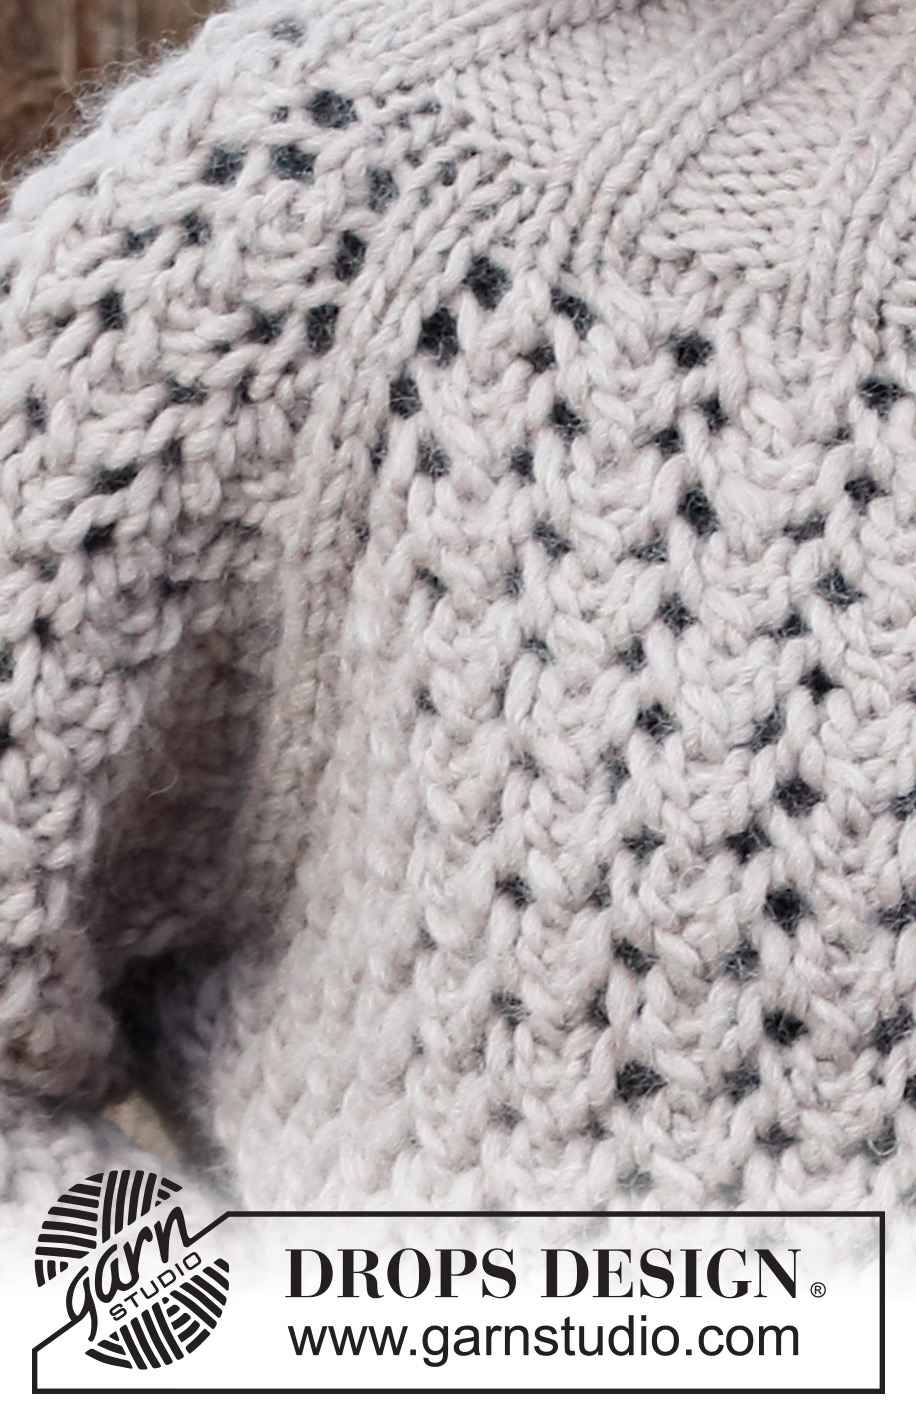
Knitted jumper in DROPS Snow or DROPS Wish. The piece is worked top down with raglan and lace pattern. Sizes S - XXXL.
DROPS 226-29 |
|||||||||||||||||||
|
------------------------------------------------------- EXPLANATIONS FOR THE PATTERN: ------------------------------------------------------- PATTERN: See diagrams A.1 to A.3. Choose diagram appropriate to your size in diagram A.1 INCREASE TIP (evenly spaced): To work out how to increase evenly, count the total number of stitches on the needle (e.g. 108 stitches) and divide by the number of increases to be made (e.g. 8) = 13.5. In this example, increase by making 1 yarn over after alternately each 13th and 14th stitch. On the next round work the yarn overs twisted to avoid holes. DECREASE TIP (for sleeves): Decrease 1 stitch on either side of the marker-stitch as follows: Work until there are 3 stitches left before the marker-stitch, knit 2 together, knit 3 (marker-stitch is the middle stitch), slip 1 stitch as if to knit, knit 1 and pass the slipped stitch over the knitted stitch (2 stitches decreased). CASTING-OFF TIP: To avoid the cast-off edge being tight you can cast off with a larger size needle. If the edge is still tight, make 1 yarn over after approx. each 8th stitch at the same time as casting off; the yarn overs are cast off as normal stitches. ------------------------------------------------------- START THE PIECE HERE: ------------------------------------------------------- JUMPER – SHORT OVERVIEW OF THE PIECE. The neck and yoke and body are worked in the round with circular needle, top down. The beginning of the round is in the transition between the left shoulder and the back piece. The sleeves are worked in the round with double pointed needles/short circular needle, top down. NECK: Cast on 60-60-60-68-68-68 stitches with circular needle size 7 mm and DROPS Snow or DROPS Wish. Knit 1 round. Then work rib in the round (knit 2, purl 2) for 8 cm. Now increase 1 stitch in each purled section by making 1 yarn over at the end of each purled section; on the next round work the yarn overs twisted to avoid holes = 75-75-75-85-85-85 stitches. Continue the new rib (knit 2, purl 3) for 4 cm. The rib is now 12 cm. Change to circular needle size 8 mm and knit 1 round where you increase 1-1-1-3-3-3 stitches evenly spaced = 76-76-76-88-88-88 stitches. Knit 2 rounds. Insert 1 marker in the middle of the round (= mid-front). THE PIECE IS NOW MEASURED FROM HERE! YOKE: The first round is worked as follows: A.1 (= 23-23-23-29-29-29 stitches on the back piece), work 2 stitches in stocking stitch (= raglan-line), A.2 (= 11 stitches on the sleeve), work 2 stitches in stocking stitch (= raglan-line), A.1 (= 23-23-23-29-29-29 stitches on the front piece), work 2 stitches in stocking stitch (= raglan-line), A.2 (= sleeve), work 2 stitches in stocking stitch (= raglan-line). You have increased 8 stitches; these increases are drawn into A.1 and A.2. When A.1 and A.2 have been completed in height, continue as follows: BACK AND FRONT PIECES: Work A.3A over the first 5-5-5-5-5-5 stitches, A.3B over the next 24-24-24-30-30-30 stitches (= 4-4-4-5-5-5 repeats of 6 stitches), finish with A.3C over the last 6-6-6-6-6-6 stitches. SLEEVES: Work A.3A over the first 5-5-5-5-5-5 stitches, A.3B over the next 12-12-12-12-12-12 stitches (= 2 repeats of 6 stitches), finish with A.3C over the last 6-6-6-6-6-6 stitches. Each time A.3 is worked 1 time in height, there is room for 2 more repeats of A.3B between A.3A and A.3C. Continue with A.3 until you have increased a total of 13-13-16-16-19-22 times. There are 180-180-204-216-240-264 stitches. REMEMBER THE KNITTING TENSION! Continue working without further increases (continue pattern as shown in A.3B) until the piece measures 18-20-21-23-25-27 cm from the marker on the neck. Now divide the piece for the body and sleeves and finish each piece separately. Work the next round as follows: Work 49-49-55-61-67-73 stitches as before (= back piece), place the next 41-41-47-47-53-59 stitches on 1 thread for the sleeve, cast on 5 new stitches (= in side under sleeve), work 49-49-55-61-67-73 stitches as before (= front piece), place the next 41-41-47-47-53-59 stitches on 1 thread for the sleeve, cast on 5 new stitches (= in side under sleeve). THE PIECE IS NOW MEASURED FROM HERE! BODY: = 108-108-120-132-144-156 stitches. Continue the pattern as before. When the piece measures 24-24-25-25-25-25 cm knit 1 round where you increase 8 stitches evenly spaced – remember INCREASE TIP = 116-116-128-140-152-164 stitches. Change to circular needle size 7 mm and work rib (knit 1, purl 1) for 6 cm. Loosely cast off with knit over knit and purl over purl – read CASTING-OFF TIP. The jumper measures 52-54-56-58-60-62 cm from the shoulder down. SLEEVES: Place the 41-41-47-47-53-59 stitches from the thread on the one side of the piece on double pointed needles/short circular needle size 8 mm and knit up 1 stitch in each of the 5 stitches cast on under the sleeve = 46-46-52-52-58-64 stitches. Insert a marker in the middle of the 5 stitches under the sleeve and start the round here. Continue the pattern in the round, but without further increases – make sure the pattern matches the stitches on the yoke – NOTE! The stitches which do not fit into the pattern under the sleeve are worked in stocking stitch. When the sleeve measures 4 cm, decrease 1 stitch on each side of the marker-stitch – read DECREASE TIP. Decrease like this every 5½-5½-4½-4-3-2½ cm a total of 6-6-7-7-8-10 times = 34-34-38-38-42-44 stitches. Continue working until the sleeve measures 37-36-36-33-32-31 cm from the division (or to desired length; there is approx. 6 cm left to finished length). Change to double pointed needles size 7 mm and work rib (knit 1, purl 1) for 6 cm. Loosely cast off with knit over knit and purl over purl. The sleeve measures approx. 43-42-42-39-38-37 cm from the division. Work the other sleeve in the same way. |
|||||||||||||||||||
Diagram explanations |
|||||||||||||||||||
|
|||||||||||||||||||
 |
|||||||||||||||||||
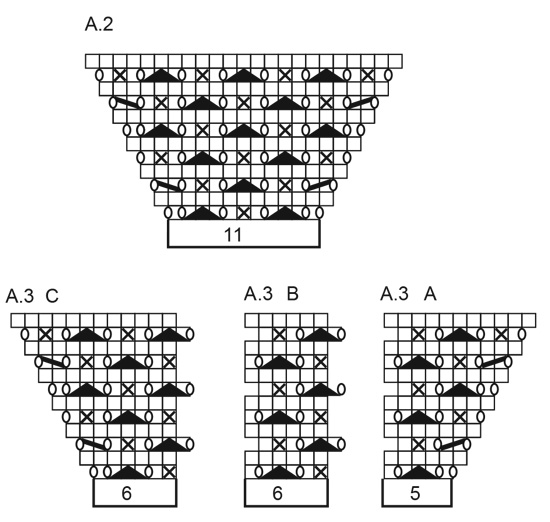 |
|||||||||||||||||||
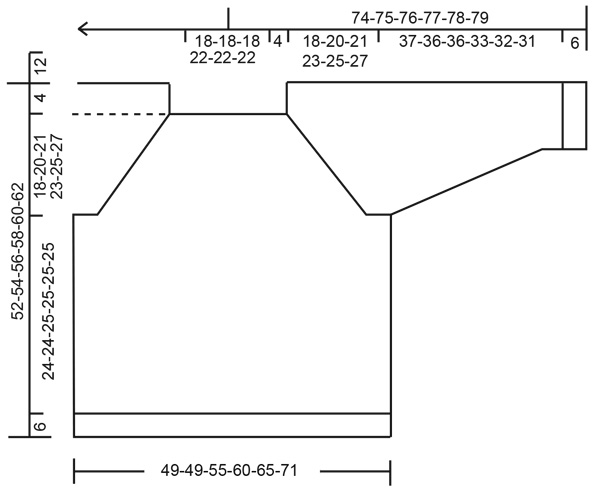 |
|||||||||||||||||||
Have you finished this pattern?Tag your pictures with #dropspattern #rockyshoressweater or submit them to the #dropsfan gallery. Do you need help with this pattern?You'll find 27 tutorial videos, a Comments/Questions area and more by visiting the pattern on garnstudio.com. © 1982-2026 DROPS Design A/S. We reserve all rights. This document, including all its sub-sections, has copyrights. Read more about what you can do with our patterns at the bottom of each pattern on our site. |
|||||||||||||||||||







Post a comment to pattern DROPS 226-29
We would love to hear what you have to say about this pattern!
If you want to leave a question, please make sure you select the correct category in the form below, to speed up the answering process. Required fields are marked *.