
Popular categories
Looking for a yarn?


Comments / Questions (14)
![]() Catherine Gorecki wrote:
Catherine Gorecki wrote:
J'ai modifié le modèle d'origine pour faire l'ouverture sur le côté du devant, et je n'ai pas de bande de boutonnage. Quand je dois diviser l'empiècement en devant-dos / manches, je suis un peu perdue. Pourriez vous m'indiquer quelles mailles je dois laisser en attente pour les manches ? Est-ce seulement les mailles à l'intérieur du motif du raglan ou dois-je séparer au milieu du raglan ? Merci d'avance de votre réponse
05.05.2024 - 22:15DROPS Design answered:
Bonjour Mme Gorecki, tout dépend de votre taille, recalculez le nombre de mailles des manches à partir de celles du dos, ce sera ainsi plus simple, certaines mailles de A.2 vont appartenir au dos/aux devants, mais ce nombre varie en fonction de la taille. Bon tricot!
06.05.2024 - 09:19
![]() Léone MEUNIER wrote:
Léone MEUNIER wrote:
Bonjour. Je ne vois pas où ni comment ajouter les 6 mailles aux mailles en attente pour la manche car mon fil se trouve sur l’aiguille droite afin de continuer le dos.
08.05.2022 - 17:20DROPS Design answered:
Bonjour Mme Meunier, cette leçon montre comment tricoter un pull de haut en bas; à partir de la photo 9, on montre comment glisser les mailles de la manche en attente, puis à la photo 11, comment on va monter des mailles sur le côté (à la suite de votre devant, avant de tricoter le dos), puis comment continuer en tricotant le dos et en montant les 6 mailles sous l'autre manche. Dites nous si c'est ainsi plus clair pour vous. Bon tricot!
09.05.2022 - 08:35
![]() Léone MEUNIER wrote:
Léone MEUNIER wrote:
Bonjour, comment faire des augmentations symétriques de chaque côté du raglan ? A moins de faire des jetés avec des jours, je ne vois pas comment y arriver.
01.05.2022 - 18:59DROPS Design answered:
Bonjour Mme Meunier, cette leçon et cette vidéo montrent comment augmenter pour le raglan avec des jetés - cette autre vidéo montre également une technique avec jetés, mais légèrement différente. L'une d'elles pourra probablement vous aider. bon tricot!
02.05.2022 - 10:17
![]() Ellen Kley wrote:
Ellen Kley wrote:
Kann ich für diese Jacke Drops Nepal verwenden ? Wie ist die Umrechnung, 850 g bei merino extra fine in ?? g Nepal? Danke für die Antwort und viele Grüße, Ellen
28.03.2022 - 13:11DROPS Design answered:
Liebe Frau Kley, DROPS Nepal ist also Garngruppe C und hier brauchen Sie ein Garn der Garngruppe D, veilleicht kann Ihnen dann DROPS Limaw gefallen - die haben beide dieselbe Zusammensetzung - dann können Sie den Garnumrechner benutzen. Viel Spaß beim stricken!
28.03.2022 - 16:06
![]() Sylvie wrote:
Sylvie wrote:
Bonjour J'ai 2 questions. 1/ Le modèle utilise 2 tailles d'aiguilles: 3,5 et 4,5. Est- ce que l'échantillon doit être tricoté en taille 3,5? 2/ Imaginons que pour avoir le bon nombre de mailles indiqué dans l'échantillon, il me faut tricoter avec une taille 4 (au lieu de 3,5) : vu que le modèle utilise 2 tailles d'aiguilles=> est-ce que je dois remplacer les parties tricotées en taille 4,5 dans le modèle par une aiguille en taille 5? Merci
30.12.2021 - 18:30DROPS Design answered:
Bonjour Sylvie, 1. dans ce modele l’echantillon est fait sur les aiguilles 4,5 (les aiguilles 3,5 sont pour le montage et les cotes/bordures). 2. Si l’echantillon n’est pas correct, vouls allez prendre px. les aiguilles no 5. Si cette fois l’echantillon est correct, les aiguilles pour les bordures devraient etre no 4. Bon tricot!
30.12.2021 - 18:47
![]() Cornelia wrote:
Cornelia wrote:
Ja das hatte ich
07.12.2021 - 19:58
![]() Cornelia wrote:
Cornelia wrote:
Habe insgesamt 211 Maschen auf der Nadel
07.12.2021 - 08:31DROPS Design answered:
Liebe Cornelia, vor der Teilung haben Sie 305 Maschen und so stricken Sie den Rumpfteil: 50 Maschen (= Vorderteil), 6 neuen Masche, 89 Maschen (Rückenteil), 6 neuen Maschen, 50 Maschen (Vorderteil) = 50+6+89+6+50=201 Maschen. Hatten Sie die richtigen Maschenanzahl vor der Teilung?
07.12.2021 - 15:46
![]() Cornelia wrote:
Cornelia wrote:
Wenn ich die Blende mitzähle habe ich 110 Maschen rücken. Da stimmt was nicht
07.12.2021 - 08:05
![]() Cornelia wrote:
Cornelia wrote:
Ich habe eine Frage zu der Jacke wird die Blende mitgezählt zu den 53 oder nicht für später den Schlitz an den Seiten
06.12.2021 - 16:44DROPS Design answered:
Liebe Cornelia, ja, die Blende sind damit gezählt, dh alle Maschen sind gezählt: 53 M für jedes Vorderteil + 95 für das Rückenteil sind 201 Maschen auf der Nadel. Viel Spaß beim stricken!
07.12.2021 - 07:12
![]() Eva wrote:
Eva wrote:
Misty Moon stickad kofta sticka 67 m (framstycke) sätt 78 m på en tråd, lägg upp 10 m sticka 123 m(bakstycke) sätt 78 m på en tråd, lägg upp 10 m, sticka 67 är detta rätt???
11.10.2021 - 18:37DROPS Design answered:
Hej Eva. Ja det stämmer. De maskorna du sätter på tråd kommer du senare att sticka ärm av (då kommer du också sticka upp maskor i de maskor du lägger upp under armen). Mvh DROPS Design
12.10.2021 - 13:38
|
|||||||
Misty Moon#mistymoonjacket |
|||||||
 |
 |
||||||
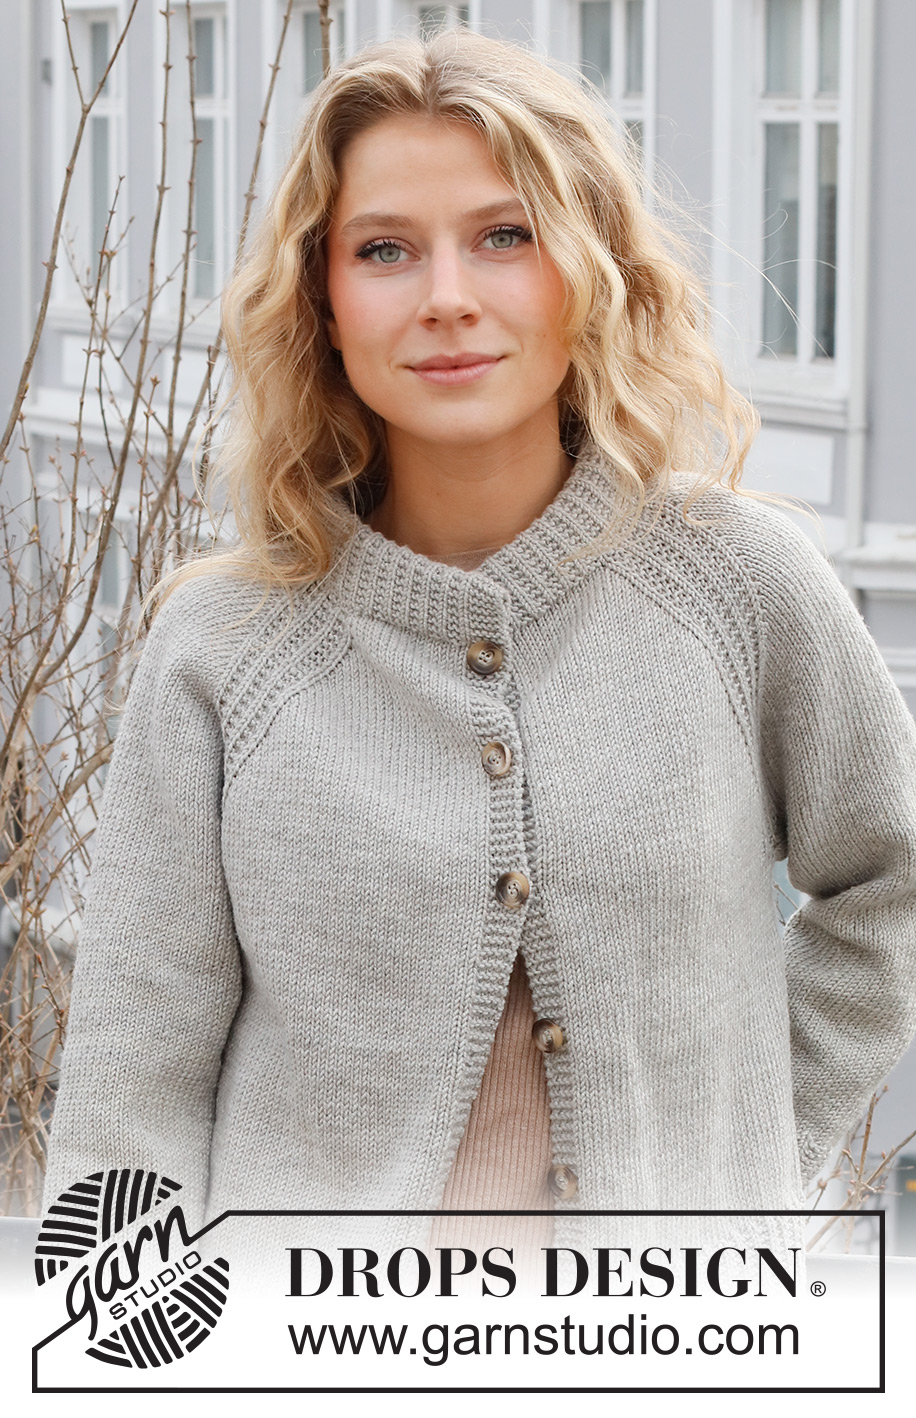
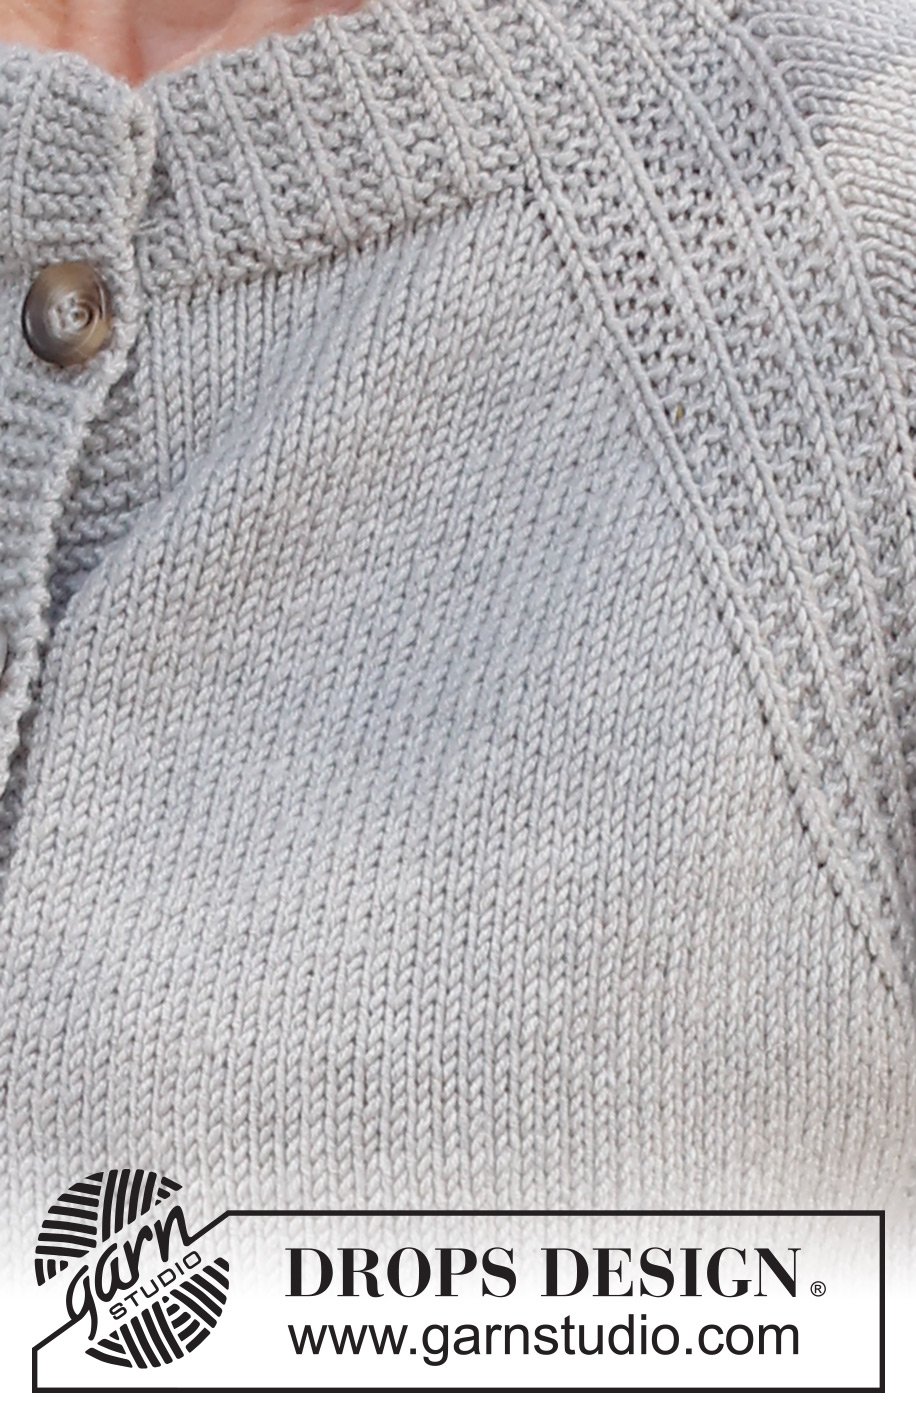
Knitted jacket in DROPS Merino Extra Fine or DROPS Puna. Piece is knitted top down with double neck edge, raglan and edges in textured pattern. Size: S - XXXL
DROPS 228-15 |
|||||||
|
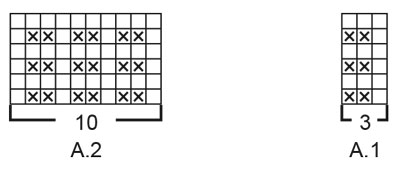
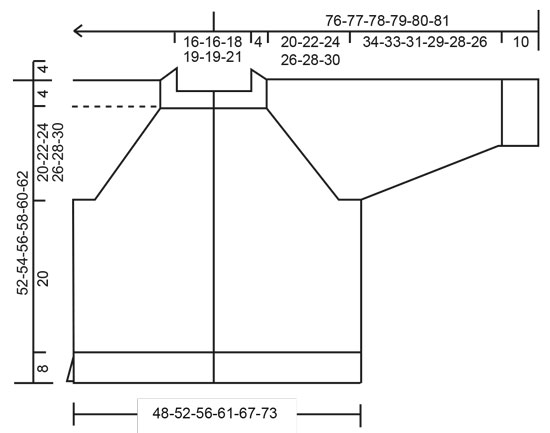
---------------------------------------------------------- EXPLANATION FOR THE PATTERN: ---------------------------------------------------------- GARTER STITCH (back and forth): Knit all rows. 1 ridge vertically = knit 2 rows. PATTERN: See diagrams A.1 and A.2. Diagrams show all rows in pattern seen from the right side. DECREASE/INCREASE TIP (evenly): To calculate how to decrease/increase evenly, use the total number of stitches to be decreased/increased over (e.g. 15 stitches) and divide stitches by number of decreases/increases to be done (e.g. 4) = 3.8. In this example decrease by knitting approx. every 3rd and 4th stitch together. When increasing make in this example 1 yarn over after approx. every 4th stitch. On next row work yarn overs twisted to avoid holes. NOTE! Do not increase/decrease over bands. RAGLAN: All increases are done from the right side. Increase for raglan by increasing 1 stitch on each side of A.2 in every transition between front/back piece and sleeves (= 8 stitches increased on round). Increase 1 stitch by making 1 yarn over. On next row (wrong side) purl yarn over twisted to avoid holes. Then work the new stitches in stocking stitch. DECREASE TIP (applies to mid under sleeves): Begin 3 stitches before marker thread and knit 2 together, knit 2 (marker thread is between these 2 stitches), slip 1 stitch knitwise, knit 1, pass slipped stitch over stitch worked (= 2 stitches decreased). BUTTONHOLES: Decrease for buttonholes on right band (when garment is worn). Decrease from right side when 4 stitches remain on row as follows: Make 1 yarn over, knit the next 2 stitches together, knit the last 2 stitches. On next row (wrong side) knit the yarn over to make a hole. Decrease first buttonhole when neck edge has been worked Then decrease the next 5-5-6-6-6-6 buttonholes, approx. 8½-9-8-8-8½-9 cm apart. CAST-OFF TIP: To avoid a tight cast-off edge when casting off, you may use a larger needle. If this still is too tight make 1 yarn over after approx. every 6th stitch while casting off (cast off yarn overs as stitches). ---------------------------------------------------------- START THE PIECE HERE: ---------------------------------------------------------- JACKET - SHORT OVERVIEW OF THE PIECE: Work double neck edge and yoke back and forth on circular needle from mid front, work top down. Now divide yoke for body and sleeves. Work body back and forth on circular needle, top down. Work sleeves in the round on double pointed needles/short circular needle, top down. DOUBLE NECK EDGE: Cast on 131-131-131-143-143-143 stitches (including 5 band stitches in each side towards mid front) on circular needle size 4.5 mm with DROPS Merino Extra Fine or DROPS Puna. Purl 1 row (= wrong side). Switch to circular needle size 3.5 mm. Work next row as follows from right side: 5 band stitches in GARTER STITCH - read explanation above, work A.1 until 6 stitches remain on row, work the first stitch in A.1 so that pattern begins and ends the same, and finish with 5 band stitches in garter stitch. Continue pattern back and forth for 9 cm – adjust after purling a row from wrong side. On next row decrease stitches evenly, i.e. work next row as follows from right side: 5 band stitches in garter stitch, work 15-15-15-18-18-18 stitches in stocking stitch and decrease at the same time 4-4-2-4-4-2 stitches evenly over these stitches – read DECREASE/INCREASE TIP (= front piece), work A.2 over the next 10 stitches (these 10 stitches is the raglan line and A.2 should fit nicely over stitches from neck edge), work 11 stitches in stocking stitch and decrease at the same time 5 stitches evenly over these stitches (= sleeve), work A.2 over the next 10 stitches, work 29-29-29-35-35-35 stitches in stocking stitch and decrease at the same time 8-8-4-8-8-4 stitches evenly over these stitches (= back piece), work A.2 over the next 10 stitches, work 11 stitches in stocking stitch and decrease at the same time 5 stitches evenly over these stitches (= sleeve), work A.2 over the next 10 stitches, work 15-15-15-18-18-18 stitches in stocking stitch and decrease at the same time 4-4-2-4-4-2 stitches evenly over these stitches (= front piece), and finish with 5 band stitches in garter stitch - remember BUTTONHOLES on band - read explanation above = 105-105-113-117-117-125 stitches on needle. Purl a row from wrong side (work band in garter stitch). Insert 1 marker after band at the beginning of row mid front. Work yoke as explained below. Measure yoke from this marker! YOKE: Switch to circular needle size 4.5 mm. Work in stocking stitch back and forth with 5 band stitches in garter stitch in each side towards mid front, and A.2 in every transition between front/back piece and sleeves. REMEMBER THE KNITTING TENSION. AT THE SAME TIME on first row from right side begin increases for RAGLAN – read explanation above. Increase for raglan on every other row (i.e. on every row from right side) 25-28-30-34-37-40 times in total vertically. After last increase there are 305-329-353-389-413-445 stitches on needle. Work without increases until piece measures 20-22-24-26-28-30 cm from marker at the neck. On next row divide yoke for body and sleeves, i.e. work next row as follows: Work as before over the first 50-54-57-62-67-73 stitches (= front piece), slip the next 58-62-68-76-78-82 stitches on a stitch holder for sleeve, cast on 6-6-8-8-10-10 new stitches on needle (= in the side under sleeve), work as before over the next 89-97-103-113-123-135 stitches (= back piece), slip the next 58-62-68-76-78-82 stitches on a stitch holder for sleeve, cast on 6-6-8-8-10-10 new stitches on needle (= in the side under sleeve), and work as before over the last 50-54-57-62-67-73 stitches (= front piece). Finish body and sleeves separately. NOW MEASURE PIECE FROM HERE! BODY: = 201-217-233-253-277-301 stitches. Insert 1 marker thread after 53-57-61-66-72-78 stitches in from each side (= in the side on body). There are 95-103-111-121-133-145 stitches between markers on back piece. Move the marker threads upwards when working; they should be used for dividing for vents later in each side. Work in stocking stitch back and forth with 5 band stitches in garter stitch in each side towards mid front until piece measures 20 cm from division. 8 cm remain until finished measurements. Try the jacket and work to desired length. Now divide the piece at the marker threads and finish each part separately. LEFT FRONT PIECE (when garment is worn): Knit 1 row from right side while increasing 4-6-5-6-6-6 stitches evenly - read DECREASE/INCREASE TIP = 57-63-66-72-78-84 stitches. Switch to circular needle size 3.5 mm and work first row from wrong side (i.e. from the side): 3 edge stitches in garter stitch, begin on 2nd row in A.1 and work A.1 until 5 stitches remain on needle- adjust A.1 so that pattern begins and ends with the first stitch in A.1 (seen from right side) and finish with 5 band stitches in garter stitch towards the mid front. Continue pattern back and forth like this for 8 cm. Cast off by knitting from right side - read CAST-OFF TIP! RIGHT FRONT PIECE: Knit 1 row from right side while increasing 4-6-5-6-6-6 stitches evenly = 57-63-66-72-78-84 stitches. Switch to circular needle size 3.5 mm and work first row from wrong side (i.e. from mid front): 5 band stitches in garter stitch, begin on 2nd row in A.1 and work A.1 until 3 stitches remain on needle - adjust so that pattern begins and ends with the first stitch in A.1 (seen from right side) and finish with 3 edge stitches in garter stitch towards the side. Continue pattern back and forth like this for 8 cm. Cast off knitting from right side. BACK PIECE: Knit 1 row from right side while increasing 8-9-10-12-12-12 stitches evenly = 103-112-121-133-145-157 stitches. Switch to circular needle size 3.5 mm and work first row from wrong side as follows: 3 edge stitches in garter stitch, begin on 2nd row in A.1 and work A.1 until 3 stitches remain on needle - adjust so that pattern begins and ends with the first stitch in A.1 (seen from right side) and finish with 3 edge stitches in garter stitch towards the side. Continue pattern back and forth like this for 8 cm. Cast off knitting from right side. Jacket measures approx. 52-54-56-58-60-62 cm from shoulder and down. SLEEVES: Slip the 58-62-68-76-78-82 stitches from stitch holder in one side of piece on double pointed needles or a short circular needle size 4.5 mm and pick in addition up 1 stitch in each of the 6-6-8-8-10-10 new stitches cast on under sleeve = 64-68-76-84-88-92 stitches. Insert 1 marker thread in the middle of the 6-6-8-8-10-10 stitches under sleeve. Move the marker thread upwards when working - marker should be used for decrease stitches mid under sleeve. Begin round at the marker thread and work stocking stitch in the round. When sleeve measures 3-3-2-2-2-1 cm from division, decrease 2 stitches mid under sleeve - read DECREASE TIP. Decrease like this every 4-3½-2½-1½-1½-1½ cm 8-9-12-15-16-17 times in total = 48-50-52-54-56-58 stitches. Continue until sleeve measures 34-33-31-29-28-26 cm from division (shorter measurements in the larger sizes because of wider neck and longer yoke). 10 cm remain until finished measurements. Try the jacket and work to desired length. Knit 1 round while increasing 6-7-8-6-7-8 stitches evenly = 54-57-60-60-63-66 stitches. Switch to double pointed needles size 3.5 mm and work A.1 in the round for 10 cm. Cast off by knitting - remember CAST-OFF TIP! Sleeve measures approx. 44-43-41-39-38-36 cm from division. Work the other sleeve the same way. ASSEMBLY: Fold rib at the top of neck down on inside of garment. Fasten rib to get a double folding edge. To avoid a tight neck edge that sticks out it is important to keep the seam elastic. Sew opening towards mid front together on bands with neat little stitches. Sew the buttons on to the left band. |
|||||||
Diagram explanations |
|||||||
|
|||||||
 |
|||||||
 |
|||||||
Have you finished this pattern?Tag your pictures with #dropspattern #mistymoonjacket or submit them to the #dropsfan gallery. Do you need help with this pattern?You'll find 31 tutorial videos, a Comments/Questions area and more by visiting the pattern on garnstudio.com. © 1982-2026 DROPS Design A/S. We reserve all rights. This document, including all its sub-sections, has copyrights. Read more about what you can do with our patterns at the bottom of each pattern on our site. |
|||||||


With over 40 years in knitting and crochet design, DROPS Design offers one of the most extensive collections of free patterns on the internet - translated to 17 languages. As of today we count 324 catalogues and 12290 patterns translated into English (UK/cm). 12290
We work hard to bring you the best knitting and crochet have to offer, inspiration and advice as well as great quality yarns at incredible prices! Would you like to use our patterns for other than personal use? You can read what you are allowed to do in the Copyright text at the bottom of all our patterns. Happy crafting!
Post a comment to pattern DROPS 228-15
We would love to hear what you have to say about this pattern!
If you want to leave a question, please make sure you select the correct category in the form below, to speed up the answering process. Required fields are marked *.