
Popular categories
Looking for a yarn?


Comments / Questions (41)
![]() Kenzai wrote:
Kenzai wrote:
Pouvez vous me donner le nombre de mailles pour un enfant de 8ans. Et 12ans merci
23.11.2020 - 11:32DROPS Design answered:
Bonjour Kenzai, en taille 7/8 ans, suivez la 3ème série de nombres/chiffres et en taille 12 ans, suivez la dernière série de nombres/chiffres - pour les quantités de laine nécessaire ainsi que pour le nombre de mailles à monter, et toutes les mesures et indications du modèle. Bon tricot!
23.11.2020 - 11:47
![]() Birgitta Appelholm wrote:
Birgitta Appelholm wrote:
Hej! Tack för snabbt svar, men jag menar, hur ökar jag en avig maska via ett omslag? Jag var inte tydlig med min fråga. Hälsningar Birgitta
10.11.2020 - 11:10DROPS Design answered:
Hej Birgitta. Du gör omslag på samma sätt oavsett om det ska bli en rät eller en avig maska. Mvh DROPS Design
10.11.2020 - 11:22
![]() Birgitta Appelholm wrote:
Birgitta Appelholm wrote:
Hur stickas ett omslag i bakre maskbågen vid en avig maska?
10.11.2020 - 08:52DROPS Design answered:
Hej Birgitta. I denna video kan du se hur du ska göra. Mvh DROPS Design
10.11.2020 - 09:16
![]() Penny Warin wrote:
Penny Warin wrote:
Pattern 34-5. The picture looks like it’s garter stitch down to the pattern but the instructions and diagram reads to me as stocking stitch. I’ve read ‘how to read a diagram’ but it doesn’t help with this. Please tell me how I should do it. Thank you
18.08.2020 - 12:23DROPS Design answered:
Dear Mrs Warin, the beginning of A.1 is not worked in garter stitch, you work as shown in diagram: (K 2 rounds, P1 round), repeat these 3 rounds a total 5 or 6 times depending on the size (and increasing with yarn overs as shown in diagram). Happy knitting!
18.08.2020 - 13:07
![]() Alejandra wrote:
Alejandra wrote:
Grace, son series de ocho puntos más 1 punto de aumento y debes repetirlo hasta el final de la linea de tejidoy despues tejer normalmente el diagrama, hasta la siguiente serie de aumento
22.05.2020 - 22:20
![]() Alejandra wrote:
Alejandra wrote:
Para Grace de Argentina....ya terminaste de hacer el aumento cada 7 puntos, ahora debes aunentar 1 punto cada ocho y éste está al final de los 8 puntos. Teje los 8 puntos igual como esta en diagrama A1 y has el aumento , tejes otros 8 puntoa y haces otro aumento. Espero que esa haya sido tu duda. Es más facil de lo que parece. Cariños
22.05.2020 - 22:17
![]() Sue Craver wrote:
Sue Craver wrote:
I’m just beginning this sweater for my granddaughter. Nowhere do I see where I’m supposed to join to knit in the round. Do I join when I cast on the 82 stitches for the yoke?
15.04.2020 - 21:06DROPS Design answered:
Hi Sue, The sweater is worked in the round throughout. Neck and yoke are worked in the round, then stitches are put on threads for each sleeve and you cast on stitches below the sleeves so you can continue in the round for the body. Happy knitting!
16.04.2020 - 07:23
![]() Solveig Charlotte Sivertsen wrote:
Solveig Charlotte Sivertsen wrote:
Finnes det ingen oppskrifter på gensere mer, hos dere , som strikkes nedenifra og opp?? Liker ikke det motsatte.
04.04.2020 - 17:51DROPS Design answered:
Hei Solveig. Jo, det fins det mange av, men de siste modellene som kommer strikkes gjerne ovenfra og ned. Bruk vår søkemotor og skriv: Nedenfra og opp, og mange modeller kommer opp. God Fornøyelse!
17.04.2020 - 12:27
![]() Kari Engen wrote:
Kari Engen wrote:
Skal mønsteret (A1) strikkes ovenfra eller nedenfra? Hvis jeg strikker det ovenfra blir jo ikke blomsten lik fordi en må øke inne i mønsteret?
18.11.2019 - 19:22DROPS Design answered:
Hei Kari! Genseren skal strikkes ovenfra og ned, mens diagram A.1 starter nedenfra og følges fra høyre mot venstre. Om det økes slik det er merket i A.1 vil mønsteret stemme. Lykke til!
19.11.2019 - 12:06
![]() Manoa wrote:
Manoa wrote:
Merci beaucoup.
08.11.2019 - 20:34
|
|||||||||||||||||||
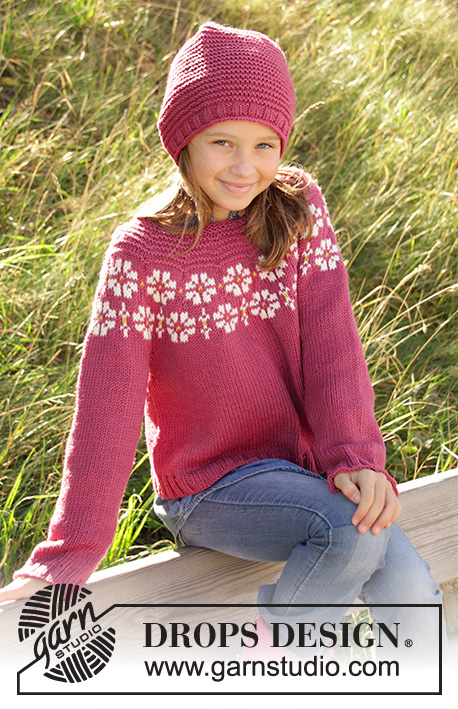
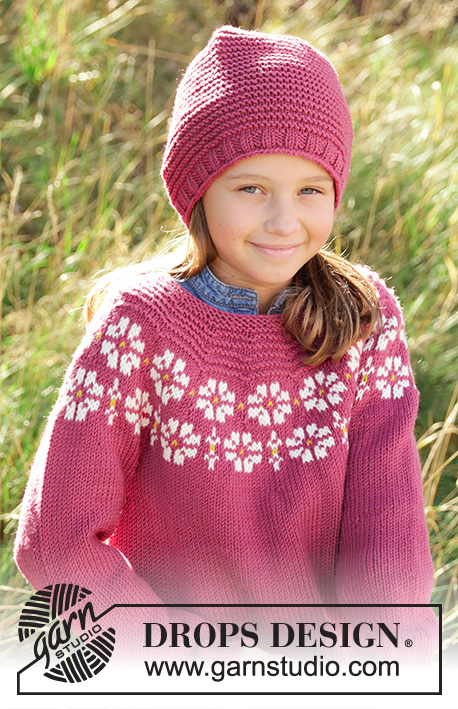
Daisy Delight#daisydelightsweater |
|||||||||||||||||||
 |
 |
||||||||||||||||||
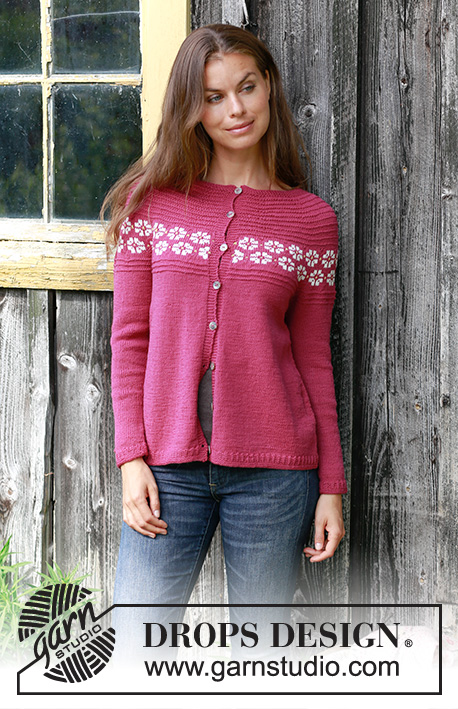
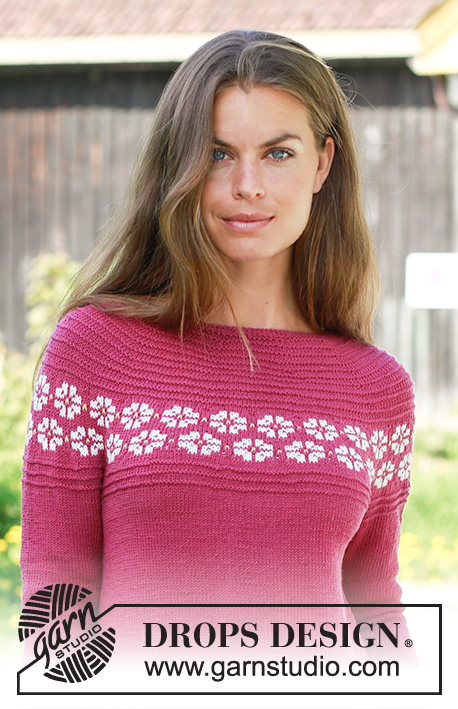
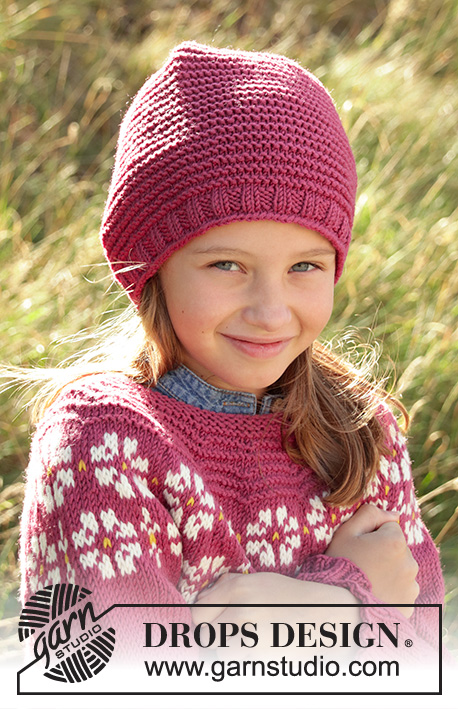
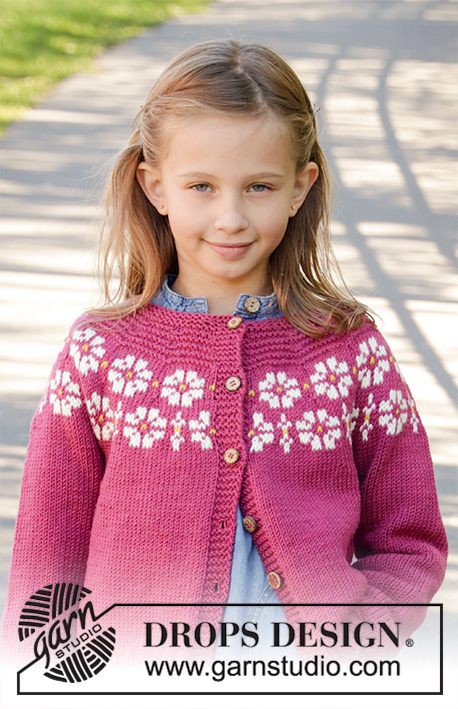
Knitted jumper for children in DROPS Merino Extra Fine, DROPS Lima and DROPS Cotton Light. The piece is worked top down with flowers, coloured pattern, garter stitch and stocking stitch. Sizes 3-12 years.
DROPS Children 34-7 |
|||||||||||||||||||
|
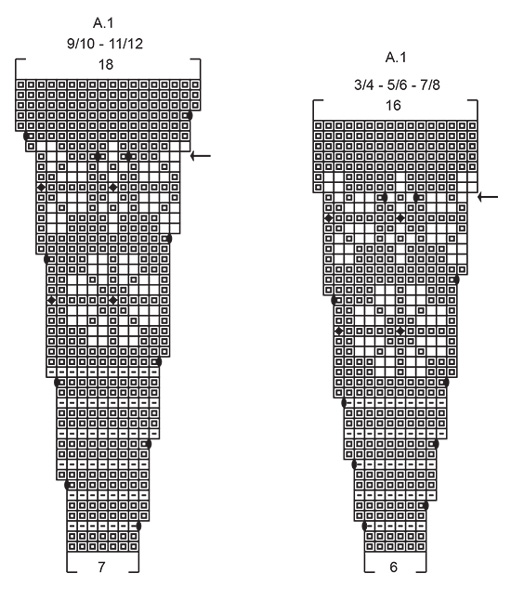
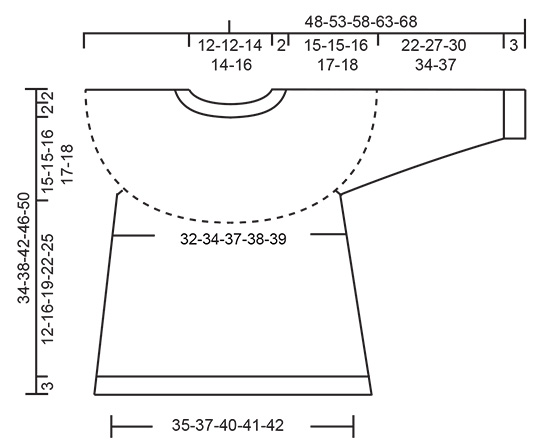
------------------------------------------------------- EXPLANATIONS FOR THE PATTERN: ------------------------------------------------------- RIDGE/GARTER STITCH (worked in the round): 1 ridge = 2 rounds. Knit 1 round and purl 1 round PATTERN: See diagram A.1. Choose diagram for your size. The diagram shows all the rows in the pattern seen from the right side. INCREASE TIP-1 (evenly spaced): To work out how to increase evenly, count the total number of stitches on the needle (e.g. 72 stitches) and divide by the number of increases to be made (e.g. 17) = 4.2. In this example increase by making 1 yarn over after approx. each 4th stitch. On the next round work the yarn overs twisted to avoid holes. INCREASE TIP-2 (for sides of body): Work until there is 1 stitch left before the marker thread, 1 yarn over, knit 2 (marker thread sits in the middle of these 2 stitches), 1 yarn over = 2 stitches increased. On the next round work the yarn overs twisted to avoid holes. Then work the new stitches in stocking stitch. DECREASE TIP (for sleeves): Decrease 1 stitch on each side of the marker thread as follows: Work until there are 3 stitches left before the marker thread, knit 2 together, knit 2 (marker thread sits in the middle of these 2 stitches), slip 1 stitch as if to knit, knit 1 and pass the slipped stitch over the knitted stitch = 2 stitches decreased. ------------------------------------------------------- START THE PIECE HERE: ------------------------------------------------------- JUMPER - SHORT OVERVIEW OF THE PIECE: The piece is worked in the round with circular needle, top down. It is divided for body and sleeves; the body is continued in the round with circular needle and the sleeves in the round with short circular needle, double pointed needles. YOKE: Cast on 62-66-70-76-82 stitches with circular needle size 4 mm and heather/cerise/dark red. Work 2 RIDGES – see description above. Knit 1 round where you increase 16-18-20-22-23 stitches evenly on round - READ INCREASE TIP-1! = 78-84-90-98-105 stitches. Purl 1 round. Insert a marker in this round and measure onwards from here. On the next round work according to diagram A.1, (choose diagram for the right size) a total of 13-14-15-14-15 times on the round. REMEMBER THE KNITTING TENSION! When diagram A.1 has been completed in height there are 208-224-240-252-270 stitches on the needle. On the next round increase 4-4-6-2-6 stitches evenly = 212-228-246-254-276 stitches. Continue with stocking stitch until the piece measures 15-15-16-17-18 cm from the marker. The next round is worked as follows: Place the first 44-48-51-53-62 stitches on a thread (= sleeve), cast on 6 new stiches, knit 62-66-72-74-76 (= front piece), place the next 44-48-51-53-62 stitches on a thread (= the other sleeve), cast on 6 new stitches and knit 62-66-72-74-76 stitches. BODY: There are 136-144-156-160-164 stitches on the round. THE PIECE IS NOW MEASURED FROM HERE! Insert 1 marker thread in the middle of the 6 new stitches cast on under each sleeve. Work stocking stitch in the round. When the piece measures 3 cm increase 1 stitch on each side of both marker threads (= 4 stitches increased) READ INCREASE TIP–2! Repeat the increase every 3-4-5-6-7 cm a total of 3 times = 148-156-168-172-176 stitches on the needle. Continue working as before until the piece measures 12-16-19-22-25 cm. Work 1 round where you increase 12-12-12-12-12 stitches evenly = 160-168-180-184-188 stitches. Work rib in the round with knit 2 / purl 2 for 3 cm. Loosely cast off with knit over knit and purl over purl. Cut and fasten the strand. SLEEVE: Place the stitches from one thread on short circular needle/double pointed needles size 4 mm (= 44-48-51-53-62 stitches) and knit up 1 stitch in each of the 6 stitches cast on under the sleeve (= 50-54-57-59-68 stitches). Insert 1 marker thread in the middle of these 6 stitches. Work stocking stitch in the round for 2 cm. Now decrease 1 stitch on each side of the marker thread - READ DECREASE TIP. Continue with stocking stitch and repeat the decrease every 4-3½-4-4-3½ cm until you have decreased a total of 5-7-7-8-10 times = 40-40-43-43-48 stitches on the round. Work stocking stitch until the sleeve measures 22-27-30-34-37 cm. Work 1 round and increase 4-4-5-5-4 stitches evenly on this round = 44-44-48-48-52 stitches. Work rib in the round with knit 2 / purl 2 for 3 cm. Loosely cast off with knit over knit and purl over purl. Cut and fasten strand. Work the other sleeve in the same way. |
|||||||||||||||||||
Diagram explanations |
|||||||||||||||||||
|
|||||||||||||||||||
 |
|||||||||||||||||||
 |
|||||||||||||||||||
Have you finished this pattern?Tag your pictures with #dropspattern #daisydelightsweater or submit them to the #dropsfan gallery. Do you need help with this pattern?You'll find 28 tutorial videos, a Comments/Questions area and more by visiting the pattern on garnstudio.com. © 1982-2026 DROPS Design A/S. We reserve all rights. This document, including all its sub-sections, has copyrights. Read more about what you can do with our patterns at the bottom of each pattern on our site. |
|||||||||||||||||||


With over 40 years in knitting and crochet design, DROPS Design offers one of the most extensive collections of free patterns on the internet - translated to 17 languages. As of today we count 324 catalogues and 12291 patterns translated into English (UK/cm). 12291
We work hard to bring you the best knitting and crochet have to offer, inspiration and advice as well as great quality yarns at incredible prices! Would you like to use our patterns for other than personal use? You can read what you are allowed to do in the Copyright text at the bottom of all our patterns. Happy crafting!
Post a comment to pattern DROPS Children 34-7
We would love to hear what you have to say about this pattern!
If you want to leave a question, please make sure you select the correct category in the form below, to speed up the answering process. Required fields are marked *.