
Popular categories
Looking for a yarn?


Comments / Questions (15)
![]() Gallienne wrote:
Gallienne wrote:
Bonjour, je ne comprends pas comment le diagramme peut faire correspondre des mailles en augmentation, je n’arrive pas à faire coïncider celui-ci, c’est à dire le dessin du diagramme avec les mailles en rond et en augmentation. Cela ne correspond pas pour former le dessin des fleurs… Merci pour votre réponse attendue..,
24.08.2022 - 21:41DROPS Design answered:
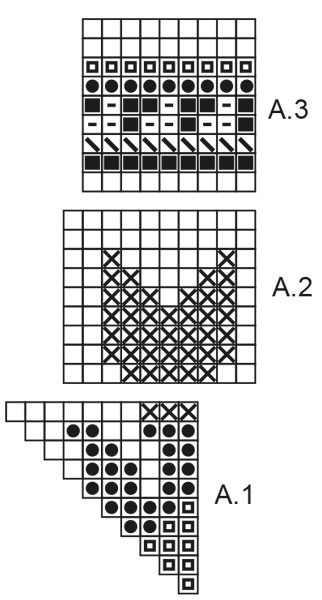
Bonjour Galienne, vous devez répéter 12 fois A.1 en largeur, autrement dit: au 1er rang: 12 x 1 bride dans la bride suivante (= 12 b.); au 2ème rang 12 x (2 brides dans chaque b ) = on a bien 2 mailles dans A.1; au 3ème rang 12 x (1 b dans la b suivante, 2 b dans la suivante = 3 brides dans A.1); et ainsi de suite. Vous crochetez les mailles de A.1 dans la couleur indiquée par le diagramme tout en suivant les indications écrites pour les augmentations. Les fleurs ne seront formées que dans A.2, dans A.1 vous faites le fond puis les tiges et les feuilles. Bon crochet!
25.08.2022 - 09:17
![]() Andrea Tummarello wrote:
Andrea Tummarello wrote:
Ich habe anstatt der 200gr. Light wash die Farbe Spray Blue genommen - leider haben bei mir die 200 gr auch nicht ausgereicht. Bestellt am besten gleich 300 gr damit euch der Garn während dem Häkeln nicht ausgeht :-)
08.03.2021 - 12:06
![]() Dea wrote:
Dea wrote:
Buongiorno, 200 gr di colore 100 light wash non bastan nemmeno per finire la borsa. Almeno a me non sono bastati.
26.07.2019 - 14:33DROPS Design answered:
Buongiorno Dea. Trasmetteremo la sua segnalazione alla casa madre. Buon lavoro!
26.07.2019 - 16:53
![]() Dea wrote:
Dea wrote:
Vi chiedo comunque di inoltrare a Drops la richiesta di un video per il diagramma A1. Seguendo le indicazioni fedelmente non si può ottenere il disegno come nelle foto sopra. Grazie.
25.07.2019 - 08:16DROPS Design answered:
Buongiorno Dea, inoltriamo la sua segnalazione alla casa madre. Buon lavoro!
25.07.2019 - 15:18
![]() Dea wrote:
Dea wrote:
Una domanda: visto che il diagramma A1 bisogna lavorarlo avanti e indietro, se si lavora dal DL da che parte bisogna leggerlo? Da dx verso sx? Quindi il primo in basso (giro 1 = 12 maglie alte) si legge da dx verso sx? Questo è importante per capire come prosegue il lavoro, comunque ho tentato più volte, ma non mi viene come il lavoro nella foto.
23.07.2019 - 20:56DROPS Design answered:
Buongiorno Dea. Il diagramma A1 viene letto da destra verso sinistra sul diritto del lavoro e da sinistra verso destra sul rovescio del lavoro. Viene letto dal basso verso l’alto. Quindi sulla prima riga avrà 12 ripetizioni di 1 maglia alta l’una; alla seconda riga avrà 2 maglie alte in ogni ripetizione e così via. Buon lavoro!
24.07.2019 - 06:36
![]() Dea wrote:
Dea wrote:
Non è possibile avere un video che spiega come realizzare il diagramma A1? Putroppo non è semplice capire gli aumenti e come comportarsi con la direzione del lavoro sullo schema. Grazie.
23.07.2019 - 20:15
![]() Elena wrote:
Elena wrote:
Avevo già provato a chiedere senza risposta. Qual è il senso del lavoro avanti e indietro visto che è in tondo? Grazie.
15.05.2019 - 15:08DROPS Design answered:
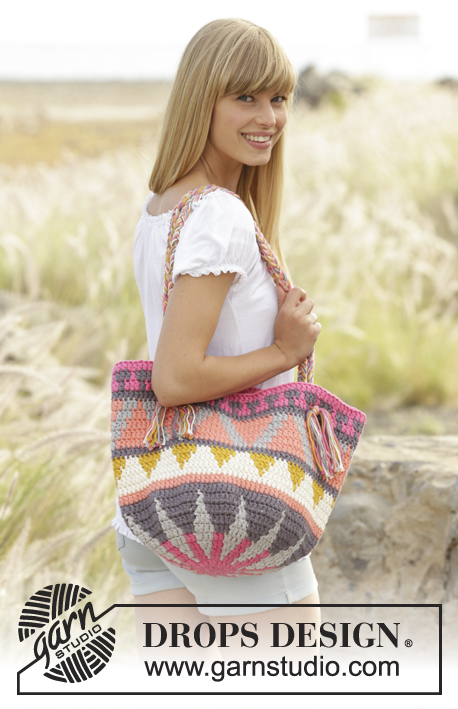
Buongiorno Elena. Viene fatto per avere il risultato che si può vedere nell'ultima fotografia, quella che inquadra meglio i fiori. Se però preferisce e si trova meglio, può lavorare in tondo. Buon lavoro!
15.05.2019 - 15:27
![]() Sylvie wrote:
Sylvie wrote:
Bonjour, Merci pour votre aide. J'ai une autre question : je suis arrivée au rang 2 du schéma A2 et je trouve que l'ouvrage fait beaucoup de "vagues", j'ai peur qu'il ne soit pas correct au niveau de la forme ? Est-ce que cette impression s'estompe au fur et à mesure des rangs qui suivent ? Merci par avance et bonne journée. Sylvie
01.04.2019 - 13:12DROPS Design answered:
Bonjour Sylvie, quand on crochète A.1, on forme le fond du sac = une sorte de disque plat (= jusqu'au tour 10 inclus) puis on va crocheter A.2 sans augmenter pour former les côtés montants du sac. Pensez à bien conserver la bonne et surtout la même tension pour que l'ouvrage conserve la bonne forme. Bon crochet!
01.04.2019 - 15:32
![]() Sylvie Nigro wrote:
Sylvie Nigro wrote:
Bonjour, existe-t-il un schéma complet du sac ? Si on tourne l'ouvrage à chaque changement de rang, ne risque-t-on pas de voir les fils que l'on fait suivre pour faire les dessins au jaquard ? Merci
15.03.2019 - 10:59DROPS Design answered:
Bonjour Mme Nigro, il n'y a pas besoin de diagramme complet, suivez les diagrammes et répétez-les comme indiqué - plus d'infos sur les diagrammes ici, en bas de page pour le jacquard. Veillez bien à ce que les fils soient côté envers pour qu'ils ne se voient pas, que vous travailliez sur l'endroit ou sur l'envers. Bon crochet!
15.03.2019 - 12:45
![]() Carolyn wrote:
Carolyn wrote:
Sorry..regarding the previous question, once we turn the work for the second (or even numbered) round, do we then read the chart from left to right?
22.08.2018 - 02:05
|
||||||||||||||||||||||
Tulip Garden#tulipgardenbag |
||||||||||||||||||||||
 |
 |
|||||||||||||||||||||
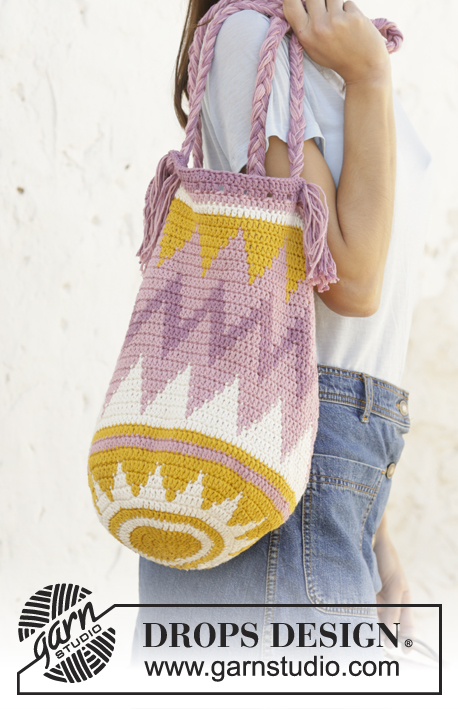
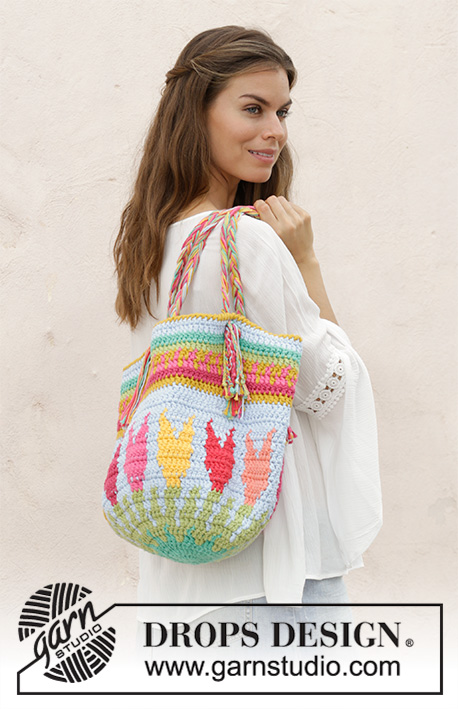
Crochet bag with coloured pattern and flowers. The piece is worked in 2 strands DROPS Paris.
DROPS 188-2 |
||||||||||||||||||||||
|
INFORMATION FOR THE PATTERN: PATTERN: See diagrams A.1, A.2 and A.3. The diagrams show the colours in the pattern. 1 square = 1 treble crochet. DOUBLE STRAND TIP: Use the strand from both the inside and outside of the ball. When changing to a new ball, it is best to change 1 strand at a time, so the strand fastenings are not too thick. COLOUR PATTERN: When changing colour, work as follows: Work the last treble crochet with the old colour, but wait with the last pull through, change to the next colour and work the last pull through with the new colour, then work the next treble crochet. When working with 2 colours, lay the strand of the colour you are not working with over the stitches from the previous round and work around the strand so that it is hidden and also brought forward. CROCHET INFO: The first treble crochet on the round is replaced by 3 chain stitches. The round finishes with 1 slip stitch in the 3rd chain stitch at the beginning of the round. Turn the piece after every round and continue working from the other side. DECREASE TIP: Decrease 1 treble crochet by working the next 2 treble crochets together as follows: Work 1 treble crochet, but wait with the last pull through (= 2 loops on the hook). Work the next treble crochet, but on the last pull through, pull the strand through all 3 loops on the hook. LOBSTER STITCH: Worked as double crochets, but backwards; i.e. work double crochets from left to right. ---------------------------------------------------------- BAG: The bag is worked with 2 strands of each colour - read DOUBLE STRAND TIP. The piece is worked in the round, but is turned after each round so that every other round is worked from the right side and the wrong side. Work 5 chain stitches with 2 strands opal green and hook size 5.5 mm. Form them into a ring with 1 slip stitch in the first chain stitch. Then work according to diagram A.1 (work 12 repeats of A.1 in width) - read COLOUR PATTERN. In other words, work as follows: ROUND 1: Work 12 treble crochets around the ring - read CROCHET INFO. ROUND 2: Work 2 treble crochets in each treble crochet = 24 treble crochets. ROUND 3: Work * 1 treble crochet in the first treble crochet, 2 treble crochets in the next treble crochet *, repeat from *-* to end of round = 36 treble crochets. ROUND 4: Work * 1 treble crochet in each of the first 2 treble crochets, 2 treble crochets in the next treble crochet *, repeat from *-* to end of round = 48 treble crochets. REMEMBER THE CROCHET TENSION! ROUNDS 5-9: Continue with increases and pattern as before, i.e. on each round work 1 more treble crochet between each increase = 108 treble crochets. ROUND 10: This round is the last round of increases (= 120 treble crochets) and you work flowers. The flowers have different colours, so you need to use 2 balls of each colour to avoid cutting strands on the round. The order of colours for the flowers are as follows: Colour 1. 06, shocking pink Colour 2. 07, heather Colour 3. 41, mustard Colour 4. 01, apricot Colour 5. 12, red Colour 6. 14, strong yellow Colour 7. 06, shocking pink Colour 8. 07, heather Colour 9. 41, mustard Colour 10. 01, apricot Colour 11. 12, red Colour 12. 14, strong yellow ROUND 11: Cut and fasten the background colour (100, light wash). This is done because this round starts 3 treble crochets earlier and the new start will be between 2 flowers. Work treble crochets and pattern according to diagram A.2 to end of round. ROUNDS 12-18: Continue with treble crochets and diagram A.2. ROUND 19: Continue with treble crochets and diagram A.2, but on this round work the first 2 treble crochets in each repeat together - i.e. decrease 12 treble crochets on this round - read DECREASE TIP = 108 treble crochets. ROUNDS 20-27: Work treble crochets and pattern according to diagram A.3 (there is 1 round left in A.3). ROUND 28. Work the last round in A.3 with double crochets, cut and fasten the strands. EDGE: Work an edge at the top of the bag with 2 strands mustard as follows: Fasten the strands with 1 double crochet in the first stitch, work 1 chain stitch then work LOBSTER STITCH - see description above, to end of round. Finish with 1 slip stitch in the first chain stitch. Cut and fasten the strands. HANDLE: Cut 4 strands of each colour of 120 cm = 36 strands. Lay the strands together and tie a loose knot, leave approx. 12 cm after the knot. Divide the strands into 3 bunches with 12 stands in each bunch. Plait the 3 bunches together until the plait measures approx. 68 cm (do not plait too tightly). Divide the strand ends in 2 bunches. Thread the 2 halves through the bag with 1 treble crochet between them, in the second round from the finishing edge. Tie the strands together on the front of the bag. Pick up the knot in the other end of the plait and fasten to the bag in the same way on the opposite side (see photo). Make another plait in the same way and fasten on the other side of the bag as described above. If you wish, you can make small plaits in the ends of the handles on the outside of the bag. |
||||||||||||||||||||||
Diagram explanations |
||||||||||||||||||||||
|
||||||||||||||||||||||
 |
||||||||||||||||||||||
Have you finished this pattern?Tag your pictures with #dropspattern #tulipgardenbag or submit them to the #dropsfan gallery. Do you need help with this pattern?You'll find 10 tutorial videos, a Comments/Questions area and more by visiting the pattern on garnstudio.com. © 1982-2026 DROPS Design A/S. We reserve all rights. This document, including all its sub-sections, has copyrights. Read more about what you can do with our patterns at the bottom of each pattern on our site. |
||||||||||||||||||||||


With over 40 years in knitting and crochet design, DROPS Design offers one of the most extensive collections of free patterns on the internet - translated to 17 languages. As of today we count 324 catalogues and 12290 patterns translated into English (UK/cm). 12290
We work hard to bring you the best knitting and crochet have to offer, inspiration and advice as well as great quality yarns at incredible prices! Would you like to use our patterns for other than personal use? You can read what you are allowed to do in the Copyright text at the bottom of all our patterns. Happy crafting!
Post a comment to pattern DROPS 188-2
We would love to hear what you have to say about this pattern!
If you want to leave a question, please make sure you select the correct category in the form below, to speed up the answering process. Required fields are marked *.