
Popular categories
Looking for a yarn?


Comments / Questions (24)
![]() Aksana wrote:
Aksana wrote:
Thank you very much! Can you clarify? Are these increases for the body and sleeves done at the same time? After all, if you first add for the body in every second row 24 times, this will be 48 rows, which will make a 17 cm yoke! And then add for the sleeves, then this will be a huge yoke! How should I make increases so that the yoke is 17 cm?
25.08.2025 - 08:01DROPS Design answered:
Dear Aksana, they are both worked at the same time. The increases for the body are worked every other row (48 rows worked in total), while the increases for the sleeve are worked over these 48 rows, but every other row 16 times (= over the first 32 rows) and every 4th row 4 times (=16 rows)32+16 = 48 rows. So the complete yoke increases are worked over those same 48 rows. AS you can see in the size chart below, the yoke actually measures 17cm, so after completing the increases the yoke should be finished. Happy knitting!
25.08.2025 - 12:50
![]() Aksana wrote:
Aksana wrote:
Hi! Help me figure out the raglan! You wrote to add 24 and 16 times, and in the end you will get 302 loops. I calculated that to get 302 loops you only need to add 22 rows. I don’t understand what you mean 24 and 16 times?
22.08.2025 - 07:11DROPS Design answered:
Dear Aksana, the increases can be worked either on the sides of the front/back piece or in the sleeves. You have 4 raglan lines and you will increase only on the side needed for the body or sleeves. For example, in the raglan line between the left front piece and the left sleeve, you increase before the raglan line for the body and after the raglan line for the sleeve. That means that you increase 4 stitches on each increase round for the body and 4 stitches on each increase round for the sleeves. So you increase 4 stitches for the body 44 times (=96 sts) and 4 stitches for the body 16+4 times (=80 sts) + initial 126 sts = 302 sts. Happy knitting!
25.08.2025 - 01:49
![]() Marie Poupon wrote:
Marie Poupon wrote:
Merci beaucoup !!!
23.06.2025 - 10:51
![]() Marie Poupon wrote:
Marie Poupon wrote:
Bonjour! concernant ce modèle Irish Plaits, je ne comprends pas : dans le dos, on tricote A2a une fois puis A2b, et après ? à nouveau A2b, A2b, A2b et ainsi de suite ? Ce n'est pas très clair ... J'ai regardé en anglais, pas mieux. Merci de votre réponse.
22.06.2025 - 14:32DROPS Design answered:
Bonjour Mme Poupon, lorsque vous avez divisé l'ouvrage et mis les mailles des manches en attente, vous tricotez A.2a sur les côtés, et, quand A.2a est terminé, vous tricotez désormais A.2b et vous répétez les rangs indiqués par l'encadré A.2b jusqu'à la fin. Bon tricot!
23.06.2025 - 07:15
![]() MarieM wrote:
MarieM wrote:
POMOC! Nevím si rady s raglánovým zkosením! můžete nějak jednoduše vysvětlit, jak se přidává u trupu a jak u rukávů? Nevím si rady s tímto: rukávy - "..Přidáváme 16-24-25-27-25-23x v každé 2. řadě a 4-1-1-1-4-6x v každé 4. řadě.."; trup - "...Přidáváme 0-0-0-2-2-6x v každé řadě a 24-26-28-28-32-32x v každé 2. řadě...."
03.11.2022 - 19:28
![]() Tessa Kiewiet wrote:
Tessa Kiewiet wrote:
Excuses ik keek verkeerd maar in a1b zit wel een fout er zit op 1 plek geen -boven-
28.08.2022 - 22:44
![]() Tessa Kiewiet wrote:
Tessa Kiewiet wrote:
Moet je de steken in de patronen op de terug gaande nld niet breien zoal ze voorkomen dus recht waar recht is en averechts waar averechts is? Zoals ik het patroon bekijk worden er recht waar averechts moet en andersom. Dit klopt volgens mij niet
28.08.2022 - 22:25DROPS Design answered:
Dag Tessa,
Voor alle steken staat aangegeven hoe je ze breit. De lege hokjes brei je recht aan de goede kant en averecht aan de verkeerde kant. De hokjes met de horizontale streepjes brei je averecht aan de goede kant en recht aan de verkeerde kant. In het telpatroon zijn alle naalden aangegeven, dus zowel de heengaande als de teruggaande naalden.
31.08.2022 - 13:47
![]() Connie wrote:
Connie wrote:
Hallo :-) ich stricke gern und viel, aber ich muss sagen.......diese Anleitung ist so kompliziert geschrieben, dass es Mühe macht, sich da durchzulesen. Sie nimmt einfach kein Ende, 10 Seiten und ein ständiges hin und her blättern sind für mich nicht motivierend. trotz alledem, ein sehr schönes Modell und ich werde mich da \" durchbeissen\"
24.07.2021 - 10:57
![]() Eliana wrote:
Eliana wrote:
Thank you again. I was confused because the pattern states that this is an "elevation in back of neck" but the turns are worked in the shoulder stitches. This makes a band of stocking stitch in the shoulders before A1 starts. Is this correct? I can't see it in the photos.
04.02.2021 - 11:50DROPS Design answered:
Dear Eliana, that's correct, that way the neck on back piece will be somewhat higher than the neck on front pieces - you can skip the elevation if you like to, both neck with then have same height. Happy knitting!
04.02.2021 - 13:10
![]() Eliana wrote:
Eliana wrote:
Thank you for answering my previous question so quickly. Do the 48 stitches include the 5 for the garter stitch band? Thank you again.
04.02.2021 - 08:11DROPS Design answered:
Dear Eliana, the 5 front band sts are always included in the number of sts, except when stated, ie on the first short row for elevation you work until 48 sts remain on needle (= including the 5 front band sts), turn and work until 48 sts remain on the other side (= including the 5 front band sts) etc. Happy knitting!
04.02.2021 - 09:45
|
||||||||||||||||||||||||||||
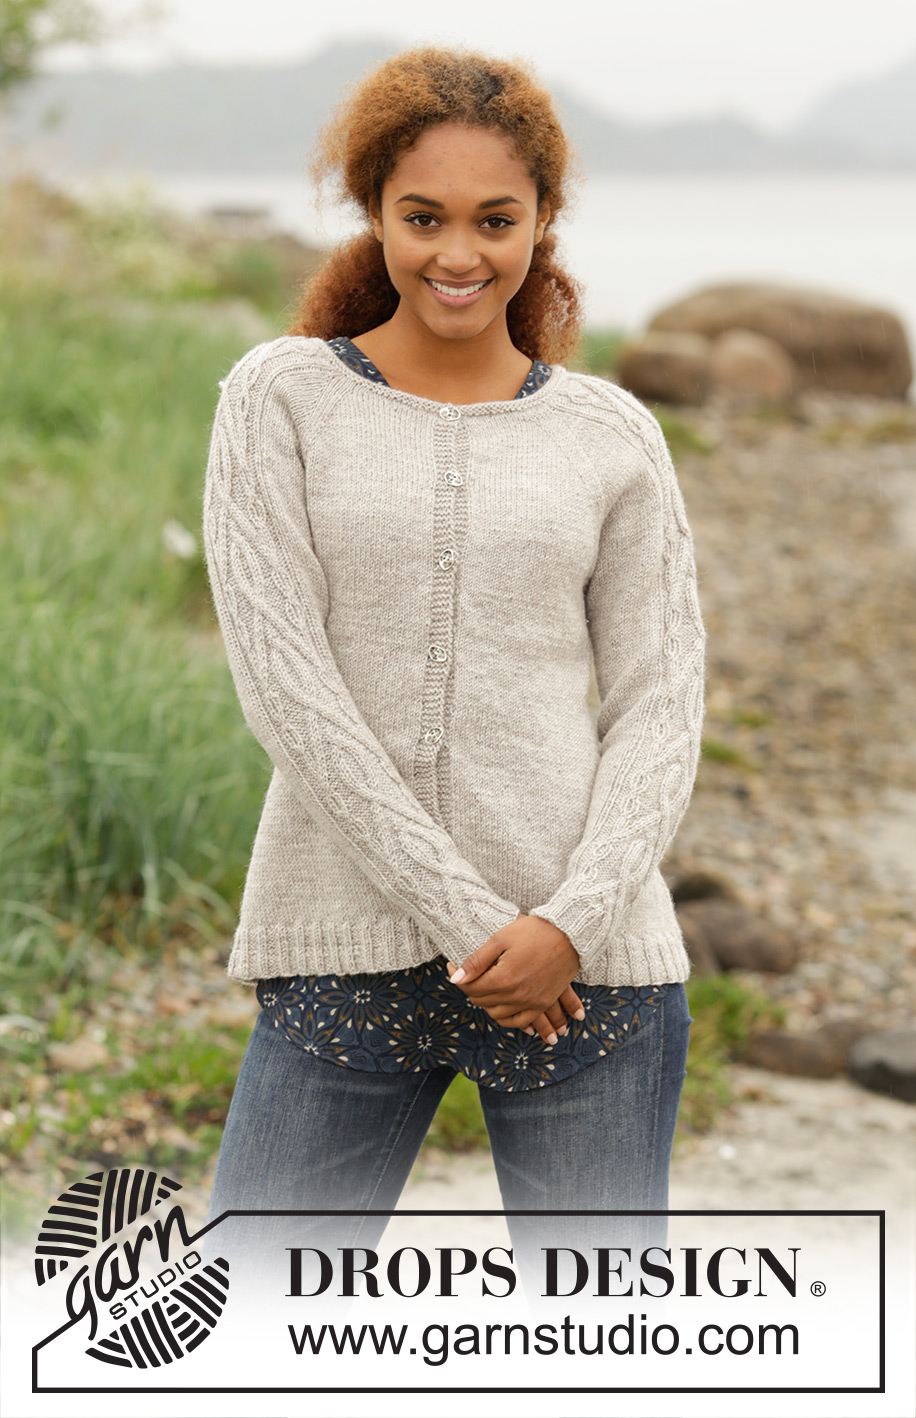
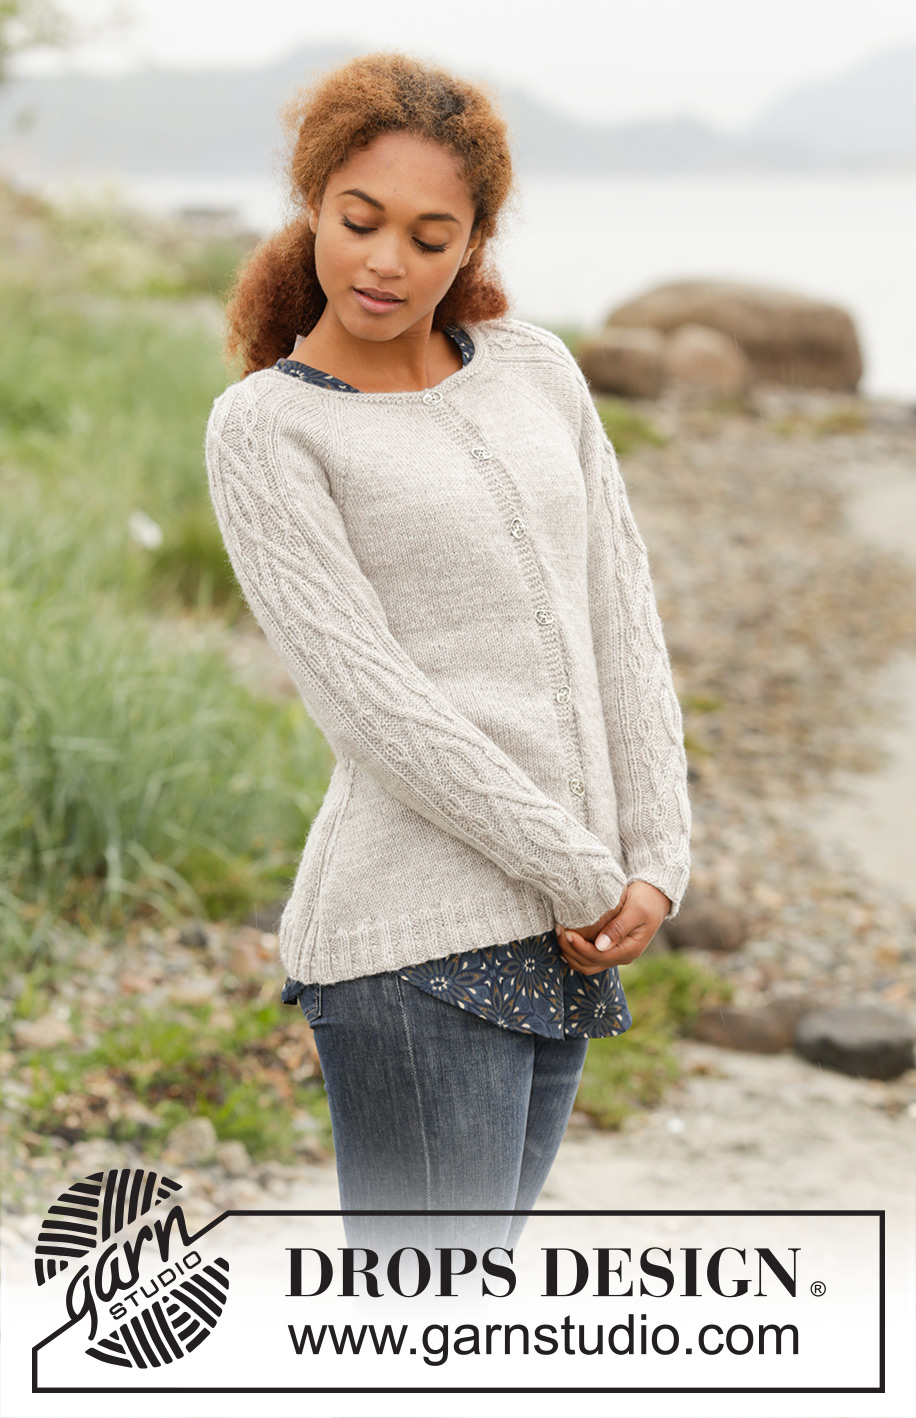
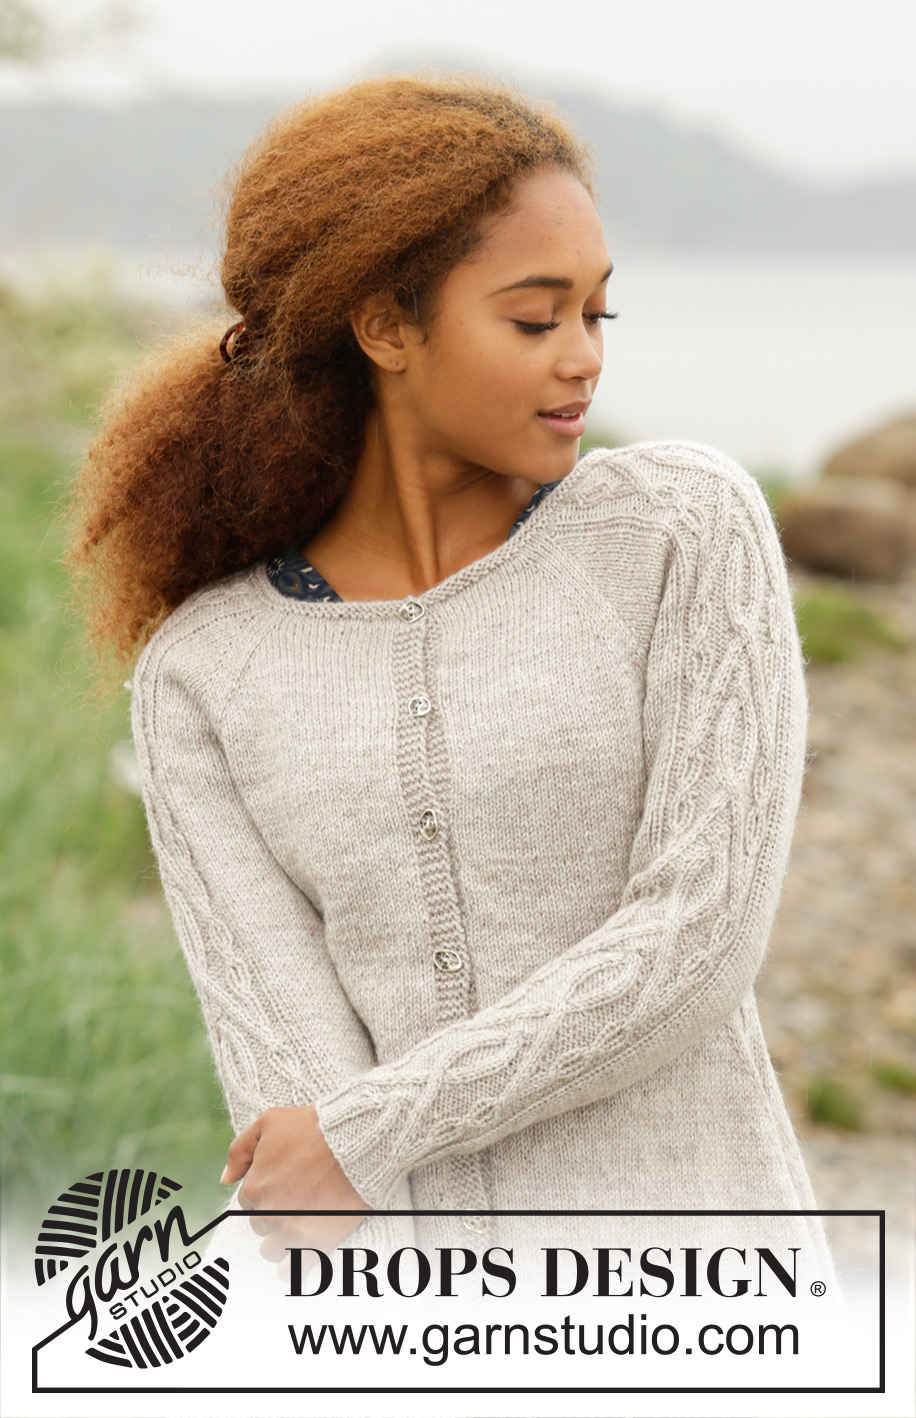
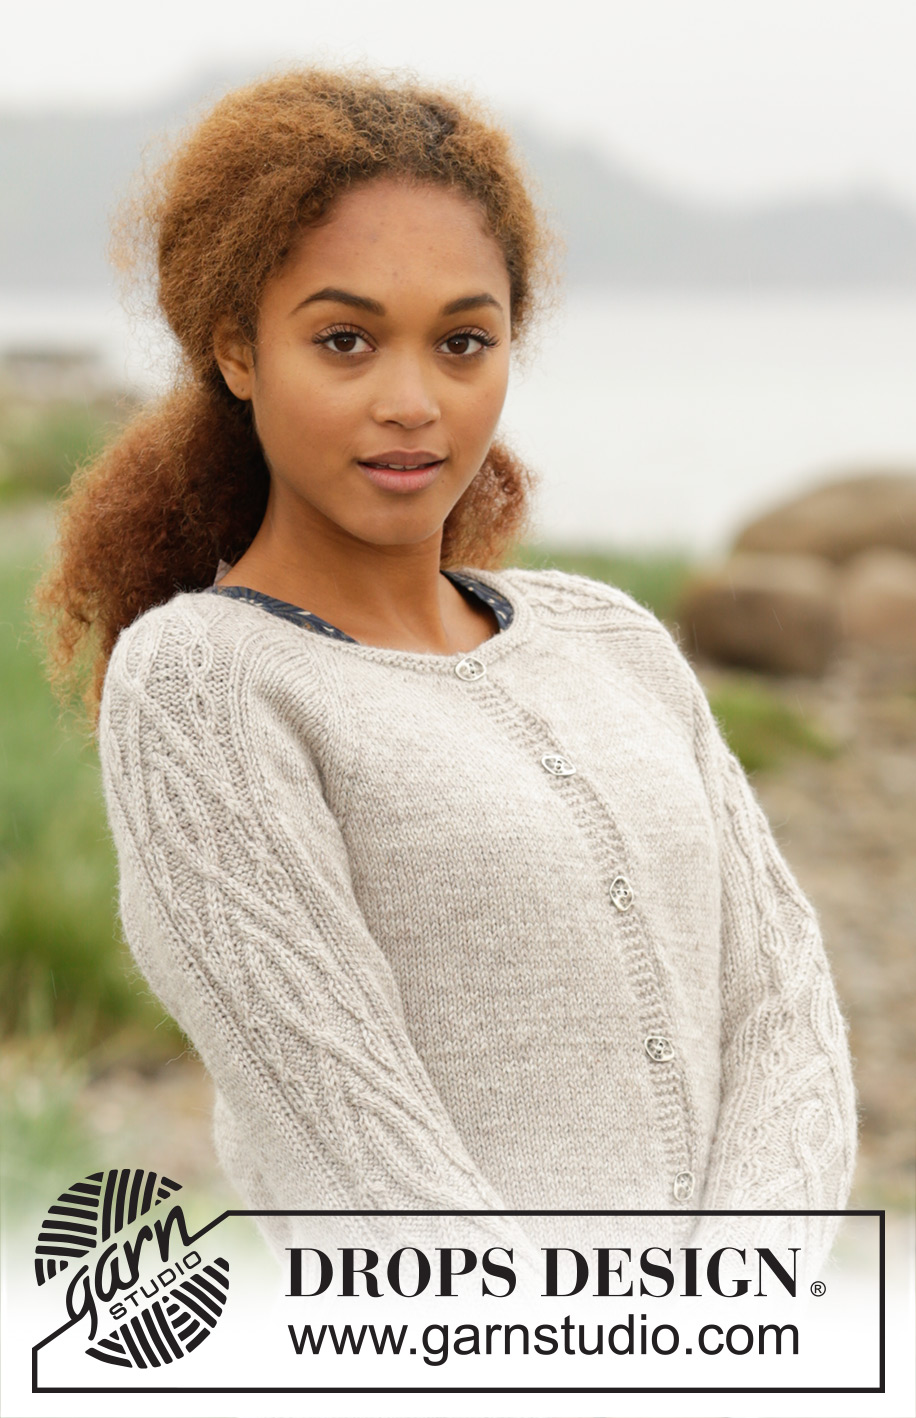
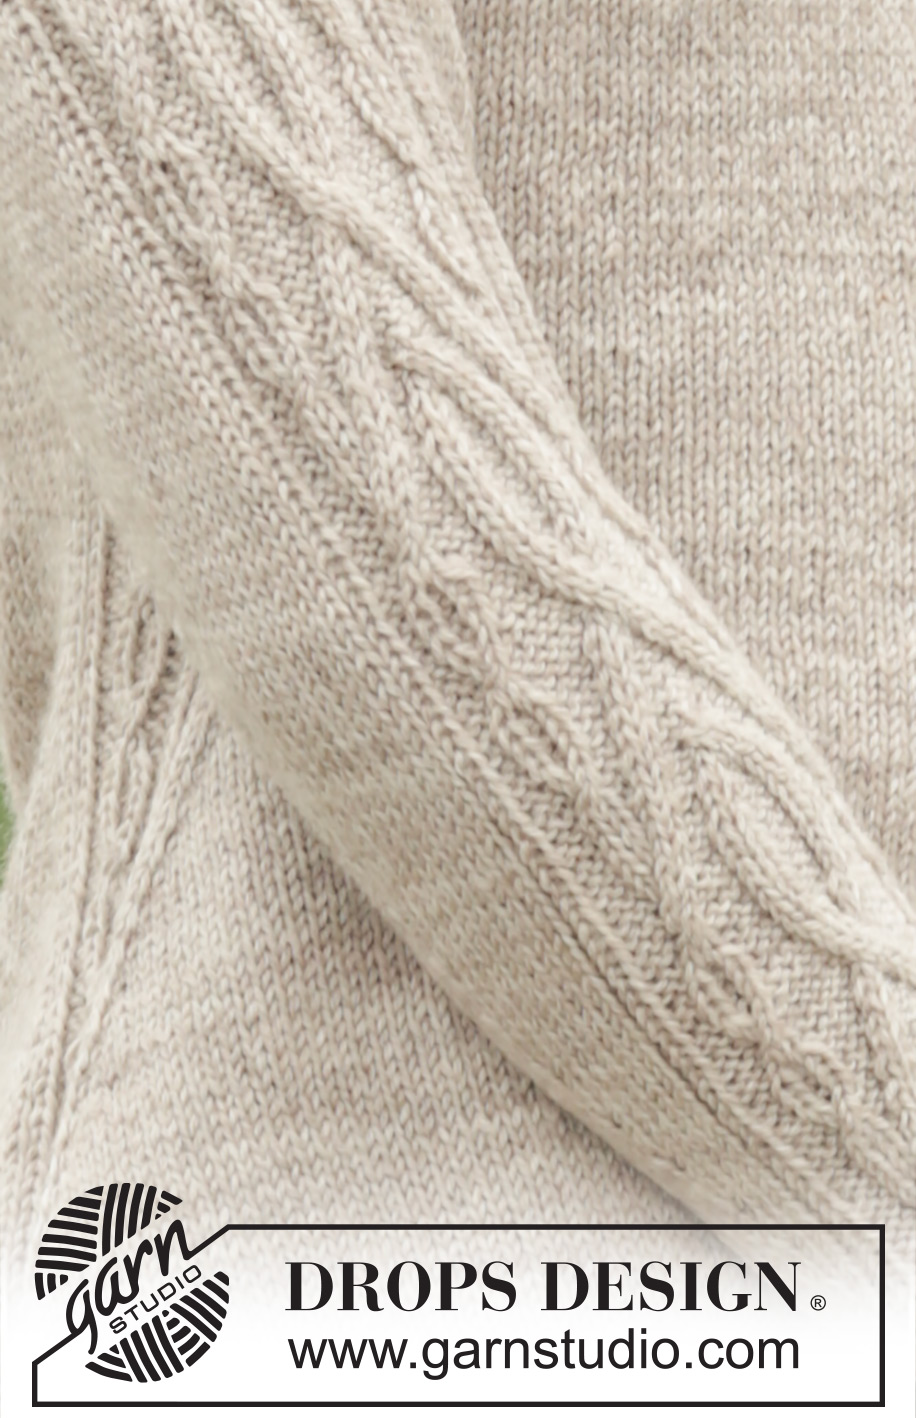
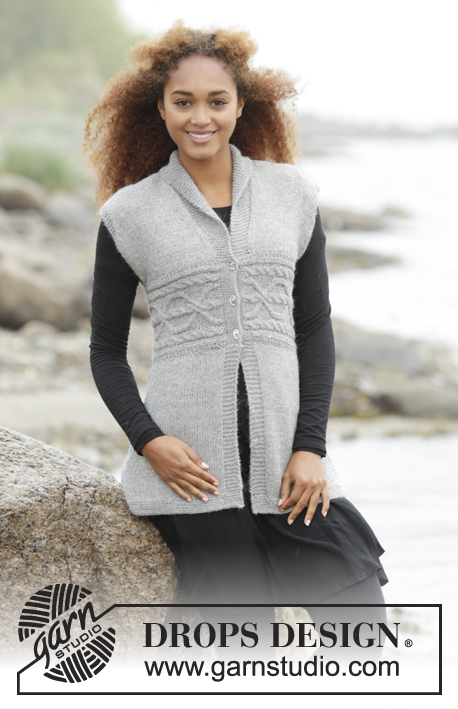
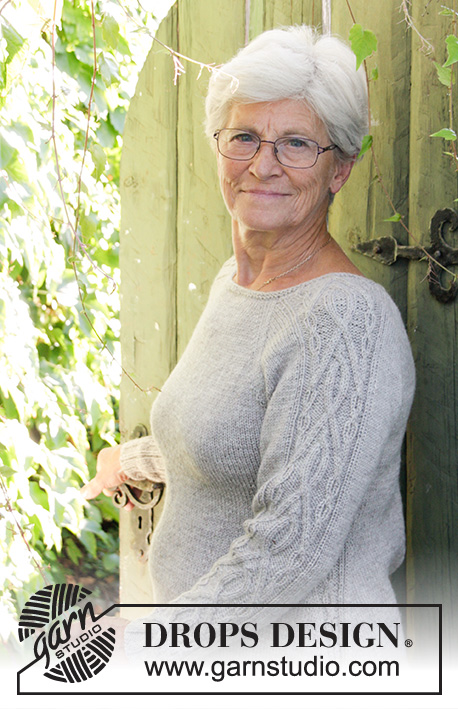
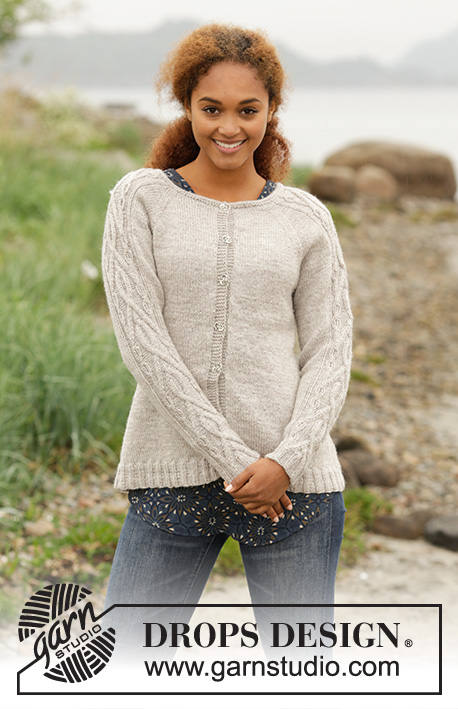
Irish Plaits Cardigan#irishplaitscardigan |
||||||||||||||||||||||||||||
 |
 |
|||||||||||||||||||||||||||
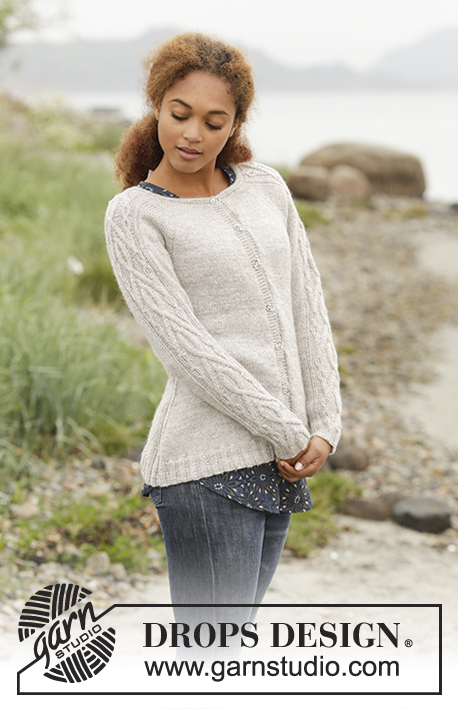
Knitted jacket with raglan and cables on sleeves and in the sides, worked top down in DROPS Karisma or Sky. Size S-XXXL.
DROPS 173-3 |
||||||||||||||||||||||||||||
|
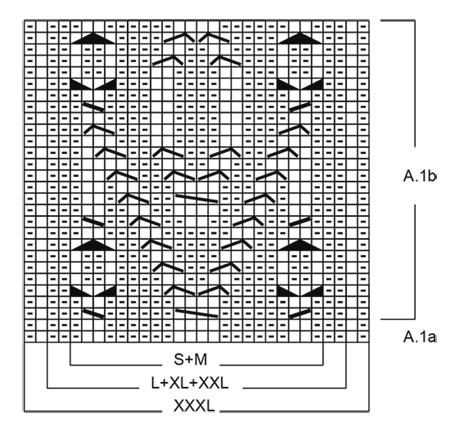
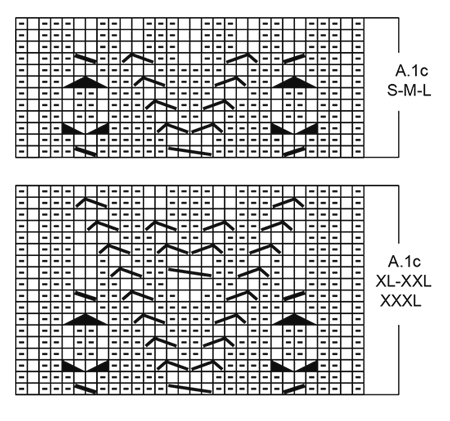
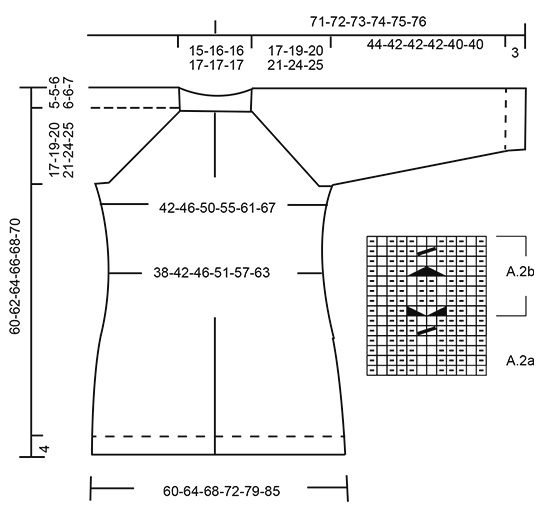
GARTER ST (back and forth): K all rows. 1 ridge = 2 rows K. PATTERN: See diagram A.1 (see diagram for correct size) and A.2. The diagrams show all rows in pattern seen from RS. RAGLAN: Inc for raglan before marker and 2 sts in stocking st. Inc for raglan after marker and 2 sts in stocking st. INC AS FOLLOWS FROM RS: Inc 1 st by making a YO. On next row P YOs twisted to avoid holes. INC AS FOLLOWS FROM WS: Inc 1 st by making a YO. On next row K YO twisted to avoid hole. DECREASE TIP: All dec are done from RS! Work until 4 sts remain before A.2a/A.2b, K 2 tog, K 2, work A.2a/A.2b, K 2, slip 1 st as if to K, K 1, psso. Repeat in the other side (= 4 sts dec). INCREASE TIP-1 (evenly spaced): To calculate how often inc should be done, use the total no of sts on row (e.g. 115 sts), minus bands (e.g. 10 sts) and divide the remaining sts by no of inc to be done (e.g. 11) = 9.5. I.e. in this example inc 1 st alternately approx. every 9th and 10th st (and do not inc over bands). INCREASE TIP-2: All inc are done from RS. Work until 2 st remains before A.2b, 1 YO, K 2, A.2b, K 2, 1 YO. Repeat inc in the other side = 4 sts inc on row. On next row P YO twisted to avoid holes. Then work the new sts in stocking st. SHORT ROWS: For every 10th row work short rows over the 5 sts in garter st in bands as follows (beg from RS): K 5 band sts, turn piece, tighten yarn and K back, turn piece and work as before over all sts, turn piece, K 5 band sts in garter st, turn piece, tighten yarn and K back. That way the ridges in band will not contract as much. CAST-OFF TIP: To avoid a tight cast-off edge, you may use a needle ½ size larger. BUTTONHOLES: Dec for buttonholes on right band. I.e. band at the end of row seen from WS. 1 buttonhole = K tog third and fourth st from edge and make 1 YO. Dec for buttonholes when piece measures (from cast-on edge and along the band): SIZE S: 2, 10, 18, 26, 34, 42 and 51 cm SIZE M: 2, 10, 18, 26, 35, 44 and 53 cm SIZE L: 2, 10, 19, 27, 36, 45 and 54 cm SIZE XL: 2, 11, 20, 29, 38, 47 and 56 cm SIZE XXL: 2, 11, 20, 29, 38, 48 and 58 cm SIZE XXXL: 2, 11, 20, 29, 39, 49 and 59 cm ---------------------------------------------------------- JACKET: Worked top down, back and forth on circular needle. YOKE: Cast on 115-119-123-130-134-140 sts (incl 5 band sts in garter st in each side) on circular needle size 3.5 mm with Karisma or Sky. Work 2 ridges in GARTER ST – see explanation above, then work 1 row in stocking st while inc 11-15-27-32-32-38 sts evenly – READ INCREASE TIP-1, inside 5 band sts in garter st in each side = 126-134-150-162-166-178 sts. Switch to circular needle size 4 mm and work 1 row. Now work an elevation in back of neck in stocking st as follows, beg from RS: Work until 41-43-45-48-49-50 sts remain, turn and work until 41-43-45-48-49-50 sts remain, turn and work until 36-38-40-43-44-45 sts remain, turn and work until 36-38-40-43-44-45 sts remain, turn. Continue back and forth over 5 sts more on every turn until totally 8 short rows have been worked, work the rest of row from WS. Remember BUTTONHOLES AND SHORT ROWS - see explanation above. Now work pattern as follows from RS: Work 5 band sts in garter st, stocking st over the next 16-18-20-23-24-25 sts (= left front piece), insert a marker, 2 sts in stocking st, work A.1a over the next 22-22-26-26-26-30 sts – see diagram for correct size, 2 sts in stocking st (= sleeve), insert a marker, work in stocking st over the next 32-36-40-46-48-50 sts (= back piece), insert a marker, 2 sts in stocking st, work A.1a over the next 22-22-26-26-26-30 sts, 2 sts in stocking st (= sleeve), insert a marker, work in stocking st over the next 16-18-20-23-24-25 sts (= right front piece), work 5 band sts in garter st. REMEMBER THE KNITTING TENSION Work 1 row from WS. Continue pattern like this. When the 2 rows in A.1a have been worked, repeat A.1b over A.1a, AT THE SAME TIME on next row from RS beg inc for RAGLAN – see explanation above, on each side of every marker. NOTE: Inc differently on body and sleeves. RAGLAN BODY: Inc like this every row 0-0-0-2-2-6 times, and every other row 24-26-28-28-32-32 times. Work the new sts in stocking st. RAGLAN SLEEVES: All inc are done from RS. Inc like this every other row 16-24-25-27-25-23 times, and every 4th row 4-1-1-1-4-6 times. In size S-XXL work the new sts in pattern A.1b until there is room for the entire pattern (= 30 sts). Then work the new sts in stocking st. In size XXXL work all the new sts in stocking st. When all inc are done there are 302-338-366-394-418-446 sts on needle. Piece measures 17-19-20-21-24-25 cm along band. Now work as follows from WS: Work the first 45-49-53-58-63-68 sts, slip the next 66-76-82-86-88-92 sts on a stitch holder (= sleeve), cast on 8-8-10-10-12-14 sts under sleeve, work the next 80-88-96-106-116-126 sts, slip the next 66-76-82-86-88-92 sts on a stitch holder (= sleeve), cast on 8-8-10-10-12-14 sts under sleeve, work the remaining 45-49-53-58-63-68 sts on row. BODY: There are now 186-202-222-242-266-290 sts for body. NOW MEASURE THE PIECE FROM HERE. Now work pattern as follows: Work 5 band sts in garter st, work 38-42-47-52-58-64 sts in stocking st, work A.2a (= 12 sts), work 76-84-94-104-116-128 sts in stocking st, work A.2a, work 38-42-47-52-58-64 sts in stocking st, 5 band sts in garter st. When A.2a has been worked vertically, repeat A.2b vertically over A.2a. When piece measures 4 cm, dec on each side of every repetition of A.2a - READ DECREASE TIP! Dec like this every 6th-6th-4th-4th-6th-6th row 4-4-5-5-4-4 times in total = 170-186-202-222-250-274 sts. When piece measures 13 cm in all sizes, inc 1 st in each side of A.2b - READ INCREASE TIP-2! Inc like this every other row a total of 23 times in all sizes = 262-278-294-314-342-366 sts. Continue until piece measures 34-34-34-35-34-34 cm adjust so that one whole repetition of A.2b has been worked vertically. Now inc sts evenly as follows on next row from RS: Work 5 band sts in garter st, work in stocking st over the next 57-61-65-70-77-83 sts while inc 10-11-12-12-15-14 sts evenly, work K over K and P over P over the next 12 sts, work in stocking st over the next 114-122-130-140-154-166 sts while inc 18-15-17-17-18-16 sts evenly, work K over K and P over P over the next 12 sts, work in stocking st over the next 57-61-65-70-77-83 sts while inc 10-11-12-12-15-14 sts evenly, work 5 band sts in garter st = 300-315-335-355-390-410 sts. Switch to circular needle size 3.5 mm and work 1 row. Now work rib as follows from RS: 5 band sts in garter st, (K 2, P 3) over the next 65-70-75-80-90-95 sts, K 2, work K over K and P over P over the next 12 sts, work (K 2, P 3) over the next 130-135-145-155-170-180 sts, K 2, work K over K and P over P over the next 12 sts, work (K 2, P 3) over the next 65-70-75-80-90-95 sts, K 2, 5 band sts in garter st. Continue like this back and forth until rib measures 2 cm. Now inc 1 P st in every section with 3 P = 356-374-398-422-464-488 sts. Continue with rib until rib measures 4 cm in total. Cast off with K over K and P over P - READ CAST-OFF TIP. Fasten off. SLEEVES: Worked in the round on double pointed needles. NOW MEASURE THE PIECE FROM HERE. Slip the 66-76-82-86-88-92 sts from stitch holder back on double pointed needles size 4 mm and pick up 1 st in each of the 8-8-10-10-12-14 new sts cast on under sleeve = 74-84-92-96-100-106 sts. Insert a marker in the middle of these new sts (= 4-4-5-5-6-7 new sts on each side of marker). Continue in the round with pattern A.1b over the 30 sts in the middle of sleeve and work A.2a (= 12 sts) mid under sleeve (i.e. 6 sts of pattern A.2a on each side of marker). Work remaining sts in stocking st. When A.2a has been worked vertically, repeat A.2b vertically over A.2a. When piece measures 4 cm, dec 1 st on each side of A.2b under sleeve - remember decrease tip. Dec like this every 7th-5th-4th-4th-4th-3rd round 14-18-21-22-23-25 times in total = 46-48-50-52-54-56 sts. When A.1b has been worked 6 times in total vertically (incl pattern on yoke), continue with A.1c (- see diagram for correct size). When entire A.1c has been worked vertically, continue with K over K and P over P over these sts. When piece measures 44-42-42-42-40-40 cm – adjust so that A.2b has been worked 1 time vertically (shorter measurements in the larger sizes because of longer yoke). Switch to double pointed needles size 3.5 mm. Now work rib, beg from the 12 sts in A.2b mid under sleeve: Work K over K and P over P over the first 12 sts (= A.2b), P 0-0-0-1-1-2, K 2-3-4-3-4-3, P 0-0-0-1-1-2, work K over K and P over P over the next 30 sts, P 0-0-0-1-1-2, K 2-3-4-3-4-3, P 0-0-0-1-1-2. When rib measures 3 cm, cast off with K over K and P over P. Fasten off. Knit another sleeve the same way. ASSEMBLY: Sew the buttons on to the left band. |
||||||||||||||||||||||||||||
Diagram explanations |
||||||||||||||||||||||||||||
|
||||||||||||||||||||||||||||
 |
||||||||||||||||||||||||||||
 |
||||||||||||||||||||||||||||
 |
||||||||||||||||||||||||||||
Have you finished this pattern?Tag your pictures with #dropspattern #irishplaitscardigan or submit them to the #dropsfan gallery. Do you need help with this pattern?You'll find 30 tutorial videos, a Comments/Questions area and more by visiting the pattern on garnstudio.com. © 1982-2026 DROPS Design A/S. We reserve all rights. This document, including all its sub-sections, has copyrights. Read more about what you can do with our patterns at the bottom of each pattern on our site. |
||||||||||||||||||||||||||||


With over 40 years in knitting and crochet design, DROPS Design offers one of the most extensive collections of free patterns on the internet - translated to 17 languages. As of today we count 324 catalogues and 12290 patterns translated into English (UK/cm). 12290
We work hard to bring you the best knitting and crochet have to offer, inspiration and advice as well as great quality yarns at incredible prices! Would you like to use our patterns for other than personal use? You can read what you are allowed to do in the Copyright text at the bottom of all our patterns. Happy crafting!
Post a comment to pattern DROPS 173-3
We would love to hear what you have to say about this pattern!
If you want to leave a question, please make sure you select the correct category in the form below, to speed up the answering process. Required fields are marked *.