
Popular categories
Looking for a yarn?


Comments / Questions (9)
![]() Hannie Roekevisch wrote:
Hannie Roekevisch wrote:
Zijn in het patroon alleen de heengaan naalden getekend? En de teruggaan naalden zoals ze zich voordoen?
07.03.2022 - 12:50DROPS Design answered:
Dag Hannie,
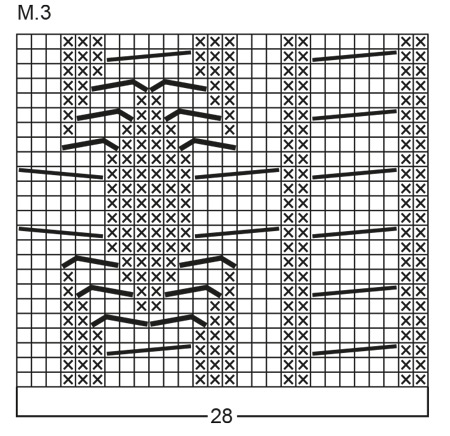
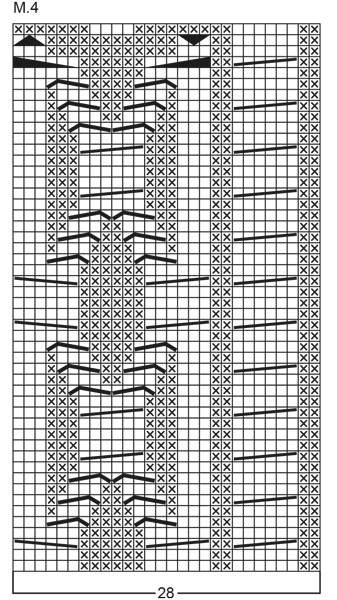
In het patroon zijn alle naalden getekend, dus zowel de heengaande als de teruggaande naalden. De lege vakjes brei je recht op de goede kant en averecht op de verkeerde kant. De vakjes met een kruisje brei je averecht op de goede kant en recht op de verkeerde kant.
10.03.2022 - 12:12
![]() Connie F Shelley wrote:
Connie F Shelley wrote:
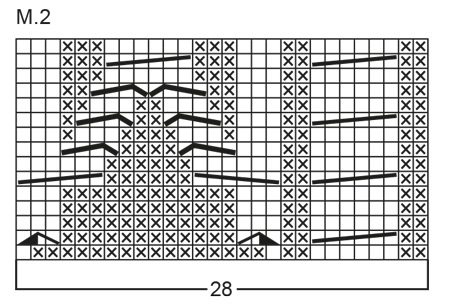
I have done the pattern through working diagram M.2. The instructions say, "After M.2 complete piece in M.3." First, the next to last diagram of M.2 has the cable and there aren't enough rows completed for the cable between the end of M.2 and the beginning of M.3. Also, I don't see the continuity of the pattern with 16 purls going to 12 knit stitches. It feels like there should be something else between the diagrams. What am I missing? Thanks!
11.10.2021 - 19:23DROPS Design answered:
Dear Mrs Shelley, after you have worked M.2, just work diagram M.3 over the 28 sts of M.2, ie starting with P2, cable (6 sts), P2, then then K3, P3, K6 , P3, K3 - there will be still 3 rows between the first cable in M.2/M.3 as before in M.1, ie all stitches on first row in M.3 (from RS) should match the sts on last row in M.2 (from WS). there aren't any P16 anymore at the end of M.2, these were just at the very beg of M.2. Can this help?
12.10.2021 - 08:39
![]() Connie F Shelley wrote:
Connie F Shelley wrote:
It says that the explanation of the diagram is at the bottom of the page. It is there, but it is not in English on my page. May I have an English translation of the diagram, please?
23.05.2021 - 16:28DROPS Design answered:
Dear Connie this is an older model of ours.The explanations for the diagram, just above the diagrams itself, and you will have to match the explanations row by row to the symbols unfortunately. Happy Knitting!
24.05.2021 - 03:32
![]() Jenny De Jong wrote:
Jenny De Jong wrote:
Wat een geweldige service, Drops! Ik ben erg blij met de Nederlandse vertaling van het patroon. Groeten, Jenny de Jong.
04.07.2020 - 12:42
![]() Jenny De Jong wrote:
Jenny De Jong wrote:
There's a Dutch flag saying there's a Dutch translation, but I can't find it. Where is it?
03.07.2020 - 07:34DROPS Design answered:
Dag Jenny,
Het patroon is nu beschikbaar in het Nederlands. Je kan hem hier vinden. Veel breiplezier!
04.07.2020 - 11:22Vickii Wilson wrote:
Thank you for your reply but I'm sorry I can not match the written explanations to the chart symbols. If you could possible send me a more detailed explanation with symbol to which = matches please. thank you
27.11.2016 - 12:21DROPS Design answered:
Dear Mrs Wilson, English translation is given in the same order the Norwegian text, ie 1st symbol = 1st text = K, 2nd symbol = 2nd text = P, 3rd symbol = 3rd text = slip 3 sts on cable needle behind piece, K3, K3 from cable needle, and so on. Happy knitting!
28.11.2016 - 09:27Vickii. Wilson wrote:
Could you please send me the English translation for the graph patterns for this jacket please as soon as you can.
25.11.2016 - 05:35DROPS Design answered:
Dear Mrs Wilson, you will find translation of diagram text at the very end of written pattern, with "=" they are given in the same order than in norwegian, at the very bottom of the pattern (under measurement chart). Happy knitting!
25.11.2016 - 08:53
![]() Drops Design wrote:
Drops Design wrote:
Diagrammene ligger der nå.
15.03.2006 - 14:46
![]() Eva Antin wrote:
Eva Antin wrote:
Hej! Saknar diagram till mönster 1 och mönster 2
14.03.2006 - 20:13
|
|||||||||||||||||||||||||||||||||||||||||||
DROPS Extra 0-65 |
|||||||||||||||||||||||||||||||||||||||||||
 |
 |
||||||||||||||||||||||||||||||||||||||||||
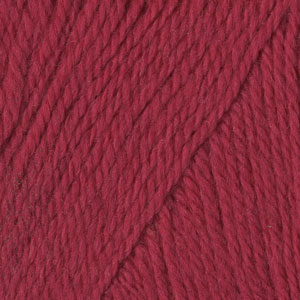
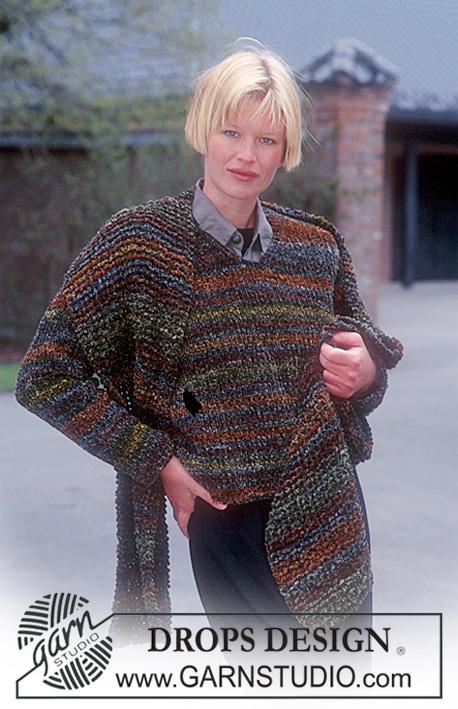
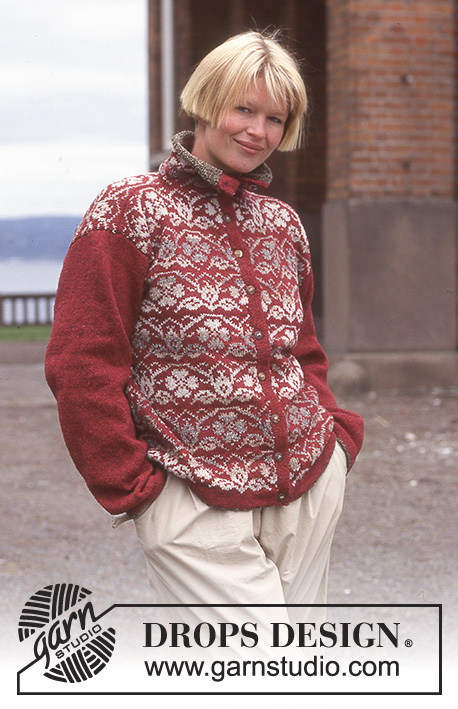
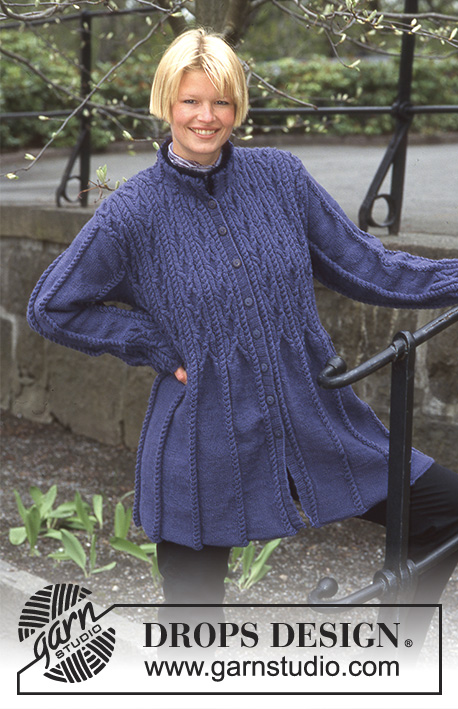
DROPS jacket with cables in “Camelia”. Size XS – XL.
DROPS Extra 0-65 |
|||||||||||||||||||||||||||||||||||||||||||
|
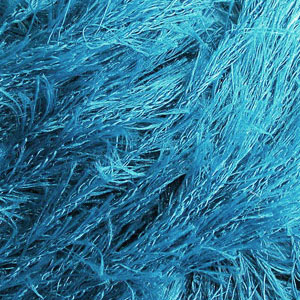
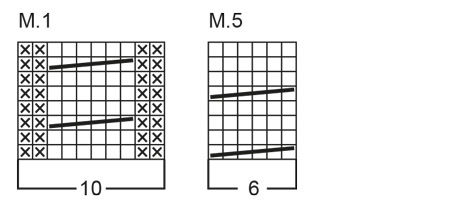
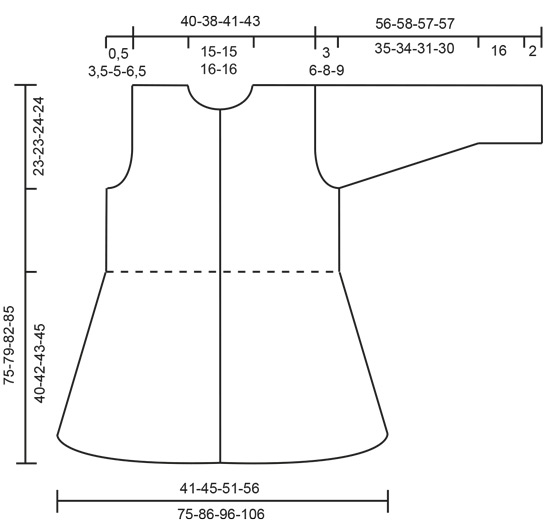
Garter st, back and forth on needle: K all rows. Garter st, in the round: K1 round, P 1 round. Pattern: See diagram. The diagram shows the pattern from the RS. English explanations to the diagrams are given at the bottom of this page. Rib: * K3, P2 *, repeat from *-*. Increasing tip: No inc in the first and the last cable. In all odd cables inc in the st before the cable and in all even cables inc in the st after cable. Front and back piece: Worked back and forth on circular needle from mid front. Cast on 404-460-516-572 sts (includes 1 edge st each side towards mid front) on circular needle size 3 mm with Camelia and work 2 rows garter st – see above. Continue as follows: 1 garter st (= edge st), M.1, * 18-18-18-18 sts in reverse stocking st, M.1 *, repeat from *-* across the row and finish with 1 garter st (= edge st). Remember the knitting tension! When piece measures 40-42-43-45 cm (adjust to pattern) work M.2with 1 garter st each side. After M.2 complete piece in M.3. When piece measures 52-56-58-61 cm work next row as follows: 102-116-130-144 sts on front piece, cast off 4 sts for armhole, 192-220-248-276 sts on back piece, cast off 4 sts for armhole, 102-116-130-144 sts on front piece. Now complete each piece separately. Back piece: = 192-220-248-276 sts. Cast off to shape the armhole each side on every other row: 4 sts 0-1-2-2 times, 3 sts 0-2-3-3 times, 2 sts 0-3-4-4 times, 1 st 2-4-5-5 times = 188-180-188-216 sts. When piece measures 73-77-80-83 cm dec 18 sts evenly on the middle 54-54-56-56 sts and on next row cast off the middle 32-32-34-34 sts for neck. Now complete each side separately and cast off 2 sts on neckline on next row = 67-63-66-80 sts on shoulder. When piece measures approx 75-79-82-85 cm – adjust to a full cable – dec 34-33-42-42 sts evenly on row and cast off remaining sts on shoulder. Front piece: = 102-116-130-144 sts. Cast off to shape the armhole at the side as described for back piece = 100-96-100-114 sts. When piece measures 68-72-75-78 cm slip sts on a stitch holder for neckline towards mid front on every other row as follows: 17-17-18-18 sts 1 time, 3 sts 3 times, 2 sts 2 times, 1 st 3 times = 67-63-66-80 sts on shoulder. When piece measures approx 75-79-82-85 cm – adjust to a full cable – dec 34-33-42-42 sts evenly on row and cast off remaining sts on shoulder. Sleeve: Cast on 112-112-140-140 sts on double pointed needles size 2.5 mm and work 2 cm rib. Change to needle size 3 mm and work M.4. After M.4 there are 96-96-120-120 sts on round. Work next round as follows: * M.5, dec the next 18 P sts evenly to 12 *, repeat from *-* = 72-72-90-90 sts and 4-4-5-5 cables with 12 P sts between each. Now continue in pattern like this on these sts, at the same time inc 1 st by cables – see increasing tip – on every 9-9-12-12 round a total of 12-12-8-8 times = 120-120-130-130 sts – P inc sts! When piece measures 53-52-49-48 cm cast off 4 sts mid under arm and complete piece back and forth on needle. Cast off for sleeve cap each side on every other row: 4 sts 5-3-3-2 times, 3 sts 0-3-3-3 times, 2 sts 0-2-4-6 times 3 sts 0-2-3-3 times and cast off remaining sts. Piece measures approx 56-58-57-57 cm. Assembly: Sew shoulder seams. Pick up approx 165-175-180-190 sts (divisible by 5) along left front piece on circular needle size 3 mm with Camelia and work 3 cm rib with 1 garter st each side back and forth on needle, cast off. Repeat along right front piece, but after 1 cm make 8 buttonholes evenly distributed. 1 buttonhole = cast off 2 sts and cast on 2 new sts on return row. Pick up approx 140-140-152-152 sts (includes sts on stitch holders at front) round neckline incl front bands on needle size 2.5 mm with Camelia and continue as follows: 1 garter st, * M.5, 6 sts in reverse stocking st *, repeat from *-* and finish with 1 garter st. After 6 cm change to Pelliza, work 6 cm stocking st and cast off. Fold edge double towards WS and fasten. Set in sleeves. Sew on buttons to fit buttonholes. |
|||||||||||||||||||||||||||||||||||||||||||
Diagram explanations |
|||||||||||||||||||||||||||||||||||||||||||
|
|||||||||||||||||||||||||||||||||||||||||||
 |
|||||||||||||||||||||||||||||||||||||||||||
 |
|||||||||||||||||||||||||||||||||||||||||||
 |
|||||||||||||||||||||||||||||||||||||||||||
 |
|||||||||||||||||||||||||||||||||||||||||||
 |
|||||||||||||||||||||||||||||||||||||||||||
Have you finished this pattern?Tag your pictures with #dropspattern or submit them to the #dropsfan gallery. Do you need help with this pattern?You'll find 25 tutorial videos, a Comments/Questions area and more by visiting the pattern on garnstudio.com. © 1982-2026 DROPS Design A/S. We reserve all rights. This document, including all its sub-sections, has copyrights. Read more about what you can do with our patterns at the bottom of each pattern on our site. |
|||||||||||||||||||||||||||||||||||||||||||


With over 40 years in knitting and crochet design, DROPS Design offers one of the most extensive collections of free patterns on the internet - translated to 17 languages. As of today we count 324 catalogues and 12290 patterns translated into English (UK/cm). 12290
We work hard to bring you the best knitting and crochet have to offer, inspiration and advice as well as great quality yarns at incredible prices! Would you like to use our patterns for other than personal use? You can read what you are allowed to do in the Copyright text at the bottom of all our patterns. Happy crafting!
Post a comment to pattern DROPS Extra 0-65
We would love to hear what you have to say about this pattern!
If you want to leave a question, please make sure you select the correct category in the form below, to speed up the answering process. Required fields are marked *.