
Popular categories
Looking for a yarn?


Comments / Questions (18)
![]() Sara wrote:
Sara wrote:
Buongiorno, non capisco come "Unire il davanti e dietro e riprendere le maglie per l’arrotondamento della manica come segue:". quali sono i punti che devo riprendere? per la taglia L ho in sospeso 58 maglie del dietro più le 16 + 16 per le spalle, come arrivo alle 120 richieste nel davanti? quali sono le parti che devo unire? grazie!
23.03.2026 - 11:31DROPS Design answered:
Buonasera Sara, l'unione delle parti e la ripresa delle maglie sono spiegate nel FERRO 1. Buon lavoro!
23.03.2026 - 22:09
![]() Karin Næss Bakås wrote:
Karin Næss Bakås wrote:
Hvordan ser jeg hvor mange nøster jeg trenger for spesifikk størrelse?
28.02.2026 - 19:33DROPS Design answered:
Hei Karin, Drops Brushed Alpaca Silk er solgt i 25 g nøster. Antall gram er gitt under Garn på toppen av siden. For eksempel, størrelse S trenger 200 g = 8 nøster. Hilsen Drops Team.
03.03.2026 - 07:12
![]() Neala Corbett wrote:
Neala Corbett wrote:
Is the yarn for this,pattern available to order from Canada
17.02.2026 - 21:30DROPS Design answered:
Hi Neala, Here is a link to stores selling Drops Yarns in Canada: https://www.garnstudio.com/findastore.php?id=15&cid=19 Regards, Drops Team.
18.02.2026 - 06:44
![]() Betty wrote:
Betty wrote:
ROUND 2: Knit. “Repeat these 2 rounds until you have increased 7-8-11-12-15-16 times on the body and sleeves. You have increased a total of 13-14-16-17-18-19 times on sleeves = 220-232-252-264-284-300 stitches.“ Burada bir yanlışlık mı var? Özellikle “7-8-11-12-15-16 “& “13-14-16- 17-18-19 kısımlarında.
16.01.2026 - 12:57DROPS Design answered:
Dear Betty, you previously increased 6 times for sleeves, now working 7 times the rounds 1 and 2 you will increase 7 times + 6 previously worked = you have increased a total of 13 times for sleeves. Happy knitting!
19.01.2026 - 07:39
![]() Valérie wrote:
Valérie wrote:
Bonjour , après avoir rejoint les mailles en rond. Quel est le début du rang ? avant ou après les mailles montées pour l'encolure. Merci Cordialement
11.01.2026 - 11:22DROPS Design answered:
Bonjour, après les mailles montées pour l'encolure. Bon tricot!
12.01.2026 - 11:14
![]() Danièle wrote:
Danièle wrote:
Bonjour, Pour les épaules, relever 1 maille dans chaque rang à 1 maille du bord = 14-14-14-14-14-16 mailles. 1 maille du bord ? quel bord ? du côté de emmanchure ou du côté de l'encolure ?
06.12.2025 - 14:40DROPS Design answered:
Bonjour Danièle, vous relevez 1 maille dans chacun des 14 ou 16 rangs tricotés pour le dos. Découvrez ici, en vidéo ou bien là, en photos, comment on relève les mailles des devants. Bon tricot!
08.12.2025 - 08:47
![]() Jet wrote:
Jet wrote:
Hallo, ik heb een vraag over de voorpanden. Het is onduidelijk waar deze moeten komen. Op het instructiefilmpje lijken ze aan de achterkant te worden opgezet van de pas en meegebreid te worden met het achterpand. Dat heb ik gedaan maar nu wordt de hals te laag dus klopt het niet denk ik. Moeten de voorpanden dan toch aan de hals-kant van de pas komen? Want dan heb je wel 2 losse delen en niet 1 deel aan 1 stuk. Is er een instructiefilmpje die het juiste laat zien? Mvg Jet
10.11.2025 - 08:21DROPS Design answered:
Dag Jet,
Boven de paragraaf over het achterpand stond 'linker schouder', dat moet 'rechter schouder' zijn. Het is nu aangepast en hopelijk is het daardoor nu duidelijker.
10.11.2025 - 21:04
![]() Jet wrote:
Jet wrote:
Hallo, ik heb een vraag over de voorpanden. Het is onduidelijk waar deze moeten komen. Op het instructiefilmpje lijken ze aan de achterkant te worden opgezet van de pas en meegebreid te worden met het achterpand. Dat heb ik gedaan maar nu wordt de hals te laag dus klopt het niet denk ik. Moeten de voorpanden dan toch aan de hals-kant van de pas komen? Want dan heb je wel 2 losse delen en niet 1 deel aan 1 stuk. Is er een instructiefilmpje die het juiste laat zien? Mvg Jet
10.11.2025 - 08:00DROPS Design answered:
Dag Jet,
De schoudernaad zit een stukje op het achterpand, vandaar dat het lijkt alsof de hals aan de voorkant te laag wordt. De bovenkant van de schouder is dus niet dezelfde plek als de schoudernaad.
14.12.2025 - 16:53
![]() Unni Løvhaug wrote:
Unni Løvhaug wrote:
Hei Jeg kan ikke finne ut av hvordan jeg skal strikke forstykkene da jeg ikke ser noen detaljert beskrivelse av dette. Håper dere kan hjelpe meg med dette. Mvh Unni
01.10.2025 - 22:07DROPS Design answered:
Hei Unni, Avsnittene hvor det står Venstre Skulder og Høyre Skulder er begynnelsen av forstykkene, som er strikket opp langs skuldrene på bakstykket. Etter økningene for halsen er ferdig på begge skuldrene, er de 2 forstykkene strikket sammen. Håper dette hjelper. Hilsen Drops Team.
02.10.2025 - 06:14
![]() Susi wrote:
Susi wrote:
Gemeint war natürlich Drops Melody... ;-)
13.08.2025 - 12:50
|
|
Misty Move#mistymovesweater |
|
 |
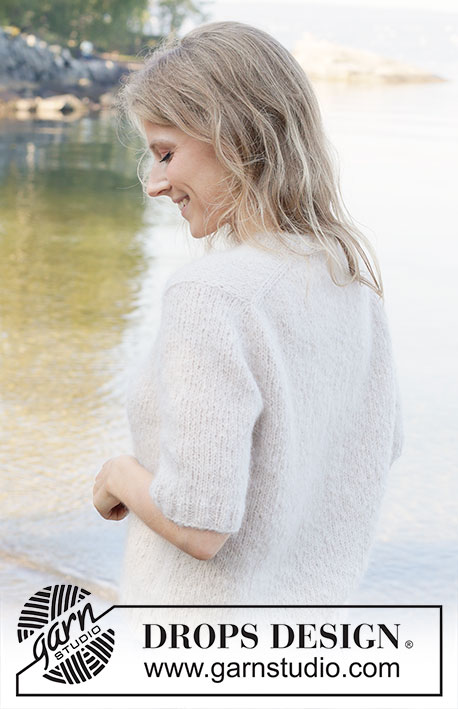 |
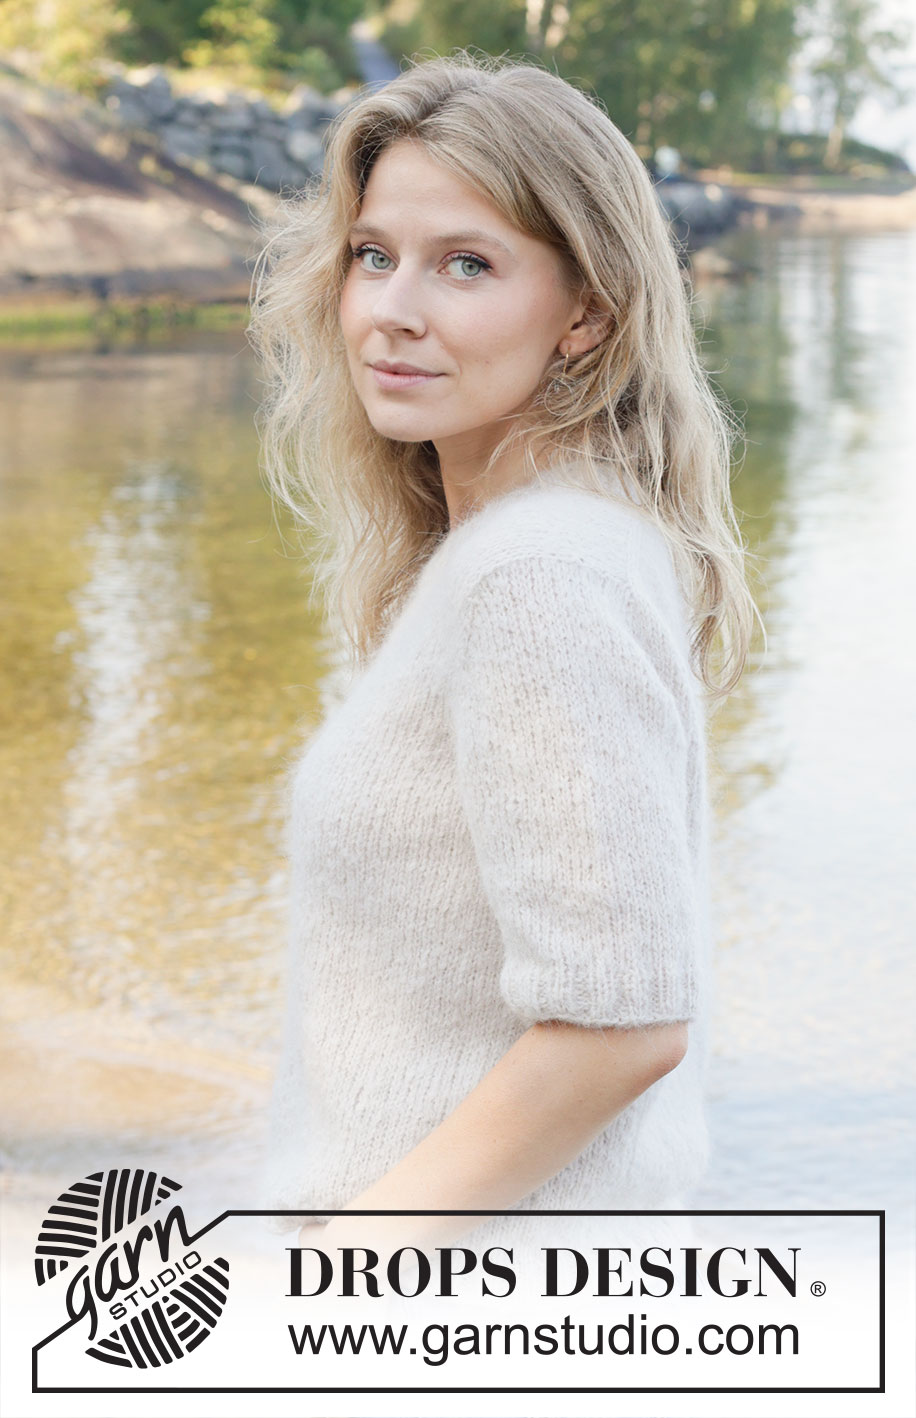
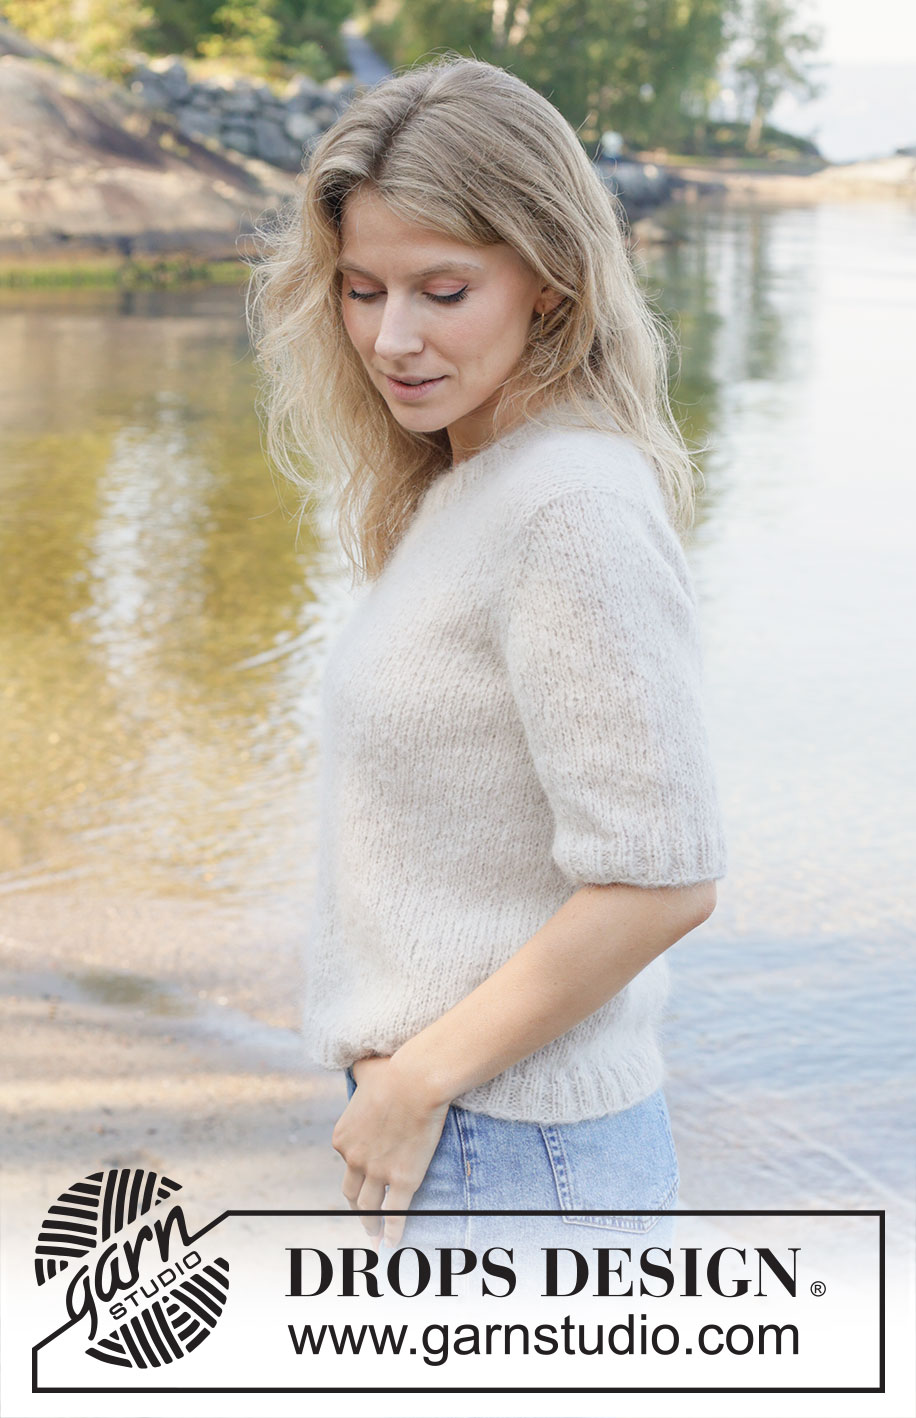
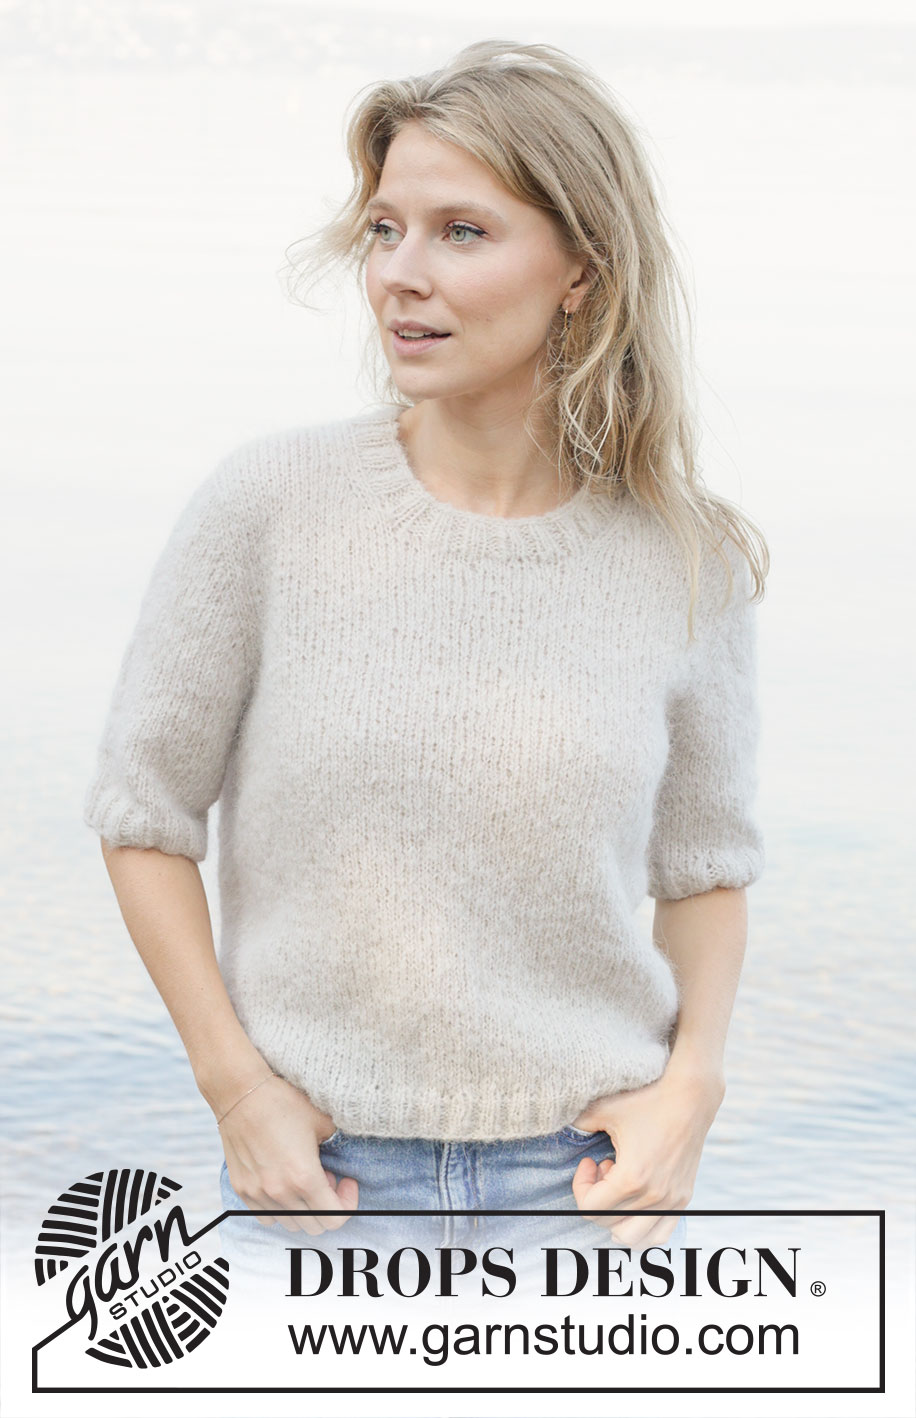
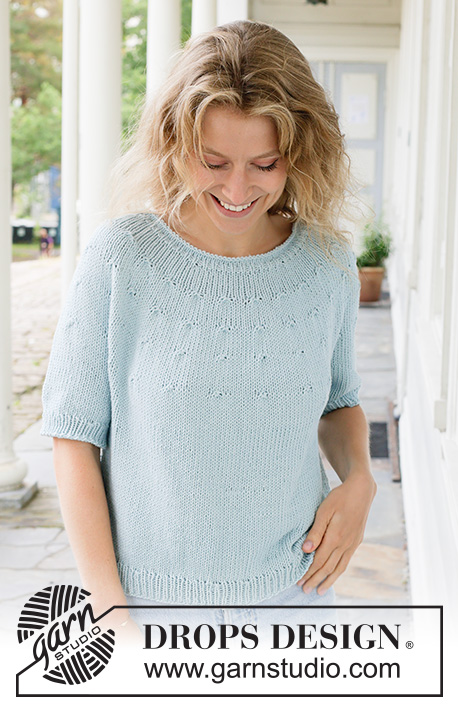
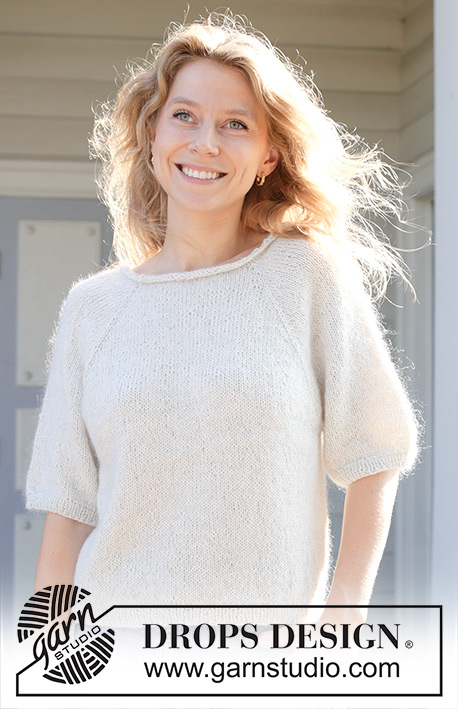
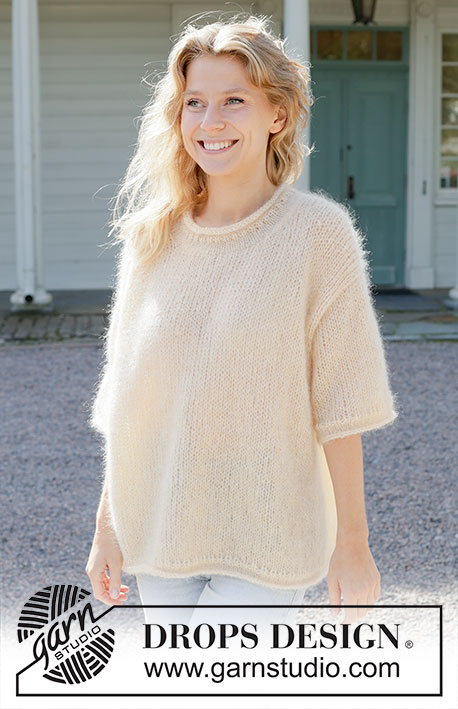
Knitted jumper in 1 strand DROPS Melody or 2 strands DROPS Brushed Alpaca Silk. The piece is worked top down with European yoke and short sleeves. Sizes S - XXXL.
DROPS 258-11 |
|
|
------------------------------------------------------- EXPLANATIONS FOR THE PATTERN: ------------------------------------------------------- INCREASE TIP-1: INCREASE 1 STITCH TOWARDS THE LEFT - from RIGHT SIDE: Use left needle to pick up yarn between 2 stitches from row below, pick up yarn from the front and knit in the stitch loop that is on the back of the needle. INCREASE 1 STITCH TOWARDS THE RIGHT - from RIGHT SIDE: Use left needle to pick up yarn between 2 stitches from row below, pick up yarn from the back and knit in the stitch loop that is on the front side of the needle. . INCREASE TIP-2: INCREASE 1 STITCH TOWARDS THE RIGHT - from WRONG SIDE: Use left needle to pick up yarn between 2 stitches from row below, pick up yarn from the back and purl in the stitch loop that is on the front side of the needle. INCREASE 1 STITCH TOWARDS THE LEFT - from WRONG SIDE: Use left needle to pick up yarn between 2 stitches from row below, pick up yarn from the front and purl in the stitch loop that is on the back side of the needle. SLEEVE TIP: When knitting up stitches under the sleeve, you can get a small hole in the transition between stitches on the body and sleeve. This hole can be closed by picking up the strand between 2 stitches and working this strand twisted together with the first stitch between body and sleeve. ------------------------------------------------------- START THE PIECE HERE: ------------------------------------------------------- JUMPER – SHORT OVERVIEW OF THE PIECE: The pattern uses both long and short needles; start with the length which fits the number of stitches and change when necessary. The piece is started back and forth, casting on stitches at the back of the neck and working the back piece top down while increasing stitches on each side for the shoulders, which become slightly diagonal. The front piece is then worked in 2 sections, knitting up stitches along 1 back shoulder, working and increasing for the neckline. This is repeated on the other shoulder. Stitches are knitted up along the front pieces for the sleeve caps and the back piece is placed on the same needle. Stitches are increased for the neckline and the yoke is continued in the round. Then stitches are increased on each sleeve and finally on both the sleeves and the body. When the yoke is finished it is divided for the body and sleeves, the body is continued in the round while the sleeves wait. Then the sleeves are worked in the round, top down. The neck is worked in the round to finish. BACK PIECE: The piece is worked back and forth. Cast on 28-30-30-32-34-34 stitches with circular needle size 5.5 mm, 1 strand DROPS Melody or 2 strands DROPS Brushed Alpaca Silk. ROW 1 (wrong side): Purl. ROW 2 (right side): Read INCREASE TIP-1. Knit 3, increase 1 stitch towards the left, knit until there are 3 stitches left on the row, increase 1 stitch towards the right, knit 3. ROW 3 (wrong side): Read INCREASE TIP-2. Purl 3, increase 1 stitch towards the right, knit until there are 3 stitches left on the row, increase 1 stitch towards the left, purl 3. Work ROWS 2 and 3 a total of 7-7-7-7-7-8 times (= 14-14-14-14-14-16 worked rows). There are 56-58-58-60-62-66 stitches. Cut the strand and place the stitches on a stitch holder. RIGHT SHOULDER: Find the right back shoulder as follows: Lay the back piece flat, right side up, with the stitch holder towards you; right side of piece = right shoulder. Stitches are knitted up along the right back shoulder, starting from the right side by the armhole and working towards the neckline as follows: Knit up 1 stitch in each worked row inside 1 stitch = 14-14-14-14-14-16 stitches. All length-measurements on the front piece are taken from this knitted-up row. Work stocking stitch back and forth (first row from the wrong side). When the piece measures 9 cm, increase for the neckline as follows: ROW 1 (right side): Knit until there are 3 stitches left on the row, increase 1 stitch towards the right, knit 3 - remember INCREASE TIP-1. ROW 2 (wrong side): Purl. Work ROWS 1 and 2 a total of 2 times (= 4 worked rows) = 16-16-16-16-16-18 stitches. At the end of the last row from the wrong side, purl the last 2 stitches together = 15-15-15-15-15-17 stitches. Place the stitches on a stitch holder and work the left front piece. LEFT SHOULDER: Knit up 1 stitch in each worked row along the left back shoulder, inside 1 stitch and starting from the right side by the neckline, working towards the armhole = 14-14-14-14-14-16 stitches. All length-measurements on the front piece are taken from this knitted-up row. Work stocking stitch back and forth (first row from the wrong side). When the piece measures 9 cm, increase for the neckline as follows: ROW 1 (right side): Knit 3, increase 1 stitch towards the left, knit to end of row - remember INCREASE TIP-1. ROW 2 (wrong side): Purl. Work ROWS 1 and 2 a total of 2 times (= 4 worked rows) = 16-16-16-16-16-18 stitches. At the beginning of the last row from the wrong side, purl the first 2 stitches twisted together = 15-15-15-15-15-17 stitches. The front and back pieces are now joined and stitches are knitted up for the sleeve caps as follows: ROW 1: Start from the right side on the left front piece, knit 3, increase 1 stitch towards the left, knit the remaining stitches on the left front piece, insert 1 marker here, knit up 16 stitches for the sleeve cap along the side of the left front piece (inside the outermost stitch), insert 1 marker, knit together the first 2 stitches on the back piece (= 1 stitch decreased), work until there are 2 stitches left on the back piece, slip 1 stitch, knit 1 and pass the slipped stitch over ( = 1 stitch decreased), insert 1 marker, knit up 16 stitches for the sleeve cap along the side of the right front piece (inside the outermost stitch), insert 1 marker, knit across the right front piece until there are 3 stitches left, increase 1 stitch towards the right, knit 3 = 118-120-120-122-124-132 stitches. ROW 2 (wrong side): Purl all stitches. ROW 3 (right side): Knit 3, increase 1 stitch towards the left, knit as far as the first marker, move the marker to the right needle, increase 1 stitch towards the left, knit 16, increase 1 stitch towards the right, move the marker to the right needle, knit to the next marker, move the marker to the right needle, increase 1 stitch towards the left, knit 16, increase 1 stitch towards the right, move the marker to the right needle, knit until there are 3 stitches left, increase 1 stitch towards the right, knit 3 = 124-126-126-128-130-138 stitches. The increases mid-front are finished. ROW 4 (wrong side): Purl. ROW 5 (right side): Knit as far as the first marker, move the marker to the right needle, increase 1 stitch towards the left, knit 18, increase 1 stitch towards the right, move the marker to the right needle, knit to the next marker, move the marker to the right needle, increase 1 stitch towards the left, knit 18, increase 1 stitch towards the right, move the marker to the right needle, knit to end of row, then cast on 20-22-22-24-26-26 stitches for the neckline = 148-152-152-156-160-168 stitches. The piece is now continued in the round. ROUND 1: Knit all stitches. ROUND 2: Knit all stitches, increasing 1 stitch on each side of each sleeve as before – remember INCREASE TIP-1, the stitch count on the sleeves increases but stays the same on the front and back pieces. Work these 2 rounds 4-4-3-3-1-1 times (you have increased a total of 6-6-5-5-3-3 times on the sleeves = 28-28-26-26-22-22 stitches on each sleeve and 54-56-56-58-60-64 stitches on the front and back pieces) = 164-168-164-168-164-172 stitches. Now work as follows: ROUND 1: Knit until there are 2 stitches left before the first marker, increase 1 stitch towards the right, knit 2, move the marker to the right needle, increase 1 stitch towards the left, knit the 28-28-26-26-22-22 sleeve-stitches, increase 1 stitch towards the right, move the marker to the right needle, knit 2, increase 1 stitch towards the left, knit 50-52-52-54-56-60, increase 1 stitch towards the right, knit 2, move the marker to the right needle, increase 1 stitch towards the left, knit the 28-28-26-26-22-22 sleeve-stitches, increase 1 stitch towards the right, move the marker to the right needle, knit 2, increase 1 stitch towards the left, knit to end of round (= 1 stitch increased on each side of 2 stitches in each transition between body and sleeves = 8 increased stitches). ROUND 2: Knit. Repeat these 2 rounds until you have increased 7-8-11-12-15-16 times on the body and sleeves. You have increased a total of 13-14-16-17-18-19 times on sleeves = 220-232-252-264-284-300 stitches. The piece measures approx. 13-14-16-17-18-19 cm from the knitted-up row measured mid-sleeve. When the jumper is folded double at the shoulder, the piece measures approx. 18-19-21-22-23-24 cm along the armhole. Work to the first marker (between front piece and left sleeve). Now divide for the body and sleeves. DIVIDE FOR BODY AND SLEEVES: Place the first 42-44-48-50-52-54 stitches on a thread for the sleeve, cast on 6-8-10-12-14-16 stitches (under sleeve), knit 68-72-78-82-90-96 (= back piece), place the next 42-44-48-50-52-54 stitches on a thread for the sleeve, cast on 6-8-10-12-14-16 stitches (under sleeve), knit the last 68-72-78-82-90-96 stitches (= front piece). The body and sleeves are finished separately. BODY: = 148-160-176-188-208-224 stitches. Work stocking stitch in the round until the piece measures 25-26-26-26-26-28 cm from the cast-on stitches under the sleeve. Change to circular needle size 4 mm. Work rib (knit 2, purl 2) and increase 16-16-20-20-24-24 stitches evenly on the first round = 164-176-196-208-232-248 stitches. When the rib measures 3-3-3-3-4-4 cm, cast off. The jumper measures approx. 50-52-54-56-58-60 cm. SLEEVES: Place the 42-44-48-50-52-54 sleeve-stitches from one thread on circular needle size 5.5 mm and knit up 1 stitch in each of the 6-8-10-12-14-16 stitches cast on under the sleeve – read SLEEVE TIP = 48-52-58-62-66-70 stitches. Insert a marker-thread in the middle of the 6-8-10-12-14-16 stitches under the sleeve. Start at the marker-thread and work stocking stitch in the round until the sleeve measures 12-11-10-9-8-6 cm from the division. Change to double pointed needles size 4 mm. Work rib (knit 2, purl 2), AT THE SAME TIME increase 4-4-6-6-6-6 stitches evenly on the first round = 52-56-64-68-72-76 stitches. When the rib measures 3-3-3-3-4-4 cm, cast off. The sleeve measures approx. 28-28-29-29-30-29 cm from the shoulder. NECK: Start from the right side on one shoulder-line. Knit up 80 to 92 stitches around the neckline with circular needle size 4 mm. Work rib in the round (knit 2, purl 2) for 3 cm. Cast off with knit. |
|
 |
|
Have you finished this pattern?Tag your pictures with #dropspattern #mistymovesweater or submit them to the #dropsfan gallery. Do you need help with this pattern?You'll find 28 tutorial videos, a Comments/Questions area and more by visiting the pattern on garnstudio.com. © 1982-2026 DROPS Design A/S. We reserve all rights. This document, including all its sub-sections, has copyrights. Read more about what you can do with our patterns at the bottom of each pattern on our site. |
|


With over 40 years in knitting and crochet design, DROPS Design offers one of the most extensive collections of free patterns on the internet - translated to 17 languages. As of today we count 324 catalogues and 12290 patterns translated into English (UK/cm). 12290
We work hard to bring you the best knitting and crochet have to offer, inspiration and advice as well as great quality yarns at incredible prices! Would you like to use our patterns for other than personal use? You can read what you are allowed to do in the Copyright text at the bottom of all our patterns. Happy crafting!
Post a comment to pattern DROPS 258-11
We would love to hear what you have to say about this pattern!
If you want to leave a question, please make sure you select the correct category in the form below, to speed up the answering process. Required fields are marked *.