
Popular categories
Looking for a yarn?


Comments / Questions (24)
![]() Helene wrote:
Helene wrote:
Please read my question from 22.10, thank you Helene
30.10.2025 - 19:23
![]() Billie wrote:
Billie wrote:
Apologies, correction on my previous comment it should read: Sadly I don't relate to your videos as I hold the yarn on the right hand not on the left hand!
27.10.2025 - 10:44
![]() Billie wrote:
Billie wrote:
Sadly I don't relate to your videos as I hold the yarn on the left hand not on the right hand!
27.10.2025 - 10:40
![]() Helene wrote:
Helene wrote:
...mig igen.. så, skal jeg forstå det sådan, at jeg ikke skulle have strikket de 6 striber færdige? Men have påbegyndt de 6 striber og så efter 17 cm have sat maskerne på tråd? Hvis det er tilfældet, er det VIRKELIG dårlig skrevet, øv :/
22.10.2025 - 20:20DROPS Design answered:
Hei, Helene, før oppskriften begynner, står den en "Kort oversikt over arbeidet" som gir de grove trekkene på hvordan genseren skal strikkes. Bakstykket skal strikkes frem og tilbake fra nakken og ned til der forstykket og bakstykket skal settes på samme pinne og strikkes rundt. Dette er det målet du nevner på 17 cm i din størrelse. Du skal bare strikke så langt på stripene som du rekker før du har kommet til dette målet. Vennlig hilsen, DROPS Design
31.10.2025 - 15:17
![]() Helene wrote:
Helene wrote:
Linda spurgte også om dette i august 24, men forstår det stadig ikke :/ Er på bagstykket, str XXL og har lige færdiggjort de 6 striber og skal nu strikke til arbejdet måler 17 cm, målt ude langs armegabet. Det forstår jeg simpelt ikke. Hvor måler jeg fra? Og "langs armegabet" er det bare ude i siden af arbejdet? Håber I kan forklare det så jeg kan komme videre. Ikke den bedst beskrevne opskrift jeg har benyttet:/
20.10.2025 - 20:30DROPS Design answered:
Hi Helene, you have to measure from the part you knit without increases, so along the side. Please see the video HERE. Happy knitting!
21.10.2025 - 08:42
![]() Randa wrote:
Randa wrote:
Forstår jeg det rett at man ikke skal strikke hele «striper bol» men kun til arbeidet langs ermegapet måler 15 cm på str m? Dette er noe uklart i oppskriften syns jeg..
29.07.2025 - 10:23DROPS Design answered:
Hei randa, Du skal strikke 3 x 6cm striper i lys beige og 3 x 6cm striper i korall før du avslutter arbeidet med korall (for det meste er dette vrangbord). Så stripene fortsetter forbi ermehull. God fornøyelse!
30.07.2025 - 06:36
![]() Eugenie Gijsbers wrote:
Eugenie Gijsbers wrote:
Kan ik ergens vinden hoeveel bollen wil ik nodig heb voor een specifiek patroon?
06.10.2024 - 19:12DROPS Design answered:
Dag Eugenie,
Ja, bij elk patroon op onze site staat de benodigde hoeveelheid garen. Deze vindt je bovenaan bij 'materialen'. De hoeveelheid wordt in grammen aangegeven. (Meestal weegt een bol 50 gram, maar controleer dit even bij het betreffende garen). Er staat een reeks getallen bij de benodigde hoeveelheid, deze refereren aan de verschillende maten. Dus het eerste getal geldt voor maat S, het tweede voor maat M, enzovoort.
08.10.2024 - 21:02
![]() Viktoria wrote:
Viktoria wrote:
Please advise what jumper size model wears on this photo?
21.08.2024 - 17:36
![]() Linda wrote:
Linda wrote:
Er på baksstykket, str S. Skal totalt måle 14 cm. Men hvor skal man måle fra når bare stripene måler 18cm?
09.08.2024 - 22:32DROPS Design answered:
Hej Linda, du skal måle fra yderst langs ærmegabet :)
15.08.2024 - 08:25
![]() Linda wrote:
Linda wrote:
Hei! Bakstykke: legge opp 26 masker. Øke totalt 18 ganger. Så skal jeg ha 62 masker etter siste økning. Forstår ikke regnestykket jeg:)
27.07.2024 - 11:10DROPS Design answered:
Hei Linda, Du øker 2 masker på hver pinne. Hvis du øker 18 ganger er det 36 økte masker. 26 + 36 = 62 masker. God fornøyelse!
29.07.2024 - 06:47
|
||||||||||
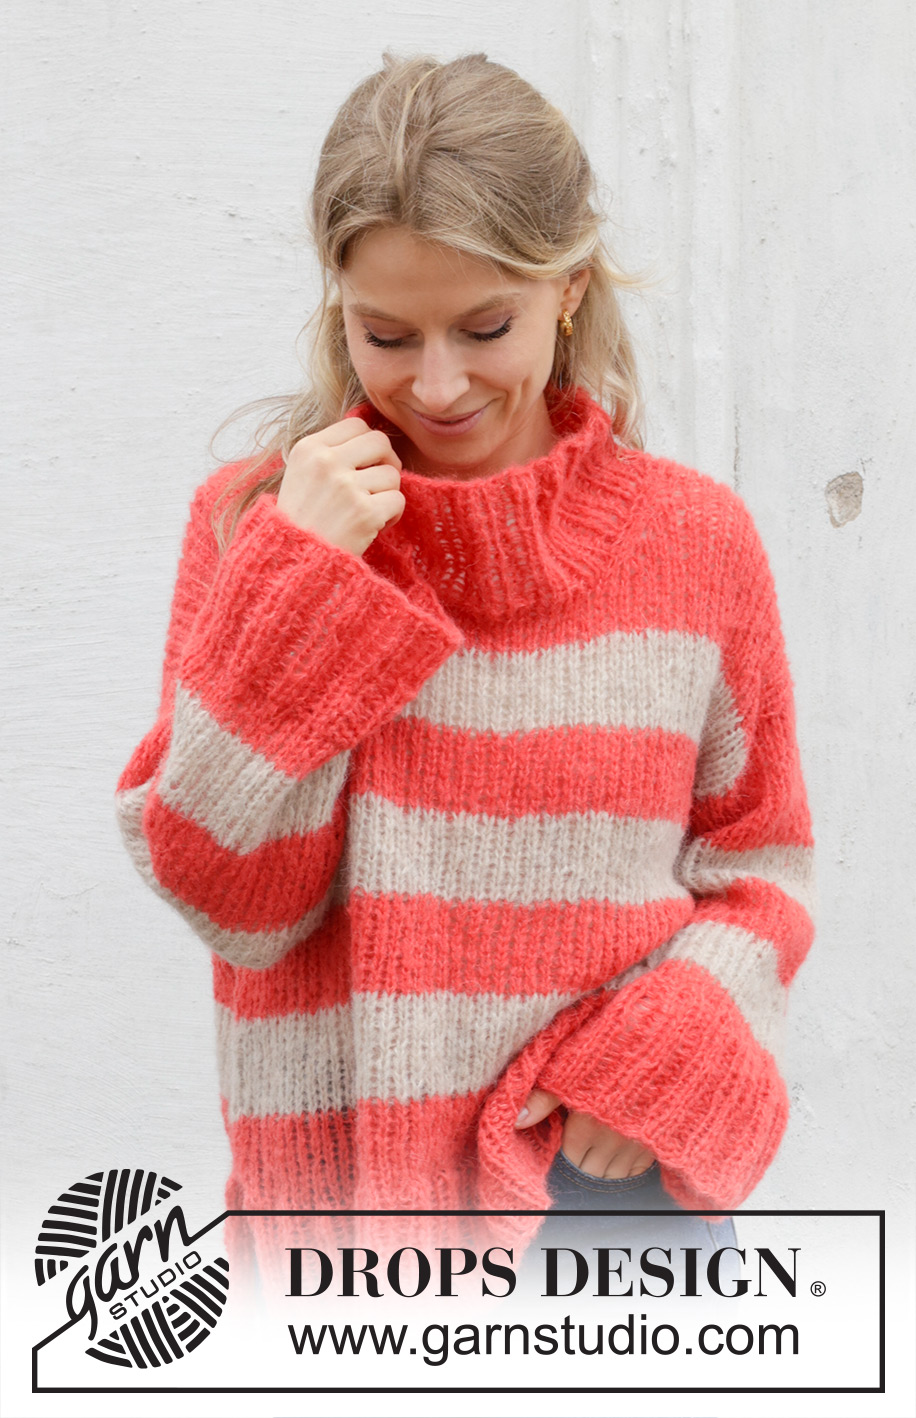
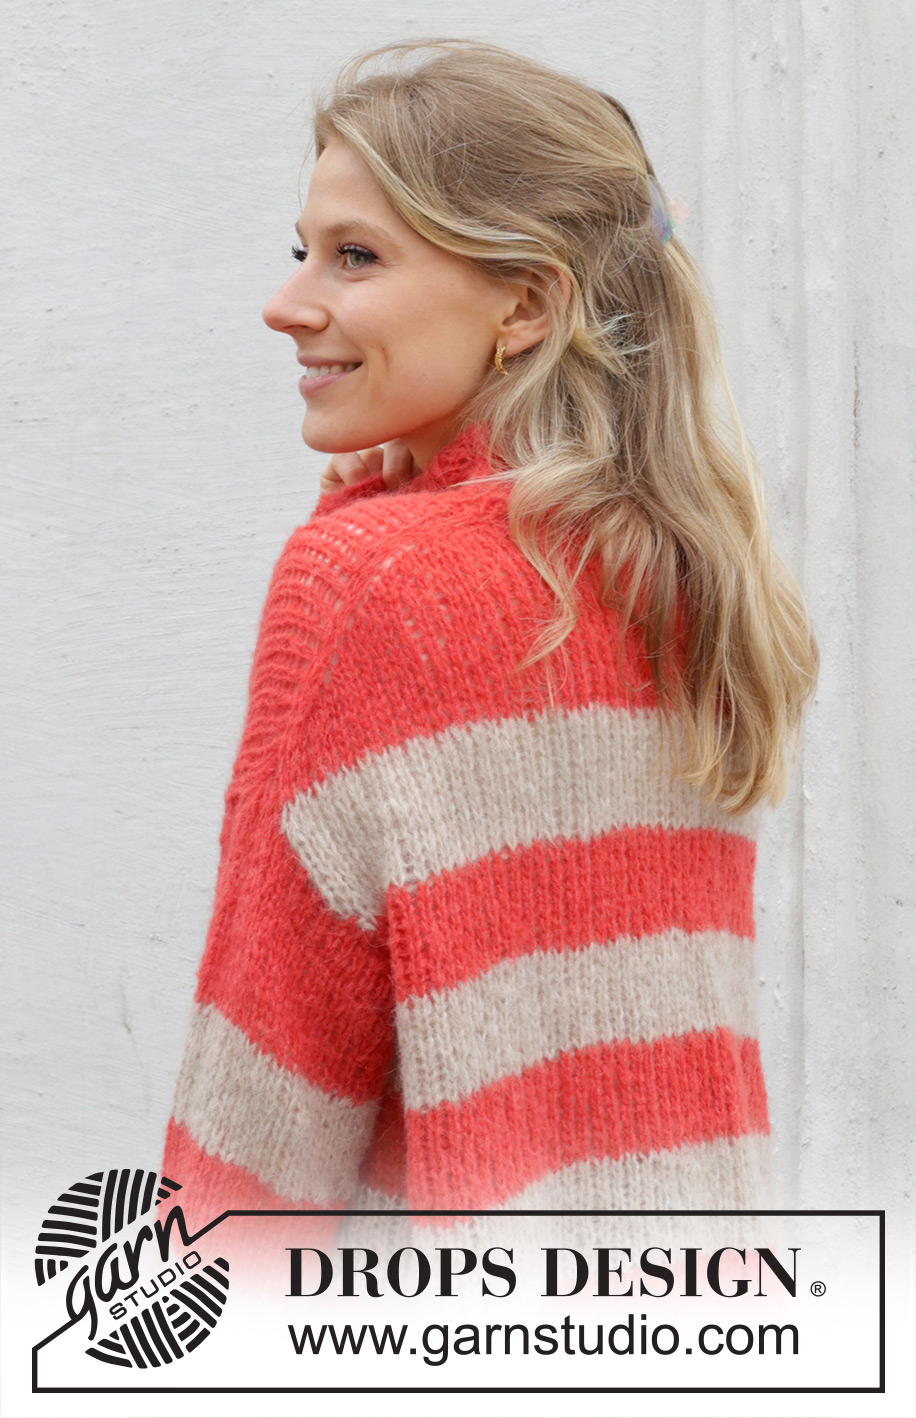
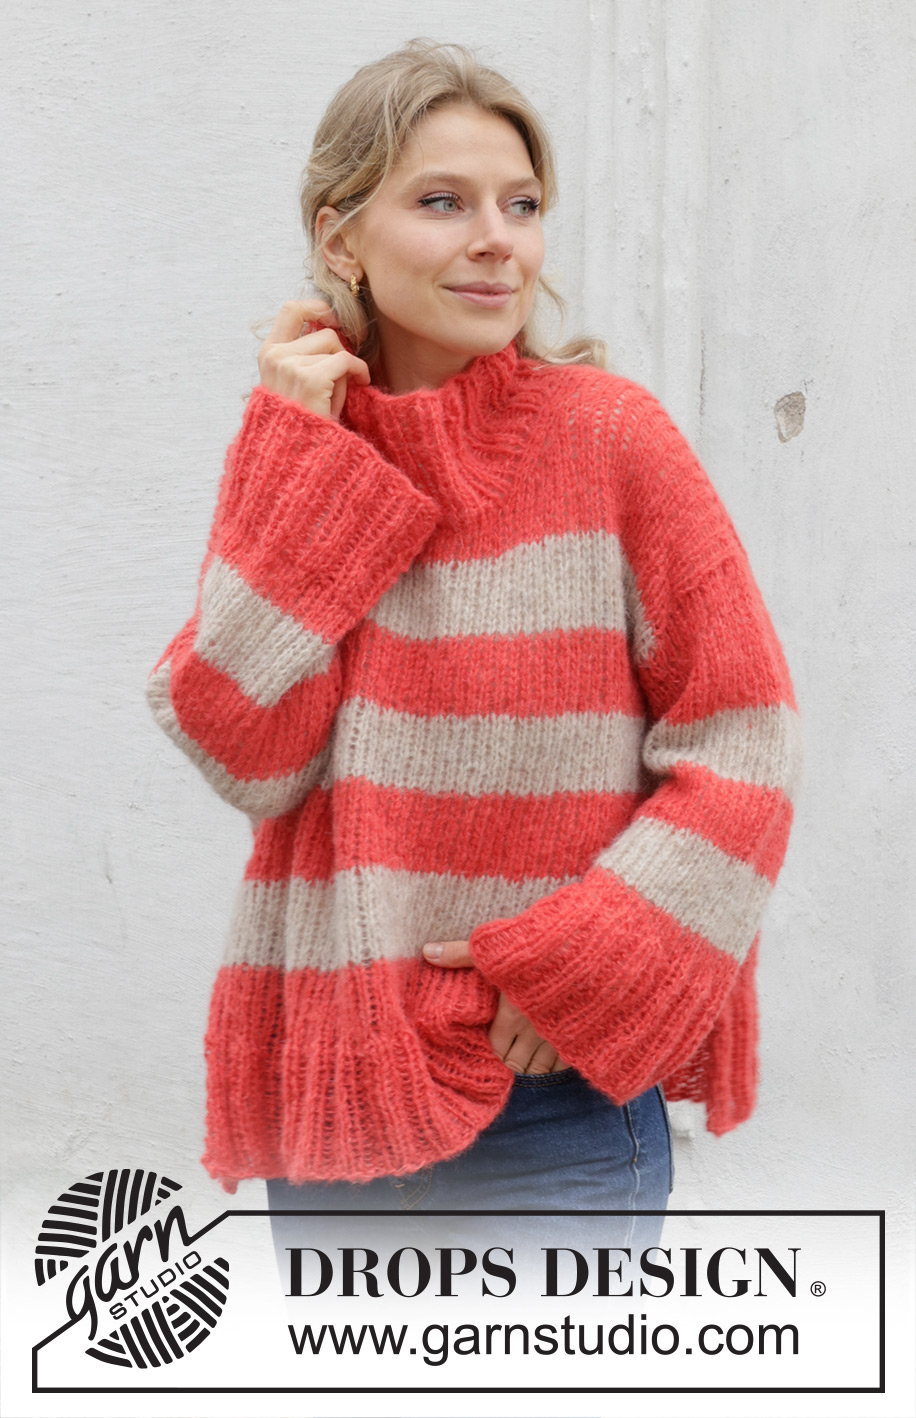
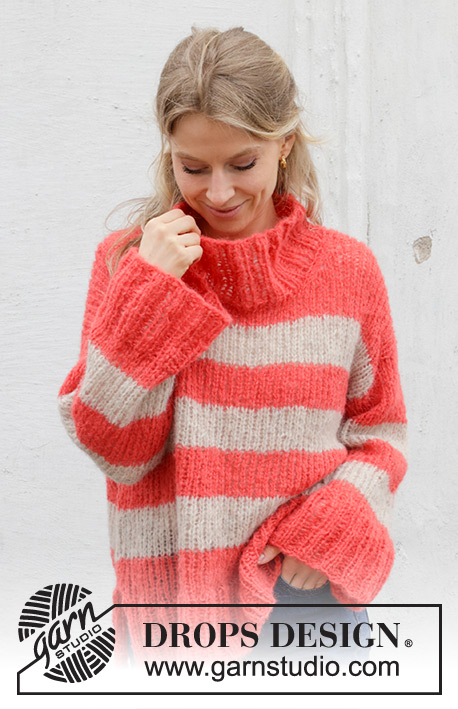
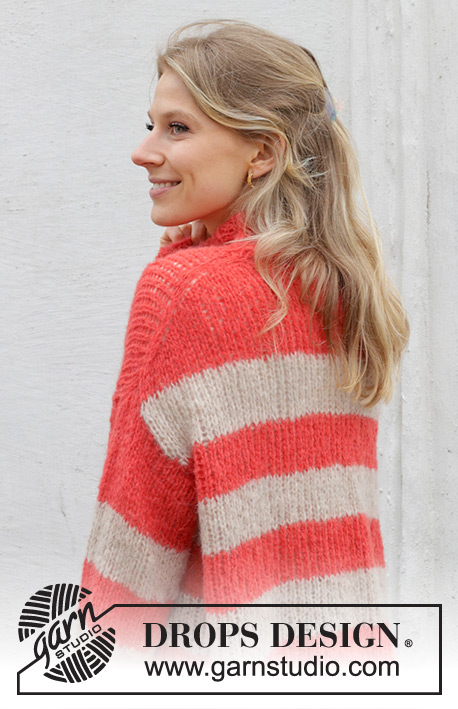
Sunset & Sand#sunsetandsandsweater |
||||||||||
 |
 |
|||||||||
Knitted jumper in 2 strands DROPS Brushed Alpaca Silk. The piece is worked top down with European/diagonal shoulders and stripes. Sizes S - XXXL.
DROPS 245-16 |
||||||||||
|
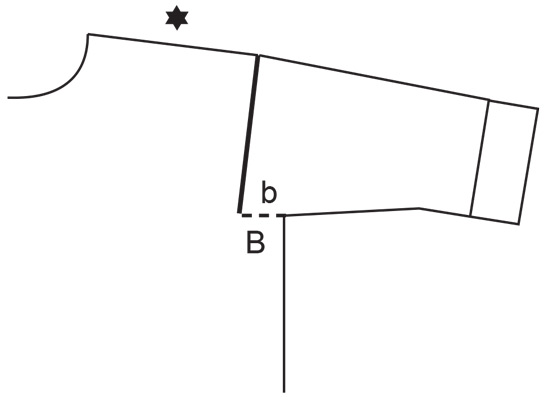
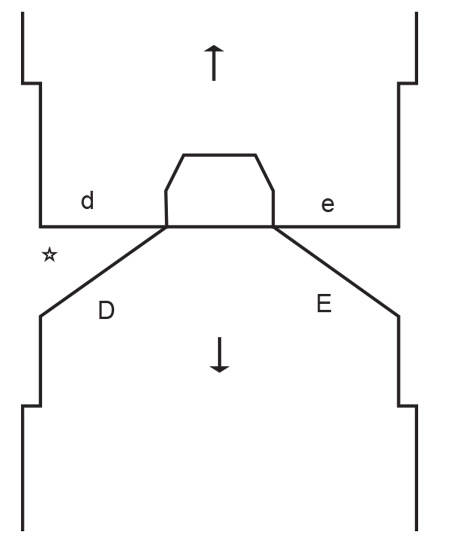
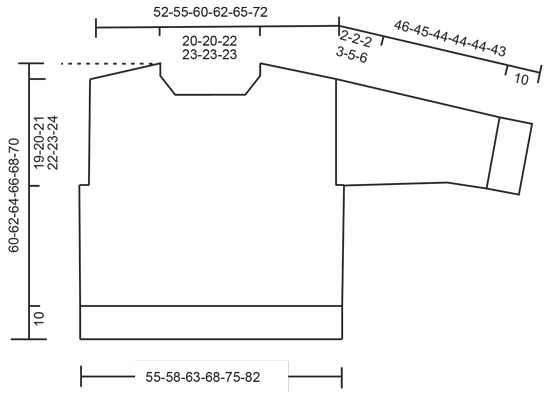
------------------------------------------------------- EXPLANATIONS FOR THE PATTERN: ------------------------------------------------------- GARTER STITCH (worked back and forth): Knit all rows. 1 ridge = knit 2 rows. INCREASE TIP FROM THE RIGHT SIDE: Increase towards the left AFTER MARKER: Use left needle to pick up yarn between 2 stitches from row below, pick up yarn from the front and knit in the stitch loop that is on the back of the needle. Increase towards the right BEFORE MARKER: Use left needle to pick up yarn between 2 stitches from row below, pick up yarn from the back and knit in the stitch loop that is on the front side of the needle. INCREASE TIP FROM THE WRONG SIDE: Increase towards the right AFTER MARKER: Use left needle to pick up yarn between 2 stitches from row below, pick up yarn from the back and purl in the stitch loop that is on the front side of the needle. Increase towards the left BEFORE MARKER: Use left needle to pick up yarn between 2 stitches from row below, pick up yarn from the front and purl in the stitch loop that is on the back side of the needle. STRIPES BODY: Work stripes as follows: * 6 cm colour light beige, 6 cm colour coral *, work from *-* 2 more times. Finish the piece with colour coral. STRIPES SLEEVES: Work stripes as follows: 10 cm colour coral, 6 cm colour light beige, 6 cm colour coral, 6 cm colour light beige. Finish the sleeve with colour coral. DECREASE TIP (for sleeves): Decrease 1 stitch on either side of the marker-thread as follows: Work until there are 3 stitches left before the marker-thread, knit 2 together, knit 2 (marker-thread sits between these 2 stitches), slip 1 stitch knit-wise, knit 1 and pass the slipped stitch over the knitted stitch. ------------------------------------------------------- START THE PIECE HERE: ------------------------------------------------------- JUMPER – SHORT OVERVIEW OF THE PIECE: The top of the back piece is worked back and forth with circular needle, top down until the armholes are finished. Stitches are knitted up along each shoulder for the front piece and increased for the neck, then the front piece is worked back and forth with circular needle until the armholes are finished. The front and back pieces are joined and the body continued in the round with circular needle. Stitches are knitted up around each armhole, the sleeve cap worked back and forth before working the sleeves in the round with double pointed needles/short circular needle. The neck is worked in the round to finish. BACK PIECE: Cast on 26-26-28-30-30-30 stitches with circular needle size 7 mm and 2 strands DROPS Brushed Alpaca Silk colour coral. Purl 1 row from the wrong side. Insert 1 marker inside the 3 outermost stitches on each side. Allow the markers to follow you work onwards (inside the 3 outermost stitches on each side). Work stocking stitch back and forth. AT THE SAME TIME increase AFTER the marker at the beginning of the row and BEFORE the marker at the end of the row – read INCREASE TIP FROM THE RIGHT SIDE. On the next row (wrong side) increase in the same way – read INCREASE TIP FROM THE WRONG SIDE. Continue increasing from both the right and wrong side a total of 18-20-22-22-24-28 times = 62-66-72-74-78-86 stitches. The piece is now measured from here! When the piece measures 4-5-5-6-7-7 cm, work STRIPES BODY – read description above. Continue with stocking stitch and stripes until the piece measures 14-15-15-16-17-17 cm, measured along the armhole. REMEMBER THE KNITTING TENSION! Cut the strand, place the stitches on a stitch holder and work the front piece. FRONT PIECE: Start with left shoulder (when the garment is worn). Using 2 strands colour coral, knit up 18-20-22-22-24-28 stitches along the left shoulder on the back piece, inside the outermost stitch (i.e., knit up 1 stitch in every row from the top edge of the back piece). Work stocking stitch back and forth for 6 cm. Now increase stitches towards the neck, increasing after the 3 stitches at the beginning of each row from the right side. Increase 1 stitch 4 times = 22-24-26-26-28-32 stitches. Work 1 row from the wrong side. Cut the strand, place the stitches on a stitch holder and work the right shoulder. Knit up 18-20-22-22-24-28 stitches inside the outermost stitches along the right shoulder on the back piece. Work stocking stitch back and forth for 6 cm. Now increase stitches towards the neck, increasing before the 3 stitches at the end of each row from the right side. Increase 1 stitch 4 times = 22-24-26-26-28-32 stitches. Work 1 row from the wrong side. Now work as follows from the right side: Stocking stitch over the 22-24-26-26-28-32 stitches from the right front piece, cast on 18-18-20-22-22-22 stitches for the neck, work stocking stitch over the 22-24-26-26-28-32 stitches from the left front piece = 62-66-72-74-78-86 stitches. Work stocking stitch until the piece measures 14-15-17-18-19-21 cm. Now work STRIPES BODY until the piece measures 24-25-27-28-29-31 cm, measured down the armhole. Finish after a row from the wrong side. The front and back pieces are now joined for the body. BODY: Work the 62-66-72-74-78-86 stitches from the front piece, cast on 4-4-4-8-12-12 stitches (= side), work stocking stitch over the 62-66-72-74-78-86 stitches from the back piece, cast on 4-4-4-8-12-12 stitches = 132-140-152-164-180-196 stitches. Work stocking stitch in the round and continue the stripes until the piece measures 50-52-54-56-58-60 cm, measured from the top of the shoulder on the front piece. Now divide for the split in each side: Place the 66-70-76-82-90-98 stitches on the back piece on a stitch holder and work the front piece. FRONT PIECE: Change to circular needle size 5 mm. Knit 1 row from the right side and increase 14-14-16-14-14-14 stitches evenly spaced = 80-84-92-96-104-112 stitches. Work as follows from the wrong side: 1 GARTER STITCH – read description above, * purl 2, knit 2 *, work from *-* until there are 3 stitches left, purl 2 and 1 garter stitch. Continue this rib back and forth for 10 cm. Cast off. The jumper measures approx. 60-62-64-66-68-70 cm, measured from the top of the shoulder on the front piece. BACK PIECE: Place the stitches on circular needle size 5 mm and work in the same way as the front piece. LEFT SLEEVE: Use circular needle size 7 mm and 2 strands colour coral. Knit up from the right side 29-30-32-34-35-37 stitches from the bottom of the armhole and up the front piece to the shoulder, then 17-18-18-20-21-21 stitches from the shoulder down the back piece = 46-48-50-54-56-58 stitches round the armhole. Insert 1 marker in the middle of the row – used to measure from. Work STRIPES SLEEVES – read description above, and stocking stitch back and forth for 2-2-2-3-5-6 cm. Now join the sleeve and continue in the round with short circular needle/double pointed needles size 7 mm. Insert 1 marker-thread at the beginning of the round (mid-under sleeve). Allow the thread to follow your work onwards. Start at the marker-thread and work stocking stitch. When the sleeve measures 4-4-4-4-5-7 cm, decrease 2 stitches mid-under the sleeve – read DECREASE TIP. Decrease like this every 8-8-8-6-6-5½ cm a total of 4-4-4-5-5-5 times = 38-40-42-44-46-48 stitches. Continue working until the sleeve measures 36-35-34-34-34-33 cm from the marker. There is 10 cm left; try the jumper on and work to desired length before the rib. Knit 1 round and increase 6-8-6-8-6-8 stitches evenly spaced = 44-48-48-52-52-56 stitches. Change to double pointed needles size 5 mm. Work rib (knit 2, purl 2) for 10 cm. Cast off a little loosely. The sleeve measures approx. 46-45-44-44-44-43 cm from the marker. Work the other sleeve in the same way but knit up stitches in reverse, i.e., knit up 17-18-18-20-21-21 stitches from the bottom of the armhole up the back piece to the shoulder, then 29-30-32-34-35-37 stitches from the shoulder and down the front piece. Sew the openings at the bottom of the armholes – see sketch. NECK: Start on one shoulder and knit up from the right side, inside 1 stitch, 68 to 80 stitches round the neck using short circular needle size 5 mm and 2 strands colour coral. The stitch count should be divisible by 4. Work rib in the round (knit 2, purl 2) for 10 cm. Cast off a little loosely. |
||||||||||
Diagram explanations |
||||||||||
|
||||||||||
 |
||||||||||
 |
||||||||||
 |
||||||||||
Have you finished this pattern?Tag your pictures with #dropspattern #sunsetandsandsweater or submit them to the #dropsfan gallery. Do you need help with this pattern?You'll find 32 tutorial videos, a Comments/Questions area and more by visiting the pattern on garnstudio.com. © 1982-2026 DROPS Design A/S. We reserve all rights. This document, including all its sub-sections, has copyrights. Read more about what you can do with our patterns at the bottom of each pattern on our site. |
||||||||||


With over 40 years in knitting and crochet design, DROPS Design offers one of the most extensive collections of free patterns on the internet - translated to 17 languages. As of today we count 324 catalogues and 12290 patterns translated into English (UK/cm). 12290
We work hard to bring you the best knitting and crochet have to offer, inspiration and advice as well as great quality yarns at incredible prices! Would you like to use our patterns for other than personal use? You can read what you are allowed to do in the Copyright text at the bottom of all our patterns. Happy crafting!
Post a comment to pattern DROPS 245-16
We would love to hear what you have to say about this pattern!
If you want to leave a question, please make sure you select the correct category in the form below, to speed up the answering process. Required fields are marked *.