Comments / Questions (65)
![]() Le Bourhis wrote:
Le Bourhis wrote:
Bonjour, J'ai du mal avec le diagramme, n'avez vous pas l'explication des mailles à réaliser en fonction des rangs (end et env )et non la vue sur l'endroit du travail? Par avance merci Cordialement
16.03.2023 - 09:52DROPS Design answered:
Bonjour Mme Le Bourhis, nous n'avons que ce type de diagramme, autrement dit, suivez bien la légende de chaque case sur l'endroit (ex 1 case blanche se tricote à l'endroit sur l'endroit) et sur l'envers (ex dans A.2 1 case blanche se tricote à l'envers sur l'envers, et 1 case avec 1 tiret va se tricoter à l'endroit sur l''envers (= maille point mousse). Bon tricot!
16.03.2023 - 15:48
![]() LE BOURHIS wrote:
LE BOURHIS wrote:
Bonjour , Pouvez vous m'expliquer le diagramme du début ...qui y a t il. dans l'espace blanc ...? apres la maille envers sur l'endroit , la maille endroit sur l'endroit et de nouveau la maille envers sur l'endroit ...et blanc ? jusqu'au jete et même chose a la fin du motif ..merci beaucoup bonne journée Aline
15.03.2023 - 10:02DROPS Design answered:
Bonjour Mme Le Bourhis, il n'y a rien dans l'espace blanc, mais on va augmenter des mailles qui vont ensuite combler cet espace, autrement dit, le 1er rang se tricote sur 10 m, et on va répéter ces 10 mailles. Bon tricot!
15.03.2023 - 10:11
![]() Dheeraj Mamak wrote:
Dheeraj Mamak wrote:
Can you please convert the size in US What size is M My Mom wants 14" Shoulder Chest 38
02.01.2023 - 19:50
![]() Dheeraj Mamak wrote:
Dheeraj Mamak wrote:
Can you please convert the size in US What size is M Shoulder Chest
29.12.2022 - 00:04
![]() Dheeraj Mamak wrote:
Dheeraj Mamak wrote:
Can you please convert the size in US What size is M Shoulder Chest
23.12.2022 - 15:51
![]() Liz M wrote:
Liz M wrote:
The pattern says to switch to 5.5mm after the neck and again after the yolk. Which is it please?
21.12.2022 - 21:57DROPS Design answered:
Hi Liz, You change to needle size 5.5 mm after the neck (not after the yoke). Merry Christmas!
22.12.2022 - 06:50
![]() Sylvie wrote:
Sylvie wrote:
Bonjour ! A partir de quand doit on prendre les aiguilles 5,5 ? Avant ou après l’empiècement ? Merci !!
13.10.2022 - 10:26DROPS Design answered:
Bonjour Sylvie, merci pour l'info, nos stylistes vont vérifier cela; je changerai au début de l'empiècement dès le début de A.1. Bon tricot!
13.10.2022 - 13:17
![]() Milou wrote:
Milou wrote:
In the directions for the yoke, what is meant by "work A. 2 over A. 1B"? Do I just start following the A. 2 chart once I've completed the two rows of A.1B? I'm confused by the use of "over". Thank you for the lovely pattern!
09.05.2022 - 20:45DROPS Design answered:
Hi Milou, Yes you work A.2 over the same stitches you have worked in A.1B. Happy knitting!
10.05.2022 - 06:52
![]() Nga Frook wrote:
Nga Frook wrote:
On chart A2: In the chart second row , do we knit from left to right? in the chart of row 1. Knit 2 at end at the end of the leaf pattern, then in row 2 if I knit from right to left as knit 3 stitches prior to leaf pattern ?Please help.
11.04.2022 - 23:10DROPS Design answered:
Hi Nga, Yes, when working back and forth the second row is worked from left to right. Knitted stitches from the right side are purled from the wrong side, the purled stitches from the right side are knitted from the wrong side. Happy crafting!
12.04.2022 - 06:56
![]() Nguyễn Liên wrote:
Nguyễn Liên wrote:
Bonjour, je n'arrive pas à trouver le NEw Digramme A2. J'ai esayé de chercher dans la section de correction. S'il vous plait, envoyez le New Digramme A2 par email je vous remercie beaucoup.
08.04.2022 - 17:33DROPS Design answered:
Bonjour Nguyễn Liên, les corrections sont déjà incluses dans le Digramme A.2 posté. Bon tricot!
09.04.2022 - 18:11
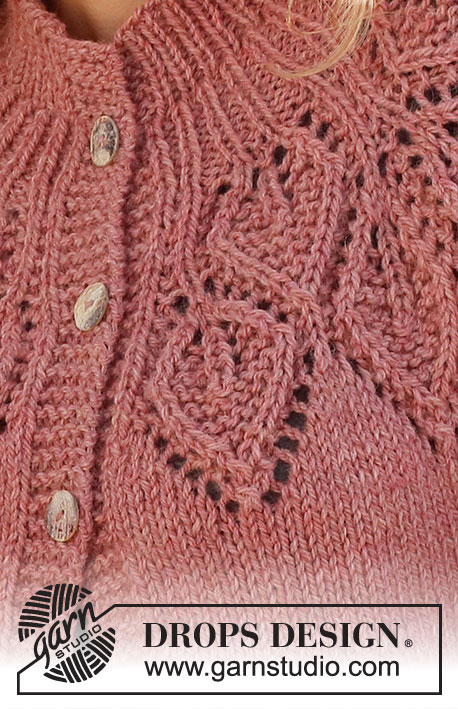
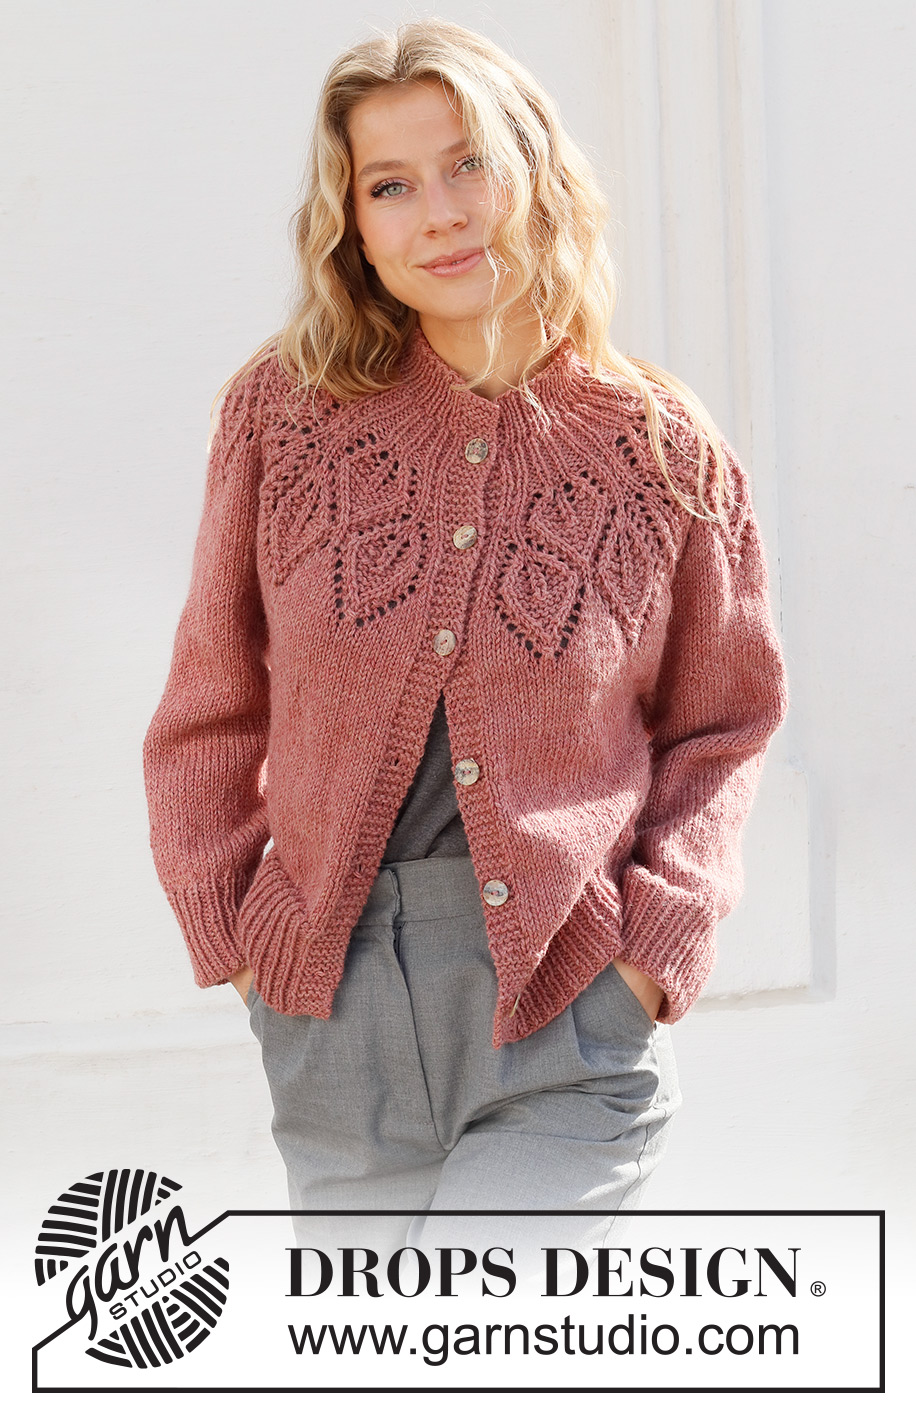
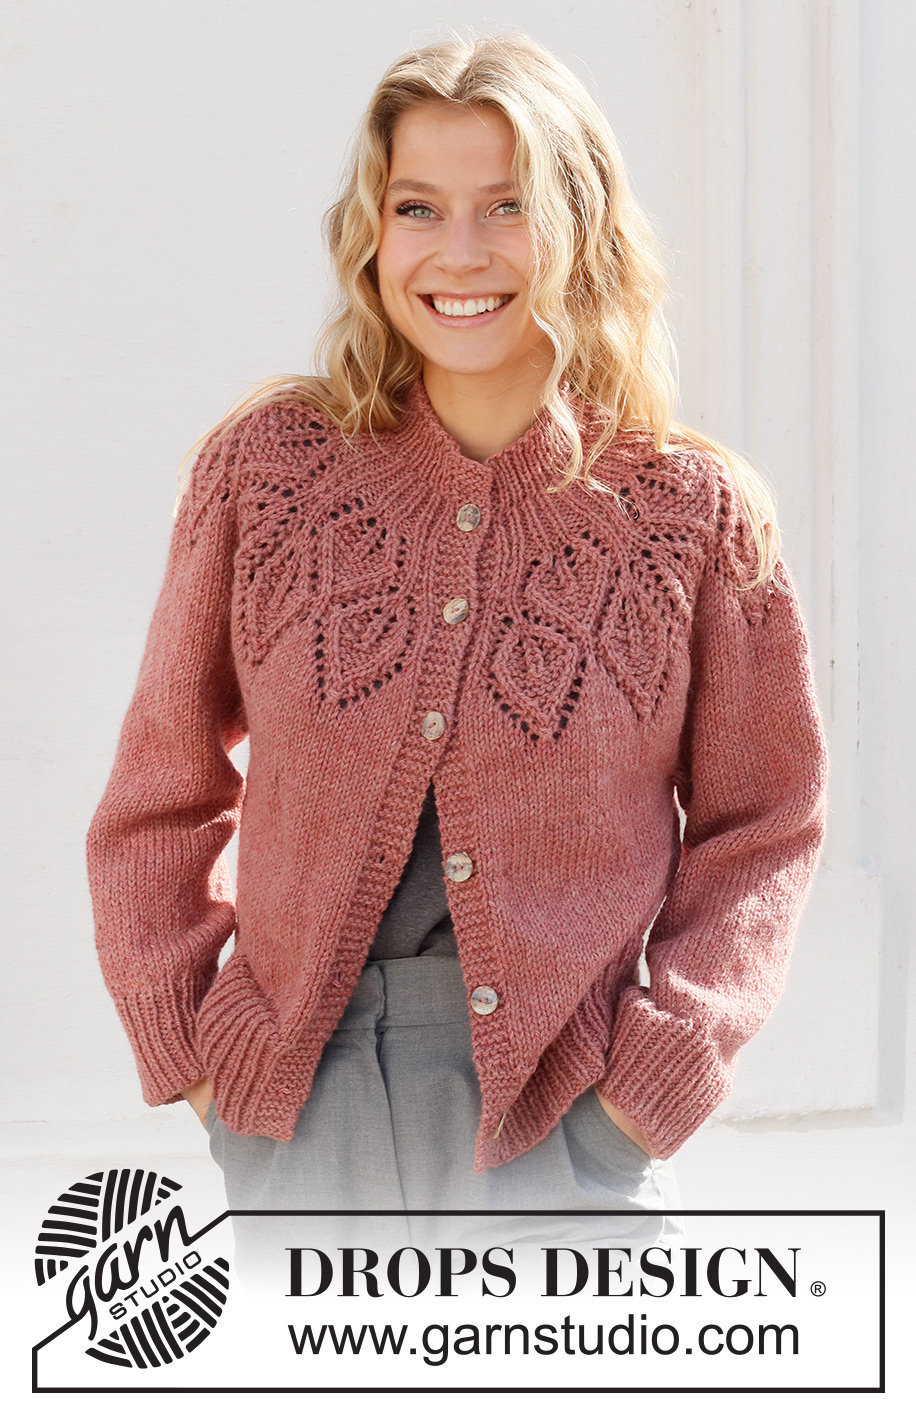
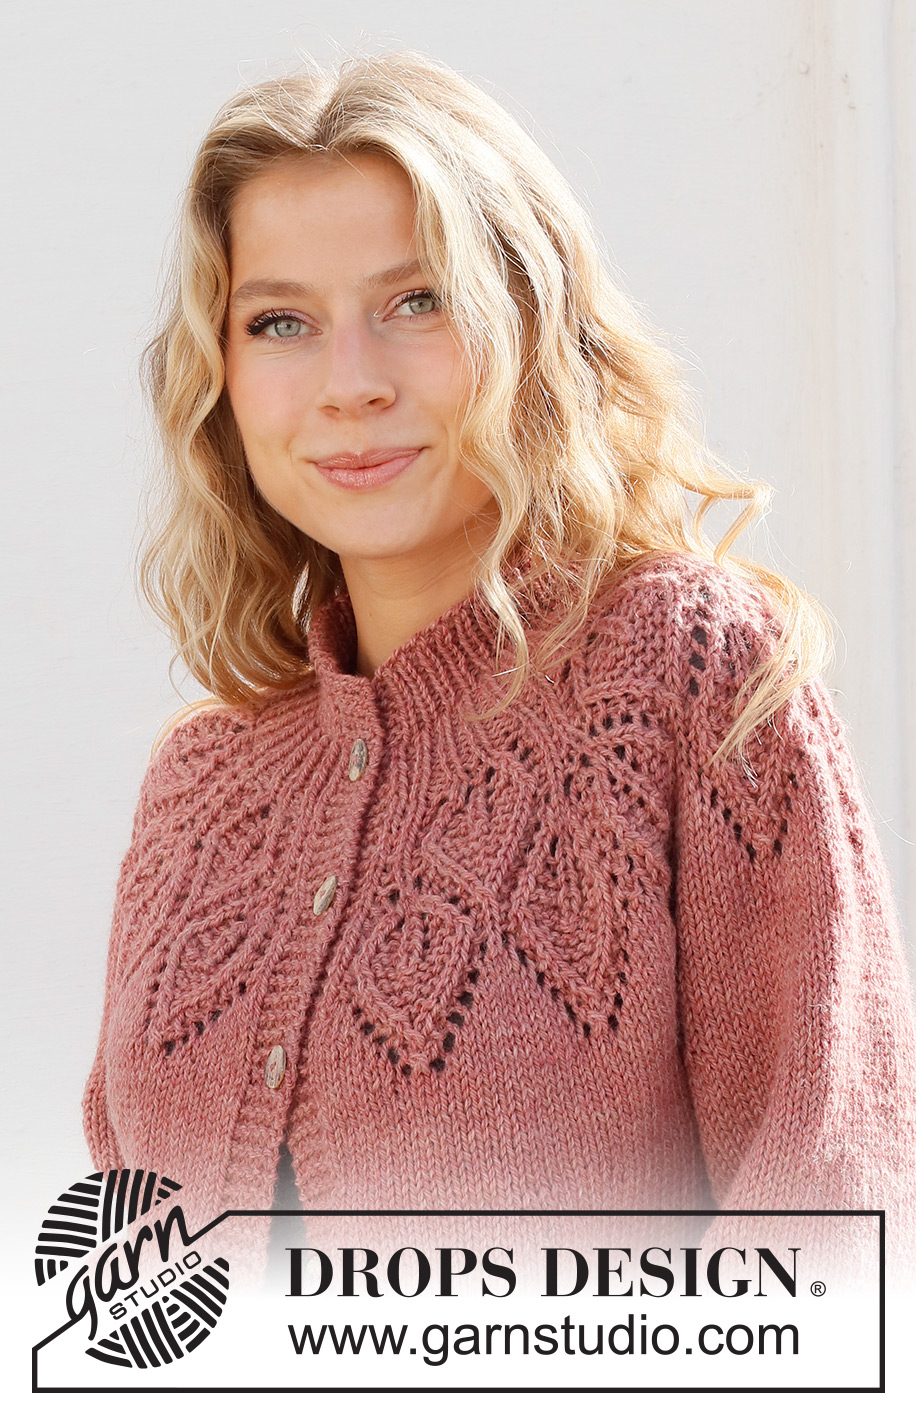
Autumn Wreath Jacket#autumnwreathjacket |
|||||||||||||||||||||||||
 |
 |
||||||||||||||||||||||||
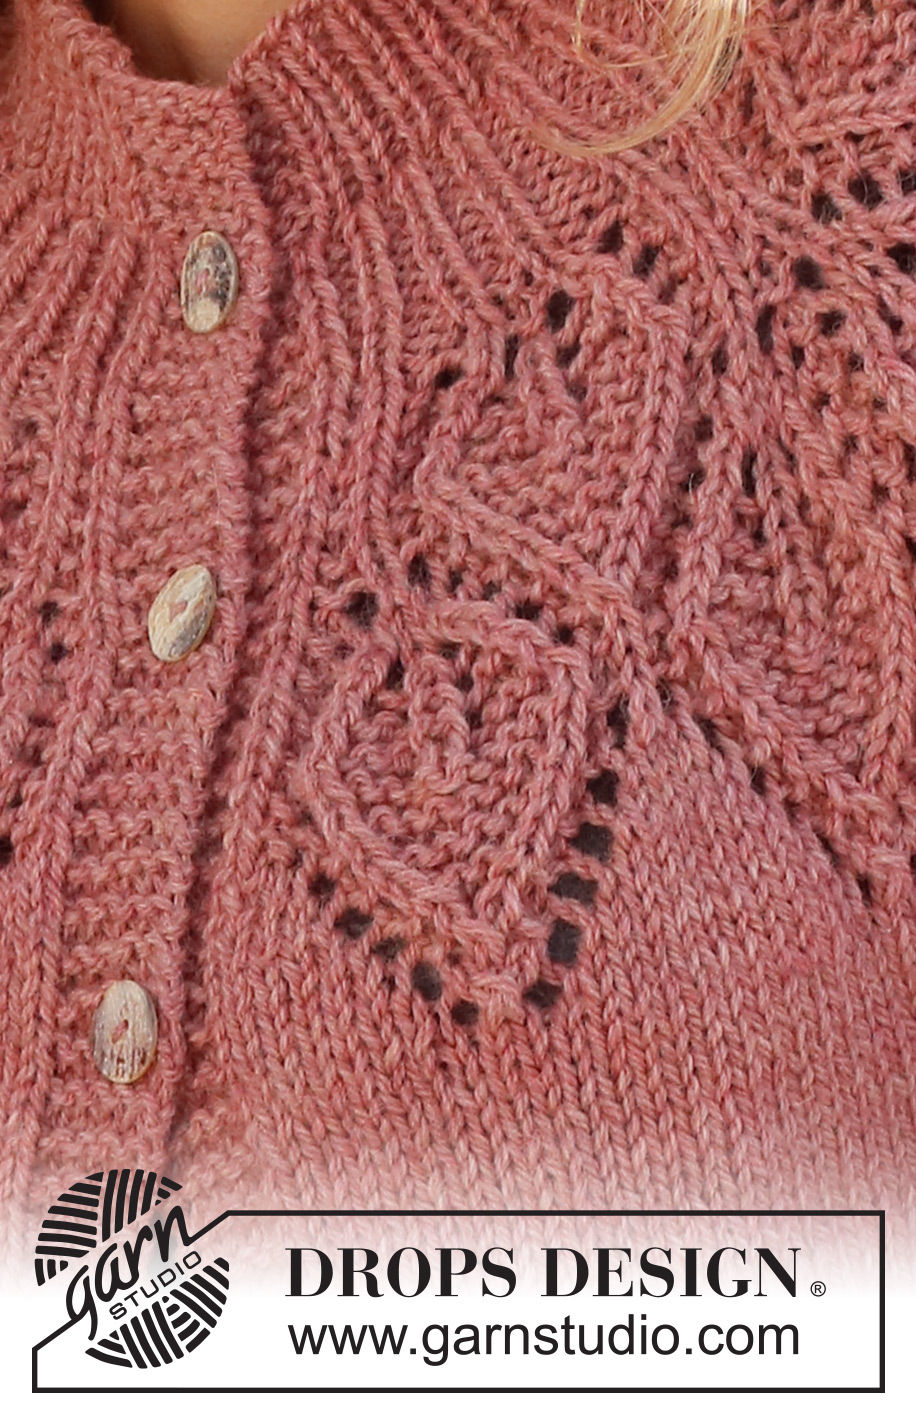
Knitted jacket in DROPS Nepal. The piece is worked top down, with round yoke and leaf pattern. Sizes S - XXXL.
DROPS 228-2 |
|||||||||||||||||||||||||
|
EXPLANATIONS FOR THE PATTERN: ------------------------------------------------------- RIDGE/GARTER STITCH (worked back and forth): Knit all rows. 1 ridge = knit 2 rows. PATTERN: See diagrams A.1 and A.2. The diagrams show all rows in the pattern from the right side INCREASE TIP (evenly spaced): To work out how to increase evenly, count the total number of stitches on the needle (e.g. 73 stitches) minus bands (e.g. 10 stitches) and divide the remaining stitches by the number of increases to be made (e.g. 25) = 2.5. In this example, increase by making 1 yarn over after alternately each 2nd and 3rd stitch. Do not increase on the bands. On the next row work the yarn overs twisted to avoid holes. BUTTONHOLES: Work buttonholes on the right band (when the garment is worn). Work from the right side when there are 3 stitches left on the row as follows: Make 1 yarn over, knit 2 together and knit 1. On the next row (wrong side), knit the yarn over to leave a hole. The first buttonhole is worked when the yoke measures 1 cm. Then work the other 5 buttonholes with approx. 9-9-9-9½-9½-9½ cm between each one. DECREASE TIP (for sleeves): Decrease 1 stitch on either side of the marker thread as follows: Work until there are 3 stitches left before the marker thread, knit 2 together, knit 2 (marker thread sits between these 2 stitches), slip 1 stitch as if to knit, knit 1 and pass the slipped stitch over the knitted stitch (2 stitches decreased). CASTING-OFF TIP: To avoid the cast-off edge being tight you can cast off with a larger size needle. If the edge is still tight, make 1 yarn over after approx. each 6th stitch at the same time as casting off; the yarn overs are cast off as normal stitches. ------------------------------------------------------- START THE PIECE HERE: ------------------------------------------------------- JACKET – SHORT OVERVIEW OF THE PIECE. The neck and yoke are worked back and forth with circular needle, from mid front and top down. The yoke is divided for body and sleeves and the body continued back and forth with circular needle. The sleeves are worked in the round with double pointed needles/short circular needle, top down. NECK: Cast on 73-77-81-85-89-93 stitches (including 5 band stitches on each side towards mid-front) with circular needle size 4.5 mm and DROPS Nepal. Purl 1 row (= wrong side). Then work as follows from the right side: 5 band stitches in GARTER STITCH – read description above, * knit 1, purl 1 *, work from *-* until there are 6 stitches left, knit 1 and 5 band stitches in garter stitch. Work this rib for 4 cm. Purl 1 row from the wrong side (band stitches in garter stitch), and increase 25-33-29-37-33-41 stitches evenly spaced – read INCREASE TIP = 98-110-110-122-122-134 stitches. Insert 1 marker after the band; the yoke is measured from this marker. Switch to circular needle size 5,5 mm. YOKE: The next row is worked as follows from the right side: 5 band stitches in garter stitch, knit 1, work A.1A until there are 8 stitches left (= 7-8-8-9-9-10 repeats of 12 stitches), work the first 2 stitches in A.1A (so the pattern is symmetrical), knit 1 and 5 band stitches in garter stitch. Remember the BUTTONHOLES – read description above. Continue this pattern for 4 cm, then work A.1B (= 2 rows). There are now 83-93-93-103-103-113 stitches. Now work pattern as follows from the right side: 5 band stitches in garter stitch, knit 1, work A.2 over A.1B (= 7-8-8-9-9-10 repeats of 10 stitches), work the first stitch in A.2, knit 1 and 5 band stitches in garter stitch. REMEMBER THE KNITTING TENSION! When A.2 has been completed in height there are 209-237-237-265-265-293 stitches and the piece measures approx. 20 cm from the marker. Knit 1 row from the right side where you increase 15-8-24-24-44-39 stitches evenly spaced = 224-245-261-289-309-332 stitches. Continue with stocking stitch and 5 band stitches in garter stitch on each side until the piece measures 22-22-23-25-27-29 cm from the marker. Now divide for the body and sleeves on the next row from the wrong side as follows: Work the first 35-38-40-44-48-53 stitches as before (= right front piece), place the next 46-50-54-60-62-64 stitches on a thread for the sleeve, cast on 8-8-10-10-12-12 stitches (= in side under sleeve), work the next 62-69-73-81-89-98 stitches (= back piece), place the next 46-50-54-60-62-64 stitches on a thread for the sleeve, cast on 8-8-10-10-12-12 stitches (= in side under sleeve), work the last 35-38-40-44-48-53 stitches as before (= left front piece). The body and sleeves are finished separately. THE PIECE IS NOW MEASURED FROM HERE. BODY: = 148-161-173-189-209-228 stitches. Continue back and forth with stocking stitch and 5 band stitches in garter stitch on each side until the piece measures 20-22-23-23-23-23 cm. There is approx. 10 cm left to finished length; try the jacket on and work to desired length. To avoid the following rib being tight, knit 1 row from the right side where you increase 22-24-27-29-33-35 stitches evenly spaced = 170-185-200-218-242-263 stitches. Change to circular needle size 4.5 mm and work rib as follows from the right side: 5 band stitches in garter stitch, * knit 1, purl 2 *, work from *-* until there are 6 stitches left, knit 1 and 5 band stitches in garter stitch. When the rib measures 10 cm, cast off with knit over knit and purl over purl – read CASTING-OFF TIP. The jacket measures approx. 56-58-60-62-64-66 cm from the shoulder down. SLEEVES: Place the 46-50-54-60-62-64 stitches from the thread on the one side of the piece on double pointed needles/short circular needle size 5.5 mm and knit up 1 stitch in each of the 8-8-10-10-12-12 stitches cast on under the sleeve = 54-58-64-70-74-76 stitches. Insert a marker thread in the middle of the new stitches under the sleeve and start the round at the marker thread. Work stocking stitch in the round for 4 cm, then decrease 1 stitch on each side of the marker thread – read DECREASE TIP. Decrease like this every 3½-3-2-1½-1½-1 cm a total of 8-9-11-13-15-15 times = 38-40-42-44-44-46 stitches. Continue with stocking stitch until the sleeve measures 31-30-30-28-26-24 cm. NOTE: Shorter measurements in larger sizes due to wider neck and longer yoke. Increase 4-5-6-7-7-8 stitches evenly spaced = 42-45-48-51-51-54 stitches. Change to double pointed needles size 4.5 mm and work rib (knit 1, purl 2) for 10 cm. Cast off with knit over knit and purl over purl - remember CASTING-OFF TIP. The sleeve measures approx. 41-40-40-38-36-34 cm from the division. Work the other sleeve in the same way. ASSEMBLY: Sew the buttons onto the left band. |
|||||||||||||||||||||||||
Diagram explanations |
|||||||||||||||||||||||||
|
|||||||||||||||||||||||||
 |
|||||||||||||||||||||||||
 |
|||||||||||||||||||||||||
Have you finished this pattern?Tag your pictures with #dropspattern #autumnwreathjacket or submit them to the #dropsfan gallery. Do you need help with this pattern?You'll find 30 tutorial videos, a Comments/Questions area and more by visiting the pattern on garnstudio.com. © 1982-2026 DROPS Design A/S. We reserve all rights. This document, including all its sub-sections, has copyrights. Read more about what you can do with our patterns at the bottom of each pattern on our site. |
|||||||||||||||||||||||||







Post a comment to pattern DROPS 228-2
We would love to hear what you have to say about this pattern!
If you want to leave a question, please make sure you select the correct category in the form below, to speed up the answering process. Required fields are marked *.