DROPS Children 49 · Lots of new kid designs!
Product image DROPS Sky yarn
DROPS Sky
74% Alpaca, 18% Polyamide, 8% Wool
from 5.90 € /50g
Get the yarn to make this pattern from 53.10€.

The yarn cost is calculated from the pattern’s smallest size and the yarn’s cheapest product type. Looking for an even better price? You might find it on the DROPS Deals!

DROPS AW2425

Lagoon

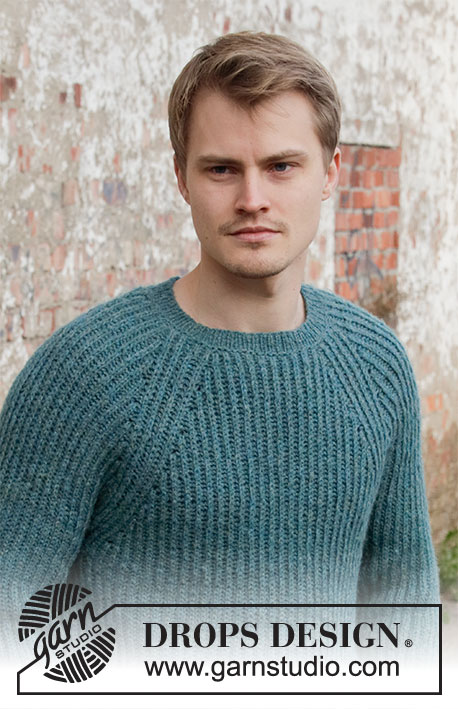
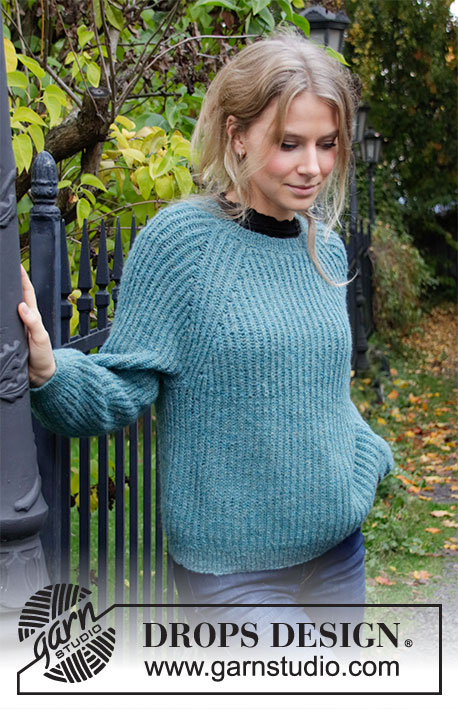
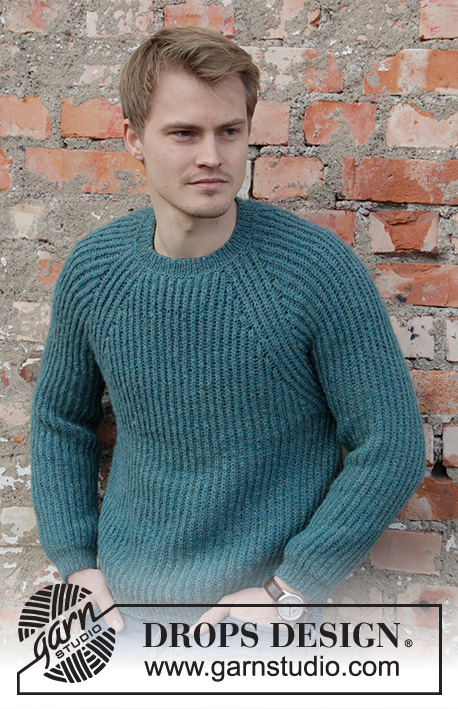
Knitted jumper with raglan for men in DROPS Sky. Piece is knitted top down with English rib. Size: S - XXXL

Highlight Size:
DROPS 208-9

#lagoonsweater

DROPS design: Pattern sk-067
Yarn group B
----------------------------------------------------------

SIZE:
S - M - L - XL - XXL – XXXL

MATERIALS:
DROPS SKY from Garnstudio (belongs to yarn group B)
450-450-500-500-550-550 g colour 06, sea green

KNITTING TENSION:
16 stitches in width and 40 rows vertically with English rib = 10 x 10 cm.

NEEDLES:
DROPS DOUBLE POINTED NEEDLES SIZE 4.5 mm
DROPS CIRCULAR NEEDLE SIZE 4.5 mm : Length 40 and 80 cm.
DROPS DOUBLE POINTED NEEDLES SIZE 3 mm
DROPS CIRCULAR NEEDLE SIZE 3 mm: Length 40 cm and 80 cm for rib.
Needle size is only a suggestion! If you have too many stitches on 10 cm switch to larger needles. If you have too few stitches on 10 cm switch to smaller needles.

-------------------------------------------------------

Alternative Yarn – See how to change yarns here
Yarn Groups A to F – Use the same pattern and change the yarn here
Yarn usage using an alternative yarn – Use our yarn converter here

-------------------------------------------------------

You might also like...

Product image DROPS Sky
DROPS Sky
74% Alpaca, 18% Polyamide, 8% Wool
from 5.90 € /50g
Get the yarn to make this pattern from 53.10€.

The yarn cost is calculated from the pattern’s smallest size and the yarn’s cheapest product type. Looking for an even better price? You might find it on the DROPS Deals!

Pattern instructions

----------------------------------------------------------

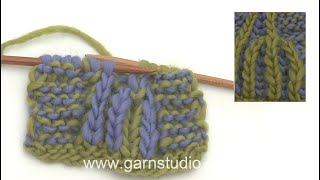
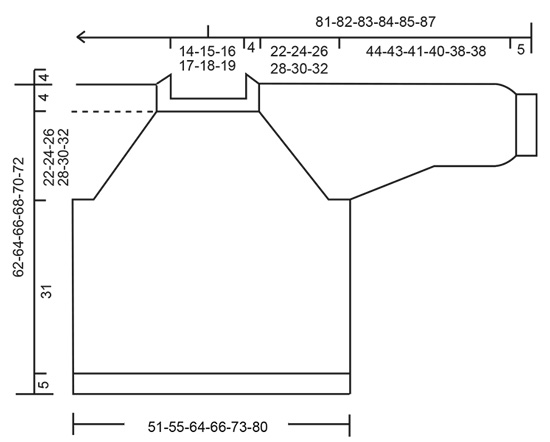
EXPLANATION FOR THE PATTERN:

----------------------------------------------------------

ENGLISH RIB:
ROUND 1: * Knit 1, 1 yarn over, slip 1 stitch as if to purl *, work from *-*.
ROUND 2: * 1 yarn over, slip 1 stitch purlwise, purl together yarn over and slipped stitch *, work from *-*. 
3.ROUND: * Knit together yarn over and slipped stitch, 1 yarn over, slip 1 stitch as if to purl *, repeat from *-*.
Repeat rounds 2 to 3.

RAGLAN:
All increases are done on 2 round in English rib pattern!
NOTE! If the knitting tension is not correct vertically the raglan increase will be too short/long vertically. Raglan increase is written in both number of round and cm. If the knitting tension is incorrect vertically, work raglan increase in cm.
Increase as follows:
Work until 4 stitches remain before stitch with marker. Increase 2 stitches in next stitch (one purl stitch + yarn over) as follows: Knit yarn over and stitch together but wait to slip stitch and yarn over off the needle, make 1 yarn over on right needle, knit stitch and yarn over together 1 more time = 3 stitches (= 2 stitches increased). Work the next 7 stitches in English rib as before. Increase 2 stitches in next stitch (one purl stitch + yarn over) as follows: Knit yarn over and stitch together but wait to slip stitch and yarn over off the needle, make 1 yarn over on right needle, knit stitch and yarn over together 1 more time = 3 stitches (= 2 stitches increased). Repeat at each of the remaining markers (= 16 stitches increased in total on round).
On next round work the increased stitches in English rib pattern - there are no English rib yarn overs in increase, so on next round in English rib pattern work stitch to be worked together yarn over, without yarn over.

DECREASE TIP-1 (evenly):
To calculate how to decrease evenly, use the total number of stitches on row (e.g. 96 stitches) and divide stitches by number of decreases to be done (e.g. 16) = 6. 
In this example decrease by knitting every 5th and 6th stitch together.

DECREASE TIP-2 (applies to sleeves):
All decreases are done on 2 round in English rib pattern.
Decrease as follows: Work like this until 2 stitches remain before stitch with marker slip the next 3 stitches (+ yarn overs that belongs to stitches) loosely over on to right needle as if to knit together, knit the next 2 stitches (+ yarn over that belongs to stitch) together, pass the 3 slipped stitches over stitches knitted together (= 4 stitches decreased). NOTE! On next round do not work any English rib stitch together with middle stitch under sleeve, then on next round in English rib pattern, work stitch together with yarn over, without yarn over.

INCREASE TIP (evenly):
To calculate how to increase evenly, use the total number of stitches on row (e.g. 164 stitches) and divide stitches by number of increases to be done (e.g. 70) = 2.3. 
In this example increase by making 1 yarn over after approx. every other stitch. On next round work yarn overs twisted to avoid holes.

CAST-OFF TIP:
To avoid a tight cast-off edge you may use a needle ½ size larger or cast off with knit over knit and purl over purl and make 1 yarn over after every 4th stitch (cast off yarn overs as regular stitches).

----------------------------------------------------------

START THE PIECE HERE:

----------------------------------------------------------

JUMPER - SHORT OVERVIEW OF THE PIECE:
Worked in the round on circular needle, top down. Work sleeves in the round on a short circular needle/double pointed needles.

NECK EDGE:
Cast on 96-102-106-110-114-118 stitches on a short circular needle size 3 mm with Sky. Knit 1 round, then work rib = knit 1/purl 1 for 4 cm. Knit 1 round while decreasing 16-18-18-22-22-26 stitches evenly - read DECREASE TIP-1 (evenly) = 80-84-88-88-92-92 stitches. Purl 1 round. Insert a marker here (= beginning of round approx. mid back). NOW MEASURE PIECE FROM HERE!

YOKE:
Switch to circular needle size 4.5 mm. Then work ENGLISH RIB - read explanation above. When 1 round has been worked with English rib, insert 4 markers in piece without working (insert all markers in a purl stitch): Skip the first 13-13-15-15-15-15 stitches, insert a marker in next stitch (= in transition between half back piece and right sleeve), skip the next 13 stitches, insert a marker in next stitch (= in transition between right sleeve and front piece), skip the next 25-27-29-29-31-31 stitches, insert a marker in next stitch (= in transition between front piece and left sleeve), skip the next 13 stitches, insert a marker in next stitch (= in transition between left sleeve and half back piece), there are now 12-14-14-14-16-16 stitches between last marker and beginning of round.
REMEMBER THE KNITTING TENSION! There is now one marker in every transition between body and sleeves. Move the markers upwards when working. Continue in the round with English rib, AT THE SAME TIME on next round (= 2nd round in English rib) begin increase for RAGLAN - read explanation above. Increase like this every 6th round (approx. every 1½ cm), 1-2-4-5-6-8 times in total and every 8th round (approx. every 2 cm) 10 times in all sizes = 256-276-312-328-348-380 stitches.
When all increases are done, continue with English rib until piece measures 22-24-26-28-30-32 cm from marker, finish after 2nd round in English rib. Work next round as follows: Work the first 37-39-47-49-53-59 stitches (= approx. half back piece), slip the next 55-59-63-67-67-71 stitches on a stitch holder for sleeve and cast on 9 new stitches on needle (= in the side under sleeve), work the next 73-79-93-97-107-119 stitches (= front piece), insert the next 55-59-63-67-67-71 stitches on a stitch holder for sleeve and cast on 9 new stitches on needle (= in the side under sleeve), work the last 36-40-46-48-54-60 stitches on round (= approx. half back piece). Finish body and sleeves separately. NOW MEASURE PIECE FROM HERE!

BODY:
There are now 164-176-204-212-232-256 stitches on round. Continue in the round with English rib until piece measures 31 cm from division - adjust to finish after 2nd round in English rib. Switch to circular needle size 3 mm. Work next round as follows: * Knit yarn over and slipped stitch together, purl 1 *, work from *-* the entire round, AT THE SAME TIME increase 60-66-70-72-84-82 stitches - read INCREASE TIP = 224-242-274-284-316-338 stitches. Work rib (knit 1/purl 1) in the round for 5 cm. Cast off - read CAST-OFF TIP. Jumper measures approx. 54-56-58-60-62-64 cm from shoulder and down.

SLEEVE:
Slip the 55-59-63-67-67-71 stitches from stitch holder in one side of piece back on a short circular needle/double pointed needles size 4.5 mm and pick in addition up 1 stitch in each of the 9 new stitches cast on in the side under sleeve = 64-68-72-76-76-80 stitches. Continue in the round with English rib. When sleeve measures 4 cm – adjust so that next round is 2nd round in English rib, insert a marker in the middle stitch under sleeve (= one knit stitch). On next round, decrease 4 stitches under sleeve - read DECREASE TIP-2.
Decrease like this every 10-10-5-5-5-4 cm 4-4-5-6-6-6 times in total = 48-52-52-52-52-56
stitches. When sleeve measures 44-43-41-40-38-38 cm – adjust so that next round is 3rd round in English rib pattern, switch to double pointed needles size 3 mm.

In S - M – L work next round as follows: * Knit yarn over and slipped stitch together, knit 1, knit yarn over and slipped stitch together, knit 1, knit yarn over as 1 knit stitch, knit slipped stitch as 1 knit stitch, knit 1 *, work from *-*, 8 stitches have been increased on round = 56-60-60 stitches.

In XL - XXL work next round as follows: Knit yarn over as 1 knit stitch, knit slipped stitch as 1 knit stitch, * knit yarn over as 1 knit stitch, knit slipped stitch as 1 knit stitch, knit yarn over and slipped stitch together, knit 1 *, work from *-*, 14 stitches have been increased on round = 66-66 stitches.

In XXXL work next round as follows: * Knit yarn over and slipped stitch together, knit 1, knit yarn over as 1 knit stitch, knit slipped stitch as 1 knit stitch, knit 1 *, work from *-*, 14 stitches have been increased on round = 70 stitches.

Now work rib (= knit 1/purl 1) for 5 cm. Cast off - read CAST-OFF TIP. Sleeve measures 49-48-46-45-43-43 cm from division. Work the other sleeve the same way.

This pattern has been corrected.

Updated online: 21.02.2020
SLEEVE:...Cast off - read CAST-OFF TIP. Sleeve measures 49-48-46-45-43-43 cm from division. Work the other sleeve the same way.

Diagram

Diagram measurements for DROPS 208-9
Do you have a question? See a list of frequently asked questions (FAQ)

Knitting tension is what determines the final measurements of your work, and is usually measured per 10 x 10 cm. It is provided like so: number of stitches in width x number of rows in height - eg: 19 stitches x 26 rows = 10 x 10 cm.

The knitting tension is very individual; some people knit/crochet loosely while others work tightly. You adjust the knitting tension with the needle size, which is why the suggested needle size is only meant as a guide! You need to adjust this (up or down) to ensure that YOUR knitting tension matches the knitting tension provided in the pattern. If you work with a different knitting tension than provided you will have a different yarn consumption, and your work will have different measurements than what the pattern suggests.

The knitting tension also determines which yarns can replace each other. As long as you achieve the same knitting tension you can replace one yarn with another.

See DROPS lesson: How to measure your tension/gauge

See DROPS video: How to make a gauge tension swatch

The required amount of yarn is provided in grams, eg: 450 g. To calculate how many balls you’ll need you first need to know how many grams are in 1 ball (25g, 50g or 100g). This information is available if you click on the individual yarn quality on our pages. Divide the amount required with the amount of each ball. For example, if each ball is 50g (the most common amount), the calculation will be as follows: 450 / 50 = 9 balls.

The important thing when changing from one yarn to another is that the knitting/crochet tension remains the same. This is so that the measurements of the finished piece will be the same as on the sketch provided. It is easier to achieve the same knitting tension using yarns from the same yarn group. It is also possible to work with multiple strands of a thinner yarn to achieve the knitting tension of a thicker one. Please try our yarn converter. We recommend you to always work a test swatch.

Please NOTE: when changing yarn the garment might have a different look and feel to the garment in the photo, due to individual properties and qualities of each yarn.

See DROPS lesson: Can I use a different yarn than the one mentioned in the pattern?

All our yarns are categorised into yarn groups (from A to F) according to thickness and knitting tension – group A contains the thinnest yarns and group F the thickest. This makes it easier for you to find alternative yarns to our patterns, should you wish to switch yarn. All yarns within the same group have a similar knitting tension and can easily replace each other. However, different yarn qualities have different structures and properties which will give the finished work a unique look and feel.

Click here for an overview of the yarns in each yarn group

At the top of all our patterns you’ll find a link to our yarn calculator, which is a helpful tool should you wish to use a different yarn than suggested. By filling in the yarn quality you wish to replace, the amount (in your size) and number of strands, the calculator will present good alternative yarns with the same knitting tension. Additionally it will tell you how much you’ll require in the new qualities and whether you’ll need to work with multiple strands. Most skeins are 50g (some are 25g or 100g).

If the pattern is worked with multiple colours, every colour will have to be calculated separately. Similarly, if the pattern is worked with several strands of different yarns (for example 1 strand Alpaca and 1 strand Kid-Silk) you will have to find alternatives for each, individually.

Click here to see our yarn calculator

Since different yarns have different qualities and textures we have chosen to keep the original yarn in our patterns. However, you can easily find options among our available qualities by using our yarn calculator, or simply pick a yarn from the same yarn group.

It is possible that some retailers still have discontinued yarns in stock, or that someone has a few skeins at home that they would like to find patterns for.

The yarn calculator will provide both alternative yarn as well as required amount in the new quality.

If you think it's hard to decide what size to make, it can be a good idea to measure a garment you own already and like the size of. Then you can pick the size by comparing those measures with the ones available in the pattern's size chart.

You'll find the size chart at the bottom of the pattern.

See DROPS lesson: How to read size chart

The needle size provided in the pattern serves only as a guide, the important thing is to follow the knitting tension. And since knitting tension is very individual, you will have to adjust the needle size to ensure that YOUR tension is the same as in the pattern – maybe you’ll have to adjust 1, or even 2 needle sizes, up or down to achieve the correct tension. For this, we recommend that you work test swatches.

Should you work with a different knitting tension than the one provided, the measurements of the finished garment might deviate from the measurement sketch.

See DROPS lesson: How to measure your tension/gauge

See DROPS video: How to make a tension/gauge swatch

Working a garment top-down provides more flexibility and room for personal adjustment. For example it is easier to try the garment on while working, as well as making adjustments to length of yoke and shoulder caps.

The instructions are carefully explaining every step, in the correct order. Diagrams are adjusted to the knitting direction and are worked as usual.

The diagram depicts all rows/rounds, and every stitch seen from the right side. It is read from bottom to top, from right to left. 1 square = 1 stitch.

When working back and forth, every other row is worked from the right side and every other row is worked from the wrong side. When working from the wrong side, the diagram will have to be worked reversed: from left to right, knit stitches are purled, purl stitches are knit etc.

When working in the round every round is worked from the right side and the diagram are worked from right to left on all rounds.

See DROPS lesson: How to read knitting diagrams

The diagram depicts all rows/rounds, and every stitch seen from the right side. It is worked from bottom to top, from right to left.

When working back and forth every other row is worked from the right side: from right to left and every other row is worked from the wrong side: from left to right.

When working in the round, every row in the diagram are worked from the right side, from right to left.

When working a circular diagram you start in the middle and work your way outwards, counter clockwise, row by row.

The rows usually start with a given number of chain stitches (equivalent to the height of the following stitch), this will either be depicted in the diagram or explained in the pattern.

See DROPS lesson: How to read crochet diagrams

Instructions for working several diagrams after each other on the same row/round, will often be written like so: “work A.1, A.2, A.3 a total of 0-0-2-3-4 times". This means you work A.1 once, then A.2 is worked once, and A.3 is repeated (in width) the number of times provided for your size – in this case like so: S = 0 times, M = 0 times, L=2 times, XL= 3 times and XXL = 4 times.

The diagrams are worked as usual: begin with the first row in A.1, then work the first row in A.2 etc.

See DROPS lesson: How to read knitting diagrams

See DROPS lesson: How to read crochet diagrams

The total width of the garment (from wrist-to-wrist) will be larger in the larger sizes, despite the actual sleeves being shorter. The larger sizes have longer sleeve caps and wider shoulders, so there will be a good fit in all sizes.

The measurement sketch/schematic drawing provides information regarding the full length of the garment. If it’s a jumper or a jacket the length is measured from the highest point on the shoulder closest to the neckline, and straight down to the bottom of the garment. It is NOT measured from the tip of shoulder. Similarly, the length of yoke is measured from the highest point on the shoulder and down to where yoke is split into body and sleeves.

On a jacket measures are never taken along bands, unless specifically stated. Always measure inside band stitches when measuring the length.

See DROPS lesson: How to read a schematic drawing

Diagrams are often repeated on the round or in height. 1 repeat is the diagram the way it appears in the pattern. If it says to work 5 repeats of A.1 in the round, then you work A.1 a total of 5 times after/next to each other in the round. If it says to work 2 repeats of A.1 vertically/in height you work the entire diagram once, then begin again at the start and work the entire diagram one more time.

Chain stitches are slightly narrower than other stitches and to avoid working the cast-on edge too tight, we simply chain more stitches to begin with. The stitch count will be adjusted on the following row to fit the pattern and measurement sketch.

The rib edge is more elastic and will contract slightly compared to, for example, stocking stitch. By increasing before the rib edge, you avoid a visible difference in width between the rib edge and the rest of the body.

It’s very easy to cast off too tightly, and by making yarn overs while casting off (and simultaneously casting these off) you avoid a too tight cast off edge.

See DROPS video: How to bind off with yarn overs (yo)

To achieve an even increase (or decrease) you can increase on, for example: every 3rd and 4th row alternately, like so: work 2 rows and increase on the 3rd row, work 3 rows and increase on the 4th. Repeat this until the increase is complete.

See DROPS lesson: Increase or decrease 1 st on every 3rd and 4th row alternately

Should you prefer to work in the round instead of back and forth, you may of course adjust the pattern. You’ll need to add steeks mid-front (usually 5 stitches), and follow the instructions. When you would normally turn and work from the wrong side, simply work across the steek and continue in the round. At the end you’ll cut the piece open, pick up stitches to work bands, and cover the cut edges.

See DROPS video: How to knit steeks and cut open

Should you prefer to work back and forth instead of in the round, you may of course adjust the pattern so you work the pieces separately and then assemble them at the end. Divide the stitches for the body in 2, add 1 edge stitch in each side (for sewing) and work the front and back pieces separately.

See DROPS lesson: Can I adapt a pattern for circular needles into straight needles?

Pattern repeats can vary slightly in the different sizes, in order to get the correct proportions. If you’re not working the exact same size as the garment in the photo, yours might deviate slightly. This has been carefully developed and adjusted so that the complete impression of the garment is the same in all sizes.

Make sure to follow instructions and diagrams for your size!

If you have found a pattern you like which is available in women’s size it’s not very difficult to convert it to men’s size. The biggest difference will be the length of sleeves and body. Start working on the women size that you think would fit across the chest. The additional length will be worked right before you cast off for the armhole/sleeve cap. If the pattern is worked top-down you can add the length right after the armhole or before the first decrease on sleeve.

Regarding additional yarn amount, this will depend on how much length you add, but it is better with a skein too many than too few.

All yarns will have excess fibres (from production) that might come off as lint or shedding. Brushed yarns (ie hairier yarns) have more of these loose, excess fibres, causing more shedding.

Shedding also depends on what is worn under or over the garment, and whether this pulls at the yarn fibres. It’s therefore not possible to guarantee that there will be no shedding

Below are some tips on how to get the best result when working with hairier yarns:

1. When the garment is finished (before you wash it) shake it vigorously so the looser hairs come off. NOTE: do NOT use a lint roller, brush or any method that pulls at the yarn.

2. Place the garment in a plastic bag and put it in your freezer - the temperature will cause the fibres to become less attached to each other, and excess fibres will come off easier.

3. Leave in the freezer for a few hours before taking it out and shaking it again.

4. Wash the garment according to the instructions on the yarn label.

Pilling is a natural process that happens to even the most exclusive of fibers. It's a natural sign of wear and tear that is hard to avoid, and that is most visible in high friction areas of your garment like a sweater's arms and cuffs.

You can make your garment look as new by removing the pilling, using a fabric comb or a pill/lint remover.

Still can't find the answer you need? Then scroll down and leave your question so one of our experts can try to help you. This will be done normally within 5 to 10 working days.
In the meantime, you can read the questions and answers that others have left to this pattern or join the DROPS Workshop on Facebook to get help from fellow knitters/crocheters!

Post a comment to pattern DROPS 208-9

We would love to hear what you have to say about this pattern!

If you want to leave a question, please make sure you select the correct category in the form below, to speed up the answering process. Required fields are marked *.

Comments / Questions (97)

country flag Synne wrote:

När jag ska sätta 4 markeringar för ärm så får jag inte antalet maskor att passa . Stl S har 80 maskor, markering på 13e m därefter 13 e maskan sedan efter 25 och därefter 13e och då ska det vara 12m kvar. Jag har då 16 maskor kvar på stickan. Vad gör jag för fel?

14.04.2025 - 22:00

DROPS Design answered:

Hei Synne. Du har "glemt" de 4 maskene du setter merkene i. I str. S har du 80 masker. Hopp over 13 masker, sett 1 merke i neste maske, hopp over 13 masker, sett 1 merke i neste maske, hopp over 25 masker, sett 1 merke i neste maske, hopp over 13 masker, sett 1 merke i neste maske og du har nå 12 masker igjen = 13+1+13+1+25+1+13+1+12= 80 masker. mvh DROPS Design

28.04.2025 - 09:45

country flag Sabine wrote:

Hallo, wenn ich bei der Raglanzunahme bis 4M vor der markierten Linksmasche stricke, ist die folgende M doch eine Linksmasche? Die Zunahme müsste doch aber in eine M + U? Danke für eine Rückmeldung

18.03.2025 - 22:42

DROPS Design answered:

Liebe Sabine, die Markierer sind jeweils in einer linken Maschen. bei der 2. Runde Patent, wenn diese linke Maschen zusammen mit dem Umschlag gestrickt werden muss, und die Zunahmen entstehen jeweils beidseitig von den 7 Raglanmaschen so: 1 linke Maschen, (7 M Patentmuster: Re, li, re, li mit einem Markierer, re, li, re) 1 linke Maschen. Viel Spaß beim Stricken!

19.03.2025 - 07:40

country flag Susan wrote:

I am making size large and am at the increases and the numbers aren't computing with me. How can six rounds of the English rib be 1/2" and 8 rounds be 3/4"? I met gauge and I just can't visualize this. ( Increase like this every 6th round (approx. every 1½ cm = ½"), 1-2-4-5-6-8 times in total and every 8th round (approx. every 2 cm = ¾") 10 times in all sizes = 256-276-312-328-348-380 stitches.). I guess I don't understand what is six rounds, three of round 2 and three of round 3?

18.03.2025 - 14:42

DROPS Design answered:

Dear Susan, increases are worked on a round 2 of the English rib, so when you have to increase on every 6th round you will increase like this: *increase on a round 2, work round 3, round 2, round 2, round 3, round 2, round 3*, and repeat from *to* increase on every 6th round; when increasing on every 8th round, you will increase like this: *increase on a round 2, work round 3, round 2, round 2, round 3, round 2, round 3, round 2, round 2* and repeat from *-* to repeat increasing on every 8th round. Make sure gauge in height is correct or then measure on your piece how many rounds you need to get the same height for each increase. Happy knitting!

19.03.2025 - 15:46

country flag Sabine wrote:

Hallo,ich hätte zwei Fragen: Für Grösse M sind vor der Passe 84 M angegeben, aber bei der Aufteilung und setzen der Maschenmarkierer (MM) sind es nur 80M . Raglanabnahme : Wenn eingeteilt wird, sind es in jedem Teil eine ungerade Anzahl von Maschen. Wenn ich bis 4 Maschen vor dem 1. MM stricke, komme ich für die Zunahme auf eine M+ U. Was ja so beschrieben ist. Aber vor MM 2 und MM4 komme ich auf eine gestrickte M?

17.03.2025 - 18:55

DROPS Design answered:

Liebe Sabine, die Markierer werden jeweils in (und nicht zwischen) einer Masche eingesetzt werden, so haben Sie: 13 M, 1 M mit einer Markierung, 13 M, 1 M mit einer Markierung,27 M, 1 M mit einer Markierung,13 M, 1 M mit einer Markierung,14 M = 13+1+13+1+27+1+13+1+14=84 M. Diese Masche mit einer Markierung wird jeweils eine linke Masche vom Patentmuster sein = wie die 1. Masche vom Rapport. Viel Spaß beim Stricken!

18.03.2025 - 09:55

country flag Susan wrote:

It's too bad their isn't a translator on the questions so we can see if someone else has asked a question that we need an answer to.

14.03.2025 - 17:52

country flag Susan wrote:

Is there no recommendation for ease in this sweater or are you to make it to the person's actual chest size. Thank you.

13.03.2025 - 12:10

DROPS Design answered:

Dear Susan, just choose the desired ease depending on your choice: measure a similar garment you/the person has and likes the shape and compare these measurements to the one in the chart (in cm, convert into inches here). Read more about charts/sizes here. Happy knitting!

13.03.2025 - 16:06

country flag Hilde De Vos wrote:

Ik brei de maat S. En nadat ik de hals gebreeen heb, heb ik 80 st op de naald. Na alle meerderingen zou ik 256 st op naald hebben: dus 176 st meerderen. Iedere 8e naald moet ik 10x meerderen : 160 steken meerdering. De eerste meerdering was op de 2enaald in patentsteek: dan kom ik al aan 176 st. Maar ik zou ook één meerdering moeten doen op de 6é naald. Maar dan kom ik aan 176 +v 16 steken, dan heb ik 16 steken meer op het einde. Wat is er fout aan de beschrijving? Of wat zie ik niet juist?

10.02.2025 - 17:23

DROPS Design answered:

Dag Hilde,

Je meerdert 11 keer in totaal (1 keer iedere 6e naald en 10 keer iedere 8e naald). Elke keer dat je meerdert maak je 16 meerderingen in totaal dus je maakt inderdaad 176 meerderingen. Na die eerste meerdering op de 2e naald ben je dus al klaar met de meerderingen op iedere 6e naald. Je meerdert dan alleen nog 10 keer iedere 8e naald.

11.02.2025 - 21:00

country flag Kerstin wrote:

Hallo, ich möchte den Pullover gerne mit verkürzten Reihen und Vollpatent stricken. Können Sie mir sagen, wie ich das mit dem Patentmuster und den Doppelmaschen machen muss, damit das Muster vom Kragen an gleich beginnt und korrekt verläuft. Vielen Dank für Ihre Hilfe :-)

08.02.2025 - 16:30

DROPS Design answered:

Liebe Kerstin, solche verkürzten Reihen stricken wir mit solchen Modellen nicht, vielleicht können Sie diese verkürzten Reihen liebe nach der Halsblende, immer noch im Bündchen stricken - Ihr Wollladen hat vielleicht mehr Idéer für Sie, gerne können sie das mit Ihnen - auch per Telefon oder per E-Mail - teilen. Viel Spaß beim Stricken!

10.02.2025 - 09:55

country flag Melanie wrote:

Hallo. Ich würde diesen Pullover unheimlich gerne stricken, aber mein Mann wünscht sich einen V - Ausschnitt. Könnten Sie mir bitte helfen das abzuändern?

30.01.2025 - 15:38

DROPS Design answered:

Liebe Melanie, hier finden Sie unsere Modelle, die von oben nach unten mit V-Halsausschnitt und Patentmuster gestrickt werden, das kann Ihnen vielleicht inspirieren bzw helfen. Viel Spaß beim Stricken!

31.01.2025 - 08:11

country flag Zoe wrote:

When making the gauge swatch should i use 4.5mm or 3mm needles?

25.01.2025 - 17:29

DROPS Design answered:

Dear Zoe, the 3mm needles are only used for the rib edges. The English rib pattern is worked with the larger, 4.5mm needles, so you need to use these to calculate the gauge. Happy knitting!

25.01.2025 - 22:52