
Popular categories
Looking for a yarn?


Comments / Questions (30)
![]() Dorothee wrote:
Dorothee wrote:
Hi, Where does the back shaping/elevation start? At the beginning of the back stitches row or in the middle? Thank you.
24.02.2026 - 15:30DROPS Design answered:
Hi Dorothee, The elevation short rows begin at the beginning of the row, then stop short as described before the end of the row where you turn, work back and stop short before the beginning of the row, turn again, etc.. Regards, Dops Team.
25.02.2026 - 07:01
![]() Dorothee wrote:
Dorothee wrote:
Thank you for responding so quickly to my short row question. So to clarify: do I start working my 9 stitches in the back from the middle of the row (at the 26 stitch mark -I have 52 stitches on each side-) or at the very beginning of the back stitch row? Thank you again.
24.02.2026 - 07:47
![]() Dorothee wrote:
Dorothee wrote:
Hello, I am confused on how to do the elevation in the back for size 6/9 months. Am I understanding correctly: I knit in rib 9 stitches on the back side, I turn my work and knit 26 stitches -which means that I will be knitting 17 stitches from the front?-, and so on? So the short rows are happening on both the back and front stitches; correct? Thank you I knit
24.02.2026 - 06:32DROPS Design answered:
Hi Dorothee, Yes, the short rows will be across some of the front piece as the short rows get longer. This gives a gradual shaping to the elevation at the back. Regards, Drops Team.
24.02.2026 - 06:42
![]() Harim wrote:
Harim wrote:
So got to the first leg yay! What i dont understand is once ive finished one leg, the working yarn will be at the ankle. How do I start the new leg? Do i need to cut the yarn from the finished first leg and then start the second leg with a fresh working yarn? Is there a video I could watch to help? Many thanks! Harim
14.02.2026 - 23:28DROPS Design answered:
Hei Harim, Yes, you need to cut the working yarn and begin the second leg with a new strand. We do not have a video for this pattern sadly. Regards, Drops team.
16.02.2026 - 06:55
![]() Petra Manuela wrote:
Petra Manuela wrote:
Hallo, ich wollte nochmals nachfragen, ob Sie diese Fragen noch betreuen. Mir ist aufgefallen, dass manchmal keine Antwort kommt. Meine Frage ist, warum muss ich nach 3/4 verkürzten Reihen plötzlich beim Wenden jeweils 6/8 M mehr stricken soll, das gibt ja ein riesiges Loch. Meinten Sie alt 6/8 mal jeweils 1 Masche? Vielen Dank für Ihre Rückantwort
11.09.2025 - 14:22DROPS Design answered:
Liebe Manuela, das Loch können Sie vermeiden, indem Sie den Faden anziehen oder mit der Technik "German Short Rows" stricken, die Sie in unseren Videos finden. Sie stricken nach jedem Wenden 6 bzw. 8 Maschen mehr, das ist vom Beginn der verkürzten Reihen so, Sie setzen die beschriebenen Reihen wie begonnen fort. Gutes Gelingen weiterhin!
17.09.2025 - 09:56
![]() Petra wrote:
Petra wrote:
Ich verstehe zu Beginn bei den verkürzten Reihen für die hintere Hose nicht, wo diese anfangen soll(rückwärtige Mitte?) und wie ich dann nach den ersten verkürzten Zunahmen am zu Ende beim Wenden jeweils 6/8 .. mehr stricken soll ? beziehungsweise wie ich dann diese am Ende in die gesamte Runde einfügen kann . Bei mir entstehen riesige Löcher. Leider finde ich die Anleitung sehr unverständlich. Bitte erklären Sie mir diese besser
09.09.2025 - 23:43DROPS Design answered:
Liebe Petra, die verkürzten Reihen beginnen an der hinteren Mitte und werden wie in diesem Video gestrickt, dh immer mehr Maschen am Ende jeder Reihe stricken, bis die gewünschte Maschenanzahl gestrickt wird; Hier finden Sie Technik für verkürzten Reihen, um Löcher zu vermeiden. Viel Spaß beim Stricken!
05.11.2025 - 08:17
![]() Zwenny wrote:
Zwenny wrote:
Ik begrijp twee stappen niet goed: ik heb google gebrobeerd maar kon de antwoorden niet vinden. 1: hoe zet je steken over van een smallere rondbreinaald naar een brede? (ik zou dat graag willen zien in een video) 2: Dan, na het wisselen moet er een ronding gebreid worden. Ik begrijp niet goed hoe ik dat moet doen terwijl ik boordsteek moet houden. Sommigen leggen uit dat je een extra steek breit, maar dan ben ik de tel kwijt als het gaat om de boorsteek.
05.07.2025 - 12:59
![]() Monica wrote:
Monica wrote:
Hi, I do not understand the beginning of the pants. The pattern say "When rib measures 3 cm....work an elevation in the back as follows.... What I do not understand is , in fact the pattern diagram shows for , in my case 22 cm. My question is , as I can not see the back of the pants, where to start the elevation after 3 cm or after 22 cm? Thank you for your kind answer!
24.05.2025 - 12:38DROPS Design answered:
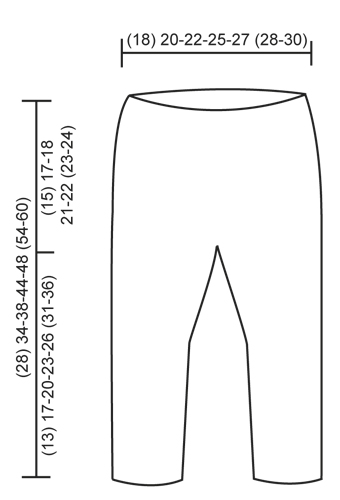
Dear Monica, the pants are worked from the top and down and the measurements are always in length. First we work a small rib edge for 3cm and then we make a slightly longer back side of the pants so that it better fits. This elevation at the back has to be worked at the beginning and it's not shown in the size chart; the size chart only indicated the width of the upper part of the pants, the length of the upper part of the pants before dividing for each leg, the length of the legs and the length of the complete pants. So the elevantion is worked when the upper part measures 3cm. Happy knitting!
25.05.2025 - 13:56
![]() Kim wrote:
Kim wrote:
I do not know how to do the increase stitches and still maintain the rib pattern. Would you be able to supply more detail (row by row, for a couple of rows) please?
09.05.2025 - 00:47DROPS Design answered:
Dear Kim, you will incorporate the new stitches into the rib as before, so that you will have first: K2, P2, K1 (inc), K2 (middle sts), K1 (inc), P2, K2 , then K2, P2, K2 (2 first inc), K2 (mid sts), K2 (2 first inc), P2, K2; then K2, P2, K2, P1 (3rd inc), K2 (mid sts), P1 (inc), K2, P2, K2; and on 4th inc: K2, P2, K2, P2 (3rd+4th inc), K2 (mid sts), P2 (3rd + 4th inc), K2, P2, K2. Continue like this. See also how to increase in rib K2/P2 in, this video (for another pattern/another way of increase but new stitches will be worked in rib). Happy knitting!
09.05.2025 - 07:58
![]() Katharina wrote:
Katharina wrote:
Gerade von der Nadel gehüpft. Wenn man nicht zu viel nachdenkt, stricken sich auch die Zunahmen quasi von alleine. Durch das ziemlich elastische Muster verzeiht dieses Modell auch moderate Abweichungen in der Maschenprobe. Sockenwolle funktioniert auch gut.
08.04.2022 - 13:26
|
|
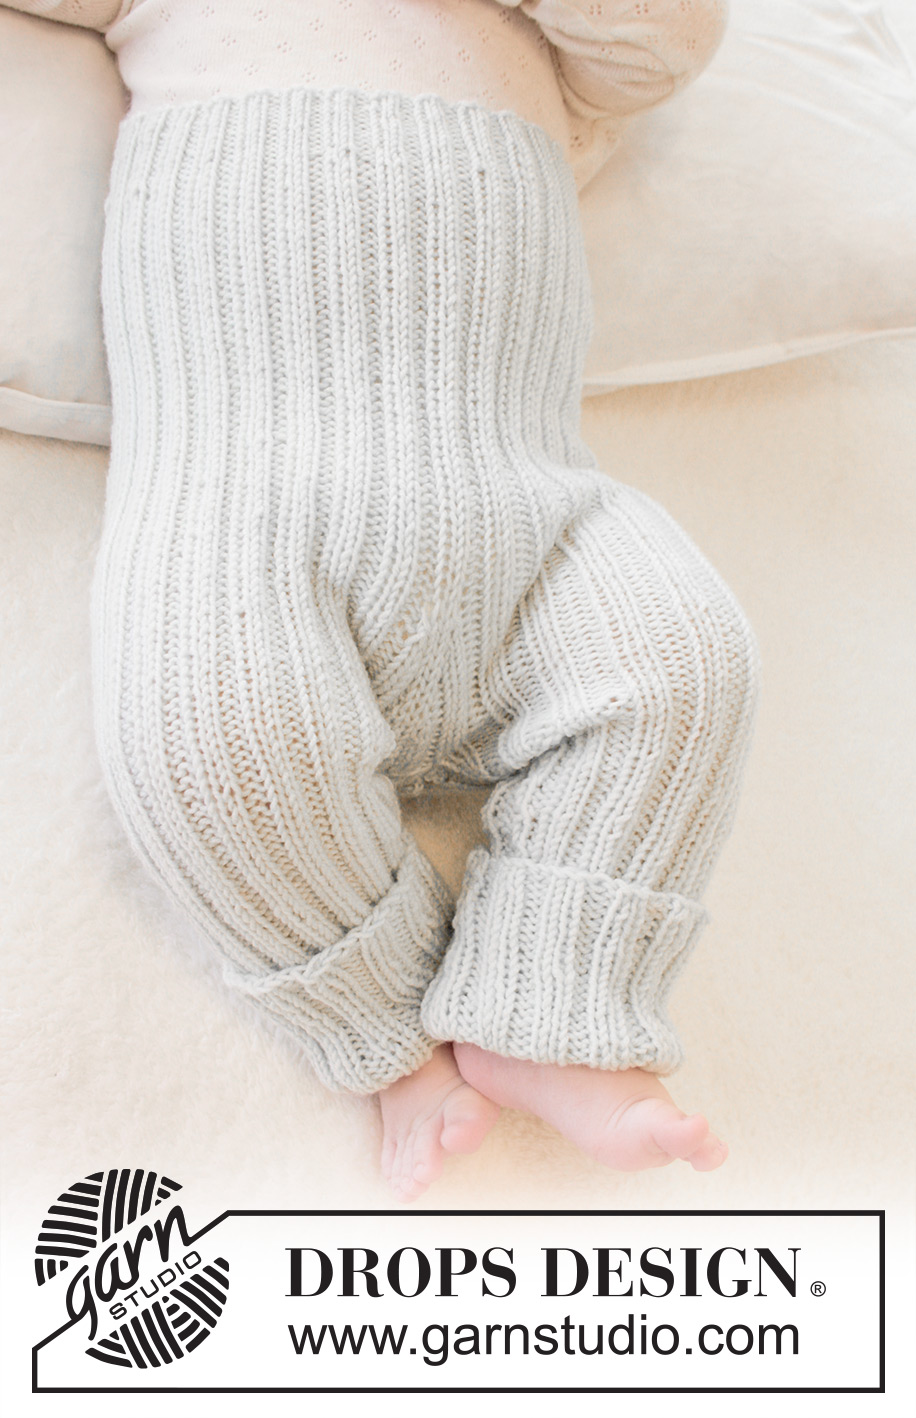
First Impression Pants#firstimpressionpants |
|
|
|
|
Knitted baby pants in rib in DROPS BabyMerino. Size premature – 4 years.
DROPS Baby 25-27 |
|
|
INCREASE TIP: Inc on each side of 2 K sts by working 1 YO. On next round work YOs twisted (i.e. work in back loop of st) to avoid holes. Work the inc sts in rib, i.e. K the first 2 sts inc, and P the next 2 sts etc. DECREASE TIP: Work until 3 sts remain before marker, work 2 tog (in rib), work 2 (marker is between these 2 sts) and then work 2 twisted tog (in rib). --------------------------------------------------------- PANTS: Worked in the round, top down. Rounds start mid back. Cast on (88) 96-104-120-128 (136-144) sts on circular needle size 2.5 mm with Baby Merino. Insert 1 marker at beg of round (= mid back) and 1 marker after (44) 48-52-60-64 (68-72) sts (= mid front). Work rib from mid back as follows: K 1, * P 2, K 2 *, repeat from *-*, finish with P 2, K 1. When rib measures 3 cm, switch to circular needle size 3 mm. Now work an elevation in the back as follows: Work (7) 7-9-9-9 (9-9) sts in rib, turn, tighten yarn, work (14) 14-18-18-18 (18-18) sts in rib, turn, tighten yarn, work (20) 20-26-26-26 (26-26) sts in rib, turn, tighten yarn, work (26) 26-34-34-34 (34-34) sts in rib. Continue like this by working (6) 6-8-8-8 (8-8) sts more on every turn until a total of (50) 50-66-66-82 (82-82) sts have been worked. Turn, continue in rib in the round over all sts. When piece measures (10) 12-13-16-15 (16-17) cm mid front, inc 1 st on each side of the middle 2 sts front and back – see INCREASE TIP (= 4 sts inc). Repeat inc every other round (7) 7-7-7-11 (11-11) more times (= (8) 8-8-8-12 (12-12) inc in total) = (120) 128-136-152-176 (184-192) sts. Cast off (12) 12-12-12-16 (16-16) sts mid front and mid back. Piece measures (15) 17-18-21-22 (23-24) cm . Finish each leg separately, slip sts for one leg on 1 stitch holder. LEG: = (48) 52-56-64-72 (76-80) sts. Distribute sts on 4 double pointed needles size 3 mm and continue in rib in the round - insert 1 marker on the inside of leg. When leg measures 2 cm, dec 1 st on each side of marker - READ DECREASE TIP. Repeat dec every (4) 6-6-4-4 (6-6) rounds (3) 3-3-7-7 (7-7) more times (= (4) 4-4-8-8 (8-8) dec in total) = (40) 44-48-48-56 (60-64) sts. When leg measures approx. (13) 17-20-23-26 (31-36) cm (or desired length), loosely cast off with K over K and P over P. Slip sts from the other leg back on needle and work as first leg. ASSEMBLY: Sew the (12) 12-12-12-16 (16-16) sts that were cast off between legs tog. |
|
 |
|
Have you finished this pattern?Tag your pictures with #dropspattern #firstimpressionpants or submit them to the #dropsfan gallery. Do you need help with this pattern?You'll find 25 tutorial videos, a Comments/Questions area and more by visiting the pattern on garnstudio.com. © 1982-2026 DROPS Design A/S. We reserve all rights. This document, including all its sub-sections, has copyrights. Read more about what you can do with our patterns at the bottom of each pattern on our site. |


With over 40 years in knitting and crochet design, DROPS Design offers one of the most extensive collections of free patterns on the internet - translated to 17 languages. As of today we count 324 catalogues and 12290 patterns translated into English (UK/cm). 12290
We work hard to bring you the best knitting and crochet have to offer, inspiration and advice as well as great quality yarns at incredible prices! Would you like to use our patterns for other than personal use? You can read what you are allowed to do in the Copyright text at the bottom of all our patterns. Happy crafting!
Post a comment to pattern DROPS Baby 25-27
We would love to hear what you have to say about this pattern!
If you want to leave a question, please make sure you select the correct category in the form below, to speed up the answering process. Required fields are marked *.