
Popular categories
Looking for a yarn?


































Comments / Questions (194)
 Maïka wrote:
Hello! While knitting the body, should the markers placed in the center stitches be moved onto the corresponding stitch in the next round? Or do they always stay in that original stitch?
31.10.2026 - 16:11DROPS Design answered:
Hi Maika, These markers should follow your work onwards. Regards, Drops Team.
01.11.2026 - 14:48
Allison wrote:
Please explain to me what you mean by knit the increased stitches into M2
22.10.2026 - 03:56DROPS Design answered:
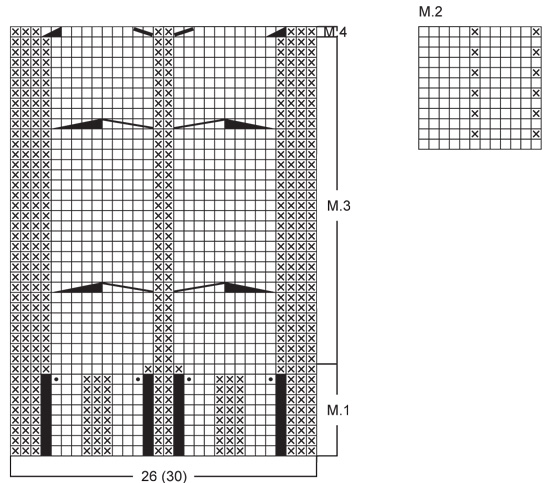
Hi Allison, M.2 consists of 12 stitches, 5 knitted, then a purled, 5 knitted, then a purled stitch. The increased stitches each side are knitted until there is room for the purled stitch (so the 6th increased stitch on each side of the marker-stitch on both sides of the body is purled). Regards, Drops Team.
22.10.2026 - 05:30
Allison wrote:
Please explain how to incorporate the increased stitches into the pattern on the sides
22.10.2026 - 03:47DROPS Design answered:
Hi Allison, See our previous answer. Regards, Drops Team.
22.10.2026 - 05:31
 Lindsay wrote:
De maat L heeft een opzet van 179 st dit komt toch niet uit als de boordsteek 3r 3 averecht is, als ik de uitleg voor de opzet van de boordsteek volg kom ik nog altijd 2x 3rechten naast elkaar uit.
14.10.2026 - 16:55
 Maya wrote:
Hei igjen☺️ Jeg skjønner ikke helt med økningene under armen,der det står at man skal øke på hver side av den perlestrikkede masken under armen. Skal det økes en maske før og etter denne masken,altså 2 masker på hver av disse økerundene? Og jeg forstår heller ikke hvordan maskene strikkes inn i mønsteret fortløpende? Det vil jo ikke stemmme med mønsteret videre rundt. Takk for svar
12.10.2026 - 19:00DROPS Design answered:
Hej Maya, ja du øker altid på hver side af den perlestrikkede maske under ærmet. De nye masker strikker du i samme mønster som resten af ærmet. Nej det vil ikke stemme, før du har taget nok masker ud til en hel rapport, men det gør ikke noget, da det er under ærmet :)
15.10.2026 - 14:16
Maya wrote:
Hei Er det slik at M3 diagrammet bare strikker 1 gang? Men M2 repeteres gjennom hele genseren.
04.10.2026 - 12:01DROPS Design answered:
Hei Maya, Både M.2 og M.3 er strikket gjennom hele genseren. Vennlig hilsen, Drops Team.
05.10.2026 - 06:15
 Foruz wrote:
Jeg er i gang med rib , der står på sidste omgang af M1 tages der 2 m ind på rygstk! Men hvor i ryggen ? !
29.06.2026 - 17:26DROPS Design answered:
Hei Foruz. Fell de 2 maskene jevnt over M.1. F.eks strikk 7. og 8. maske i M.1 vrang sammen og 19. og 20. maske i M.1 vrang sammen. mvh DROPS Design
30.06.2026 - 09:00
 Ema wrote:
Hola, Qué significa en el patrón, sección cuerpo: (colocar un MP en el pt central = lado
15.06.2026 - 19:35DROPS Design answered:
Hola Ema, quiere decir que colocas un marcapuntos (MP) ya sea un hilo marcador u otro tipo de marcapuntos en el punto central de los 3 o 5 derechos (según la talla). Estos marcapuntos marcan el lateral del jersey o lado y nos divide la pieza en delantero y espalda.
28.06.2026 - 22:44
 Marianne Briffaz wrote:
Oj det tog lång tid att få svar, jag fick gissa.. Tröjan är klar sen länge..
08.04.2026 - 13:45DROPS Design answered:
Godt at høre :)
08.04.2026 - 14:55
 Rosi wrote:
Warum ist mein gestrickter Pullover mit der Big Merino-Wolle während der Wäsche mit der Hand so aus der Form gegangen und nun 20 cm zu lang? Auch die Armlänge ist 20 cm zu lang. Ist dies jemand auch schon passiert?
25.03.2026 - 16:21
|
||||||||||||||||||||||||||||
To the Sea |
||||||||||||||||||||||||||||
|
|
||||||||||||||||||||||||||||
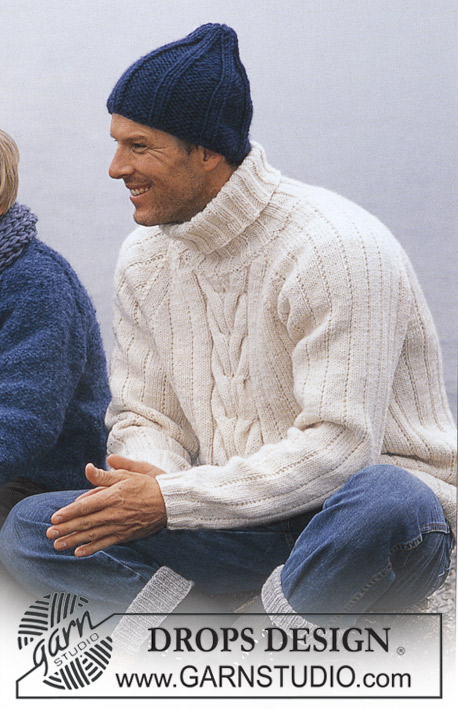
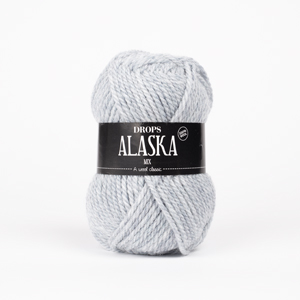
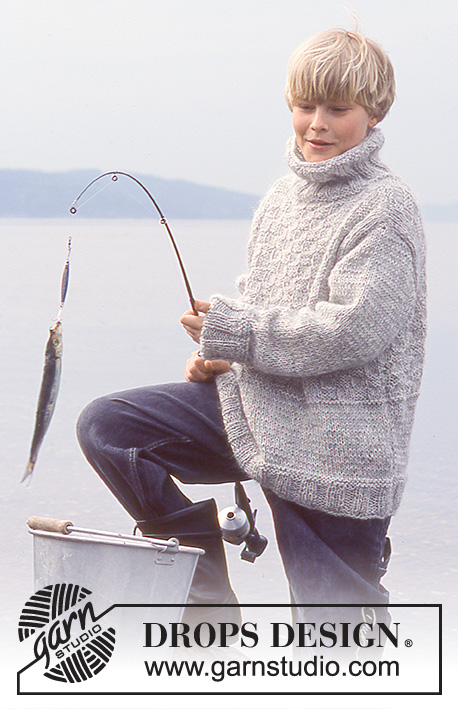
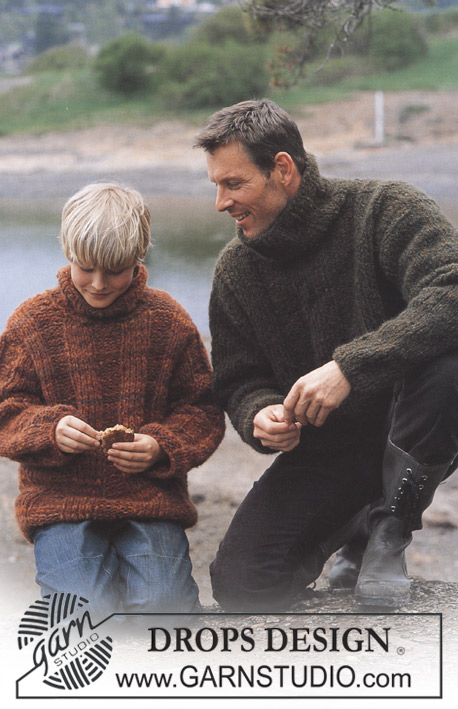
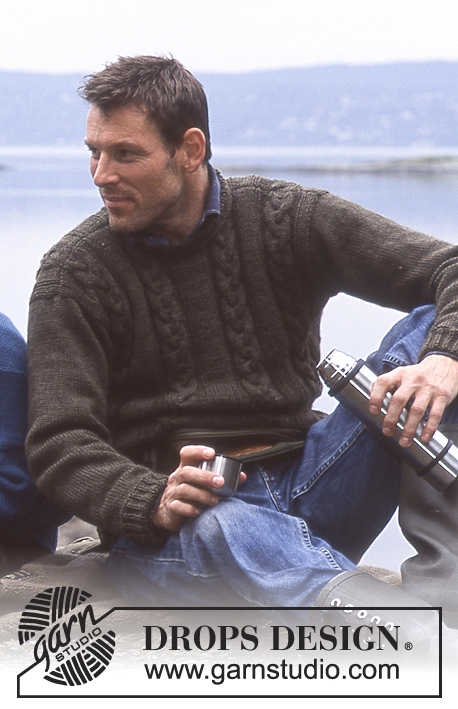
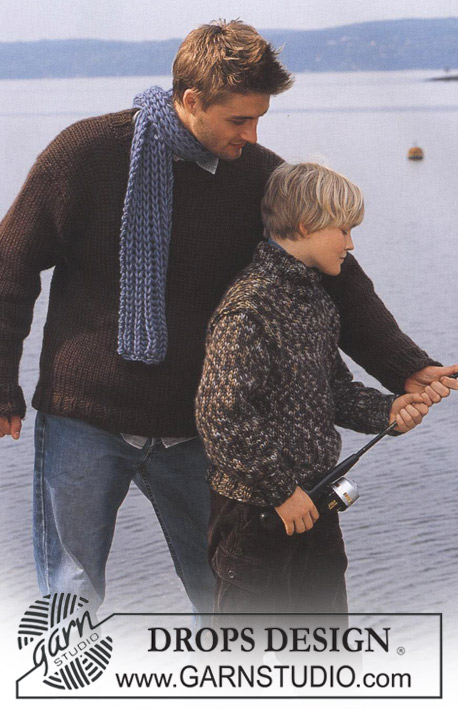
Knitted men's jumper with cables and high neck in DROPS Alaska, plus hat in DROPS Snow
DROPS 85-23 |
||||||||||||||||||||||||||||
|
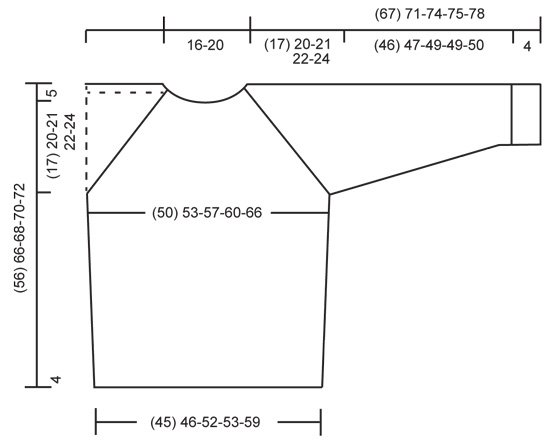
Gauge: 17 sts x 22 rows on larger needles in stockinette st = 10 x 10 cm. Rib: *K 3, P 3*, repeat from *-*. Pattern: See the chart below. The pattern is seen from the right side. Decreasing tips (for raglan): Dec as follows on right side: Start 4 sts before the marker: Sl 1 as if to knit, K 1, psso, K 4 (the marker is in the middle of these 4 sts), K 2 tog. Dec as follows on wrong side: Start 4 sts before the marker, P 2 tog, P 4, P 2 tog, twisting sts (if this is too difficult, sl 2, return to left needle 1 by 1, twisting each, then P 2 tog). BODY Cast on 155-159-179-183-203 sts on smaller circular needles; join and knit rib as follows: K 3-5-3-5-3 (put a marker in the center st = side), *P 3, K 3*, repeat *-* over the following 24-24-30-30-36 sts, Pattern 1 (= 26 sts), *K 3, P 3*, repeat *-* over the following 24-24-30-30-36 sts, K 3-5-3-5-3 (put a marker in the center st = side), *P 3, K 3*, repeat *-* over the following 72-72-84-84-96 sts and finish with P 3. On the last row of Pattern 1 dec 2 sts on back and at the same time inc 4 sts on the front as shown in chart = 157-161-181-185-205 sts. When Pattern 1 is complete (the piece measures approx. 4 cm) change to larger circular needles and continue as follows: K 3-5-3-5-3, Pattern 2 over the following 24-24-30-30-36 sts, Pattern 3 (= 30 sts), Pattern 2 over the following 24-24-30-30-36 sts – reverse the pattern so that it will be the same on both sides of Pattern 3, K 3-5-3-5-3 and Pattern 2 over the remaining 73-73-85-85-97 sts. When the piece measures 12 cm inc 1 st at each side of sts with markers at each side every 5-4-6-4-4 cm a total of 4-6-4-6-6 times – knit the increased sts in Pattern 2 as you go along = 173-185-197-209-229 sts. When the piece measures 34-41-42-43-43 cm bind off 7 sts at each side for armhole (= the sts with the markers + 3 sts each side = 82-88-94-100-110 sts on front and 77-83-89-95-105 sts on back. Lay piece aside and knit the sleeves. Sleeve: Cast on 42-42-42-48-48 sts on double-pointed needles 4 mm; join and place a marker at the join. Knit rib. When the piece measures 4 cm change to double-pointed needles 5 mm and continue working following Pattern 2 (the pattern will not come out even). When the piece measures 9-12-14-14-14 cm inc 1 st on each side of seed st at marker every 3.5-2.5-2-2.5-2 cm a total of 11-14-17-15-20 times (knit the incd sts into the pattern as you go along) = 64-70-76-78-88 sts. When the piece measures 50-51-53-53-54 cm bind off 7 sts at marker (the st with the marker + 3 sts each side of marker) = 57-63-69-71-81 sts. Lay piece aside and knit second sleeve. Yoke: Put the sleeves in on the same circular needles as Body where you bound off for armhole = 273-297-321-337-377 sts Put a marker in each transition between Body and sleeves = 4 markers. Knit 2-3-0-0-0 rows before decreasing. Read the entire next section before knitting: Raglan shaping: Dec 1 st at each side of each marker (= 8 decs) – see Decreasing tips above. Dec every other row 18-21-23-24-24 times and every row 0-0-1-1-6 times. Pattern: When the piece measures 50-59-61-63-65 cm – adjust to end after a cable – knit Pattern 4 over the center 30 sts (decreasing the 4 sts incd on the last row of Pattern 1 at lower edge of Body) – knit the remaining sts as before. On the next row put the center 30-30-30-34-34 sts on a st holder for the neck and knit back and forth on needles. Continue to dec 1 st at each neck edge every other row 1-2-2-2-2 times. After all raglan and neck shaping is complete, 93-91-91-95-95 sts remain and the piece measures approx. 56-66-68-70-72 cm to shoulder. Neckband: Pick up and knit approx. 32-38 sts in front neck (incl. sts on st holder) on double-pointed needles and put all sts on same needles = approx. 125-133 sts. Join and P 1 row, then K 1 row, decreasing evenly distributed to 83-89-89-95-95 sts. Knit rib (K 3, P 3) – but at center front there should be a P 2, following pattern on front. When the collar measures 18-20-20-22-22 cm bind off all sts in rib. Fold neckband out to right side. If you want a crew neck, knit as follows: knit rib until the collar measures approx. 10-11-12-12-13 cm, bind off in pattern. Fold the neckband to wrong side and stitch in place. Assembly: Sew opening under the sleeve. HAT: Sizes: one-size Materials: SNOW 100 gr nr 15, marine blue. DROPS 9 mm double-pointed needles, or size needed to obtain correct gauge. Gauge: 10 sts x 14 rows in stockinette st = 10 x 10 cm. Rib: *P 5, K 2*, repeat from *-*. Hat: Cast on 56 sts; join and place a marker at the join. Knit 1 row stockinette st, then knit rib – see instructions above. When the piece measures 12 cm dec all P 5 to P 4 = 48 sts. When the piece measures 15 cm dec all P 4 to P 3 = 40 sts. Dec in the same way 2 more times with 3 cm between each dec round so that there will be 1 P less for each dec round = 24 sts – the rib is now *K 2, P 1*. When the piece measures 22 cm knit the next row as follows: *K 2 tog, P 1*, repeat from *-* over all sts = 16 sts. Cut yarn and pull through the remaining sts, fasten neatly. Hat measures approx 23 cm high. |
||||||||||||||||||||||||||||
Diagram explanations |
||||||||||||||||||||||||||||
|
||||||||||||||||||||||||||||
 |
||||||||||||||||||||||||||||
 |
||||||||||||||||||||||||||||
Have you finished this pattern?Tag your pictures with #dropspattern or submit them to the #dropsfan gallery. Do you need help with this pattern?You'll find 18 tutorial videos, a Comments/Questions area and more by visiting the pattern on garnstudio.com. © 1982-2026 DROPS Design A/S. We reserve all rights. This document, including all its sub-sections, has copyrights. Read more about what you can do with our patterns at the bottom of each pattern on our site. |
||||||||||||||||||||||||||||






With over 40 years in knitting and crochet design, DROPS Design offers one of the most extensive collections of free patterns on the internet - translated to 17 languages. As of today we count 333 catalogues and 12525 patterns translated into English (UK/cm). 12525
We work hard to bring you the best knitting and crochet have to offer, inspiration and advice as well as great quality yarns at incredible prices! Would you like to use our patterns for other than personal use? You can read what you are allowed to do in the Copyright text at the bottom of all our patterns. Happy crafting!
Post a comment to pattern DROPS 85-23
We would love to hear what you have to say about this pattern!
If you want to leave a question, please make sure you select the correct category in the form below, to speed up the answering process. Required fields are marked *.