
Popular categories
Looking for a yarn?














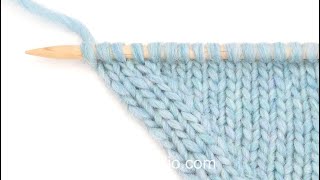

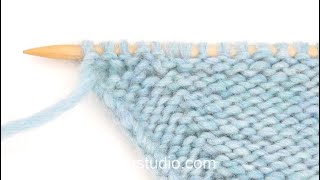





















Comments / Questions (16)
 Marie-Laure B wrote:
Bonjour. J'ai des doutes à propos des calculs : si je rapproche le nombre total de mailles du corps à la taille M (272) et l'échantillon supposé (21m aux 10 cm) je n'obtiens pas un une largeur de 54 cm mais de plus de 64 cm : [(272:21)x 10]: 2=64,75, sans compter les bordures rapportées par la suite. Ce n' est pas un petit différentiel. Avez-vous eu des retours de projets aboutis, les mesures étaient-elles les mesures attendues ?
22.10.2026 - 09:06DROPS Design answered:
Bonjour Marie-Laure, en taille M, vous avez pour le dos 106 m + 4 m de chaque côté = 114 mailles, soit 54 cm de large avec 21 m = 10 cm. Les 272 mailles que vous avez compté sont celles après les augmentations des côtes (on a besoin de davantage de mailles pour les côtes avec les aiguilles 2,5 que pour le jersey avec les aiguilles 4), on va donc prendre le nombre de mailles du dos après la division. Bon tricot!
23.10.2026 - 06:08
 Rita wrote:
Kan ik bij jullie patronen vinden zonder rondbreinaalden?
30.09.2026 - 16:47DROPS Design answered:
Dag Rita,
Ja, die zijn er wel, maar dit zijn de wat oudere patronen, dus als je wat verder door de pagina's bladert kun je patronen vinden die je zonder rondbreinaald kunt breien. De modernere patronen zijn wel overwegend met de rondbreinaald.
Verder hebben we een instructie gemaakt om een patroon aan te passen om op rechte naalden te breien, maar hiervoor is niet elk patroon geschikt. Deze instructie vind je hier.
02.10.2026 - 12:54
Christine wrote:
Bonjour Quand vous dites dans l\'explication du devant droit: \"Quand l\'ouvrage mesure 7-7-8-8-8-9-9 cm, augmenter pour l\'encolure ainsi:...\" Est ce la mesure à partir du marqueur ou bien a partir des mailles en attente du dos? Merci!
03.09.2026 - 14:47DROPS Design answered:
Bonjour Christine, lorsque l'on mesure le devant, on va mesurer à partir des mailles relevées, ainsi, on va commencer l'encolure du devant quand le devant mesure 7, 8 ou 9 cm depuis que l'on a relevé les mailles du devant, mesurez bien dans le sens du tricot (des mailles). Bon tricot!
04.09.2026 - 16:17
 Bobby wrote:
Hello. I am currently on the step to pick up the stitches from the left front piece. I've picked up the 30 stitches that the pattern requested but it seems like its not enough for the left front piece to connect with the back piece. I began picking up stitches right after knitting (rs), am I missing something or misread the pattern? Please help. Thank you!
17.06.2026 - 18:55DROPS Design answered:
Dear Bobby, the stitches for sleeves are picked up along the side of the front pieces - see this video so you worked approx.14-15 cm on front pieces from picked up sts down, with 21 sts for 10 cm tension, you should have enough place to pick up 30 sts. The video might help you with that step. Happy knitting!
18.06.2026 - 09:29
 Ann-Marie wrote:
Videofilmerna kopplade till koftan 263-35 visar hur en tröja stickas! Istället borde filmerna visa hur de olika stegen till en kofta stickas. Gör om och gör rätt!
10.05.2026 - 19:07DROPS Design answered:
Hei Ann-Marie. Videoene visere ulike teknikker, ofte er det lik teknikk brukt i jakker som genser, men man må jo selvsagt lese oppskriften man strikker. Ser man videoen og leser hva man skal gjøre er det nok mange som vil syns videoene er til god hjelp. mvh DROPS Design
18.05.2026 - 14:38
 Stephanie wrote:
Ich komme bei der europäischen Passe nicht weiter. Im Video würd gezeigt,dass ich 14 Maschen aufnehmen soll (Schritt 2/4,), in der Anleitung ist von 22 Maschen die Rede. Es sind aber keine 22 Maschen in der Schräge. Könnt ihr mir helfen?
07.04.2026 - 22:26DROPS Design answered:
Liebe Stephanie, beachten Sie, daß das Video die Technik zeigt, aber je nach Modell, Maschenprobe, usw wird die Maschen- bzw Zunahmen-Anzahl unterschiedlich. Meinen Sie für die Vorderteile? Sie haben 22 Reihen (mit Zunahmen) beim Rückenteil gestrickt, für die Vorderteile nehmen Sie 1 Masche in jeder dieser 22 Reihen so bekommen Sie 22 Maschen für Vorderteil. Viel Spaß beim Stricken!
08.04.2026 - 14:22
 Ola wrote:
Hej! Czy przerobione dwa pierwsze oczka oznaczają również oczko pierwsze na drucie? Czy jest ono uznane tylko za początkowe i nie powinno być liczone? Dziękuję!
22.03.2026 - 19:27DROPS Design answered:
Witaj Olu, pierwsze oczko jest również liczone do podanej liczby oczek. Pozdrawiamy!
23.03.2026 - 14:36
 Chipuruime wrote:
Hi please I would like to ask for the sequence in which I should be reading this please it’s very confusing to go back and still not understand
26.02.2026 - 22:00DROPS Design answered:
Hi Chipuruime, The first sequence of points under Overview is a summary of the project, to give you an idea of what you will be facing while working the jacket. You start knitting the Back Piece, which is the next section after the Overview, and go on from there. Regards, Drops Team.
27.02.2026 - 06:49
 Elena wrote:
Hallo, ich werde zum ersten mal von oben nach unten stricken. Daher brauche ich Anleitungen für alles. :) Es gibt zwar schöne Videoanleitungen für den Pulli, aber nicht für den Cardigan. Vielleicht wird bei einem anderen Muster gezeigt, wie man eine Strickjacke von oben nach unten strickt? Ich bedanke mich im Voraus für Ihre Antwort.
09.02.2026 - 00:17
 Simone wrote:
Hi, ich wundere mich, warum beim Bund soviele (38!) Maschen zu- statt abgenommen werden?
01.02.2026 - 16:55DROPS Design answered:
Liebe Simone, das Bündchen soll nicht eng sitzen, sondern locker fallen, daher werden Maschen zugenommen. Auf dem Bild sehen Sie, dass das Bündchen eine ähnliche Weite hat wie der Rest der Jacke. Viel Spaß beim Stricken!
03.02.2026 - 00:14
|
|
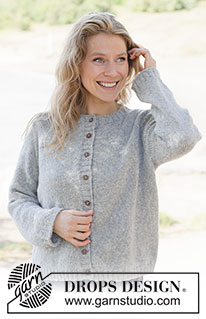
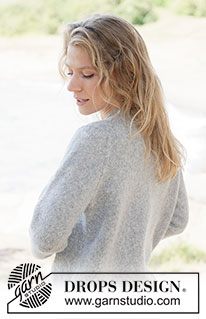
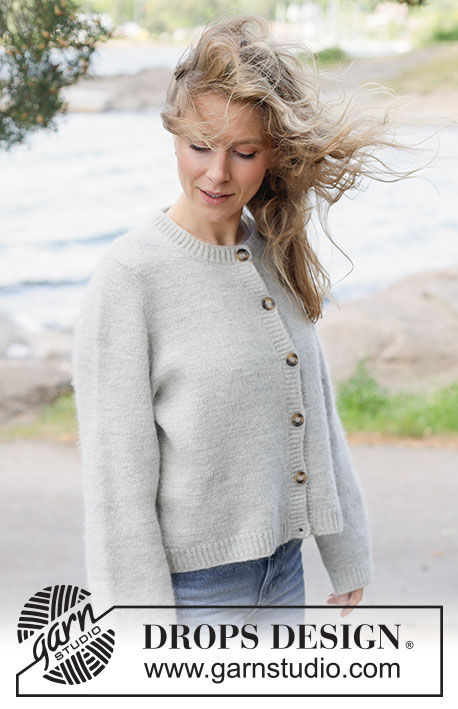
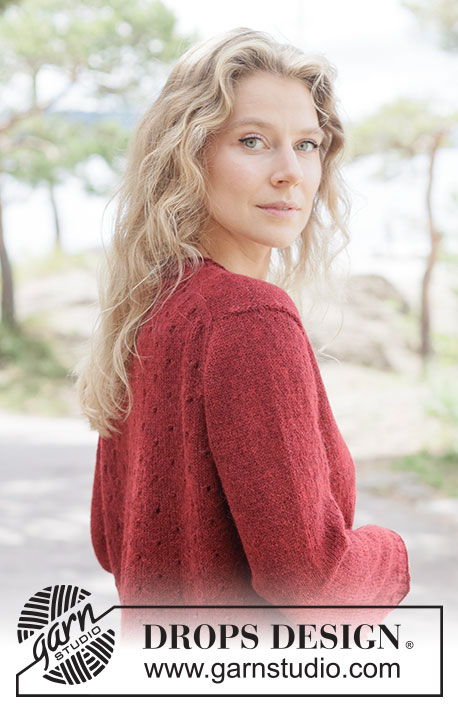
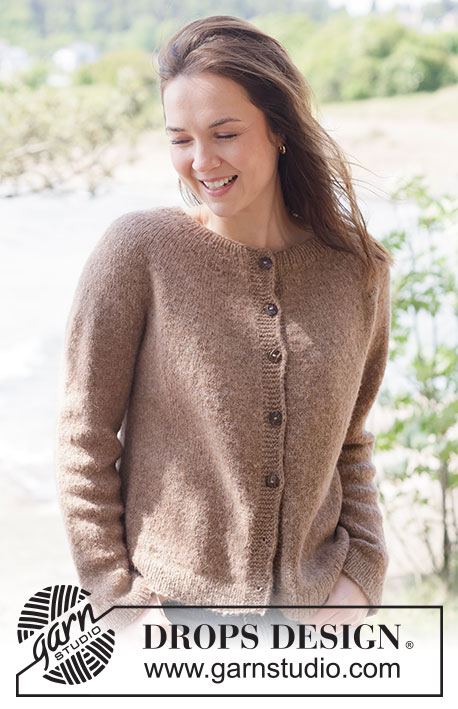
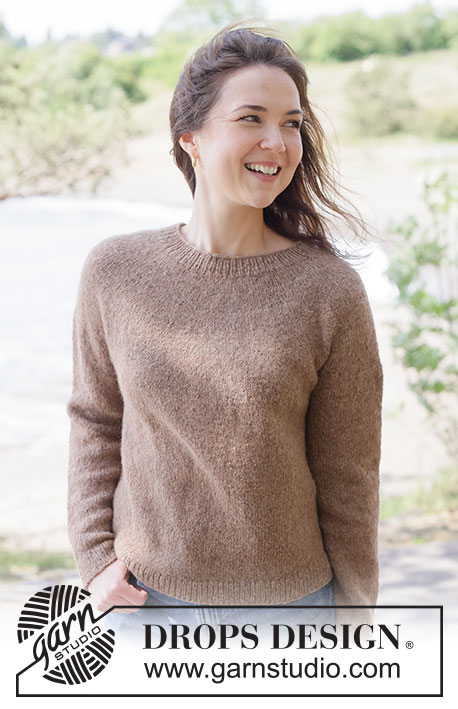
Silver Snuggle Cardigan#silversnugglecardigan |
|
 |
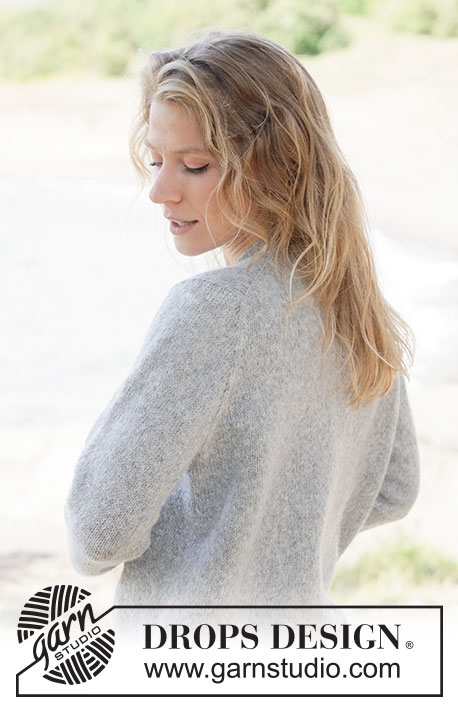 |
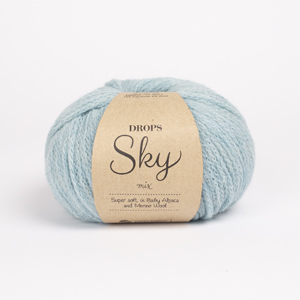
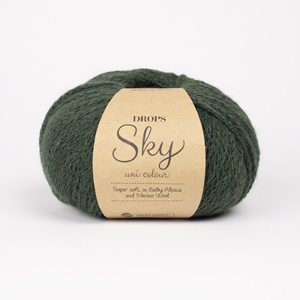
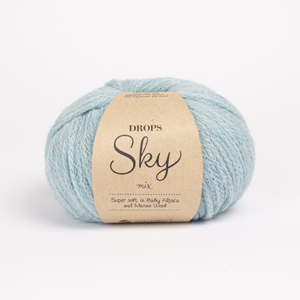
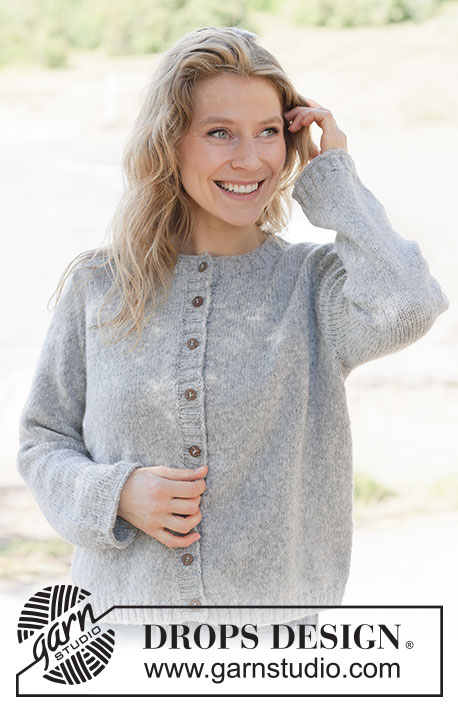
Knitted jacket in DROPS Sky or DROPS Cotton Merino. Piece is knitted top down in stocking stitch with European yoke. Size: XS - XXXL.
DROPS 263-35 |
|
|
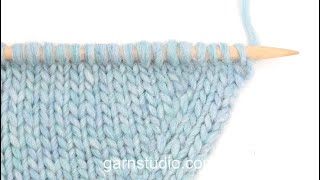
---------------------------------------------------------- EXPLANATION FOR THE PATTERN: ---------------------------------------------------------- INCREASE TIP-1: INCREASE 1 STITCH TOWARDS THE LEFT - from RIGHT SIDE: Use left needle to pick up yarn between 2 stitches from row below, pick up yarn from the front and knit in the stitch loop that is on the back of the needle. INCREASE 1 STITCH TOWARDS THE RIGHT - from RIGHT SIDE: Use left needle to pick up yarn between 2 stitches from row below, pick up yarn from the back and knit in the stitch loop that is on the front side of the needle. . INCREASE TIP-2: INCREASE 1 STITCH TOWARDS THE RIGHT - from WRONG SIDE: Use left needle to pick up yarn between 2 stitches from row below, pick up yarn from the back and purl in the stitch loop that is on the front side of the needle. INCREASE 1 STITCH TOWARDS THE LEFT - from WRONG SIDE: Use left needle to pick up yarn between 2 stitches from row below, pick up yarn from the front and purl in the stitch loop that is on the back side of the needle. GARTER STITCH (when working back and forth): Knit on all rows, i.e. knit from right side and knit from wrong side. 1 ridge vertically = knit 2 rows. DECREASE TIP: Decrease 1 stitch on each side of marker thread as follows: Work until 3 stitches remain before marker thread, knit 2 together, knit 2 (marker thread is in the middle of these 2 stitches), slip 1 stitch knitwise, knit 1, pass slipped stitch over stitch worked (= 2 stitches decreased). SLEEVE TIP: When picking up stitches mid under sleeve, there will be a small hole in the transition between stitches on body and sleeves. The holes can be closed by picking up the strand between two stitches - work this strand twisted together with the first stitch between body and sleeve to close the hole. BUTTONHOLES: Decrease for 7-7-7-8-8-8-8 buttonholes on right band. 1 buttonhole = work 2 stitches together, make 1 yarn over – NOTE: Decrease for buttonholes will look better by purling 2 together in a section with 2 purl stitches (seen from right side). On next row knit yarn over to make holes. Place top buttonhole approx. 5 cm from top edge, bottom buttonhole approx. in the transition between body and rib. Place the remaining 5-5-5-6-6-6-6 buttonholes evenly approx. 6-6-6-6-6-6-6 cm apart. Decrease the last buttonhole when neck edge is worked. ---------------------------------------------------------- START THE PIECE HERE: ---------------------------------------------------------- JACKET - SHORT OVERVIEW OF THE PIECE: In this pattern needles of different length have been used, begin with fitting length for number of stitches and switch as needed. Garment is worked as point 1 - 5. 1 BACK PIECE: Cast on stitches in the back of neck and work back piece back and forth downwards while at the same time increasing in each side of piece until number of stitches for shoulder width is reached. Back piece has a slight diagonal shoulder. 2 FRONT PIECES: Begin by picking up stitches along one shoulder from back piece, work front piece downwards while increasing towards the neck. Repeat on the other shoulder. 3 YOKE: On next row work all stitches on to same circular needle - work as follows: Work one front piece, pick up stitches for sleeve along the side of front piece, work stitches on back piece, pick up stitches for sleeve along the side of the other front piece and work stitches on last front piece = work yoke over all stitches back and forth from mid front. 4 INCREASES FOR BODY AND SLEEVES: While working the yoke continue to increase for sleeve and later on body. 5 BODY AND SLEEVES: When all stitches have been increased and yoke is knitted to desired measurements, divide the piece for body and sleeves. Work body downwards back and forth on circular needle while putting the sleeves aside. Then work sleeves downwards in the round on needle. Finish by picking up stitches around the neck and work the neck edge back and forth. If 0 is given for the chosen size, it means that you skip the information until next information. BACK PIECE: Work piece back and forth on circular needle. Cast on 36-36-38-40-42-44-44 stitches on circular needle size 4 mm with DROPS Sky or DROPS Cotton Merino. ROW 1 (= wrong side): Purl all stitches. ROW 2 (= right side): Read INCREASE TIP-1 and knit 2, increase 1 stitch towards the left, knit until 2 stitches remain, increase 1 stitch towards the right, knit 2. ROW 3 (= wrong side): Read INCREASE TIP-2 and purl 2, increase 1 stitch towards the right, purl until 2 stitches remain, increase 1 stitch towards the left, purl 2. AFTER 3RD ROW: Work 2nd and 3rd ROW 11-11-11-11-11-11-13 times in total (= 22-22-22-22-22-22-26 rows have been worked), after increase there are = 80-80-82-84-86-88-96 stitches on needle. Remember to follow the knitting tension! Cut the yarn, slip stitches on a thread or a stitch holder. RIGHT FRONT PIECE: Find right shoulder on back piece as follows: Place back piece flat with right side up, place back piece so that stitches on thread/stitch holder are towards you, right side of piece = right shoulder. Now pick up stitches along right diagonal shoulder on back piece - begin from right side at the armhole and pick up stitches in towards the neck as follows: Pick up 1 stitch in every worked row inside outermost stitch = 22-22-22-22-22-22-26 stitches. Insert 1 marker in piece in towards the neck. All length measurements are done from this marker, measured in stitch direction. Work in stocking stitch (work first row as follows from wrong side). When piece measures 7-7-8-8-8-9-9 cm, increase stitches towards the neck as follows: ROW 1 (= right side): Knit until 3 stitches remain, increase 1 stitch towards the right, knit 3 – remember INCREASE TIP-1. ROW 2 (= wrong side): Purl all stitches. Work 1st and 2nd ROW 6-6-6-6-6-6-6 times (= 12-12-12-12-12-12-12 rows have been worked) = 28-28-28-28-28-28-32 stitches. On next row from right side, cast on 13-13-14-15-16-17-17 new stitches for neck at the end of row = 41-41-42-43-44-45-49 stitches. Work 1 row from wrong side, first stitch is an edge stitch and is worked in GARTER STITCH - read explanation above. Increases for neck are now done. Piece measures 11-11-12-12-12-13-13 cm from marker. Some of the neck depth will be over on back piece. Neck depth at the front = 9-9-9-9-9-10-10 cm. Neck depth at the back = 2-2-3-3-3-3-3 cm. Then work in stocking stitch with 1 stitch in garter stitch mid front until front piece measures 12-12-13-13-14-14-15 cm from marker - finish with a row from wrong side. Cut the yarn, slip stitches on a thread or stitch holder, now work left shoulder along the left diagonal shoulder on back piece as explained below. LEFT FRONT PIECE: Pick up stitches along left diagonal shoulder on back piece - begin from right side at the neck and pick up stitches out towards the armhole as follows: Pick up 1 stitch in every worked row inside outermost stitch = 22-22-22-22-22-22-26 stitches. Insert 1 marker in piece in towards the neck. All length measurements are done from this marker, measured in stitch direction. Work in stocking stitch (work first row as follows from wrong side). When piece measures 7-7-8-8-8-9-9 cm, increase stitches towards the neck as follows: ROW 1 (= right side): Remember INCREASE TIP-1 and knit 3, increase 1 stitch towards the left, work the rest of row. ROW 2 (= wrong side): Purl all stitches. Work 1st and 2nd ROW 6-6-6-6-6-6-6-6 times (= 12-12-12-12-12-12-12 rows have been worked) = 28-28-28-28-28-28-32 stitches. On next row from wrong side, cast on 13-13-14-15-16-17-17 new stitches at the end of row = 41-41-42-43-44-45-49 stitches. Increases for neck are now done. Piece measures 11-11-12-12-12-13-13 cm from marker. Some of the neck depth will be over on back piece. Neck depth at the front = 9-9-9-9-9-10-10 cm. Neck depth at the back = 2-2-3-3-3-3-3 cm. Then work in stocking stitch with 1 edge stitch in garter stitch mid front until front piece measures 12-12-13-13-14-14-15 cm from marker - finish with a row from wrong side, do not cut the yarn. Then slip front pieces and back piece together and pick up stitches for sleeve as explained below. ROW 1 (= right side): Begin from right side with stitches from left front piece: Work 1 edge stitch in garter stitch, work until 2 stitches remain on needle, slip 1 stitch, knit 1, pass slipped stitch over (= 1 stitch decreased), insert 1 marker here, pick up 26-26-28-28-30-30-30 stitches along the side from left front piece (= stitches for sleeve - pick up stitches inside outermost stitch), insert 1 marker, knit the first 2 stitches from back piece together (= 1 stitch decreased), work until 2 stitches remain on back piece, slip 1 stitch, knit 1, pass slipped stitch over (= 1 stitch decreased), insert 1 marker, pick up 26-26-28-28-30-30-30 stitches along the side from right piece (= stitches for sleeve - pick up stitches inside outermost stitch), insert 1 marker, work stitches from right front piece back on needle, knit the first 2 stitches together (= 1 stitch decreased), work over stitches from right front piece (the last stitch is an edge stitch and always worked in garter stitch) = 210-210-218-222-230-234-250 stitches. 2nd ROW (= wrong side): Work edge stitch as before, purl until first marker, move marker on to right needle, increase towards the right, purl until next marker, increase towards the left, move marker on to right needle, purl until next marker, move marker on to right needle, increase towards the right, purl until next marker, increase towards the left, move marker on to right needle, work the rest of row as before: 214-214-222-226-234-238-254 stitches. ROW 3 (= right side): Work edge stitch as before, knit until first marker, move marker on to right needle, increase towards the left, work until next marker, increase towards the right, move marker on to right needle, work until next marker, move marker on to right needle, increase towards the left, work until next marker, increase towards the right, move marker on to right needle, work the rest of row as before = 218-218-226-230-238-242-258 stitches. ROW 4 (= wrong side): Work 1 edge stitch and purl until first marker, move marker on to right needle, increase 1 stitch towards the right, purl until next marker (= sleeve), increase 1 stitch towards the left, move marker on to right needle, purl until next marker, move marker on to right needle, increase 1 stitch towards the right, purl until next marker, increase 1 stitch towards the left, move marker on to right needle, work the rest of row as before: 222-222-230-234-242-246-262 stitches. ROW 5 (= right side): Work as before until first marker, move marker on to right needle, increase 1 stitch towards the left, work until next marker (= sleeve), increase 1 stitch towards the right, move marker on to right needle, work until next marker, move marker on to right needle, increase 1 stitch towards the left, work until next marker (= sleeve), increase 1 stitch towards the right, move marker on to right needle, work the rest of row as before = 226-226-234-238-246-250-266 stitches. ROW 6 (= wrong side): Purl with 1 edge stitch in garter stitch in each side without increasing. AFTER 6TH ROW: Work 5th and 6th row 9-6-4-6-3-0-0 more times (= 18-12-8-12-6-0-0 rows worked). 13-10-8-10-7-4-4 increases have been done in total for sleeve = 52-46-44-48-44-38-38 stitches on each sleeve, 40-40-41-42-43-44-48 stitches on each front piece and 78-78-80-82-84-86-94 stitches on back piece = 262-250-250-262-258-250-266 stitches. Then increase on both sleeves and body, increase on body 2 stitches inside marker so that there are 2 stitches between increase for body and increase for sleeve - work next row as follows: ROW 1 (= right side): Work 1 edge stitch and stocking stitch until 2 stitches remain before first marker, increase towards the right, work 2 stitches, move marker on to right needle, increase towards the left, work until next marker (= sleeve), increase towards the right, move the marker on to right needle, work 2 stitches, increase towards the left, work until 2 stitches remain before next marker, increase towards the right, work 2 stitches, move marker on to right needle, increase towards the left, work until next marker (= sleeve), increase towards the right, move marker on to right needle, work 2 stitches, increase towards the left, work the rest of row as before (= 8 stitches increased, on each side of 2 stitches in every transition between body and sleeve). ROW 2 (= wrong side): Purl with edge stitch in each side. Repeat these 2 rows until 6-11-13-15-19-23-25 increases have been done in total on body and sleeves. 19-21-21-25-26-27-29 increases have been done in total for sleeve = 64-68-70-78-82-84-88 stitches on each sleeve, 46-51-54-57-62-67-73 stitches on each front piece and 90-100-106-112-122-132-144 stitches on back piece = 310-338-354-382-410-434-466 stitches. Piece should now measure approx. 13-14-14-17-18-18-20 cm on sleeve, when the jacket is folded double at the shoulder, it should measure approx. 19-20-21-24-25-25-27 cm from the top of shoulder. If the garment is shorter than this, continue until correct measurements without increases. Now divide yoke for body and sleeves. DIVIDING FOR BODY AND SLEEVES: AT THE SAME TIME as next row is worked divide yoke for body and sleeves as follows: Work 46-51-54-57-62-67-73 stitches as before (= front piece), slip the next 64-68-70-78-82-84-88 stitches on a thread for sleeve, cast on 6-6-8-10-10-12-14 new stitches on row (= in the side mid under sleeve), and work the next 90-100-106-112-122-132-144 stitches in stocking stitch (= back piece), slip the next 64-68-70-78-82-84-88 stitches on a thread for sleeve, cast on 6-6-8-10-10-12-14 new stitches on row (= in the side mid under sleeve) and work the last 46-51-54-57-62-67-73 stitches as before (= front piece). Finish body and sleeves separately. BODY: = 194-214-230-246-266-290-318 stitches. Work in stocking stitch with 1 edge stitch in garter stitch in each side until piece measures 26-27-27-27-27-29-29 cm from division. On next row from the right side begin rib while AT THE SAME TIME increasing 38-38-42-46-54-58-62 stitches evenly on row (do not increase over bands), work as follows: Switch to needle size 2.5 mm, work 1 edge stitch in garter stitch, work rib (= knit 2/purl 2) (– remember increase) until 3 stitches remain, finish with knit 2 and 1 edge stitch as before = 232-252-272-292-320-348-380 stitches. Work rib for 3-3-3-3-4-4-4 cm, cast off all stitches with knit over knit and purl over purl. Jacket measures approx. 52-54-56-58-60-62-64 cm from the top of shoulder. SLEEVES: Slip 64-68-70-78-82-84-88 sleeve stitches from one thread on to circular needle size 4 mm and pick in addition up 1 stitch in each of the 6-6-8-10-10-12-14 stitches cast on under sleeve - read SLEEVE TIP = 70-74-78-88-92-96-102 stitches. Insert 1 marker in the middle of the 6-6-8-10-10-12-14 new stitches under sleeve - round begins at the marker thread. Work in stocking stitch in the round on needle - AT THE SAME TIME when sleeve measures 3 cm from division, decrease mid under sleeve – read DECREASE TIP and decrease as follows: Decrease 2 stitches every 5-4½-4-2½-2-2-1½ cm 7-8-9-14-14-15-18 times in total = 56-58-60-60-64-66-66 stitches. Work until sleeve measures 38-39-41-38-35-35-33 cm from division. Switch to double pointed needles size 2.5 mm and work rib (= knit 2/purl 2) while AT THE SAME TIME increasing 8-10-8-8-12-14-14 stitches evenly on 1st round = 64-68-68-68-76-80-80 stitches. When rib measures 3-3-3-3-4-4-4 cm knit 2 rounds. Switch to circular needle size 3 mm and cast off by knitting somewhat loosely. Sleeve measures 41-42-44-41-39-39-37 cm from division. LEFT BAND: Use circular needle size 2.5 mm, begin from right side at the neck and pick up approx. 96 to 120 stitches along the edge on front piece (pick up inside 1 stitch in garter stitch), number of stitches must be divisible by 4. Work first row as follows from wrong side: 1 stitch in garter stitch, * purl 2, knit 2 *, work from *-* until 3 stitches remain, purl 2 and 1 stitch in garter stitch. Work next row as follows from right side: 1 stitch in garter stitch, * knit 2, purl 2 *, work from *-* until 3 stitches remain, knit 2 and 1 stitch in garter stitch. Continue back and forth like this until band measures 3-3-3-3-4-4-4 cm. Cast off stitches with knit over knit and purl over purl. RIGHT BAND: Use circular needle size 2.5 mm, begin from right side at the bottom of right front piece and pick up approx. 96 to 120 stitches along the edge on front piece (pick up the same number of stitches as on left band and pick up inside 1 stitch in garter stitch), number of stitches must be divisible by 4. Work first row as follows from wrong side: 1 stitch in garter stitch, * purl 2, knit 2 *, work from *-* until 3 stitches remain, purl 2 and 1 stitch in garter stitch. Work next row as follows from right side: 1 stitch in garter stitch, * knit 2, purl 2 *, work from *-* until 3 stitches remain, knit 2 and 1 stitch in garter stitch. Continue rib until band measures 1½-1½-1½-1½-2-2-2 cm. Now decrease for BUTTONHOLES – read explanation above. Continue to work until band measures 3-3-3-3-4-4-4 cm. Cast off stitches with knit over knit and purl over purl. NECK EDGE: Use circular needle size 2.5 mm, begin from right side mid front, pick up approx. 108 to 144 stitches around the neck inside 1 stitch (pick up a few extra stitches over band so that the rib does not contract over the bands – number of stitches must be divisible by 4). Work first row as follows from wrong side: 1 stitch in garter stitch, * purl 2, knit 2 *, work from *-* until 3 stitches remain, purl 2 and 1 stitch in garter stitch. Work next row as follows from right side: 1 stitch in garter stitch, * knit 2, purl 2 *, work from *-* until 3 stitches remain, knit 2 and 1 stitch in garter stitch. When rib measures 1½ cm, decrease 1 buttonhole at the beginning of next row from right side as follows: work 5 stitches as before, make 1 yarn over and purl the next 2 stitches together, work the rest of row as before. Continue until rib measures 3-3-3-3-4-4-4 cm, then cast off by knitting from right side. ASSEMBLY: Sew the buttons on to the left band. |
|
 |
|
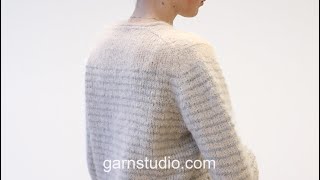
Have you finished this pattern?Tag your pictures with #dropspattern #silversnugglecardigan or submit them to the #dropsfan gallery. Do you need help with this pattern?You'll find 31 tutorial videos, a Comments/Questions area and more by visiting the pattern on garnstudio.com. © 1982-2026 DROPS Design A/S. We reserve all rights. This document, including all its sub-sections, has copyrights. Read more about what you can do with our patterns at the bottom of each pattern on our site. |
|






With over 40 years in knitting and crochet design, DROPS Design offers one of the most extensive collections of free patterns on the internet - translated to 17 languages. As of today we count 333 catalogues and 12525 patterns translated into English (UK/cm). 12525
We work hard to bring you the best knitting and crochet have to offer, inspiration and advice as well as great quality yarns at incredible prices! Would you like to use our patterns for other than personal use? You can read what you are allowed to do in the Copyright text at the bottom of all our patterns. Happy crafting!
Post a comment to pattern DROPS 263-35
We would love to hear what you have to say about this pattern!
If you want to leave a question, please make sure you select the correct category in the form below, to speed up the answering process. Required fields are marked *.