
Popular categories
Looking for a yarn?


































Comments / Questions (66)
 Marii wrote:
Hei, voiko mallin neuloa C-langoilla? Mitä lankoja tällöin suosittelisitte? Kiitos!
31.10.2026 - 14:45DROPS Design answered:
Voit neuloa puseron 1-kertaisella langalla lankaryhmästä C. Jos neulot 1-kertaisella DROPS Air-langalla, puserosta tulee pehmeä ja ilmava. Tai voit käyttää DROPS Big Merino -lankaa, joka on myös hvin pehmeä ja lämmin lanka.
02.11.2026 - 16:07
 Francine wrote:
Quelle est la longueur du tricot uni entre les diagrammes ?
21.10.2026 - 18:09DROPS Design answered:
Bonjour Francine, en fonction de votre taille, vous tricoterez 4 ou 5 cm en uni - cf JACQUARD au début des explications. Bon tricot!
22.10.2026 - 08:49
Francine wrote:
Dans un diagramme jacquard, lorsque je tricote un rang envers et que je commence selon la flèche indiquée par la taille, je dois reprendre au début du rang de gauche à droite par-là suite? Ex au 6 e rang XL, je tricote 2 mailles en jersey et les 6 dernières mailles puis je recommence le rang? Est-ce correct?
13.10.2026 - 15:21DROPS Design answered:
Bonjour Francine, effectivement, notez la dernière maille tricotée sur l'endroit et en début de rang sur l'envers, vous commencerez par cette maille et vous lirez de gauche à droite avant de répéter le motif en entier de gauche à droite. Bon tricot!
14.10.2026 - 06:43
Francine wrote:
Dans un diagramme jacquard, lorsque je tricote un rang envers et que je commence selon la flèche indiquée par la taille, je dois reprendre au début du rang de gauche à droite par-là suite? Ex au 6 e rang XL, je tricote 2 mailles en jersey et les 6 dernières mailles puis je recommence le rang? Est-ce correct?
13.10.2026 - 15:19
Francine wrote:
Lorsqu’on tricote le diagramme en jacquard en aller retour, est-ce que je suis le rang donné( 2e) lorsque je tricote sur l’envers?
05.10.2026 - 20:41DROPS Design answered:
Bonjour Francine, les diagrammes montrent tous les rangs du motif, ceux sur l'endroit mais aussi ceux sur l'envers, ainsi, sur l'endroit, vous lisez le diagramme de droite à gauche et sur l'envers de gauche à droite. Bon tricot!
06.10.2026 - 08:41
Francine wrote:
Est que je dois commencer le diagramme au coin droit et arrêter a la grandeur voulue soit à l’endroit indiqué par la flèche ex coin droit jusqu’à la flèche L ?
30.09.2026 - 01:55DROPS Design answered:
Bonjour Francine, commencez le diagramme à la flèche indiquée pour votre taille et lisez (sur l'endroit) de droite à gauche), puis répétez le diagramme en entier jusqu'à la fin du rang. Autrement dit, en taille L, tricotez les 2 dernières mailles du diagramme (celles de gauche), puis répétez 5 fois les 20 mailes du diagramme (100 mailles de A.1) et tricotez les 3 premières mailles de A.1. Sur l'envers, tricotez les 3 dernières mailles de A.1 (on lit maintenant de gauche à droite), répétez A.1 et terminez par les 2 dernières mailles de A.1. Bon tricot!
30.09.2026 - 08:25
 Lilith wrote:
Jeg forstår ikke åssen man skal strikke ermetoppen uten å få hull. Pinne 3 og 4 skal strikkes fire ganger hver, men dette resulterer jo i at kantene av ermetoppen er mye lengre enn maskene ved siden av ermetoppen. Altså det er ingen gradvis økning rundt ermetoppen, den strikkes bare rett frem. Hvordan skal jeg gjøre dette uten å få et stort hull mellom kanten på ermetoppen og masken ved siden av? (Jeg har prøvd german short rows, men dette endrer jo ingenting?)
28.08.2026 - 14:08DROPS Design answered:
Hei Lilith. Ved å strikke forkortede pinner former man ermtoppen slik at den ligger penere. Ta gjerne en titt på de hjelpevideoen vi har, både "Hvordan strikke et erme til et plagg med europeisk skulder med forkortede pinner" og "Hvordan strikke German Short Rows – med dobbeltmaske frem og tilbake på pinnen". Da skal du ikke få noen store hull. Klikk på Videoer til høyre /eller under bildet for videoer. mvh DROPS Design
31.08.2026 - 13:13
 Anna wrote:
Hej! Jag får rätt längd och bredd på stickfastprovbiten men när jag mäter bakstyckets bredd så saknas det nästan 10cm från bredden på mönstret. Även om jag skulle sticka ännu lösare över stjärnmönstret så skulle det ändå inte bli rätt mått. Ska jag gå upp en stl på stickorna? Eller sticka i en större storlek?
07.06.2026 - 20:22DROPS Design answered:
Hej Anna, kom ihåg att du får ett antal nya maskor i varje sida när du sätter ihop fram och bakstycke :)
09.06.2026 - 09:36
 Malin wrote:
Hallo, ein wirklich tolles Muster! Mir geht es allerdings wie Barbara. Ich habe nun mit der Grundfarbe die fehlenden cm gestrickt, sehe aber auf allen Bildern, dass nach dem letzten Muster direkt mit dem Bündchen begonnen wird, was auch besser aussieht in meinen Augen. Messen wir ab einem falschen Punkt? Die Maschenprobe hier ist auch wirklich spannend. Ich habe immer eine Nadelstärke mehr, hier aber 2, was bei der Dicke der Garne zusammen eigentlich nicht ungewöhnlich erscheint. LG und danke
27.03.2026 - 13:47
 Barbara wrote:
Hoi, als ik de aanwijzingen in maat S volg voor het voorpand dan moet ik na 61 cm aan de boord beginnen. A1 is 31 naalden, dus 11,5 cm en er zit 4 cm tussen de patroondelen. Het begin van het voorpand bestaat uit 10 cm + 6 naalden = 12 cm waarna het eerste patroon wordt gebreid. Op de foto zie ik driemaal het patroon + 2 witte strepen voor de boord begint. Dat is 42,5 cm. Plus de 12 cm aan het begin maakt 54,5 cm. Dan kom ik 6,5 cm tekort om op 61 cm te komen. Wat doe ik verkeerd?
07.03.2026 - 20:23
|
||||||||||
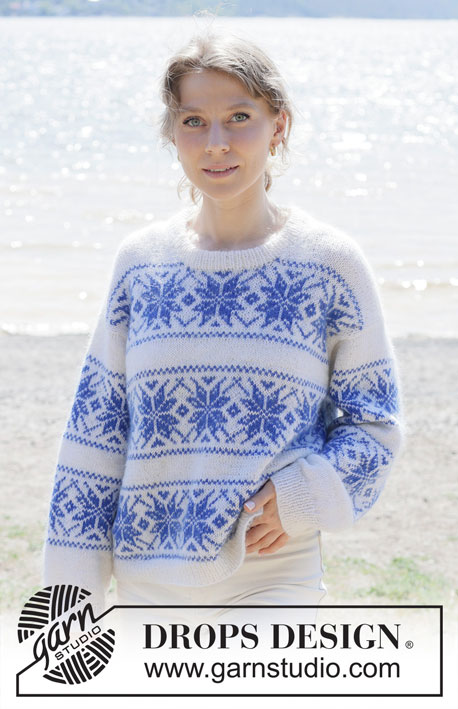
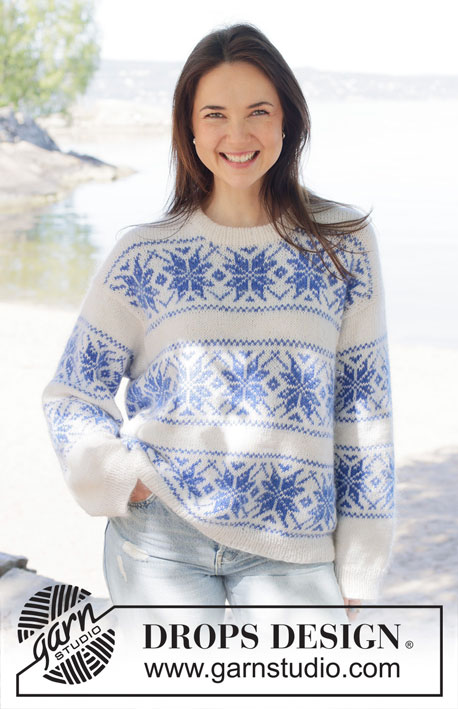
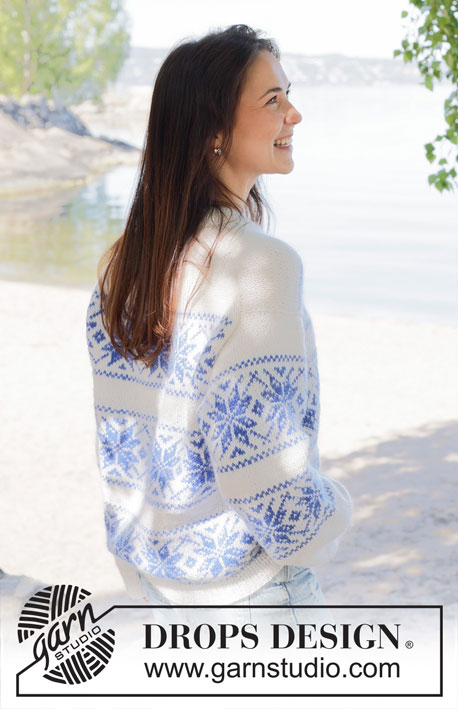
Far Away#farawaysweater |
||||||||||
 |
 |
|||||||||
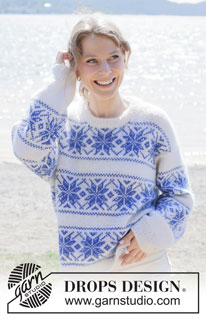
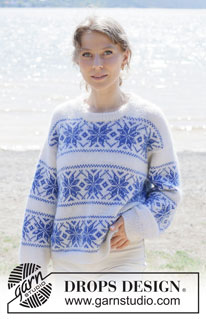
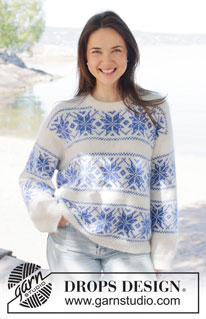
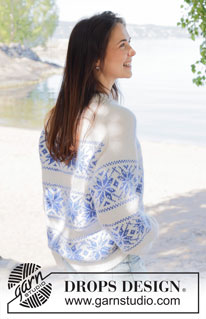
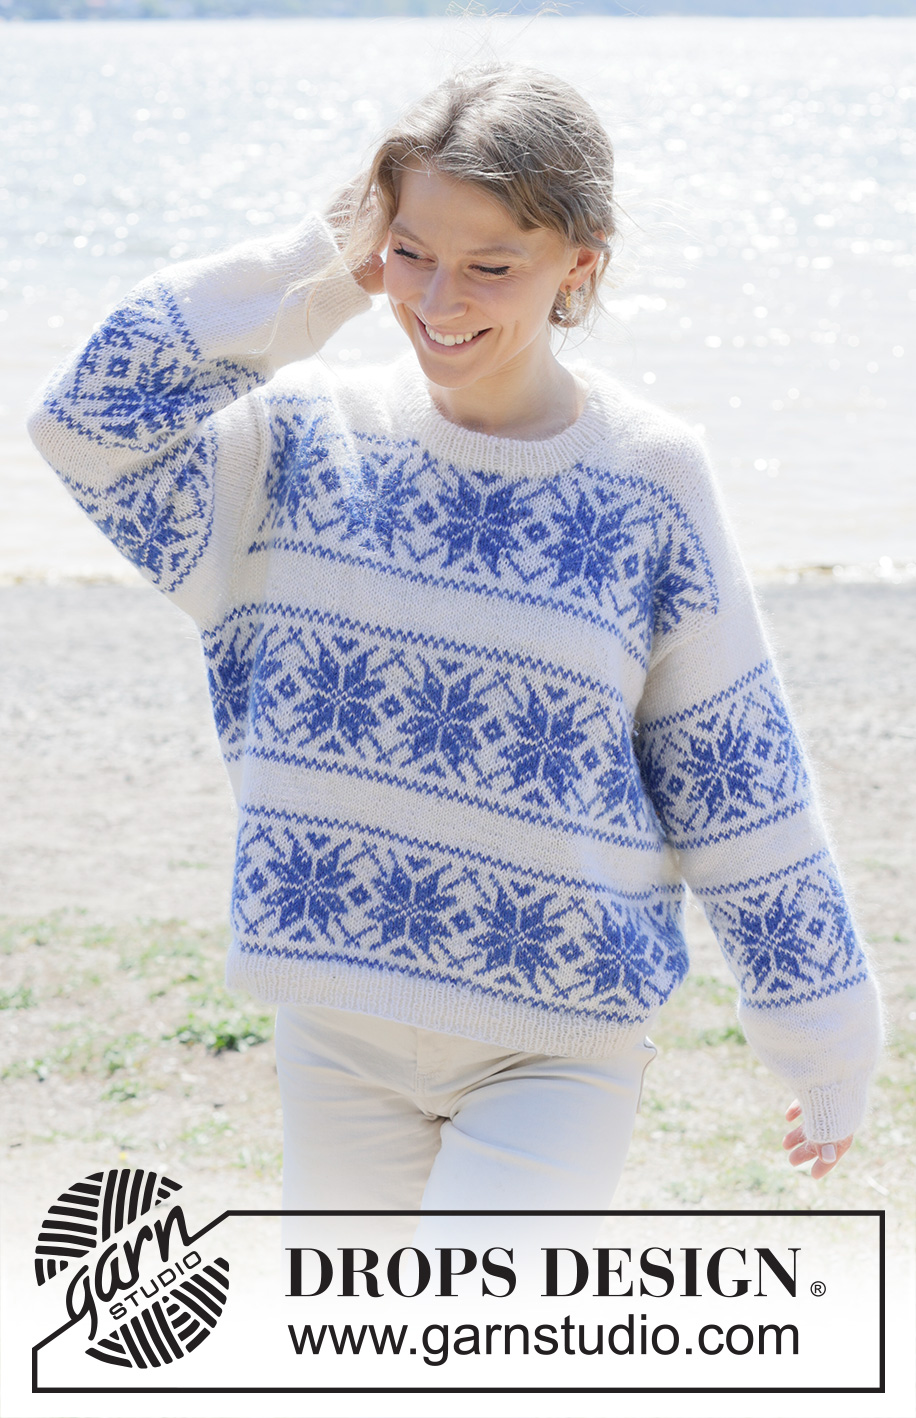
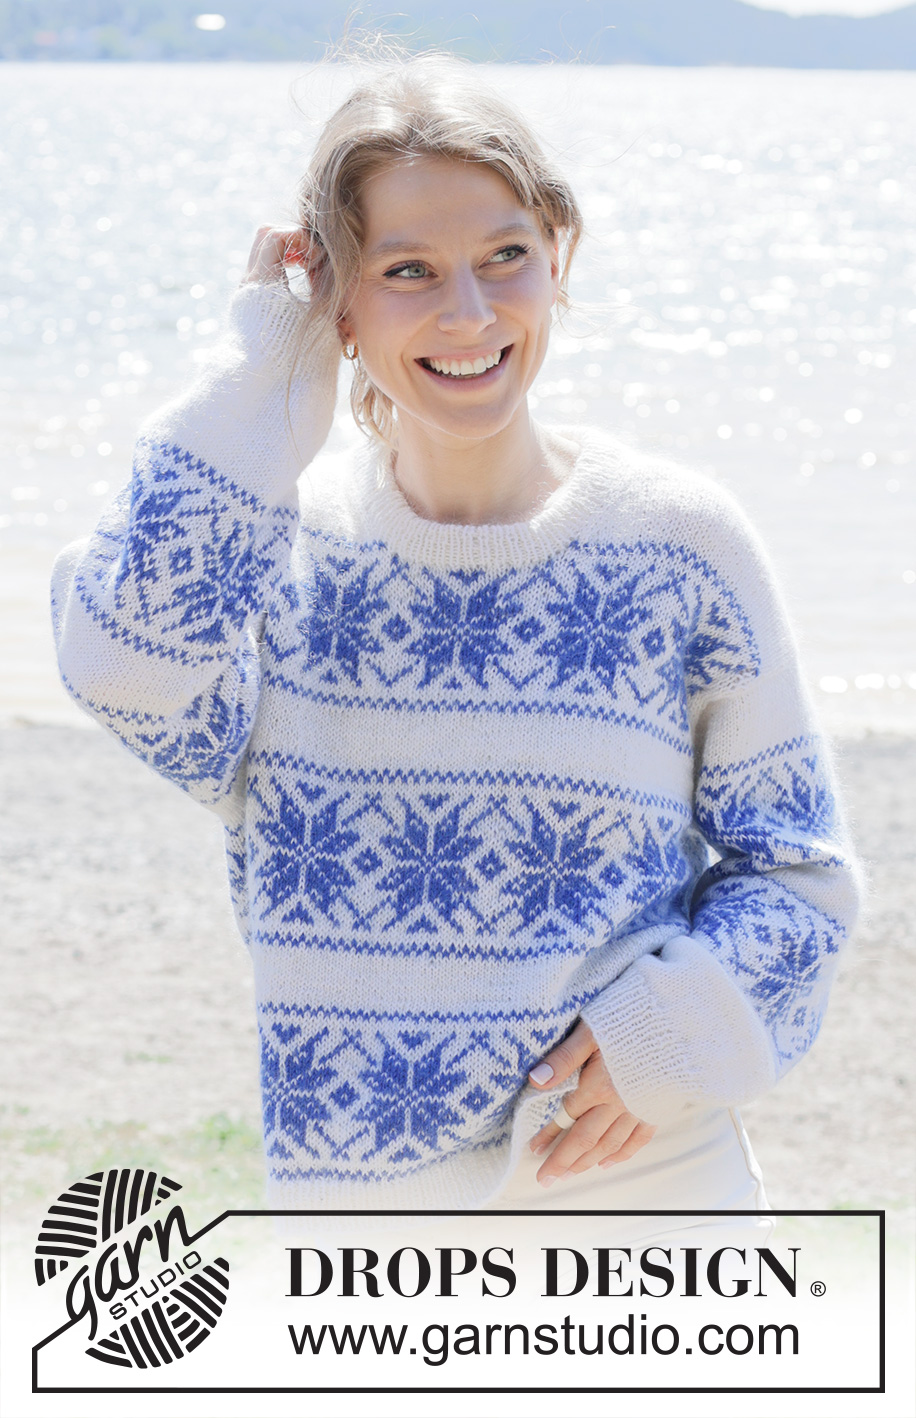
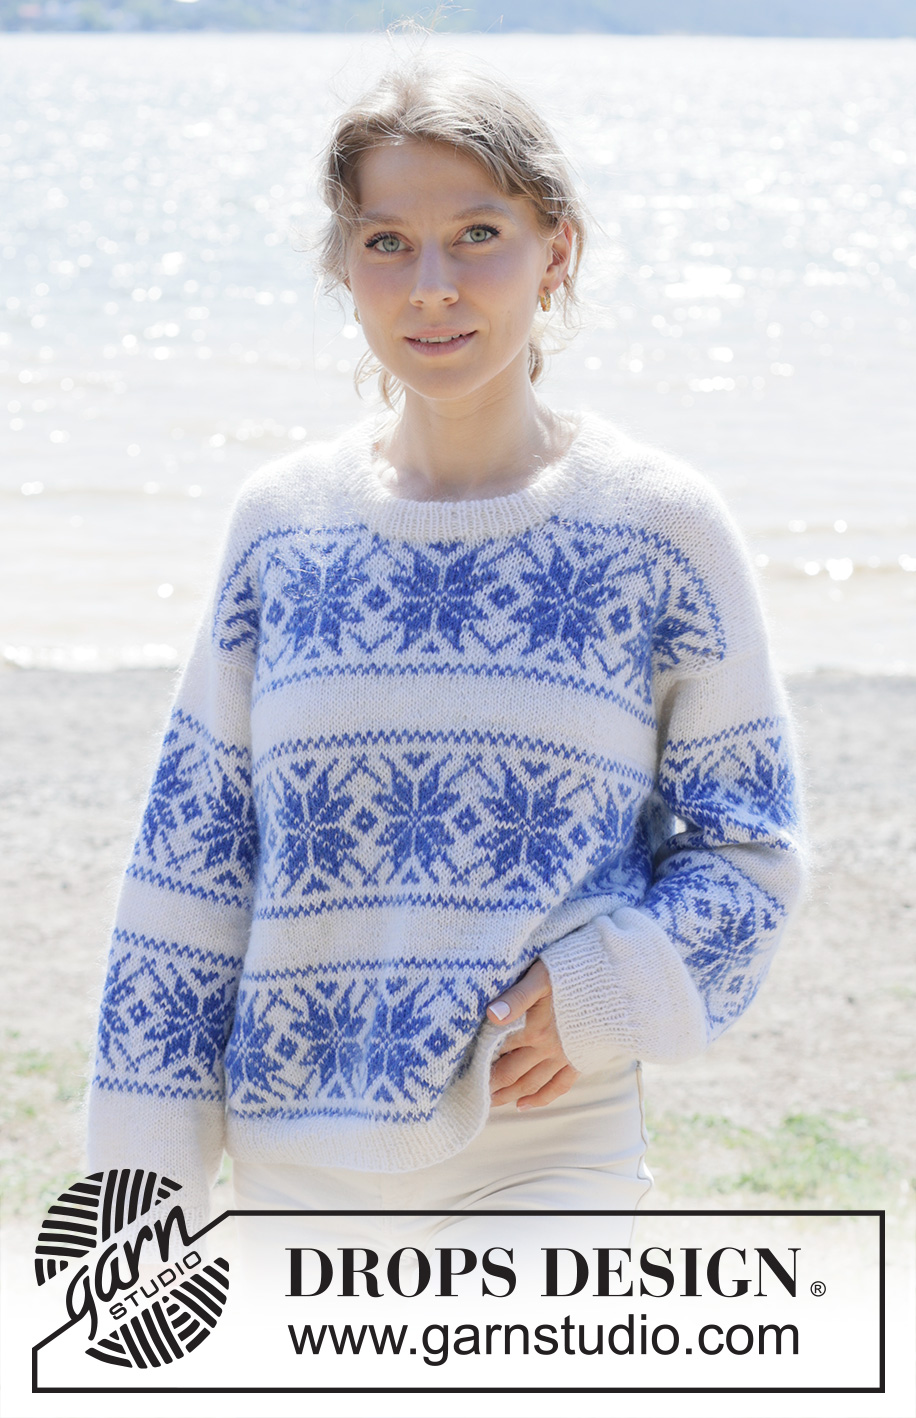
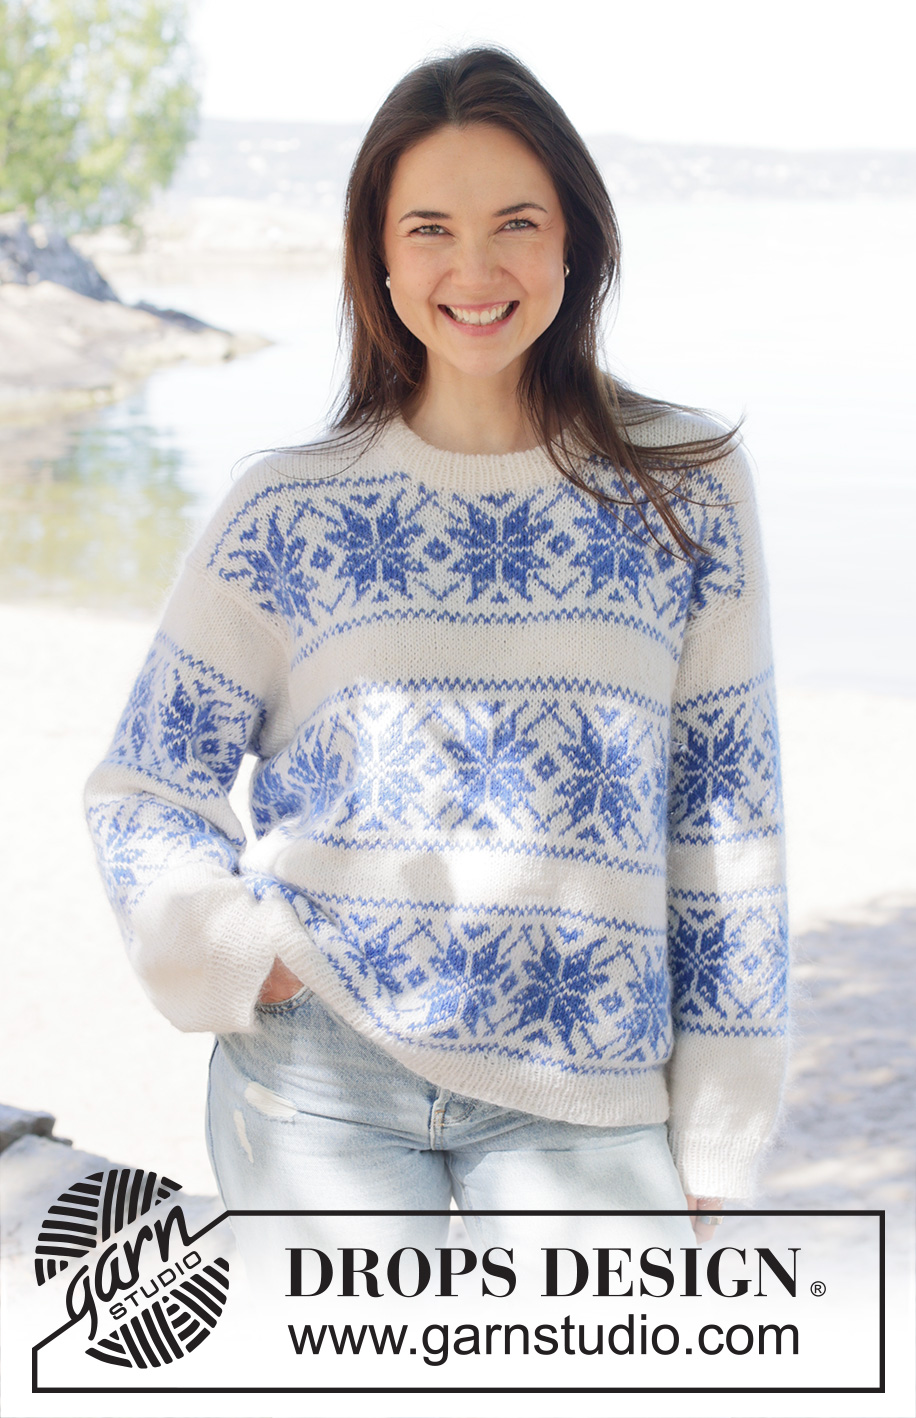
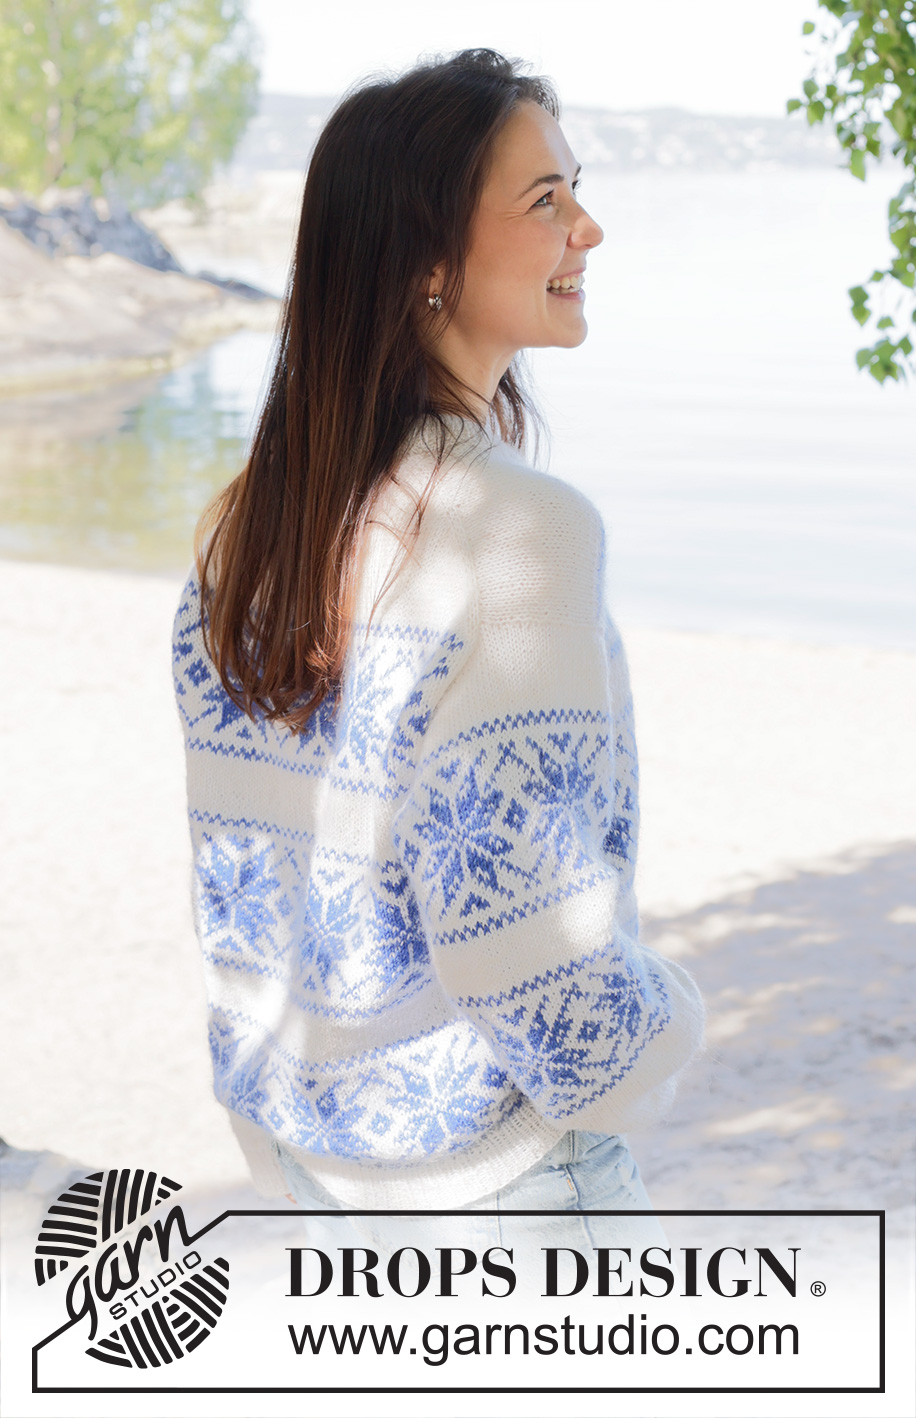
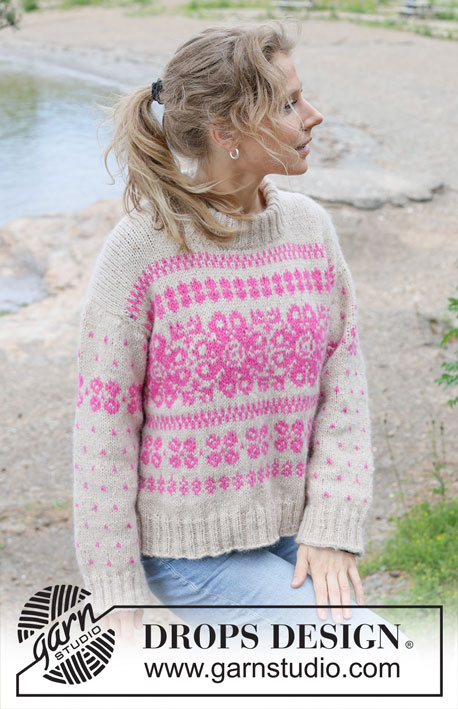
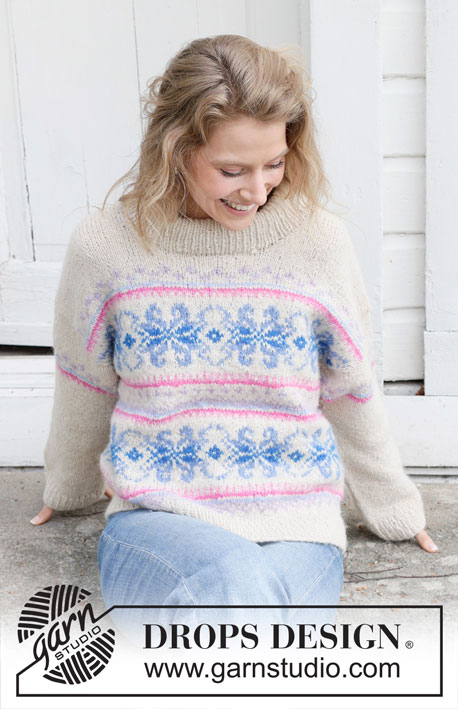
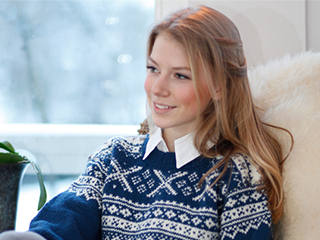
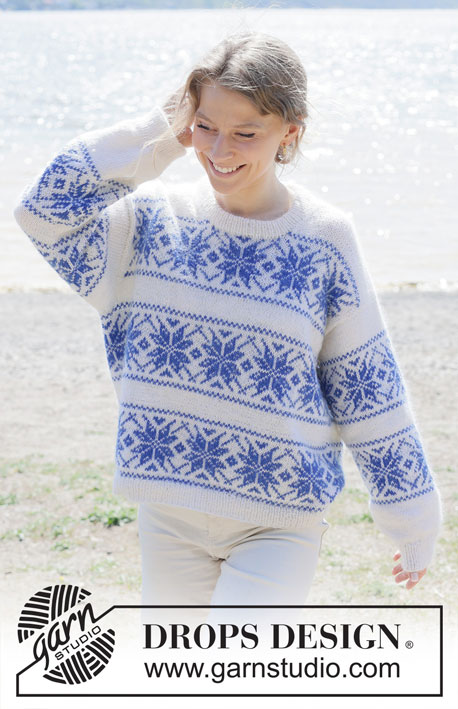
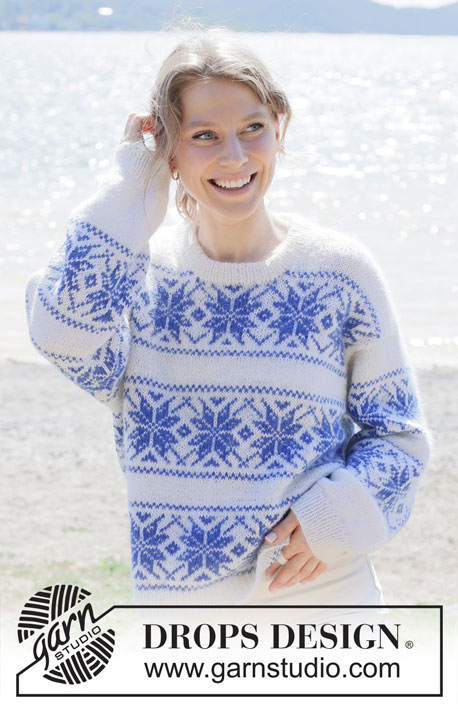
Knitted jumper in DROPS BabyMerino and DROPS Kid-Silk. The piece is worked top down with European/diagonal shoulders, Nordic pattern and double neck. Sizes S - XXXL.
DROPS 254-8 |
||||||||||
|
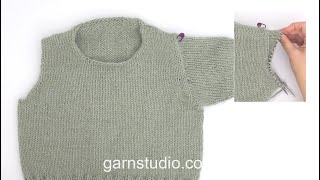
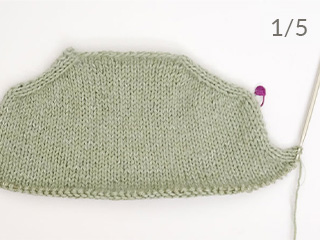
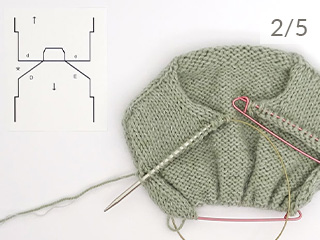
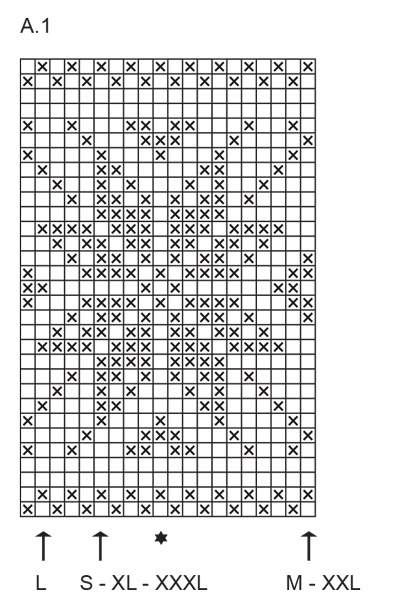
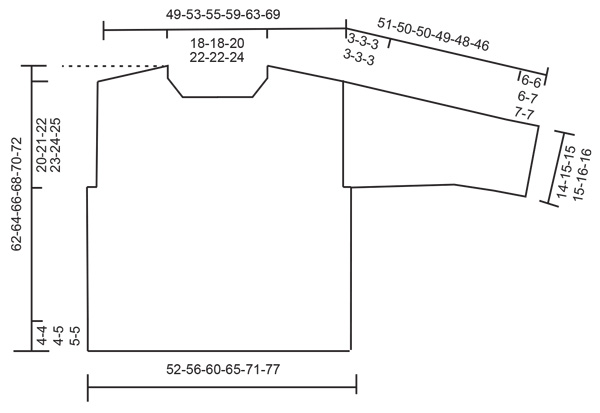
------------------------------------------------------- EXPLANATIONS FOR THE PATTERN: ------------------------------------------------------- PATTERN: See diagram A.1. The diagram shows the pattern from the right side and is worked in stocking stitch. Work pattern as follows: * A.1 one time in height, then 4-4-4-4-5-5 cm with background colour *, work from *-* until A.1 has been worked 3 times in height, finish the jumper with the background colour. To avoid the knitting tension losing its elasticity when working colour-pattern, it is important that the strands at the back are not tight. Use a size larger needle when working pattern if the piece becomes tight. INCREASE TIP-1: INCREASE 1 STITCH TOWARDS THE LEFT - from RIGHT SIDE: Use left needle to pick up yarn between 2 stitches from row below, pick up yarn from the front and knit in the stitch loop that is on the back of the needle. INCREASE 1 STITCH TOWARDS THE RIGHT - from RIGHT SIDE: Use left needle to pick up yarn between 2 stitches from row below, pick up yarn from the back and knit in the stitch loop that is on the front side of the needle. . INCREASE TIP-2: INCREASE 1 STITCH TOWARDS THE RIGHT - from WRONG SIDE: Use left needle to pick up yarn between 2 stitches from row below, pick up yarn from the back and purl in the stitch loop that is on the front side of the needle. INCREASE 1 STITCH TOWARDS THE LEFT - from WRONG SIDE: Use left needle to pick up yarn between 2 stitches from row below, pick up yarn from the front and purl in the stitch loop that is on the back side of the needle. DECREASE TIP (for sleeves): Decrease 1 stitch on each side of the marker-stitch as follows: Work until there are 2 stitches left before the marker-thread, knit 2 together, knit the marker-stitch, slip 1 stitch knit-wise, knit 1 and pass the slipped stitch over the knitted stitch (2 stitches decreased). KNITTING TIP: When working short rows, there will be a small hole after each turn. This hole can be closed by tightening the strand or using the technique German Short Rows as follows: Slip the first stitch purl-wise, take the strand over the right needle and tighten well from the back (2 loops on the needle). These loops are worked together on the next row. ------------------------------------------------------- START THE PIECE HERE: ------------------------------------------------------- JUMPER – SHORT OVERVIEW OF THE PIECE: The pattern uses both long and short needles; start with the length which fits the number of stitches and change when necessary. The piece is started back and forth, casting on stitches at the back of the neck and working the back piece top down, while increasing stitches on each side for the shoulders which become slightly diagonal. The back piece is then worked with pattern as far as the armholes and set aside. The front piece is worked in 2 sections, knitting up stitches first along 1 back shoulder and increasing for the neckline. This is repeated on the other shoulder, the 2 front sections are joined when the neckline is finished and worked with pattern until the armholes are finished. The front and back pieces are joined on the same circular needle and the body worked in the round Stitches are knitted up around the armholes for the sleeves, which are started back and forth for the sleeve cap then finished in the round. Stitches are knitted up around the neckline and the neck worked in the round then folded double to the inside to finish. BACK PIECE: The piece is worked back and forth. Cast on 37-37-41-45-45-49 stitches with circular needle size 3.5 mm, 1 strand colour white DROPS Baby Merino and 1 strand colour off white DROPS Kid-Silk (2 strands, hereafter called background colour). ROW 1 (wrong side): Purl. ROW 2 (right side): Read INCREASE TIP-1. Knit 3, increase 1 stitch towards the left, knit until there are 3 stitches left, increase 1 stitch towards the right, knit 3. ROW 3 (wrong side): Read INCREASE TIP-2. Purl 3, increase 1 stitch towards the right, purl until there are 3 stitches left, increase 1 stitch towards the left, purl 3. AFTER 3rd ROW: Work ROWS 2 and 3 a total of 15-17-17-18-20-22 times (30-34-34-36-40-44 rows worked). There are = 97-105-109-117-125-137 stitches. Insert 1 marker outermost on one side. The piece is now measured from here! Continue as follows: 2 stocking stitches with background colour, see start-arrow for your size and work the last 6-0-2-6-0-6 stitches in A.1, work A.1 across the next 80-100-100-100-120-120 stitches, work the first 7-1-3-7-1-7 stitches in A.1 (so the pattern is symmetric) and 2 stocking stitches with background colour. Continue this pattern until the piece measures 14-15-16-17-17-18 cm from the marker and finishing after a row from the wrong side. Note which row this is in the pattern. Cut the strand, place the stitches on a stitch holder and work the left front piece. LEFT FRONT PIECE: Find the left back shoulder as follows: Lay the back piece flat, right side up, with the stitch holder towards you; left side of piece = left shoulder. Start from the right side by the neck with background colour and knit up 1 stitch in each worked row on the left back shoulder (inside the outermost stitch) to the shoulder = 30-34-34-36-40-44 stitches. All measurements on the front piece are taken from this knitted-up row. Work stocking stitch (first row from wrong side). When the piece measures 10-10-10-10-12-12 cm, increase for the neck as follows: ROW 1 (right side): Remember INCREASE TIP-1. Knit 3, increase 1 stitch towards the left, work to end of row. ROW 2 (wrong side): Purl. Work ROWS 1 and 2 a total of 3 times (6 worked rows) = 33-37-37-39-43-47 stitches (last row from the wrong side). Work 2 rows of colour pattern according to A.1 with 2 stitches in background colour by the armhole. Rows 1 and 2 in A.1 have now been worked. Cut the strands, place the stitches on a stitch holder and work the right front piece. RIGHT FRONT PIECE: Start from the right side, outermost on the right back shoulder with background colour and knit up 1 stitch in each worked row along the shoulder (inside the outermost stitch) to the neckline = 30-34-34-36-40-44 stitches. All measurements on the front piece are taken from this knitted-up row. Work stocking stitch (first row from wrong side). When the piece measures 10-10-10-10-12-12 cm, increase for the neck as follows: ROW 1 (right side): Remember INCREASE TIP-1. Work until there are 3 stitches left on the row, increase 1 stitch towards the right, knit 3. ROW 2 (wrong side): Purl. Work ROWS 1 and 2 a total of 3 times (6 worked rows) = 33-37-37-39-43-47 stitches (last row from the wrong side). Work 2 rows of colour pattern according to A.1 with 2 stitches in background colour by the armhole. Rows 1 and 2 in A.1 have now been worked. Now join the 2 front pieces. FRONT PIECE: From the right side and with background colour (which is row 3 in A.1), work the 33-37-37-39-43-47 stitches on the right front piece, cast on 31-31-35-39-39-43 stitches for the neckline, work the 33-37-37-39-43-47 stitches on the left front piece = 97-105-109-117-125-137 stitches. Purl 1 row from the wrong side with background colour (this is row 4 in A.1). Work as follows from the right side (row 5 in A.1): 2 stitches with background colour, see start-arrow for your size and work the last 6-0-2-6-0-6 stitches in A.1, work A.1 across the next 80-100-100-100-120-120 stitches, work the first 7-1-3-7-1-7 stitches in A.1 (so the pattern is symmetrical), work 2 stitches with background colour. Continue working until the piece measures 26-27-28-29-31-32 cm, finishing on the same row as the back piece. Now join the front and back pieces. Cut the strand BODY: Cast on 4-4-6-7-9-9 new stitches then continue the pattern across the 97-105-109-117-125-137 stitches on the front piece, cast on 7-7-11-13-17-17 stitches (in side mid-under sleeve), continue the pattern across the 97-105-109-117-125-137 stitches on the back piece, cast on 3-3-5-6-8-8 stitches (in side mid-under sleeve) = 208-224-240-260-284-308 stitches. Continue A.1 in the round across all stitches. NOTE! The pattern will not fit under the sleeves; work the pattern as far as it will go. The middle stitch of the cast-on stitches under both sleeves is always worked with background colour. Work until the front piece measures 57-59-61-62-64-66 cm. Change to circular needle size 2.5 mm. Work rib with background colour (knit 1, purl 1), AT THE SAME TIME increase 20-22-24-26-28-30 stitches evenly on the first round = 228-246-264-286-312-338 stitches. When the rib measures 4-4-4-5-5-5 cm, cast off. The front piece measures approx. 61-63-65-67-69-71 cm from the knitted-up row and is 3 cm longer than the finished length as the knitted-up row is not on the shoulder but slightly down the back piece. The jumper measures approx. 58-60-62-64-66-68 cm. SLEEVES: The sleeve is worked top down. Lay the piece flat and insert 1 marker at the top of the armhole (NOTE! This is not in the knitted-up row on the front piece but approx. 6-6-6-6-7-7 cm down the front piece). Use circular needle size 2.5 mm and background colour. Start in the middle of the cast-on stitches under the sleeve, knit up 82-86-94-102-110-114 stitches around the armhole, with equal numbers of stitches on both sides of the marker. Change to circular needle size 3.5 mm. Insert 1 marker in the middle cast-on stitch and move the marker on top of the armhole to the middle stitch on the round – with equal numbers of stitches on each side. Work stocking stitch back and forth with short rows for the sleeve cap, starting mid-under the sleeve as follows: ROW 1 (right side): Knit to 8-8-12-12-12-14 stitches past the marker-stitch on top of the armhole, turn – read KNITTING TIP. ROW 2 (wrong side): Purl to 8-8-12-12-12-14 stitches past the marker-stitch, turn. ROW 3 (right side): Knit to 5 stitches past the previous turn, turn. ROW 4 (wrong side): Purl to 5 stitches past the previous turn, turn. Repeat ROWS 3 and 4 until you have turned a total of 8 times (4 times on each side, with the last row from the wrong side). AFTER THE LAST TURN: Knit back to the beginning of the round (mid-under sleeve). Now work stocking stitch and pattern in the round as follows, as well as decreasing under the sleeve. Read the next 2 sections before continuing. PATTERN: Remember to decrease as described below. After the sleeve cap continue in the round as follows: Work with background colour until piece measures 4-4-4-4-5-5 cm from the shoulder, then work A.1 in the round – the pattern will not fit under the sleeve. Count out from the marker-stitch on the shoulder to determine where the pattern should start under the sleeve – the marker-stitch should match the mid-stitch in A.1. Work pattern in the same way as on the body but after 2 repeats of A.1 in height finish the sleeve with background colour. DECREASES: Read DECREASE TIP. when the sleeve measures 1 cm from the join, decrease 2 stitches every 2nd round 4-4-5-6-7-8 times, then every 3-3-2½-1½-1½-1½ cm 9-10-12-15-17-17 times = 56-58-60-60-62-64 stitches Continue working until the sleeve measures 45-44-44-42-41-39 cm from the shoulder. Change to double pointed needles size 2.5 mm. Work rib (knit 1, purl 1), AT THE SAME TIME increase 6-6-6-6-6-6 stitches evenly on round 1 = 62-64-66-66-68-70 stitches. When the rib measures 6-6-6-7-7-7 cm, cast off. The sleeve measures approx. 51-50-50-49-48-46 cm from top of shoulder. NECK: Use circular needle size 2.5 mm and background colour. Start from the right side on one shoulder-line and knit up 112 to 148 stitches inside 1 stitch – the stitch count should be divisible by 2. Work rib in the round (knit 1, purl 1) for 9-9-9-10-10-10 cm. Change to circular needle size 3.5 mm and cast off a little loosely. Fold the neck double to the inside and fasten down with a couple of stitches by each shoulder. |
||||||||||
Diagram explanations |
||||||||||
|
||||||||||
 |
||||||||||
 |
||||||||||
Have you finished this pattern?Tag your pictures with #dropspattern #farawaysweater or submit them to the #dropsfan gallery. Do you need help with this pattern?You'll find 26 tutorial videos, a Comments/Questions area and more by visiting the pattern on garnstudio.com. © 1982-2026 DROPS Design A/S. We reserve all rights. This document, including all its sub-sections, has copyrights. Read more about what you can do with our patterns at the bottom of each pattern on our site. |
||||||||||






With over 40 years in knitting and crochet design, DROPS Design offers one of the most extensive collections of free patterns on the internet - translated to 17 languages. As of today we count 333 catalogues and 12532 patterns translated into English (UK/cm). 12532
We work hard to bring you the best knitting and crochet have to offer, inspiration and advice as well as great quality yarns at incredible prices! Would you like to use our patterns for other than personal use? You can read what you are allowed to do in the Copyright text at the bottom of all our patterns. Happy crafting!
Post a comment to pattern DROPS 254-8
We would love to hear what you have to say about this pattern!
If you want to leave a question, please make sure you select the correct category in the form below, to speed up the answering process. Required fields are marked *.