
Popular categories
Looking for a yarn?



































Comments / Questions (47)
 Valerie wrote:
Bonjour Je tricote la taille 6 mois. Pour les manches on a 32 mailles puis apres on augmente 4 fois. On a donc 40 mailles pour chaque manche mais vous nous dites qu'on devrait en avoir 46 . Où est mon erreur? Merci
01.11.2026 - 10:57DROPS Design answered:
Bonjour Valérie, aucune erreur, la division de l'empiècement ne se fait pas au niveau des marqueurs, pour le devant vous avez 37 mailles au total avant la manche, mais les 3 dernières mailles du devant gauche sont attribuées à la manche, les 3 premières mailles du dos également ainsi vous avez bien 34 m pour le devant gauche, 46 m pour les manches et ainsi de suite. Bon tricot!
02.11.2026 - 09:02
 Ayla wrote:
Klopt het dat bij het verdelen van het lijf en de mouwen de plek waar lijf en mouw gesplitst worden niet overeen komt met waar de markeerdraden zitten? Ik brei de versie 6/9 maanden. Daar moeten 32 steken op de mouw zitten tussen de markeringen. Dan moet ik nog 4x acht steken meerderen. Dan kom ik op de mouw uit op 40 en niet op 46.
14.10.2026 - 09:43
 Katharina wrote:
Liebes Drops-Team, stricke 0-1. Ärmelmaschen insgesamt. 44 Maschen . Die 4 Markierer der Ärmelzunahmen so versetzen, dass jeder dieser Markierer in der äußersten Masche an beiden Seiten von Vorderteil und Rückenteil sitzt. Es sind 34-32-32-32 (34) Maschen pro Ärmel zwischen den markierten Maschen vorhanden. Wie komme ich auf diese maschenzahl für die Ärmel? Bitte um Hilfe!
09.10.2026 - 11:40
 Els wrote:
Do I have to ask my question in englisch or french to get an answer? Question on 19/9
23.09.2026 - 13:59DROPS Design answered:
Hi Els, We have translators and staff that answer questions in many different languages, so you can ask in any language. Regards, Drops Team.
24.09.2026 - 07:41
Curtillet wrote:
Bonjour, je fais la taille 6/9 mois il faut faire pour les augmentations des devants et dos 12 fois ça fait 24 rangs comment est-il possible de n'avoir que 4 cm alors que 24 rangs ça devrait faire plus de 8 cm puisque l'échantillon donne 10 cm = 32 rgs je vous remercie
21.09.2026 - 13:14DROPS Design answered:
Bonjour Mme Curtillet, vous pensez aux augmentations des épaules? Ces augmentations se font tous les rangs, pas tous les 2 rangs ainsi vous ne tricotez que 12 rangs (12 augmentations = 6 sur l'endroit et 6 sur l'envers) = vous aurez bien 4 cm environ. Bon tricot!
22.09.2026 - 08:58
Els wrote:
Hallo, Nog 1 vraagje. Je neemt de steken van de hulpdraad voor de mouwen op en daarna de 8 opgezette steken. Ok. Je werkdraad van die 8 steken opnemen zit dan aan het einde, maar je moet de 1e toer beginnen aan de markeerdraad die in het midden van de 8 steken zit. Neem je dan een nieuwe draad? Of neem je die steken op zonder werkdraad?
19.09.2026 - 18:00DROPS Design answered:
Dag Els,
Het handigst is om met een nieuwe draad de 8 steken op te nemen en dan gelijk door te breien in de rondte. Op de volgende naald kun je dan een markeerder in het midden van de 8 steken plaatsen. Je mindert later aan beide kanten van de markeerder.
27.09.2026 - 13:15
Anja wrote:
Hallo. Ich stricke diese Jacke im Auftrag in Größe 0-3 Monate. Nutze die Original Wolle, Baby Merino. Habe jetzt die Ärmelzunahmen fertig. Da steht dass man da ca. 10cm ab Markierer hat. Habe aber nur 8cm. Kann ich jetzt einfach noch 2cm ohne Zunahmen stricken? Oder jetzt einfach die Zunahmen für die Passe machen und da dann bis 12cm ohne zunahmen stricken?
18.09.2026 - 20:22DROPS Design answered:
Liebe Anja, wenn die Maschenprobe in der Höhe etwas unterschiedlich ist, dann können Sie ja wahrscheinlich die Zunahmen zuerst fertig stricken dann bis die angegebene Länge (aber dann ohne weitere Zunahmen) stricken. Viel Spaß beim stricken!
21.09.2026 - 07:45
Els wrote:
Markeerdraad zit tussen 2 steken, dus ter hoogte van een dwarsdraad. Wat wordt er precies bedoelt met meerderen voor of na markeerdraad. Er is maar 1 dwarsdraad.
05.09.2026 - 22:05DROPS Design answered:
Dag Els,
Je meerdert inderdaad in de dwarsdraad waar de markeerdraad ook in zit. De steek die er uiteindelijk bij komt komt voor of na de markeerdraad te liggen (afhankelijk van wat is aangegeven in de tekst).
06.09.2026 - 14:11
 Małgorzata wrote:
Witam, dlaczego nie wyświetla się kalkulator obliczania dodawania lub odejmowania oczek. Funkcja ta była bardzo przydatna. Sweterek piękny. Dziękuję za wzór.
15.05.2026 - 18:00DROPS Design answered:
Witaj Małgosiu, na dole każdego wzoru znajduje się ikonka NARZĘDZIA. Jak na nią klikniesz zobaczysz między innymi 'Kalkulator dodawania/zamykania oczek'. U mnie wszystko działa, zobacz jeszcze raz jak u Ciebie. Pozdrawiamy!
18.05.2026 - 11:21
 Solrun wrote:
Hei. Jeg strikker størrelse 1-3 mnd. jeg har 202 masker som i oppskriften, men ved deling til bol og ermer får jeg 16 masker for mye. 29+40+48+40+29=186. Hvor hører disse maskene til? Mvh Solrun
03.02.2026 - 10:17DROPS Design answered:
Hej Solrun. I storlek 1-3 mnd blir delningen såhär: 32+42+54+42+32= 202 masker. Mvh DROPS Design
06.02.2026 - 12:30
|
|||||||||||||
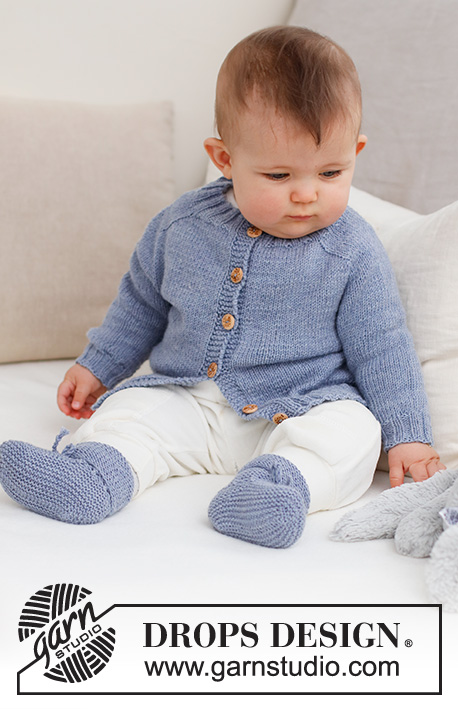
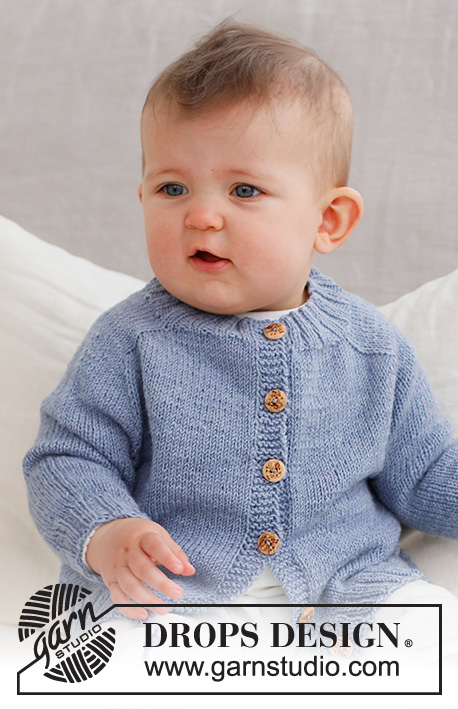
Blue Pebbles Cardigan#bluepebblescardigan |
|||||||||||||
 |
 |
||||||||||||
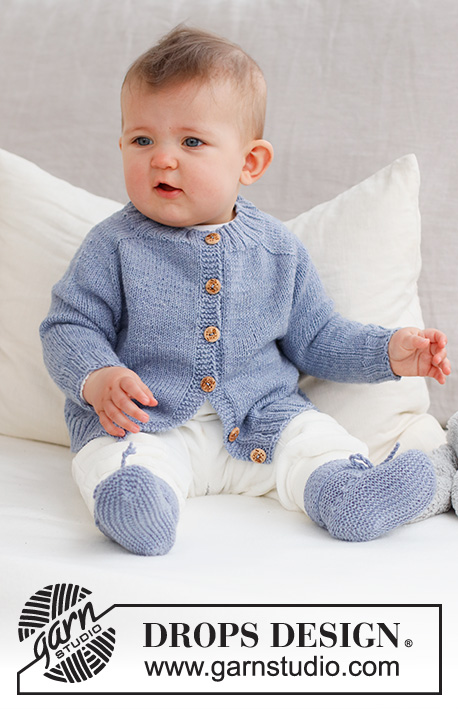
Knitted jacket for baby in DROPS BabyMerino. The piece is worked top down with saddle-shoulders. Sizes: Premature to 2 years.
DROPS Baby 43-3 |
|||||||||||||
|
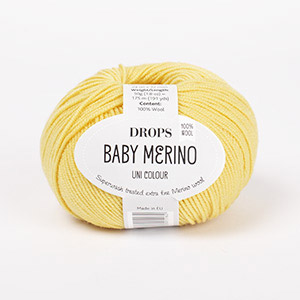
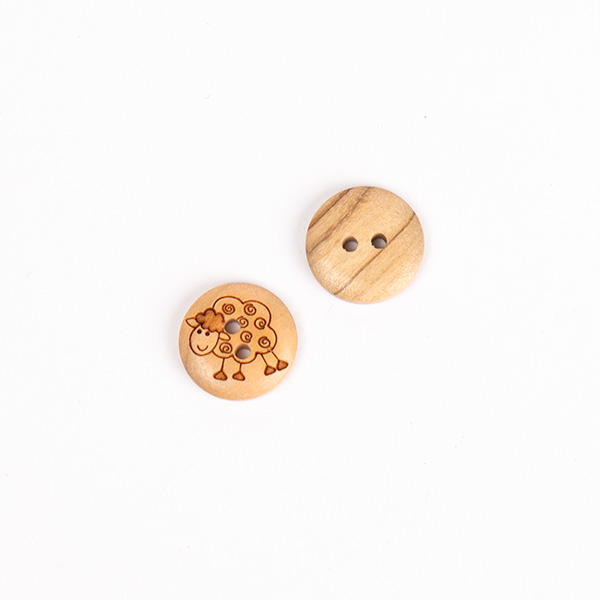
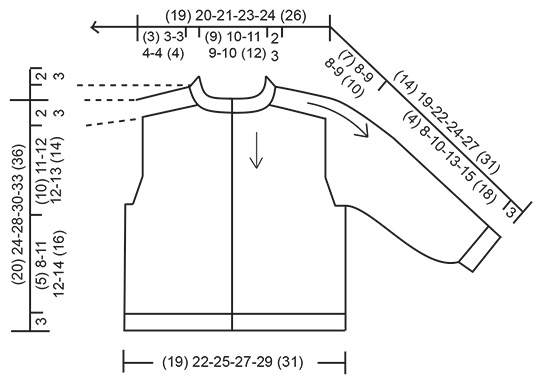
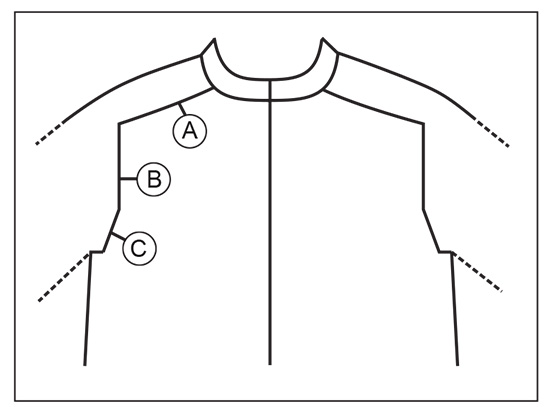
------------------------------------------------------- EXPLANATIONS FOR THE PATTERN: ------------------------------------------------------- RIDGE/GARTER STITCH (worked back and forth): Knit all rows. 1 ridge = knit 2 rows. INCREASE TIP-1 (saddle-shoulders, sleeves and yoke from the right side): BEFORE MARKER: The new stitch twists to the right. Use left needle to pick up thread between 2 stitches from row below, pick up thread from behind and knit stitch in front loop. AFTER MARKER: The new stitch twists to the left. Use left needle to pick up thread between 2 stitches from row below, pick up thread from front and knit stitch in back loop. INCREASE TIP-2 (for saddle-shoulders from the wrong side): BEFORE MARKER: The new stitch twists to the (seen from the right side). Use left needle to pick up thread between 2 stitches from row below, pick up thread from front and purl stitch in back loop. AFTER MARKER: The new stitch twists to the left (seen from the right side). Use left needle to pick up thread between 2 stitches from row below, pick up thread from behind and purl stitch in front loop. DECREASE TIP (for sleeves): Start 3 stitches left before the marker, knit 2 together, knit 2 (marker sits between these 2 stitches), slip 1 stitch as if to knit, knit 1 and pass the slipped stitch over the knitted stitch (= 2 stitches decreased). BUTTONHOLES: Work the buttonholes on the right band (when the garment is worn). Work from the right side when there are 3 stitches left: Make 1 yarn over, knit 2 together and knit 1. On the next row (wrong side) knit the yarn over to leave a hole. The first buttonhole is worked when the neck measures 1½-2 cm, the other (3) 4-5-5-5 (5) buttonholes are worked with (5) 5-5-5-5½ (6) cm between each one. ------------------------------------------------------- START THE PIECE HERE: ------------------------------------------------------- JACKET – SHORT OVERVIEW OF THE PIECE. The neck and yoke are worked back and forth with circular needle, from mid front and top down. Stitches are increased for the saddle-shoulders, sleeves and yoke. The yoke is divided for body and sleeves and the body continued back and forth. The sleeves are worked in the round with double pointed needles. NECK: Cast on (72) 76-80-84-88 (96) stitches with circular needle size 2.5 mm and DROPS Baby Merino. Purl 1 row from the wrong side. The next row is worked as follows from the right side: 5 band stitches in GARTER STITCH – read description above, * knit 2, purl 2 *, work from *-* until there are 7 stitches left, knit 2 and 5 band stitches in garter stitch. Work this rib for (2) 2-2-3-3 (3) cm – remember the BUTTONHOLES on the right band – read description above. When the rib is finished, knit 1 row from the right side where you increase (10) 14-14-18-18 (18) stitches evenly spaced (do not increase over the bands) = (82) 90-94-102-106 (114) stitches. Purl 1 row from the wrong side (the bands are knitted). YOKE: Change to circular needle size 3 mm. Insert 1 marker after the band; the yoke is measured from this marker! In addition, insert 4 other markers without working the stitches and each marker is inserted between 2 stitches; these markers are used when increasing for the shoulders and should have a different colour to the marker on the neck. Marker 1: Start mid-front and count (18) 20-21-21-22-24 stitches (front piece), insert the marker before the next stitch. Marker 2: Count (10) 10-10-14-14 (14) stitches from marker 1 (shoulder), insert the marker before the next stitch. Marker 3: Count (26) 30-32-32-34 (38) stitches from marker 2 (back piece), insert the marker before the next stitch. Marker 4: Count (10) 10-10-14-14 (14) stitches from marker 3 (shoulder), insert the marker before the next stitch. There are (18) 20-21-21-22 (24) stitches left after marker 4 (front piece). Allow these markers to follow your work onwards. INCREASES FOR SADDLE SHOULDERS: Read the next section before continuing – on the first row from the right side, increase 4 stitches for the saddle-shoulders as follows: Work stocking stitch and 5 band stitches in garter stitch on each side. Increase BEFORE markers 1 and 3 and AFTER markers 2 and 4 – read INCREASE TIP-1. You are only increasing on the front and back pieces. The number of shoulder stitches remains the same. On the next row (wrong side), increase 4 stitches as follows: Increase BEFORE markers 4 and 2 and AFTER markers 3 and 1– read INCREASE TIP-2. You are, therefore, increasing on EACH row but differently from the right and wrong side so the stitches lie neatly. Continue like this, increasing a total of (10) 10-10-12-12 (12) times = (122) 130-134-150-154 (162) stitches. REMEMBER THE KNITTING TENSION! After the last increase, the piece measures approx. (3) 3-3-4-4 (4) cm from the marker on the neck. Now increase for the sleeves as follows: INCREASES TO SLEEVES: Continue with stocking stitch and 5 band stitches in garter stitch on each side. AT THE SAME TIME, on the next row from the right side increase 4 stitches for the sleeves as follows: Increase AFTER markers 1 and 3 and BEFORE markers 2 and 4 – remember INCREASE TIP-1. You are only increasing on the sleeves and the number of stitches on the front and back pieces remains the same. Increase like this every 2nd row (each row from the right side) a total of (10) 12-11-9-9 (10) times = (162) 178-178-186-190 (202) stitches. The piece measures approx. (9) 11-10-10-10 (10) cm from the marker on the neck. Now increase for the yoke as follows. INCREASES TO YOKE: SIZE (prematur): = (162) stitches. Continue with stocking stitch but without increasing until the piece measures 10 cm from the marker on the neck. Go to ‘Divide for the body and sleeves’ below. SIZES 0/1 - 1/3 - 6/9 - 12/18 months (2 years): Move the 4 markers so each marker sits in the outermost stitch on each side of the back and front pieces, with 34-32-32-32 (34) stitches between the marker-stitches on the sleeves. On the next row from the right side increase 8 stitches by increasing both before and after each marker-stitch – remember INCREASE TIP-1. You are now increasing on the front and back pieces as well as the sleeves. Increase like this every 2nd row (each row from the right side) a total of 1-3-4-5 (5) times = 186-202-218-230 (242) stitches. After the last increase, the piece measures approx. 11-12-12-13 (13) cm from the marker on the neck. Continue working until the piece measures 11-12-12-13 (14) cm from the marker. DIVIDE FOR THE BODY AND SLEEVES: Work the first (26) 29-32-34-36 (38) stitches, place the next (34) 40-42-46-48 (50) stitches on a thread for the sleeve, cast on (4) 4-6-6-8 (8) stitches (in side under sleeve), work (42) 48-54-58-62 (66) stitches, place the next (34) 40-42-46-48 (50) stitches on a thread for the sleeve, cast on (4) 4-6-6-8 (8) stitches (in side under sleeve), work the last (26) 29-32-34-36 (38) stitches. The body and sleeves are finished separately. The piece is now measured from here! BODY: = (102) 114-130-138-150 (158) stitches. Continue with stocking stitch and 5 band stitches in garter stitch on each side for a further (5) 8-11-12-14 (16) cm. Knit 1 row from the right side where you increase (14) 14-18-18-22 (22) stitches evenly spaced (do not increase over the bands) = (116) 128-148-156-172 (180) stitches. Change to circular needle size 2.5 mm and work as follows from the wrong side: 5 band stitches in garter stitch, * purl 2, knit 2 *, work from *-* until there are 7 stitches left, purl 2 and 5 band stitches in garter stitch. Continue this rib for 3 cm. Cast off a little loosely. The jacket measures approx. (20) 24-28-30-33 (36) cm from the shoulder down. SLEEVES: Place the (34) 40-42-46-48 (50) stitches from the thread on the one side of the piece on double pointed needles size 3 mm and knit up 1 stitch in each of the (4) 4-6-6-8 (8) stitches cast on under the sleeve = (38) 44-48-52-56 (58) stitches. Insert a marker in the middle of the (4) 4-6-6-8 (8) stitches under the sleeve. Start at the marker and work stocking stitch in the round for 1 cm. Now decrease 2 stitches under the sleeve (does not apply to sizes prematur and 0/1 month) – read DECREASE TIP. Decrease like this every 3rd round a total of (0) 2-2-3-4 (4) times = (38) 40-44-46-48 (50) stitches. Continue working until the sleeve measures (4) 8-10-13-15 (18) cm from the division. There is approx. 3 cm to finished length; try the jacket on and work to desired length. Knit 1 round where you decrease (2) 0-0-2-0 (2) stitches evenly spaced = (36) 40-44-44-48 (48) stitches. Change to double pointed needles size 2.5 mm and work rib (knit 2, purl 2) for 3 cm. Cast off a little loosely The sleeve measures approx. (7) 11-13-16-18 (21) cm from the division. Work the other sleeve in the same way. ASSEMBLY: Sew the buttons onto the left band. |
|||||||||||||
Diagram explanations |
|||||||||||||
|
|||||||||||||
 |
|||||||||||||
 |
|||||||||||||
Have you finished this pattern?Tag your pictures with #dropspattern #bluepebblescardigan or submit them to the #dropsfan gallery. Do you need help with this pattern?You'll find 24 tutorial videos, a Comments/Questions area and more by visiting the pattern on garnstudio.com. © 1982-2026 DROPS Design A/S. We reserve all rights. This document, including all its sub-sections, has copyrights. Read more about what you can do with our patterns at the bottom of each pattern on our site. |
|||||||||||||






With over 40 years in knitting and crochet design, DROPS Design offers one of the most extensive collections of free patterns on the internet - translated to 17 languages. As of today we count 333 catalogues and 12532 patterns translated into English (UK/cm). 12532
We work hard to bring you the best knitting and crochet have to offer, inspiration and advice as well as great quality yarns at incredible prices! Would you like to use our patterns for other than personal use? You can read what you are allowed to do in the Copyright text at the bottom of all our patterns. Happy crafting!
Post a comment to pattern DROPS Baby 43-3
We would love to hear what you have to say about this pattern!
If you want to leave a question, please make sure you select the correct category in the form below, to speed up the answering process. Required fields are marked *.