
Popular categories
Looking for a yarn?


Comments / Questions (30)
![]() Tanja wrote:
Tanja wrote:
Verzeihung! Es ist mein Fehler, ich habe nicht genau gelesen…
01.05.2026 - 18:30
![]() Tanja wrote:
Tanja wrote:
Ich stricke Größe XS, wenn ich den ersten Markierer in der 18. Masche habe, komme ich bei 7 Blendenmaschen + 3 M A1 und 6 Maschen A2 auf 16 Maschen. Nun ist noch eine Masche vor der markierten M über. Was passiert mit dieser? Es eilt, da es eine Auftragsarbeit ist! Danke
01.05.2026 - 13:33DROPS Design answered:
Liebe Tanja, nach der Blende strickt man zuerst 1 Masche glatt rechts dann A.1 über 3 M und A.2 über 6 M so hat man: 7+1+3+6=17 M für das linke Vorderteil. Viel Spaß beim Stricken!
04.05.2026 - 08:32
![]() Caroline wrote:
Caroline wrote:
Bonjour Comment lire les diagrammes pour réaliser l’échantillon ? Je suis troublée par les schémas A2 et A3 : faut-il faire des augmentations lorsque l’on tricote sur l’envers ? Par avance merci de votre réponse
17.04.2026 - 01:45DROPS Design answered:
Bonjour Caroline, pour l'echantillon il faut que vous realisiez par exemple 4 fois le diagramme A.1 (sans des augmentations sur le cote). Le diagramme est lu de droite a gauche sur l'endroit, et de gauche a droite sur l'envers. Bon tricot!
17.04.2026 - 08:15
![]() Karin wrote:
Karin wrote:
Nå men den ½ ekstra mønsterraport i højden, måtte jeg finde ud af selv, da jeg overhovedet ikke kunne få mønstret til at passe. men nu er jeg nået dertil, hvor jeg kun skal tage ud på for og bagstykke. I skriver så at man skal forsætte mønstret på for og bagstykke der hvor man er nået til i mønstre, men på ærmerne skal man starte på 1. Pind, det giver da overhovedet ingen mening, så bliver mønstret jo forskelligt. Vil gerne have svar på DANSK......
14.04.2026 - 10:33
![]() Karin wrote:
Karin wrote:
Strikker str. m og skal til at starte på den ½ gang mønster inden jeg skal dele arbejdet. Jeg kan slet ikke få det til at passe, jeg har de rigtige antal masker. Skal man starte den ½ omgang forneden af, eller ved den 9. række, jeg har snart prøvet alt, men kan ikke få det til at passe, alt har ellers passet fint indtil nu. :/
13.04.2026 - 09:33DROPS Design answered:
Hi Karin, in size M you have stopped approx. in the middle of a repeat in height, so make sure you continue from the right row in the diagrams (the next row). The diagram is read from right to left (bottom up). Then when you start dividing your work, you should be in one of the impaire rows (all knit stitches). Happy knitting!
14.04.2026 - 09:52
![]() Astrid wrote:
Astrid wrote:
Bij het verdelen van de steken bij de pas kloppen de aantallen niet. Bijv bij maat XXL moet het volgens mij zijn: 25,19,35,19,25. + 4 gemarkeerde steken. Dan kom ik op 127(=hals). Bij de start van het patroon moet je dan nog 1 extra tricot steek breien om tot 25 te komen, na de voorbies.
10.04.2026 - 15:30
![]() Dorthe wrote:
Dorthe wrote:
Men hvad med de 3 m ? Diagrammet går jo ikke helt op når der er for mange masker. Mvh Dorthe
09.04.2026 - 13:28DROPS Design answered:
Hej Dorthe, de masker som ikke går op i mønsteret strikkes i glatstrik :)
09.04.2026 - 13:35
![]() Geertje wrote:
Geertje wrote:
Ik probeer dit patroon te breien maar er lijkt een fout in te staan bij het verdelen van de steken om de steekmarkerders te plaatsen. Bij de eerste mouw blijven de steken hetzelfde in elke mouw. Als ik de steken zoals aangegeven in het patroon verdeel kom daarna niet uit bij het breien van het patroon. Onderin staat ook dat dit patroon is aangepast maar ik kan deze aanpassing niet zien. Ik zou graag horen wat het juiste patroon is. Met vriendelijke groet Geertje
03.04.2026 - 20:36DROPS Design answered:
Dag Geertje,
De aanpassingen zijn reeds doorgevoerd in het patroon dat online staat. Mocht je een afdruk hebben gemaakt van de datum voor de aanpassing. Dan is de aanpassing dus nog niet in de afdruk doorgevoerd.
04.04.2026 - 20:34
![]() Rita wrote:
Rita wrote:
Jeg har samme problem som Dorthe - håper noen kan svare på hvordan vi skal fortsette mønsteret også i størrelse L ! 3 masker for mye hos meg også.
28.03.2026 - 12:28
![]() Dorthe wrote:
Dorthe wrote:
Hej. Jeg strikker Lace Diamond Cardigan og jeg er kommet til hvor jeg skal strikke diagrammerne en halv gang mere i højden i str M. Maskeantallet og mønsteret passer. Hvordan fortsætter jeg for at maskeantallet kommer til at passe? Jeg har prøvet flere gange og jeg får 3 m for meget før raglan og derfor ved jeg ikke hvordan jeg kommer videre på højre forstykke. Hvad er rækkefølgen på diagrammerne ?Mvh Dorthe
27.03.2026 - 09:36DROPS Design answered:
Hej Dorthe, du fortsætter bare på nøjagtig samme måde 4 gange til. Når du har taget ud 4 gange til har du strikket diagrammet ½ gang mere i højden :)
09.04.2026 - 10:50
|
||||||||||||||||
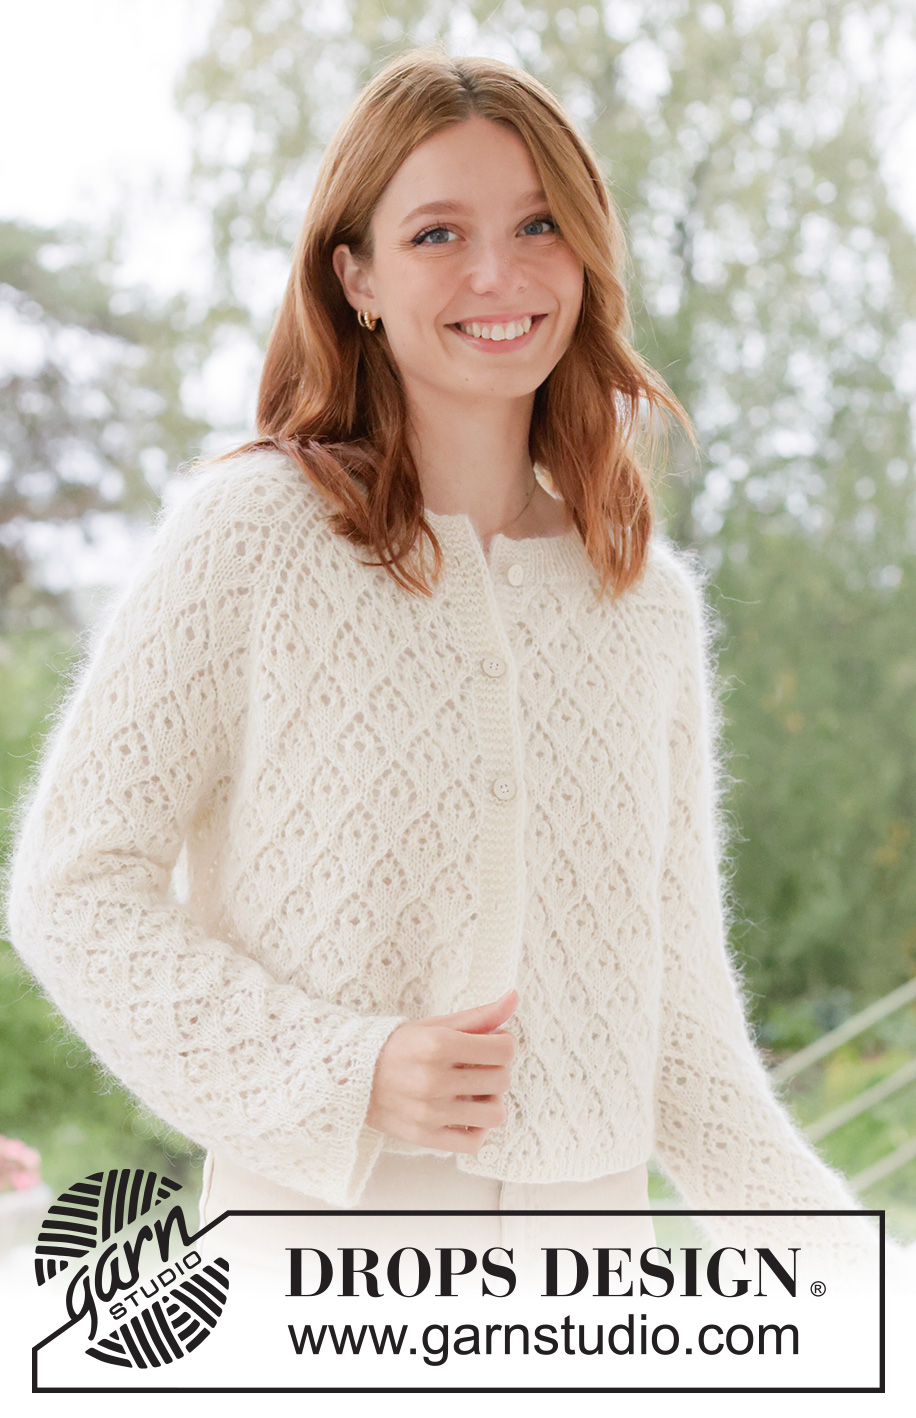
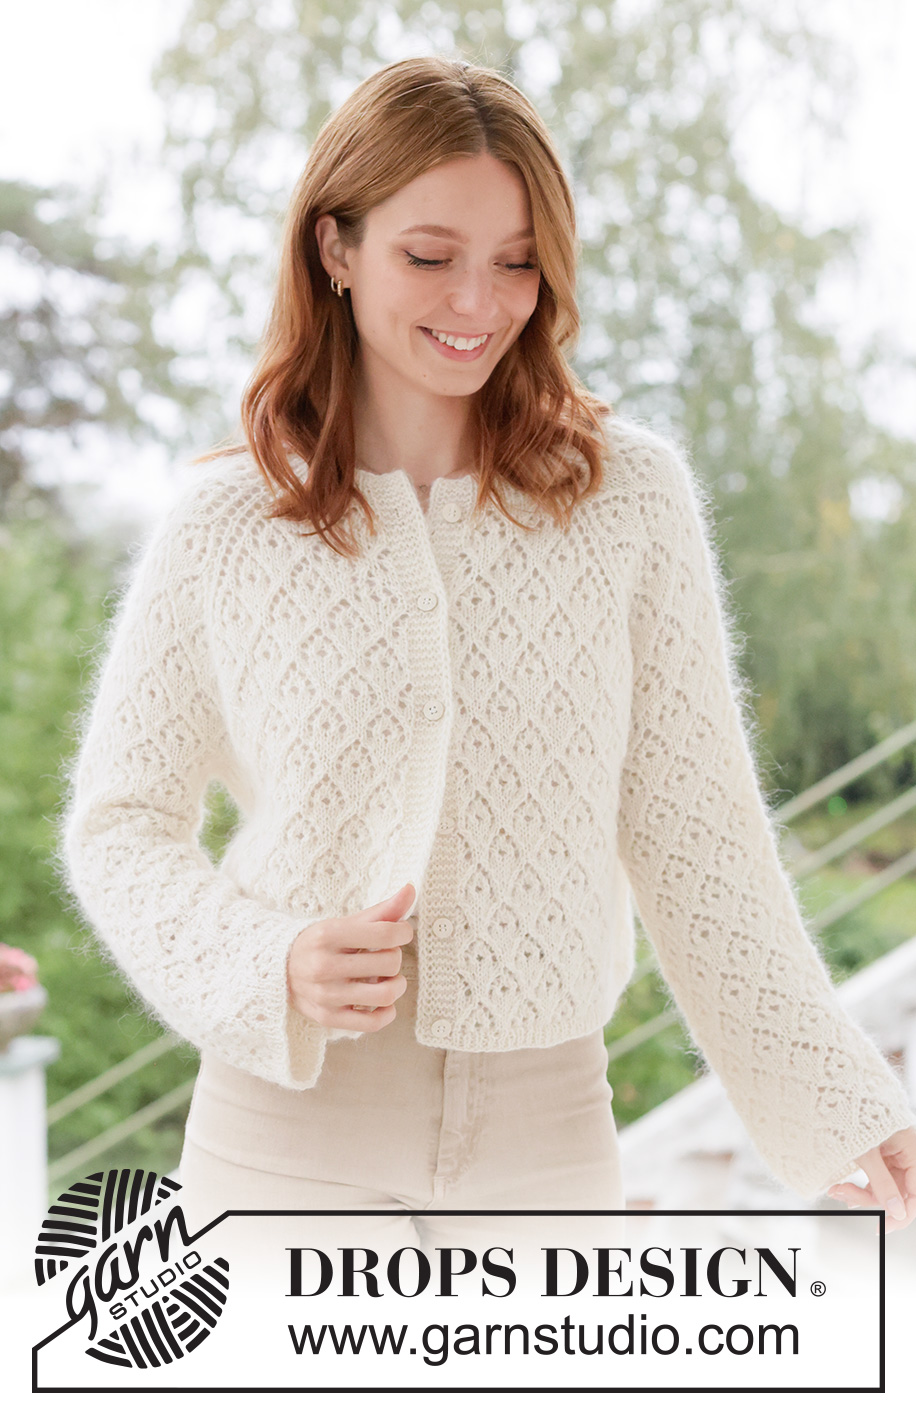
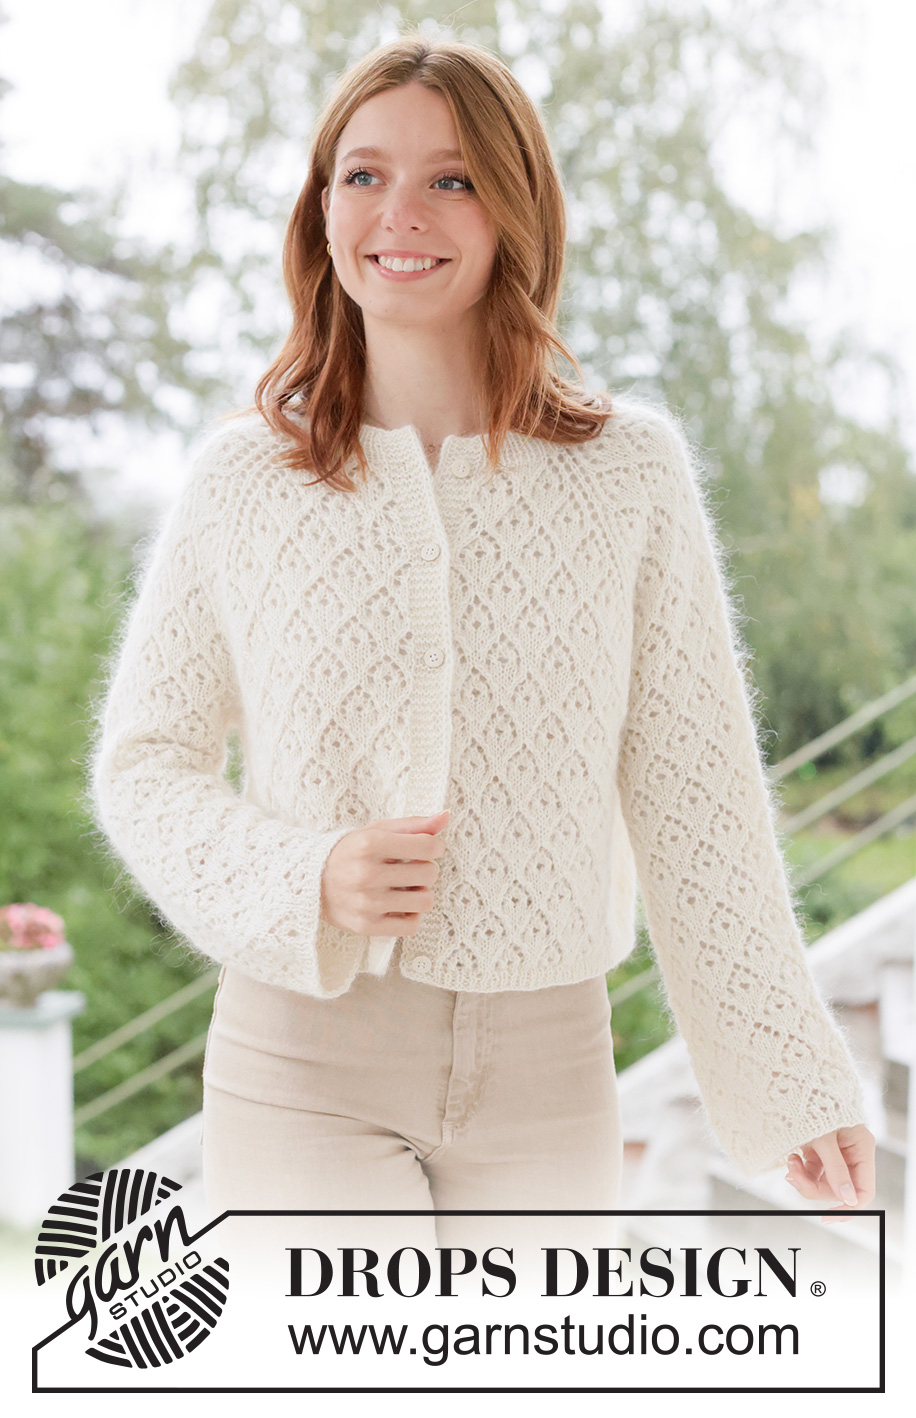
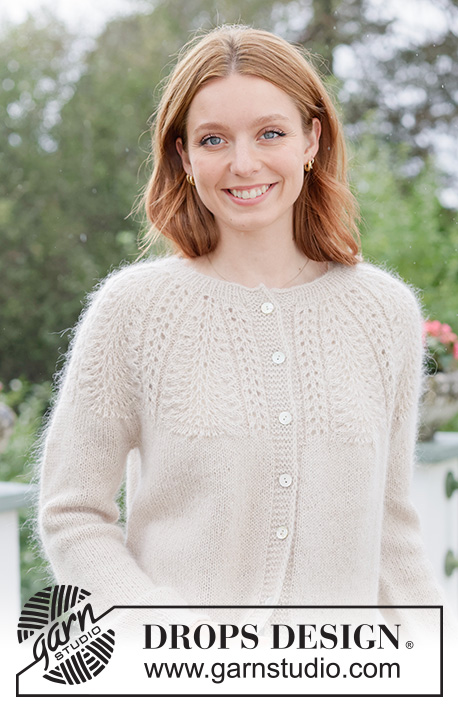
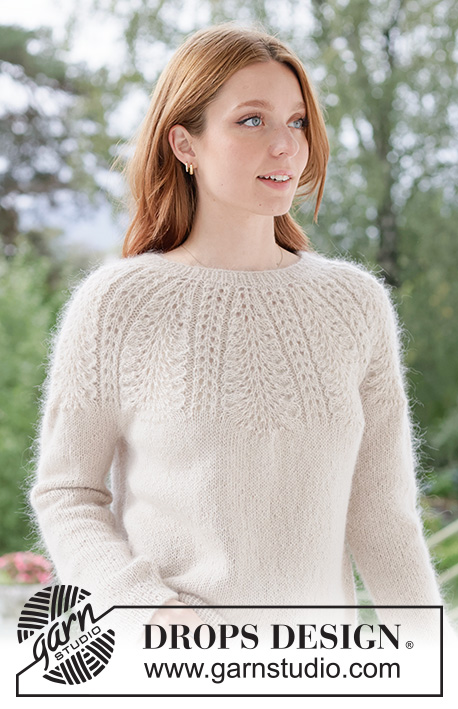
Lace Diamond Cardigan#lacediamondcardigan |
||||||||||||||||
 |
 |
|||||||||||||||
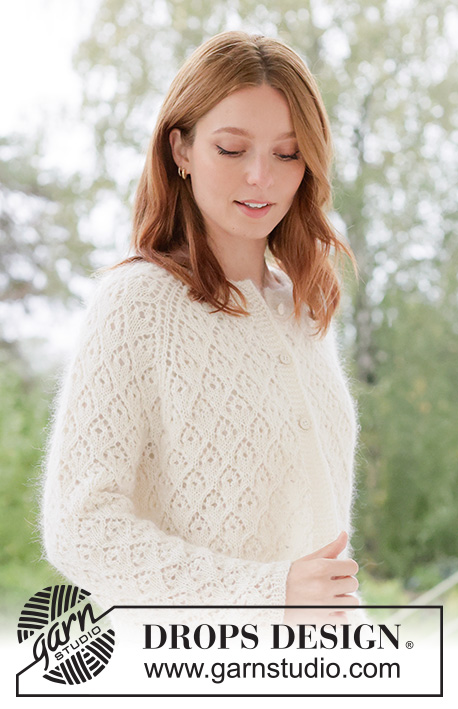
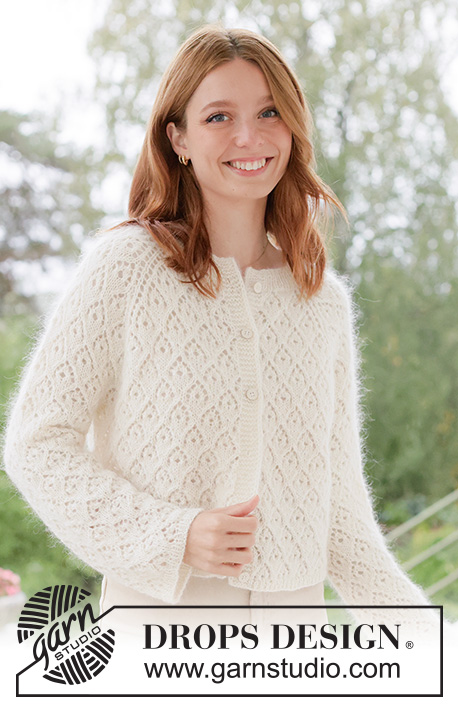
Knitted jacket in DROPS Alpaca and DROPS Kid-Silk. The piece is worked top down with raglan, lace pattern and bands with I-cord. Sizes XS - XXXL.
DROPS 266-2 |
||||||||||||||||
|
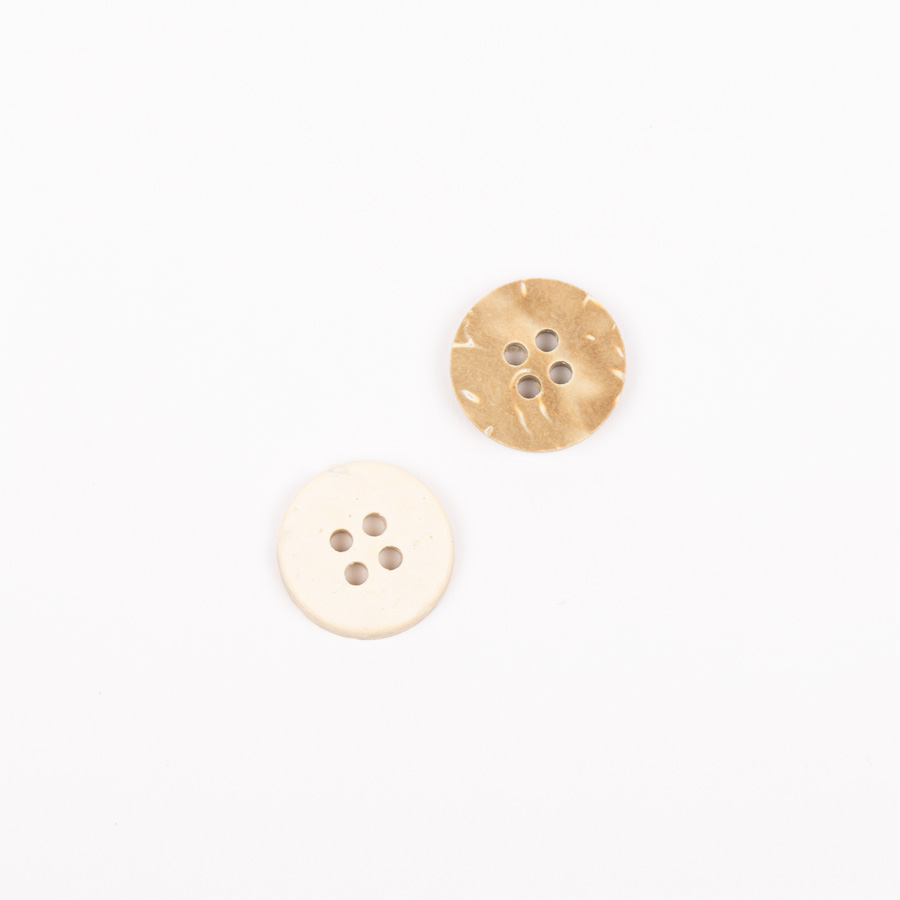
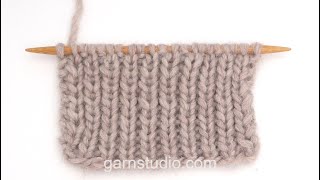
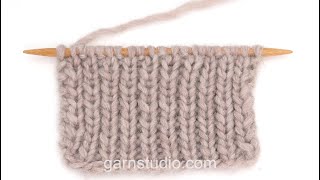
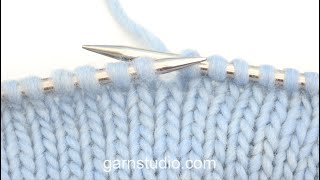
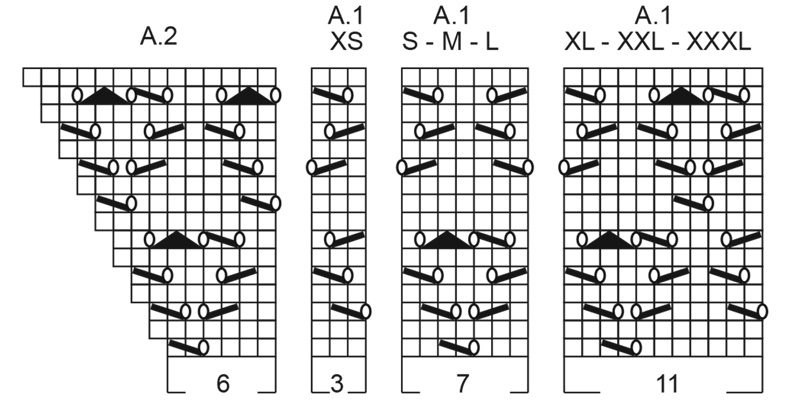
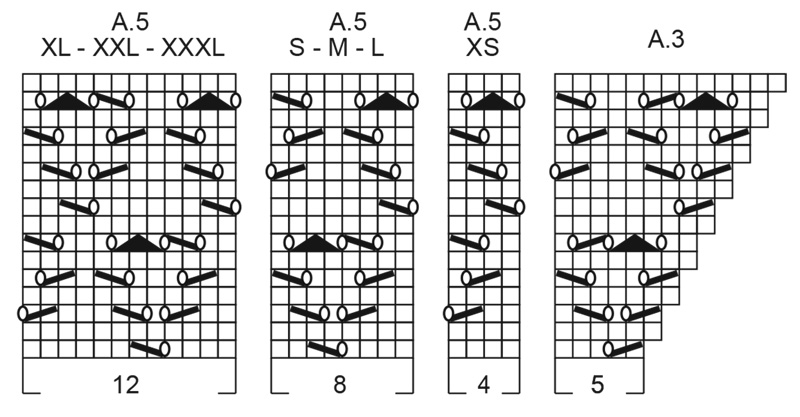
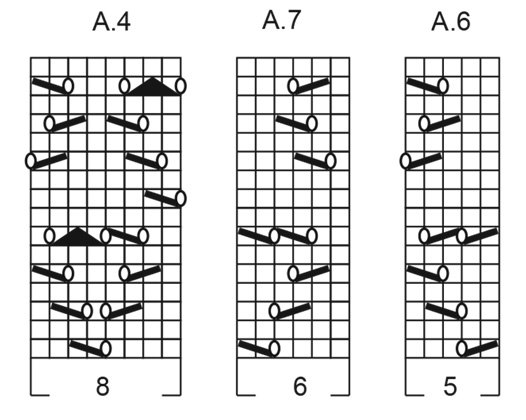
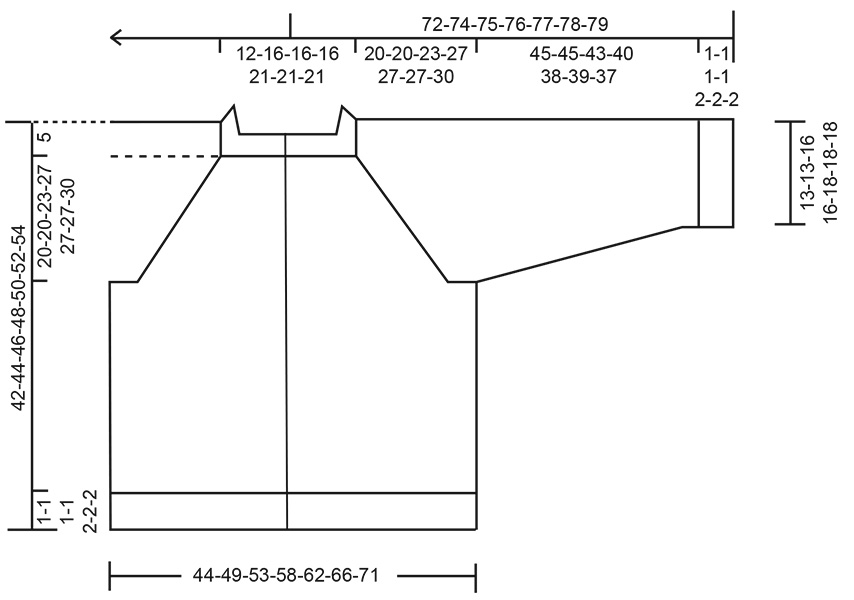
------------------------------------------------------- EXPLANATIONS FOR THE PATTERN: ------------------------------------------------------- GARTER STITCH (worked back and forth): Knit all rows, from both the right and wrong side. 1 ridge in height = knit 2 rows. BANDS WITH I-CORD: BEGINNING OF ROW: Work the band as follows (7 stitches): Slip 1 stitch purl-wise with yarn in front, knit 1, work 5 garter stitches. END OF ROW: Work the band as follows (7 stitches): Work until there are 7 stitches left on the row, work 5 garter stitches, slip 1 stitch purl-wise with yarn in front, knit 1. Work like this from both the right and wrong side. BUTTONHOLES: Work the buttonholes on the right band (when the garment is worn) from the right side, when there are 5 stitches left on the row as follows: ROW 1 (right side): Make 1 yarn over, knit 2 together, knit 1, slip 1 purl-wise with strand in front, knit 1. ROW 2 (wrong side): Work the band as before, knit the yarn over to leave a hole. The first buttonhole is worked on the first row from the right side after the neck is finished. Then work the other 5-5-5-5-5-6-6 buttonholes with 7-7-7½-8-8-7-7½ cm between each one. PATTERN: See diagrams A.1 to A.7. Choose diagram for your size (applies to diagrams A.1 and A.5). The diagrams show all rows in the pattern from the right side. RAGLAN: The raglan-stitches are worked in stocking stitch. Increase 1 stitch by making 1 yarn over. On the next row purl the yarn over from the wrong side to leave a hole, then work the new stitch into the pattern as shown in the diagrams. SLEEVE TIP: When knitting up stitches under the sleeve, you can get a small hole in the transition between stitches on the body and sleeve. This hole can be closed by picking up the strand between 2 stitches and working this strand twisted together with the first stitch between body and sleeve. DECREASE TIP: Decrease 1 stitch on each side of the marker-thread as follows: Work until there are 3 stitches left before the marker-thread, knit 2 together, knit 2 (marker-thread sits between these 2 stitches), slip 1 stitch knit-wise, knit 1 and pass the slipped stitch over the knitted stitch (2 stitches decreased). ------------------------------------------------------- START THE PIECE HERE: ------------------------------------------------------- JACKET – SHORT OVERVIEW OF THE PIECE. The pattern uses both long and short needles; start with the length which fits the number of stitches and change when necessary. The neck and yoke are worked back and forth with circular needle, from mid front and top down. When the yoke is finished, it is divided for body and sleeves and the body continued back and forth, while the sleeves wait. The sleeves are worked in the round, top down. If there is a «0» in your chosen size, skip the information and go straight to the next instruction. NECK: Cast on 95-111-111-111-127-127-127 stitches with circular needle size 3.5 mm, 1 strand DROPS Alpaca and 1 strand DROPS Kid-Silk (2 strands). Work the first row from the wrong side: 7 stitches according to BANDS WITH I-CORD – read explanation above, work rib (purl 1, knit 1) until there are 8 stitches left, purl 1 and 7 stitches according to bands with I-cord. Continue this rib for 3-3-3-4-4-4-4 cm, finishing after a row from the wrong side. Insert 1 marker inside 1 band (mid-front). The piece is measured from here. YOKE: Change to circular needle size 4.5 mm. Insert 4 markers, without working the stitches and each marker inserted in a knitted stitch (raglan-stitch). You increase for raglan on each side of the raglan-stitches. Count 17-21-21-21-25-25-25 stitches (= left front piece), insert marker-1 in the next stitch, count 19-19-19-19-19-19-19 stitches (= sleeve), insert marker-2 in the next stitch, count 19-27-27-27-35-35-35 stitches (= back piece), insert marker-3 in the next stitch, count 19-19-19-19-19-19-19 stitches (= sleeve), insert marker-4 in the next stitch. There are 17-21-21-21-25-25-25 stitches left (= right front piece). Work PATTERN back and forth with the bands as before on each side. AT THE SAME TIME increase for RAGLAN on each side of the raglan-stitches– read descriptions above for pattern and how to increase for raglan. Work as follows from the right side: The band as before, work 1 stitch in stocking stitch, A.1 across 3-7-7-7-11-11-11 stitches, A.2 across 6 stitches (= left front piece), increase for raglan before and after the raglan-stitch, work A.3 across 5 stitches, A.4 across 8 stitches and A.2 across 6 stitches (= sleeve), increase for raglan before and after the raglan-stitch, work A.3 across 5 stitches, A.4 across the next 8-16-16-16-24-24-24 stitches (1-2-2-2-3-3-3 times in width), A.2 across 6 stitches (= back piece), increase for raglan before and after the raglan-stitch, work A.3 across 5 stitches, A.4 across 8 stitches, A.2 across 6 stitches (= sleeve), increase for raglan before and after the raglan-stitch, work A.3 across 5 stitches, A.5 across 4-8-8-8-12-12-12 stitches, 1 stitch in stocking stitch – read BUTTONHOLES, see explanation above and work the band as before. (= right front piece). Continue the pattern and increase for raglan as above every 2nd row, on each side of the raglan-stitches until the diagrams are finished in height. Remember to maintain the knitting tension. You have increased a total of 8 times for raglan = 159-175-175-175-191-191-191 stitches. There are 35 stitches on each sleeve, 37-45-45-45-53-53-53 stitches on the back piece and 26-30-30-30-34-34-34 stitches on each front piece (the raglan-stitches are included in the stitch count for the front and back pieces). Continue increasing for raglan every 2nd row and continue the pattern as follows: Work the band as before, 1 stitch in stocking stitch, A.1 across 3-7-7-7-11-11-11 stitches, A.4 across 8 stitches, A.2 across 6 stitches (= left front piece), increase for raglan before and after the raglan-stitch, work A.3 across 5 stitches, A.4 across 24 stitches A.2 across 6 stitches (= sleeve), increase for raglan before and after the raglan-stitch, work A.3 across 5 stitches, A.4 across the next 24-32-32-32-40-40-40 stitches (3-4-4-4-5-5-5 times in width), A.2 across 6 stitches (= back piece), increase for raglan before and after the raglan-stitch, work A.3 across 5 stitches, A.4 across 24 stitches, A.2 across 6 stitches (= sleeve), increase for raglan before and after the raglan-stitch, work A.3 across 5 stitches, A.4 across 8 stitches, A.5 across 4-8-8-8-12-12-12 stitches, 1 stitch in stocking stitch, and the band as before (= right front piece). Continue the pattern and increase for raglan as above every 2nd row on each side of the raglan-stitches until the diagrams are finished in height. You have increased a total of 16 times for raglan and the diagrams twice in height in all sizes = 223-239-239-239-255-255-255 stitches. In sizes XS and S the sleeve-increases are finished. In sizes M and L continue increasing as before another 4 times (i.e., ½ repeat of the diagrams in height) and in sizes XL, XXL and XXXL increase another 8 times (i.e. 1 more repeat of the diagrams in height). A total of 16-16-20-20-24-24-24 increases for raglan (the diagrams have been worked 2-2-2½-2½-3-3-3 times in height) = 223-239-271-271-319-319-319 stitches: 51-51-59-59-67-67-67 stitches on each sleeve, 53-61-69-69-85-85-85 stitches on the back piece and 34-38-42-42-50-50-50 stitches on each front piece (the raglan-stitches are included in the stitch count for the front and back pieces). The sleeve-increases are finished in all sizes. Now continue to increase only on the front and back pieces. In sizes M and L you are in the middle of a repeat in height. When continuing, the pattern should continue as before on the front and back pieces, but on the sleeves, the pattern should start on the 1st row of the diagrams, as in the other sizes. Continue the pattern and increase for raglan every 2nd row as follows: Work the band as before, 1 stitch in stocking stitch, A.1 across 3-7-7-7-11-11-11 stitches, A.4 across 16-16-16-16-24-24-24 stitches, A.2 across 6-6-10-10-6-6-6 stitches (= left front piece), increase for raglan, knit the raglan-stitch, work A.6 across 5 stitches, A.4 across 40-40-48-48-56-56-56 stitches, A.7 across 6 stitches (= sleeve), knit the raglan-stitch, increase for raglan, work A.3 across 5-5-9-9-5-5-5 stitches, A.4 across 40-48-48-48-72-72-72 stitches (5-6-6-6-9-9-9 times in width), A.2 across 6-6-10-10-6-6-6 stitches (= back piece), increase for raglan, knit the raglan-stitch, work A.6 across 5 stitches, A.4 across 40-40-48-48-56-56-56 stitches, A.7 across 6 stitches (= sleeve), knit the raglan-stitch increase for raglan, work A.3 across 5 stitches, A.4 across 16-16-16-16-24-24-24 stitches, A.5 across 4-8-8-8-12-12-12 stitches, 1 stitch in stocking stitch and the band as before (right front piece). Continue this pattern and increase 8 times for raglan on the front and back pieces (a total of 24-24-28-28-32-32-32 increases for raglan on the front and back pieces) = 255-271-303-303-351-351-351 stitches. In sizes XS, S, M, XL and XXL the raglan-increases on the front and back pieces are finished. In sizes L and XXXL continue the raglan-increases as above another 4 times (i.e., ½ repeat of the diagrams in height). All sizes: A total of 24-24-28-32-32-32-36 increases for raglan on the front and back pieces. The diagrams are worked 3-3-3-3½-4-4-4½ times in height. In some sizes you have worked a ½ repeat in height of the diagrams. Make sure you continue the pattern on the correct row. There are 255-271-303-319-351-351-367 stitches: 51-51-59-59-67-67-67 stitches on each sleeve, 69-77-85-93-101-101-109 stitches on the back piece and 42-46-50-54-58-58-62 stitches on the front pieces. The piece measures approx. 20-20-23-27-27-27-30 cm from the marker mid-front. Now divide for the body and sleeves. DIVIDE FOR BODY AND SLEEVES: Continue the band and pattern across the first 42-46-50-54-58-58-62 stitches (= front piece), place the next 51-51-59-59-67-67-67 stitches on a stitch holder for the sleeve, cast on 11-11-11-11-11-19-19 stitches (mid-under the sleeve), continue the pattern across the next 69-77-85-93-101-101-109 stitches (= back piece), place the next 51-51-59-59-67-67-67 stitches on a stitch holder for the sleeve, cast on 11-11-11-11-11-19-19 stitches (mid-under the sleeve), continue the pattern and band across the last 42-46-50-54-58-58-62 stitches (= front piece). BODY: = 175-191-207-223-239-255-271 stitches. Purl 1 row from the wrong side, with the bands as before. On the next row from the right side, continue the pattern and the bands. The raglan-stitches and the cast-on stitches under each sleeve are worked into the pattern, as follows: Work the band as before, 1 stitch in stocking stitch, A.1 across 3-7-7-7-11-11-11 stitches, A.4 until there are 11-15-15-15-19-19-19 stitches left, work A.5 across 4-8-8-8-12-12-12 stitches, 1 stitch in stocking stitch and the band as before. Continue this pattern until the piece measures 35-37-39-41-42-44-46 cm from the marker mid-front. Finish after a complete or a half repeat of the diagrams in height. Work 2 rows of stocking stitch with the bands as before. On the next row from the right side begin the rib. AT THE SAME TIME increase 18-20-22-24-26-28-30 stitches evenly on the row (do not increase across the bands) = 193-211-229-247-265-283-301 stitches. Work as follows: Change to circular needle size 3.5 mm. Work the band as before, rib (knit 1, purl 1 – remember to increase) until there are 8 stitches left, knit 1 and work the band as before. When the rib measures 1-1-1-1-2-2-2 cm, cast off slightly loosely with knit above knit and purl above purl. The jacket measures approx. 37-39-41-43-45-47-49 cm from the marker mid-front and 42-44-46-48-50-52-54 cm from the shoulder. SLEEVES: Place the 51-51-59-59-67-67-67 sleeve-stitches from one stitch holder onto circular needle size 4 mm. Knit up 1 stitch in each of the 11-11-11-11-11-19-19 cast-on stitches under the sleeve - read SLEEVE TIP, and continue the pattern across the sleeve-stitches (making sure you begin on the correct row in the diagrams) = 62-62-70-70-78-86-86 stitches. Insert a marker in the middle stitch of the knitted-up stitches under the sleeve. Work to the marker-stitch (the round begins here). Continue as follows: Knit 5-5-5-5-5-9-9, continue A.6 from the yoke across 5 stitches, A.4 across the next 40-40-48-48-56-56-56 stitches, A.7 across 6 stitches and knit 6-6-6-6-6-10-10. Continue this pattern in the round. AT THE SAME TIME, when the sleeve measures 1 cm from the division, decrease mid-under the sleeve – read DECREASE TIP as follows: Decrease 2 stitches every 1-1-1-1-1-1½-1½ cm a total of 7-7-7-7-7-11-11 times = 48-48-56-56-64-64-64 stitches. After the last decrease, A.4 will fit on the round. Start the round before the marker-stitch and work A.4 in the round until the sleeve measures 44-44-42-39-37-38-36 cm from the division. Finish after a complete or a half repeat of the diagram in height. Knit 2 rounds Change to double pointed needles size 3.5 mm. Work rib (knit 1, purl 1), AT THE SAME TIME increase 6 stitches evenly on the first round = 54-54-62-62-70-70-70 stitches. When the rib measures 1-1-1-1-2-2-2 cm, cast off slightly loosely with rib. The sleeve measures approx. 46-46-44-41-40-41-39 cm from the division. ASSEMBLY: Sew the buttons onto the left band. |
||||||||||||||||
Diagram explanations |
||||||||||||||||
|
||||||||||||||||
 |
||||||||||||||||
 |
||||||||||||||||
 |
||||||||||||||||
 |
||||||||||||||||
Have you finished this pattern?Tag your pictures with #dropspattern #lacediamondcardigan or submit them to the #dropsfan gallery. Do you need help with this pattern?You'll find 39 tutorial videos, a Comments/Questions area and more by visiting the pattern on garnstudio.com. © 1982-2026 DROPS Design A/S. We reserve all rights. This document, including all its sub-sections, has copyrights. Read more about what you can do with our patterns at the bottom of each pattern on our site. |
||||||||||||||||


With over 40 years in knitting and crochet design, DROPS Design offers one of the most extensive collections of free patterns on the internet - translated to 17 languages. As of today we count 324 catalogues and 12291 patterns translated into English (UK/cm). 12291
We work hard to bring you the best knitting and crochet have to offer, inspiration and advice as well as great quality yarns at incredible prices! Would you like to use our patterns for other than personal use? You can read what you are allowed to do in the Copyright text at the bottom of all our patterns. Happy crafting!
Post a comment to pattern DROPS 266-2
We would love to hear what you have to say about this pattern!
If you want to leave a question, please make sure you select the correct category in the form below, to speed up the answering process. Required fields are marked *.