
Popular categories
Looking for a yarn?


Comments / Questions (34)
![]() Willemijn wrote:
Willemijn wrote:
In patroon City Ranger 247-7 staat een patroon vermeld. Maar in de werkbeschrijving komt dat niet voor.
13.02.2026 - 19:59
![]() Zoe wrote:
Zoe wrote:
Hello, At what point will you recommend blocking? Before the band is added or after?
09.02.2026 - 20:34DROPS Design answered:
Hi Zoe, It is best to block the jacket after it is completed. Regards, Drops Team.
10.02.2026 - 06:52
![]() Joanna wrote:
Joanna wrote:
Wg instrukcji na obszycie mam nabrać 298 oczek (rozmiar XXL), tymczasem u mnie tych oczek wyjdzie o wiele więcej. Sprawdziłam, że na jedną połówkę wyjdzie sporo ponad 200. Gdybym trzymała się instrukcji (149 o. na połówkę obszycia) musiałabym nabierać oczko z co drugiego oczka przodu, wiec sweter by się zmarszczył. Czy mam po prostu nabrać tyle oczek ile trzeba, byle było to podzielne przez 4 + 2?
15.01.2026 - 13:51DROPS Design answered:
Witaj Joasiu, u mnie też zwykle liczba oczek nie do końca się zgadza, gdy nabieram oczka na obszycia. Czasem wynika to z wprowadzonych wcześniej modyfikacji, np. długości swetra. Ale wykończenie w swetrze jest bardzo ważne. Mam na to taki sposób, że biorę próbkę (zwykle robię ją nieco większą), nabieram oczka na jej boku i przerabiam ściągacz, blokuję i patrzę czy wygląda to dobrze. Jeśli tak, liczę ile oczek (dajmy na to 30) nabrałam na długość np. 20 cm swetra. Jeżeli długość brzegu swetra ma 200 cm, to będę musiała nabrać na ściągacz 30 o. x10 cm=300 oczek. Mam nadzieję, że pomogłam. Pozdrawiam!
16.01.2026 - 09:18
![]() Celeste wrote:
Celeste wrote:
Hello, please could you clarify these instructions: Then work as follows from the right side: 1 GARTER STITCH – read description above, * purl 2, knit 2 *, work from *-* until there are 3 stitches left, purl 2 and 1 garter stitch. Should I knit one row of Garter Stitch before starting the ribbing of purl 2 knit 2 on the third row finishing with purl 2 and 1 knit? Thank you.
15.01.2026 - 08:26DROPS Design answered:
Dear Celeste, you now work in rib P2, K2 with 1 edge stitch in garter stitch in each side, ie start with 1 stitch in garter stitch (- knit from RS and from WS), then repeat (P2, K2) until 3 sts remain, P2 and 1 stitch in garter stitch. From WS knit 1, (K2, P2) until 3 sts remain, finish with K2, 1 knit 1. Happy knitting!
16.01.2026 - 07:41
![]() Florence Pinçon wrote:
Florence Pinçon wrote:
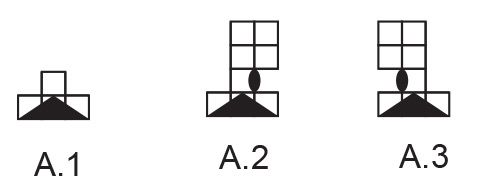
Bonjour, je tricote avec deux aiguilles au lieu d'une aiguille circulaire. Pour diminution encolure, si je suis diagramme A1 je dois faire un rang endroit avant de faire les 3 m. ensemble à l'envert ? Merci pour votre aide à comprendre la réalisation du diagramme.
16.12.2025 - 11:46DROPS Design answered:
Bonjour Mme Pinçon, les 3 mailles ensemble à l'envers de A.1, A.2 et A.3 se tricotent sur l'endroit, elles vont former ainsi un petit motif près de l'encolure qui se répètera tout du long de l'encolure. Bon tricot!
17.12.2025 - 10:18
![]() Debora wrote:
Debora wrote:
Buonasera, vorrei sapere se le misure finali date nello schemino sono comprensive di agio, se si quanto più o meno? Oppure sono misure aderenti e devo aggiungere i cm di agio desiderati? Grazie mille
12.11.2025 - 14:49DROPS Design answered:
Buonasera Debora, le misure finali sono quelle del capo finito. Buon lavoro!
12.11.2025 - 17:02
![]() Françoise Rudaz wrote:
Françoise Rudaz wrote:
Bonjour ! Je désire signaler que chez les hommes les boutonnières se trouvent sur le devant gauche. Et non pas sur le devant droit comme indiqué sur les explications du modèle. Merci de rectifier ceci. Certaines tricoteuses pourraient être déçues. Bien à vous !
06.06.2025 - 17:22
![]() Wil wrote:
Wil wrote:
Goedemiddag Drops-team, waarschijnlijk heb ik iets verkeerd gedaan. Bij het minderen voor de V-hals begin je aan de goede kant. De 4e naald is bij mij dan de verkeerde kant. Dat heb ik dus niet gedaan en daar ben ik denk ik de fout ingegaan. Ik heb steeds de 3e naald , goede kant geminderd. Is het patroon verkeerd uitgelegd of ben ik fout en moet ik het uithalen?
27.05.2025 - 16:39DROPS Design answered:
Dag Wil,
Wanneer er staat dat je moet beginnen met minderen, minder je gelijk in die eerste naald aan de goede kant. De volgende keer dat je mindert is 4 naalden later, dus weer aan de goede kant.
28.05.2025 - 21:17
![]() Wil wrote:
Wil wrote:
Dankjewel voor de duidelijke uitleg.
26.05.2025 - 21:47
![]() Wil wrote:
Wil wrote:
Goedemiddag Drops-team, ik loop vast in de uitleg van het patroon voor de V- hals met de minderingen. Als ik het lees worden de minderingen aan de goede kant gemaakt. Maar het telpatroon A1 zegt: 3 averechts samen. Ook de omslag uitleg tussen 2 steken aan de verkeerde kant: waar komen die .. dat is A2 ?Ik vind het nogal moeilijk uitgelegd, is mijn mening.
26.05.2025 - 16:13DROPS Design answered:
Dag Wil,
De 3 steken averecht samen breien worden inderdaad aan de goede kant gemaakt. De omslag van A.2 wordt op de verkeerde kant gemaakt. Je breit eerst 1 steek averecht (boven de 3 samen gebreide steken en dan maak je een omslag.
26.05.2025 - 21:05
|
|||||||||||||
City Ranger#cityrangercardigan |
|||||||||||||
 |
 |
||||||||||||
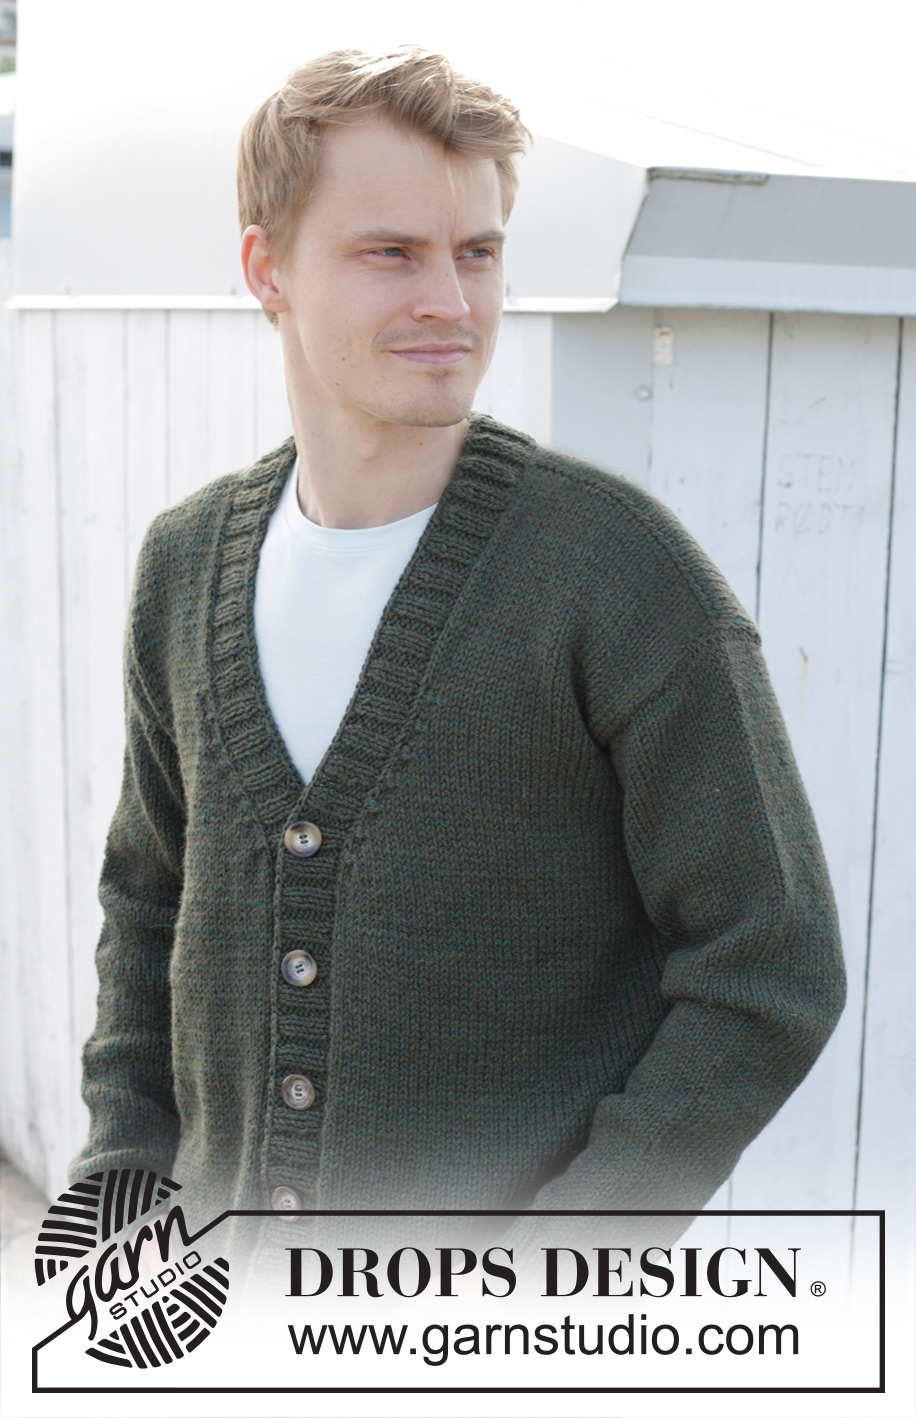
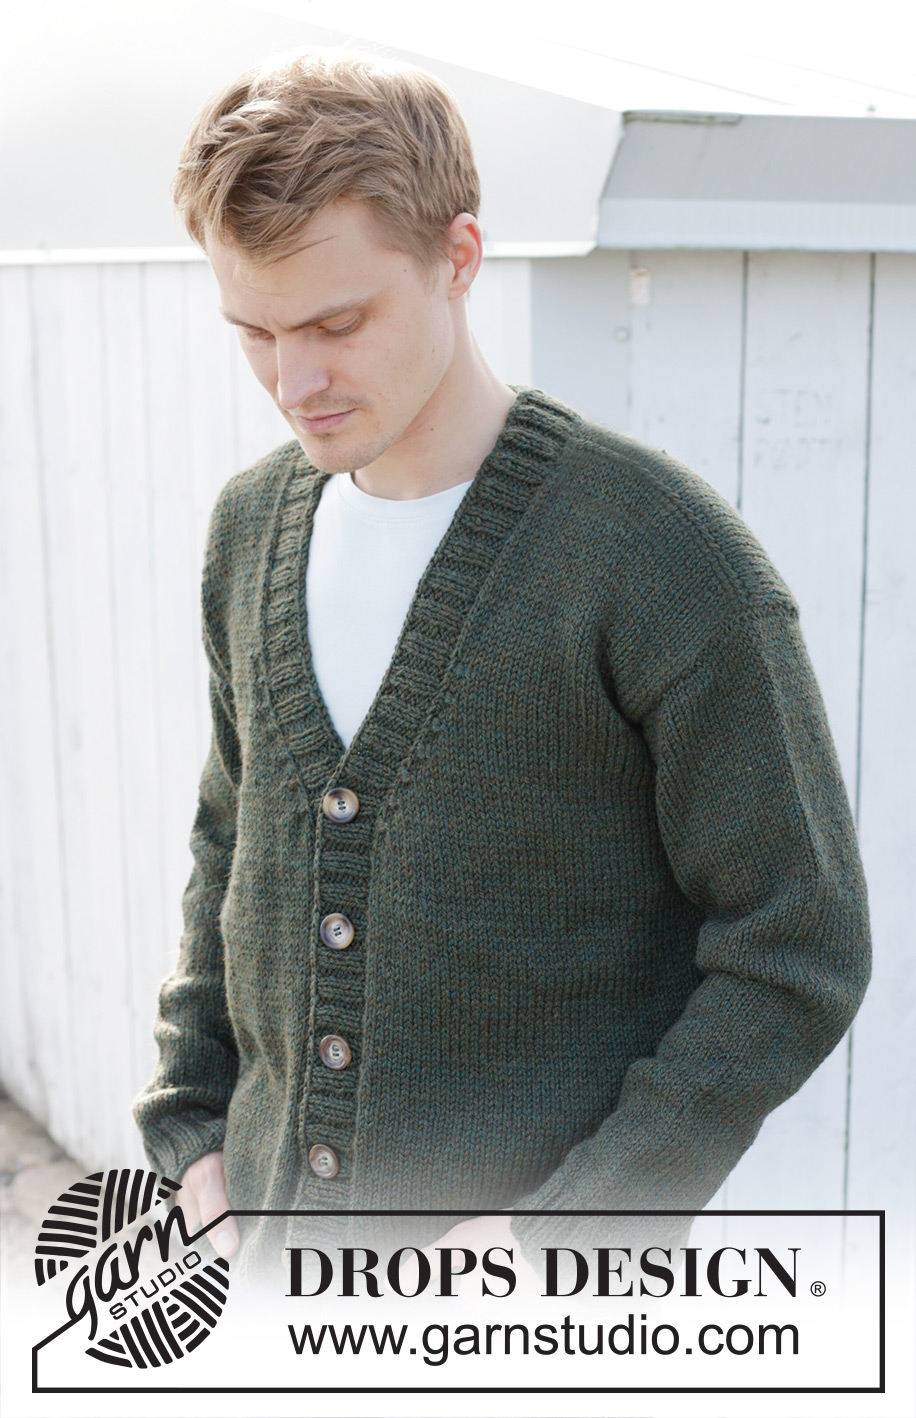
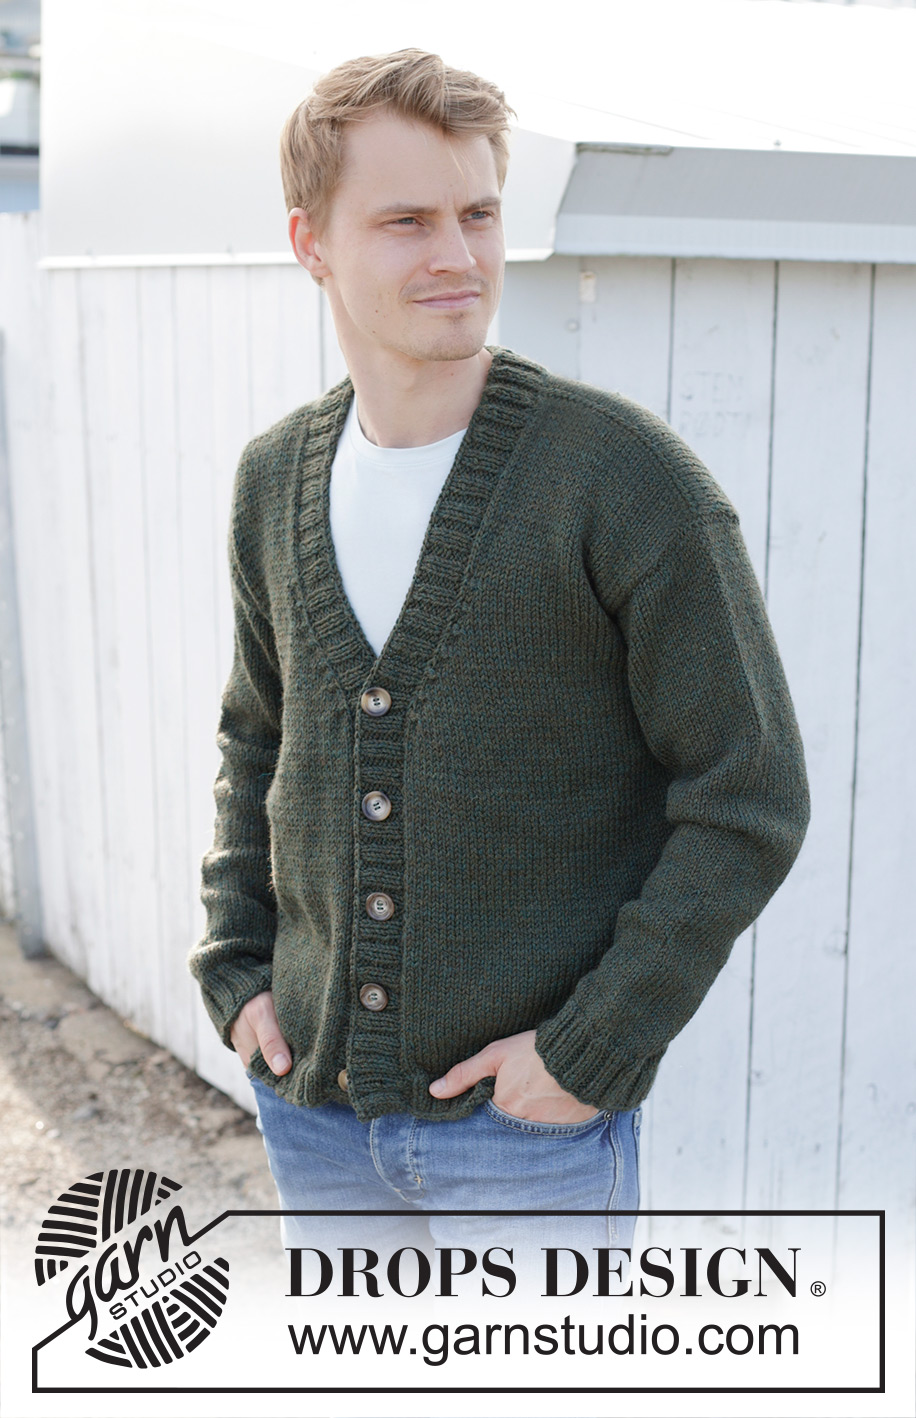
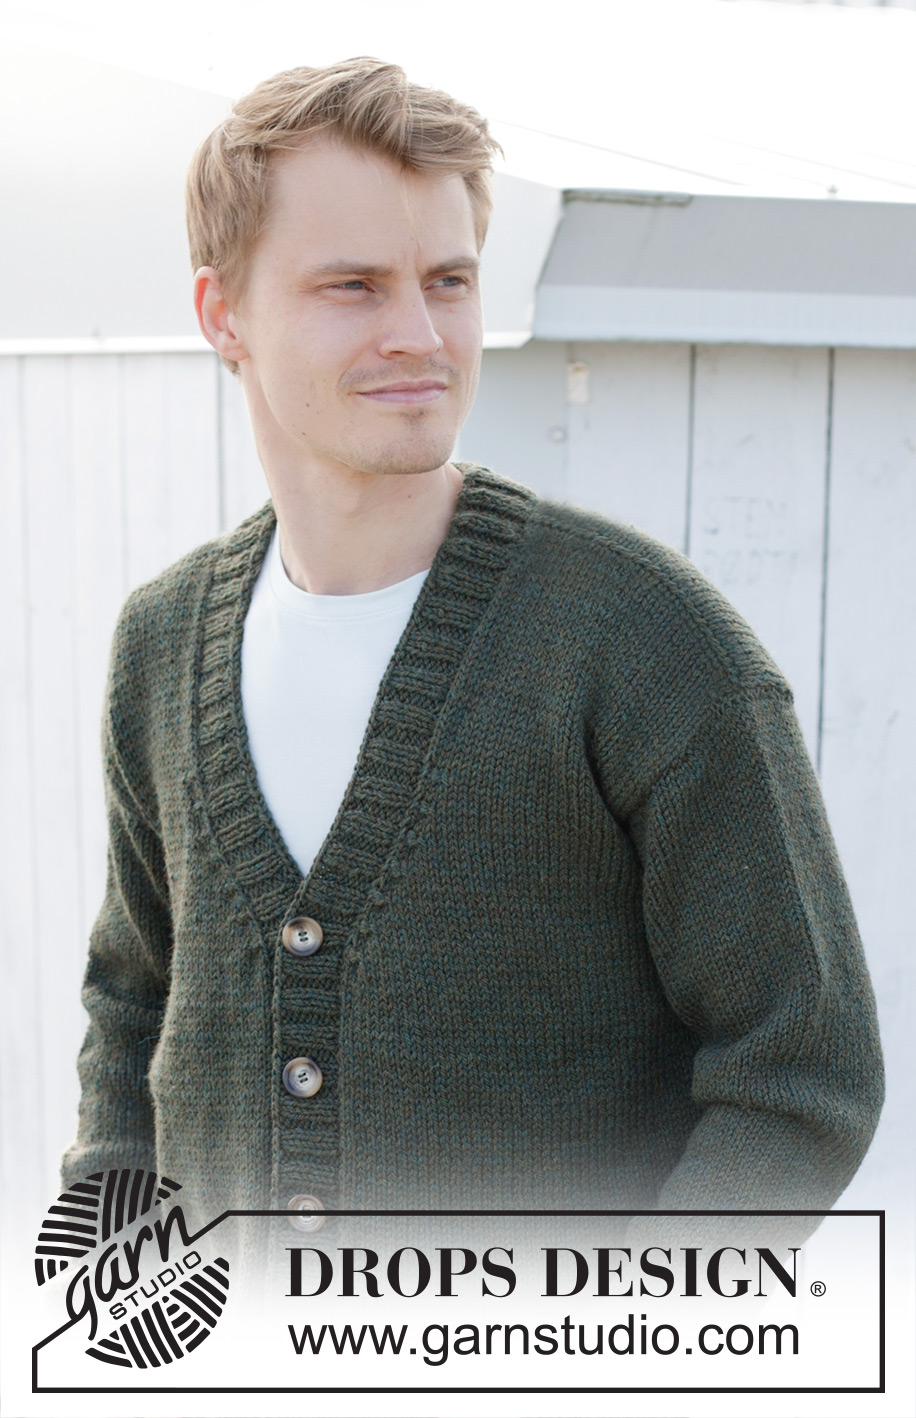
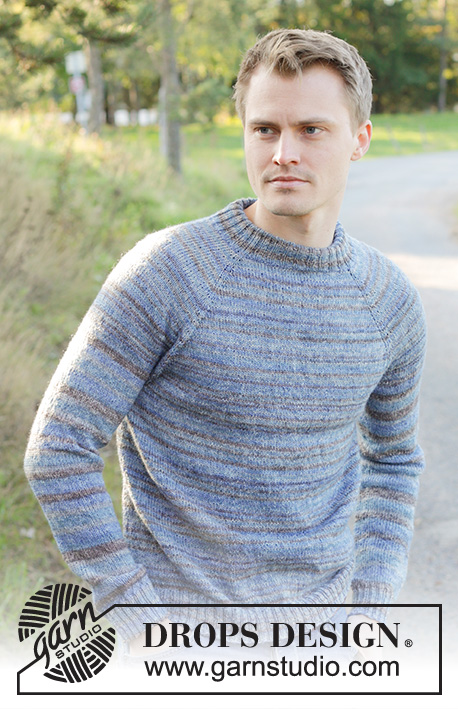
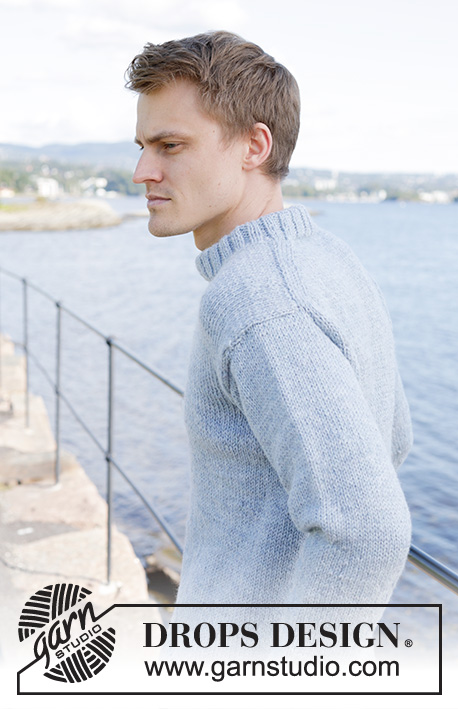
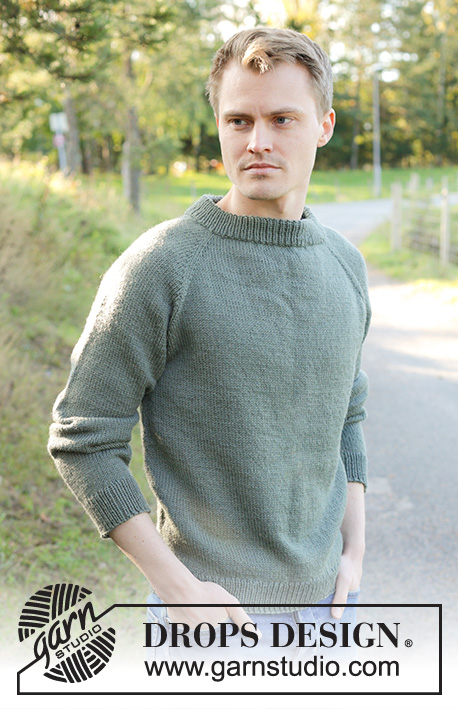
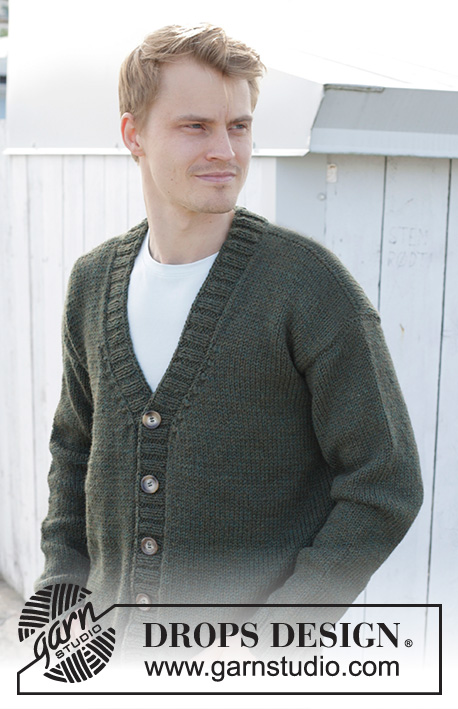
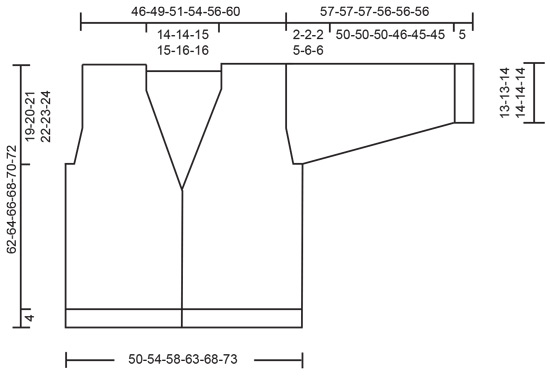
Knitted jacket for men in DROPS Nepal. The piece is worked bottom up with V-neck. Sizes S - XXXL.
DROPS 246-7 |
|||||||||||||
|
------------------------------------------------------- EXPLANATIONS FOR THE PATTERN: ------------------------------------------------------- GARTER STITCH (worked back and forth): Knit all rows. 1 ridge = knit 2 rows. PATTERN: See diagrams A.1 to A.3. The diagrams show all rows in the pattern from the right side. DECREASE TIP (for V-neck and armholes): All decreases are worked from the right side! DECREASE 2 STITCHES AT BEGINNING OF ROW: Work 1 edge stitch in garter stitch, knit 1, work A.1 over the next 3 stitches. DECREASE 2 STITCHES AT END OF ROW: Work until there are 5 stitches left on the row, work A.1 over the next 3 stitches, knit 1 and 1 edge stitch in garter stitch. DECREASE 1 STITCH AT BEGINNING OF ROW: Work 1 edge stitch in garter stitch, knit 1, A.2 over the next 3 stitches. DECREASE 1 STITCH AT END OF ROW: Work until there are 5 stitches left on the row, work A.3 over the next 3 stitches, knit 1 and 1 edge stitch in garter stitch. INCREASE TIP (for sleeves): Knit to 1 stitch past the marker-thread, make 1 yarn over, knit to 1 stitch before the marker-thread, make 1 yarn over. On the next round knit the yarn overs twisted, then work the new stitches in stocking stitch. BUTTONHOLES: Work 5 buttonholes on the right band. 1 buttonhole = knit 2 together and make 1 yarn over – NOTE: It is neatest, when working the buttonholes, to purl 2 together in each purled section (seen from the right side). Knit the yarn over on the next row to leave a hole. The bottom buttonhole is worked 5 cm from the bottom edge and the top buttonhole 25-27-29-30-31-32 cm below the shoulder. The other 3 buttonholes are worked evenly between these two. ------------------------------------------------------- START THE PIECE HERE: ------------------------------------------------------- JACKET – SHORT OVERVIEW OF THE PIECE: The body is worked back and forth with circular needle, bottom up as far as the armholes, divided and then the front and back pieces are finished separately back and forth with circular needle. The sleeves are worked in the round with double pointed needles/short circular needle, bottom up as far as the sleeve cap, which is then finished back and forth with circular needle. The neck/bands are worked to finish. BODY: Cast on 192-208-224-240-264-280 stitches with circular needle size 4 mm and DROPS Nepal. Purl 1 row from the wrong side. Then work as follows from the right side: 1 GARTER STITCH – read description above, * purl 2, knit 2 *, work from *-* until there are 3 stitches left, purl 2 and 1 garter stitch. Continue this rib back and forth for 4 cm. Knit 1 row from the right side and decrease 30-34-38-38-46-46 stitches evenly spread = 162-174-186-202-218-234 stitches. Change to circular needle size 5.5 mm. Insert 1 marker-thread 41-44-47-51-55-59 stitches in from each side (= 80-86-92-100-108-116 stitches on the back piece between the markers). Allow the threads to follow your work onwards; they mark the sides and are used when working the armholes. Work stocking stitch with 1 garter stitch on each side. REMEMBER THE KNITTING TENSION! OVERVIEW OF THE NEXT SECTION: When the piece measures 38-38-38-39-40-41 cm, start to decrease for the V-neck. AT THE SAME TIME, cast off for the armholes and finish each section separately. Read V-NECK and ARMHOLES before continuing. V-NECK: When the piece measures 38-38-38-39-40-41 cm, decrease for the neck on the next row from the right side – read DECREASE TIP. Decrease 2 stitches on each side every 4th row 4 times in all sizes. Then decrease 1 stitch on each side every 4th row 3-3-4-4-5-5 times. ARMHOLES: AT THE SAME TIME, when the piece measures 43-44-45-46-47-48 cm, cast off for the armholes on the next row from the right side as follows: Work until there are 2-3-4-4-4-5 stitches left before the first marker-thread, cast off 4-6-8-8-8-10 stitches, work until there are 2-3-4-4-4-5 stitches left before the second marker-thread, cast off 4-6-8-8-8-10 stitches and work to end of row. Finish the front and back pieces separately. LEFT FRONT PIECE: Start from the wrong side and work stocking stitch, with 1 garter stitch on each side, and continue to decrease for the V-neck. In addition, work the armhole as follows: ARMHOLES: At the beginning of the next row from the right side decrease 1-1-1-2-2-2 stitches, then decrease 1 stitch every 4th row 0-0-0-1-3-3 times – remember DECREASE TIP. After all the decreases for the neck and armhole there are 27-29-30-32-33-36 stitches on the shoulder. Continue with stocking stitch and 1 garter stitch on each side until the piece measures 62-64-66-68-70-72 cm. Cast off. RIGHT FRONT PIECE: Start from the wrong side and work stocking stitch, with 1 garter stitch on each side, and continue to decrease for the V-neck. In addition, work the armhole as follows: ARMHOLE: At the end of the next row from the right side decrease 1-1-1-2-2-2 stitches, then decrease 1 stitch every 4th row 0-0-0-1-3-3 times – remember DECREASE TIP. After all the decreases for the neck and armhole there are 27-29-30-32-33-36 stitches on the shoulder. Continue with stocking stitch and 1 garter stitch on each side until the piece measures 62-64-66-68-70-72 cm. Cast off. BACK PIECE: = 76-80-84-92-100-106 stitches. Start from the wrong side and work stocking stitch, with 1 garter stitch on each side, and work the armholes as follows: On the next row from the right side, decrease 1-1-1-2-2-2 stitch on each side, then 1 stitch on each side every 4th row, 0-0-0-1-3-3 times – remember DECREASE TIP = 74-78-82-86-90-96 stitches. When the piece measures 59-61-63-65-67-69 cm, cast off the middle 18-18-20-20-22-22 stitches for the neckline (28-30-31-33-34-37 stitches on each shoulder). Finish each shoulder separately. On the next row from the neck cast off 1 stitch by the neck = 27-29-30-32-33-36 stitches. Cast off when the piece measures 62-64-66-68-70-72 cm. Work the other shoulder in the same way. SLEEVES: Cast on 48-48-52-52-56-56 stitches with double pointed needles size 4 mm and DROPS Nepal. Knit 1 round. Then work rib in the round (knit 2, purl 2) for 5 cm. Knit 1 round and decrease 8-6-8-8-10-10 stitches evenly spaced = 40-42-44-44-46-46 stitches. Insert 1 marker-thread at the beginning of the round (mid-under sleeve). Allow the thread to follow your work onwards – it is used when increasing under the sleeve. Change to double pointed needles size 5.5 mm and work stocking stitch. When the sleeve measures 12-12-9-11-9-12 cm, increase 1 stitch on each side of the marker-thread – read INCREASE TIP. Increase like this every 4½-4-4-3-3-2½ cm a total of 10-11-12-13-14-15 times = 60-64-68-70-74-76 stitches. When the sleeve measures 55-55-55-51-50-50 cm, work as follows: Start 2-3-4-4-4-5 stitches before the marker-thread, cast off 4-6-8-8-8-10 stitches and work to the end of the round = 56-58-60-62-66-66 stitches. Start from the wrong side and work the sleeve cap back and forth. Cast off stitches at the beginning of each row as follows: Cast off 9-9-10-5-4-4 stitches 2-2-2-5-6-6 times on each side = 20-22-20-12-18-18 stitches. Cast off. The sleeve measures approx.57-57-57-56-56-56 cm. Work the other sleeve in the same way. ASSEMBLY: Sew the shoulder seams inside the cast-off edge. Sew in the sleeves inside the 1 edge stitch on the armholes. BANDS/NECK: Insert 1 marker, in the middle of the back piece. The bands/neck are knitted up inside 1 edge stitch. Start from the right side at the bottom of the right front piece and knit up 131-135-139-143-149-153 stitches up the front piece to the marker mid-back, with circular needle size 4 mm – leave the marker in place. Knit up 131-135-139-143-149-153 stitches down the left front pieces = a total of 262-270-278-286-298-306 stitches (should be divisible by 4 + 2. It is important that the bands are neither too tight nor too loose. Work as follows from the wrong side: 2 garter stitches, * purl 2, knit 2 *, work from *-* until there are 4 stitches left, purl 2 and 2 garter stitches. Continue this rib for 2 cm. Now work the BUTTONHOLES on the right band – read description above. Continue working until the rib measures 4 cm. Cast off a little loosely. Sew the buttons onto the left band. |
|||||||||||||
Diagram explanations |
|||||||||||||
|
|||||||||||||
 |
|||||||||||||
 |
|||||||||||||
 |
|||||||||||||
Have you finished this pattern?Tag your pictures with #dropspattern #cityrangercardigan or submit them to the #dropsfan gallery. Do you need help with this pattern?You'll find 30 tutorial videos, a Comments/Questions area and more by visiting the pattern on garnstudio.com. © 1982-2026 DROPS Design A/S. We reserve all rights. This document, including all its sub-sections, has copyrights. Read more about what you can do with our patterns at the bottom of each pattern on our site. |
|||||||||||||


With over 40 years in knitting and crochet design, DROPS Design offers one of the most extensive collections of free patterns on the internet - translated to 17 languages. As of today we count 324 catalogues and 12290 patterns translated into English (UK/cm). 12290
We work hard to bring you the best knitting and crochet have to offer, inspiration and advice as well as great quality yarns at incredible prices! Would you like to use our patterns for other than personal use? You can read what you are allowed to do in the Copyright text at the bottom of all our patterns. Happy crafting!
Post a comment to pattern DROPS 246-7
We would love to hear what you have to say about this pattern!
If you want to leave a question, please make sure you select the correct category in the form below, to speed up the answering process. Required fields are marked *.