
Popular categories
Looking for a yarn?


Comments / Questions (7)
![]() Barbara I Huss wrote:
Barbara I Huss wrote:
I can't seem to find the directions for making the pattern on this sweater. the pattern # is241-31
19.04.2024 - 18:59
![]() Renata wrote:
Renata wrote:
Czy ten wzór da się robić na okrągło?
26.03.2024 - 13:01DROPS Design answered:
Witaj Renato, oczywiście. Tak jest np. we wzorze 249-21. Wszystkie okrążenia będziesz przerabiała na prawej stronie robótki zgodnie ze schematem. W kolejnym okrążeniu po narzutach, narzuty będą przerabiane albo na prawo albo przekręcone na prawo (patrz legenda do schematu). Powodzenia!
26.03.2024 - 16:30
![]() Karen wrote:
Karen wrote:
Una pregunta: ¿Qué significa una lazada entre dos puntos? Agradezco la pronta respuesta
11.07.2023 - 02:03DROPS Design answered:
Hola Karen, para hacer una lazada o hebra entre 2 puntos, trabaja 1 punto, coger una hebra/ el hilo con la aguja derecha y trabaja el siguiente punto. Este puede formar un agujero o convertirse en un punto aumentado, dependiendo de cómo se trabaje la hebra en la siguiente vuelta.
17.07.2023 - 10:46
![]() Janne wrote:
Janne wrote:
Kevad koos sirelitega
19.01.2023 - 22:01
![]() Gabriele wrote:
Gabriele wrote:
Das Muster ist sehr schön.
17.01.2023 - 20:13
![]() Dubois Diane wrote:
Dubois Diane wrote:
Joli modèle printanier, motif et couleur superbes !
17.01.2023 - 20:09
![]() Ewelina wrote:
Ewelina wrote:
Lavender wave
17.01.2023 - 14:13
|
|||||||||||||||||||
Hope Bay Cardigan#hopebaycardigan |
|||||||||||||||||||
 |
 |
||||||||||||||||||
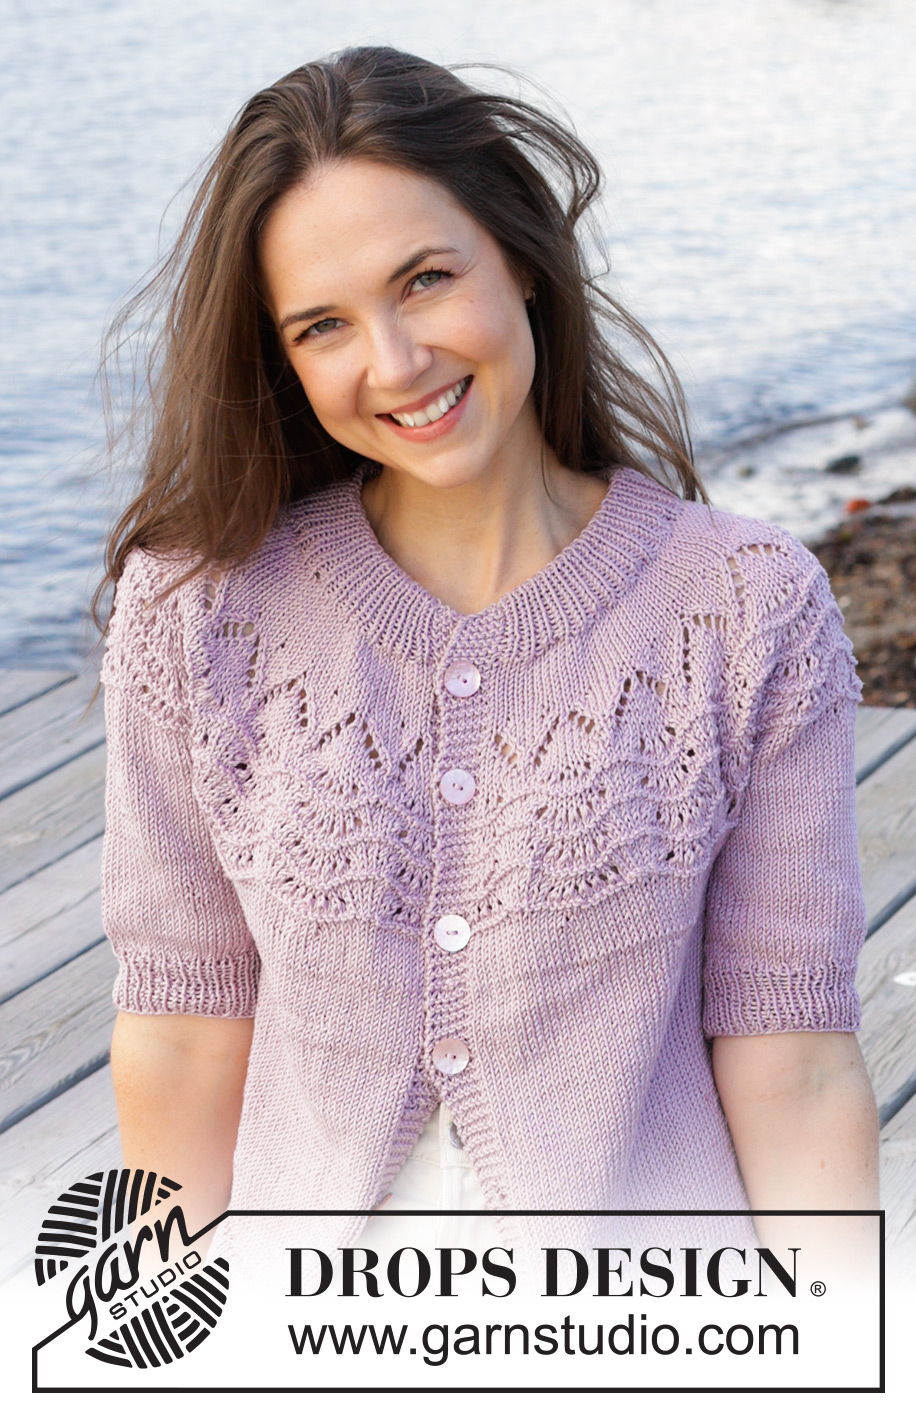
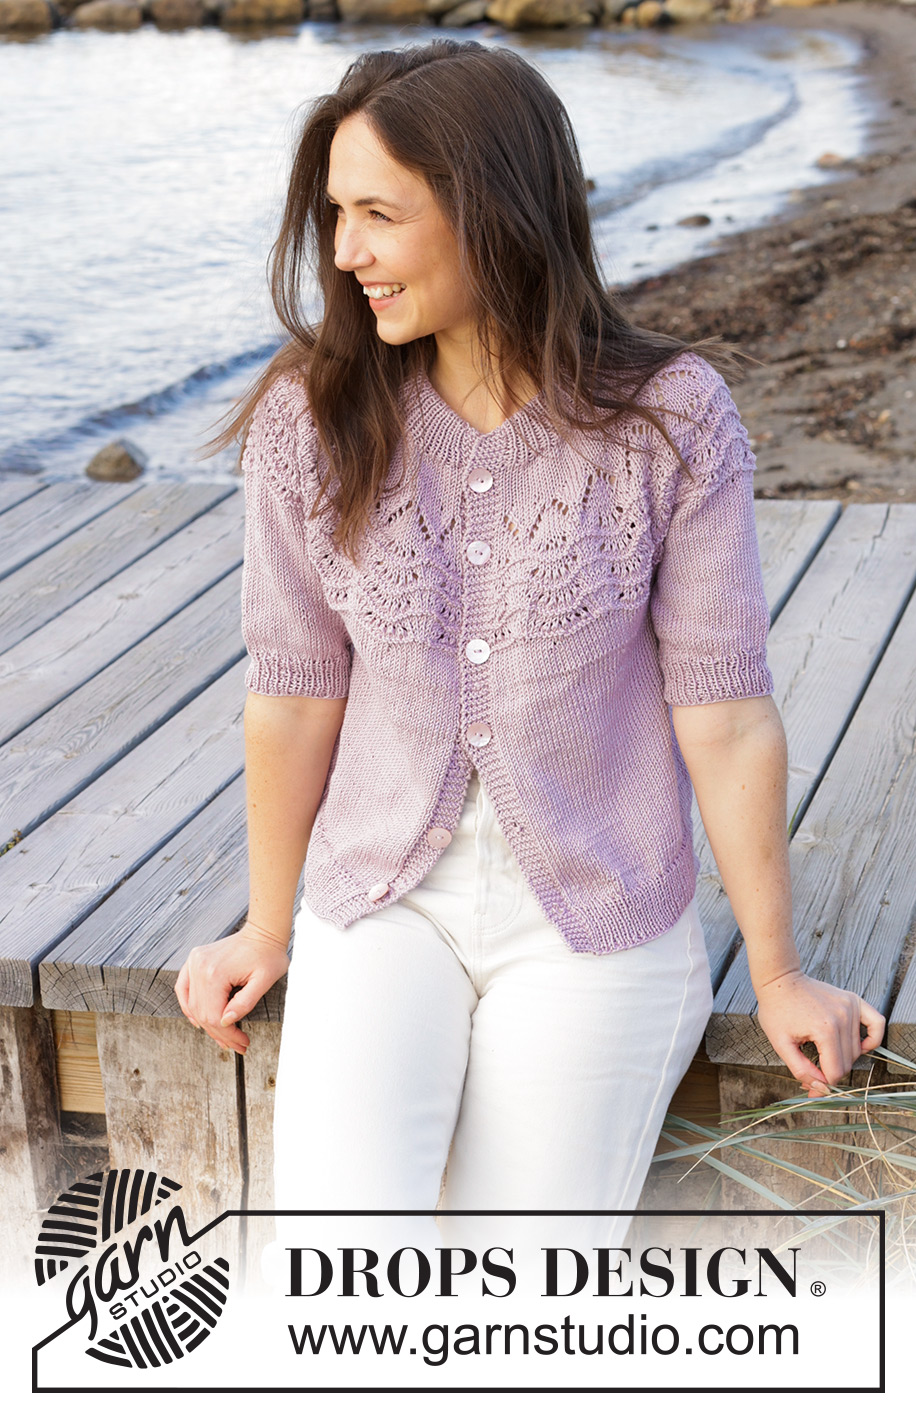
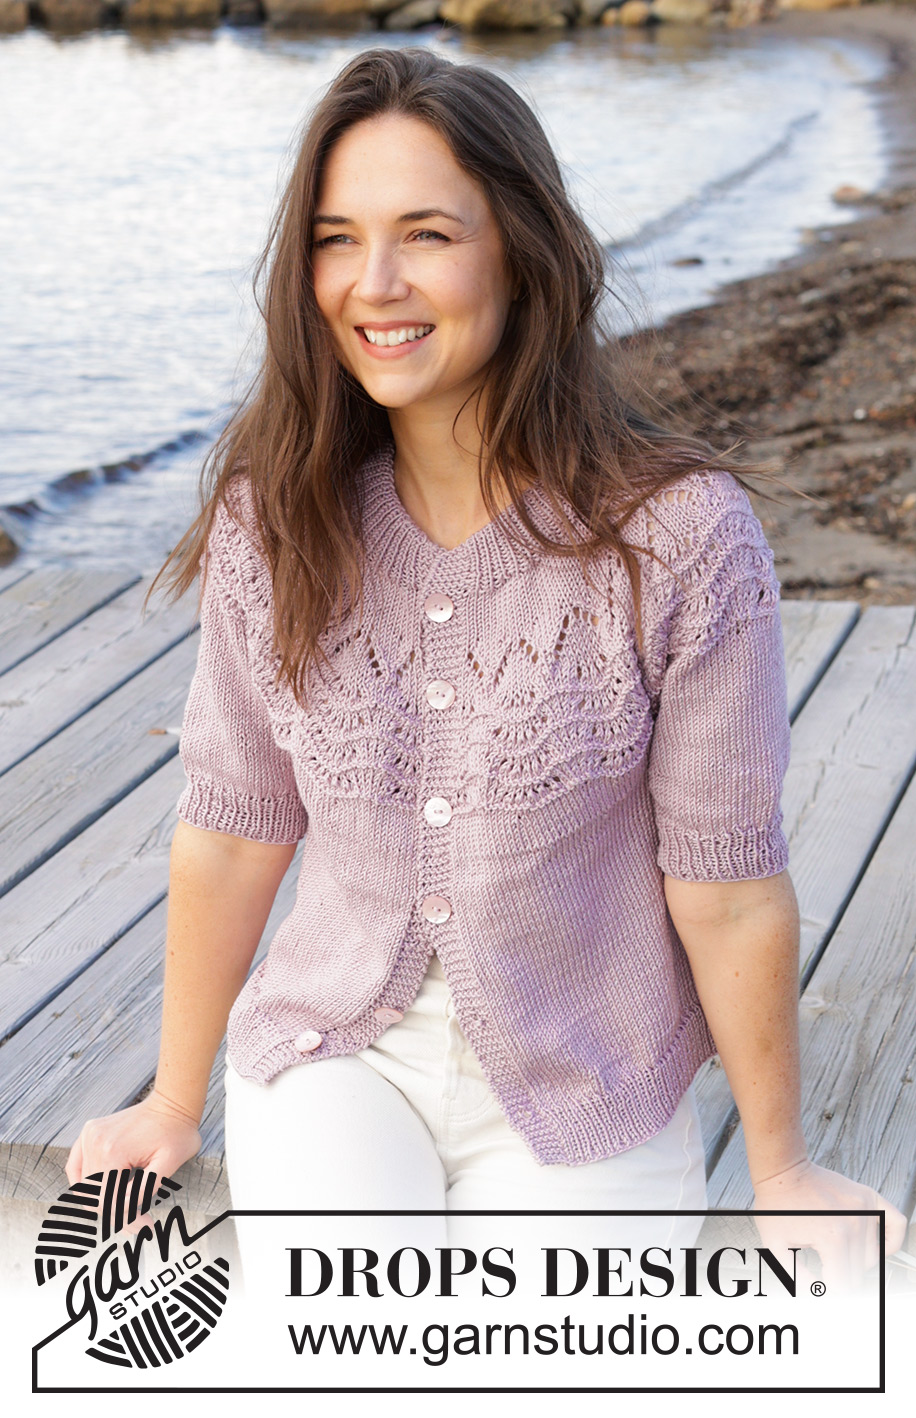
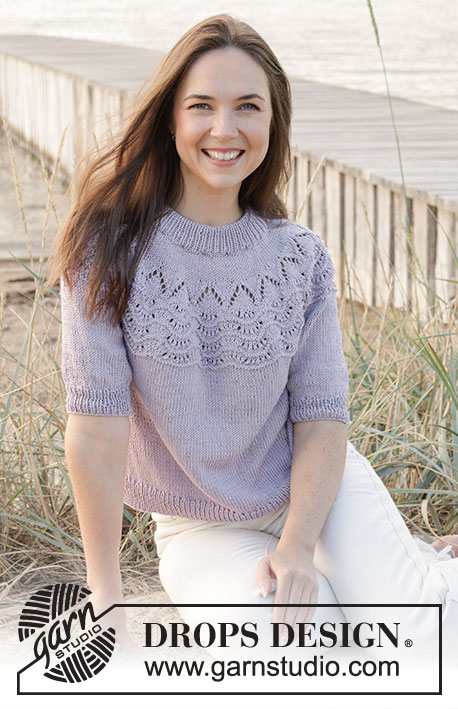
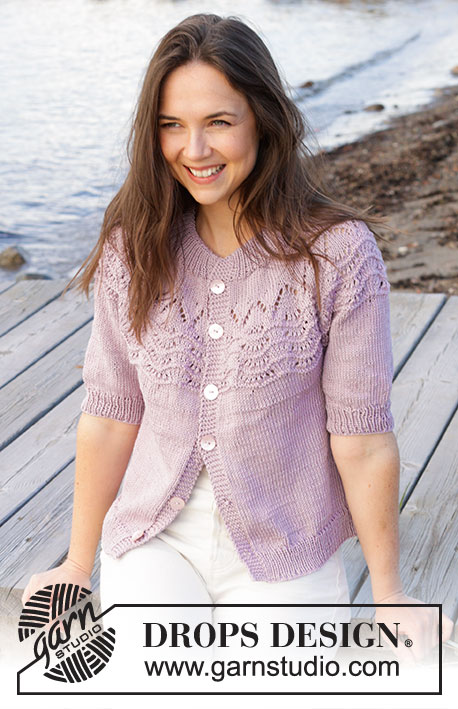
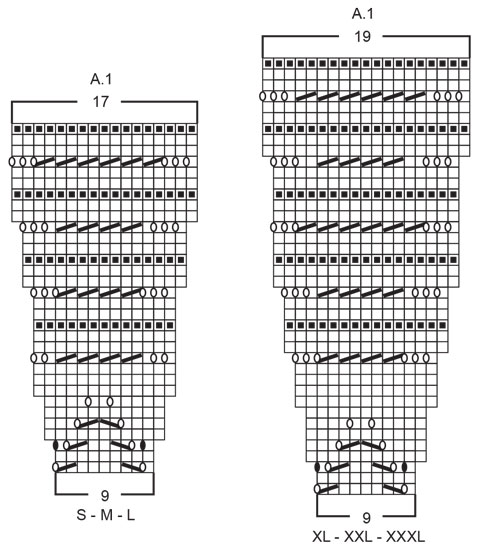
Knitted short-sleeved jacket in DROPS Muskat. The piece is worked top down with double neck and round yoke with wave pattern. Sizes S - XXXL.
DROPS 241-31 |
|||||||||||||||||||
|
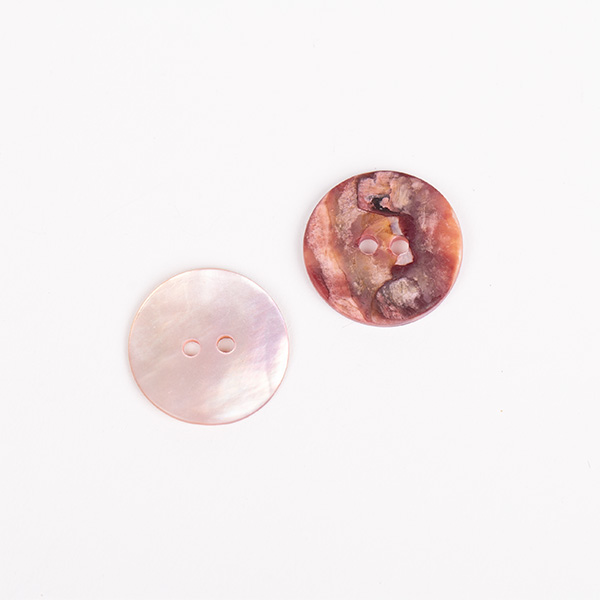
------------------------------------------------------- EXPLANATIONS FOR THE PATTERN: ------------------------------------------------------- RIDGE/GARTER STITCH (worked back and forth): Knit all rows. 1 ridge = knit 2 rows. PATTERN: See diagram A.1. Choose diagram for your size. The diagrams show all rows in the pattern from the right side. INCREASE TIP: Increase 1 stitch by making 1 yarn over, which is worked twisted on the next row to avoid a hole. ELEVATION: To make the back of the neck slightly higher when working a round yoke, you can work an elevation as described here. Skip this section if you do not want an elevation. Insert 1 marker in the middle stitch on the row. Start from the right side and knit 16-17-18-19-20-21 stitches past the marker-stitch, turn, tighten strand and purl 33-35-37-39-41-43 stitches back. Turn, tighten strand and knit 49-52-55-58-61-64 stitches, turn, tighten strand and purl 65-69-73-77-81-85 stitches back. Turn, tighten strand and knit 81-86-91-96-101-106 stitches, turn, tighten strand and purl 97-103-109-115-121-127 stitches. Turn, tighten the strand and knit to the end of the row, turn, and purl to the end of the row (work the front band stitches in garter stitch). Continue working as explained under YOKE. DECREASE TIP (for sleeves): Decrease 1 stitch on either side of the marker-thread as follows: Work until there are 3 stitches left before the marker-thread, knit 2 together, knit 2 (marker-thread sits between these 2 stitches), slip 1 stitch as if to knit, knit 1 and pass the slipped stitch over the knitted stitch. BUTTONHOLES: Work buttonholes on the right band (when the garment is worn). Work from the right side when there are 4 stitches left on the row as follows: Make 1 yarn over, knit 2 together and knit 2. On the next row (wrong side), knit the yarn over to leave a hole. The first buttonhole is worked on the first knitted row after the neck is finished. Then the other 5-5-5-6-6-6 buttonholes are worked with approx. 8½-9-9½-8-8½-9 cm between each one. ------------------------------------------------------- START THE PIECE HERE: ------------------------------------------------------- JACKET – SHORT OVERVIEW OF THE PIECE: The neck and yoke are worked back and forth with circular needle, from mid front and top down. An elevation is worked at the back of the neck if desired. The yoke is divided for body and sleeves and the body continued back and forth with circular needle. The sleeves are worked in the round with short circular needle/double pointed needles. DOUBLE NECK: Cast on 111-115-119-123-129-133 stitches with DROPS Muskat using circular needles sizes 3 and 4 mm held together. Remove the circular needle size 4 mm (this gives an elastic cast-on edge). Work the first row from the right side as follows: 1 stitch in GARTER STITCH – read description above, * knit 1, purl 1 *, work from *-* until there are 2 stitches left, knit 1 and 1 stitch in garter stitch. Continue this rib back and forth for 4 cm. Now cast on 6 stitches at the end of the next 2 rows for the bands = 123-127-131-135-141-145 stitches. Continue the rib, with 7 stitches in garter stitch on each side. When the neck measures 8 cm and the next row is from the right side, fold the neck double to the inside and work 1 more row of rib, working every 2nd stitch together with its corresponding stitch on the cast-on edge. You now have a double neck. YOKE: Change to circular needle size 4 mm. Work the next row from the wrong side as follows: 7 band stitches in garter stitch, purl until there are 7 stitches left increasing 32-32-34-34-36-38 stitches evenly over these stitches – read INCREASE TIP and 7 band stitches in garter stitch = 155-159-165-169-177-183 stitches. Insert 1 marker inside the first band – it is used for measuring the yoke. You can now work an ELEVATION at the back of the neck – read description above. If you do not want an elevation, continue as below. Work stocking stitch with 7 band stitches in garter stitch on each side – remember the BUTTONHOLES on the right band – read description above. When the yoke measures 3-4-5-5-5-6 cm from the marker, increase 22-27-30-35-36-39 stitches evenly spaced (do not increase over the bands) = 177-186-195-204-213-222 stitches. When the yoke measures 4-5-6-6-6-7 cm from the marker, work the next row from the right side as follows: 7 band stitches in garter stitch, work A.1,18-19-20-21-22-23 times, work the first stitch in A.1 so the pattern is symmetrical and 7 band stitches in garter stitch. Continue this pattern and increase as shown in the diagram. REMEMBER THE KNITTING TENSION! When A.1 is finished, the yoke measures approx. 15-16-17-19-19-20 cm from the marker (measured to where the wave pattern arches up). There are 321-338-355-414-433-452 stitches. Continue with stocking stitch and 7 band stitches in garter stitch on each side – AT THE SAME TIME, on the first row from the right side, increase 5-16-23-0-5-14 stitches evenly spaced (do not increase over the bands) = 326-354-378-414-438-466 stitches. When the yoke measures 18-19-21-22-24-26 cm from the marker, divide for the body and sleeves as follows: Work 54-59-62-67-72-78 stitches as before (front piece), place the next 62-66-72-80-82-84 stitches on a thread for the sleeve, cast on 6-6-8-8-10-12 stitches (in side under sleeve), work 94-104-110-120-130-142 stitches in stocking stitch (back piece), place the next 62-66-72-80-82-84 stitches on a thread for the sleeve, cast on 6-6-8-8-10-12 stitches (in side under sleeve), work the last 54-59-62-67-72-78 stitches as before (front piece). The body and sleeves are finished separately and the piece is measured from here! BODY: = 214-234-250-270-294-322 stitches. Work stocking stitch with 7 band stitches in garter stitch on each side for a further 25-26-26-27-27-27 cm. Knit 1 row from the right side and increase 21-21-23-25-29-29 stitches evenly spaced (do not increase over the bands) = 235-255-273-295-323-351 stitches. Change to circular needle size 3 mm. Work as follows from the wrong side: 7 band stitches in garter stitch, * purl 1, knit 1 *, work from *-* until there are 8 stitches left, purl 1 and 7 band stitches in garter stitch. Continue this rib for 4 cm. Cast off a little loosely. The jacket measures approx. 52-54-56-58-60-62 cm from the shoulder. SLEEVES: Place the 62-66-72-80-82-84 stitches from the thread on the one side of the piece on short circular needle/double pointed needles size 4 mm and knit up 1 stitch in each of the new stitches cast on under the sleeve = 68-72-80-88-92-96 stitches. Insert a marker in the middle of the new stitches under the sleeve. Start at the marker-thread and work stocking stitch in the round. When the sleeve measures 2-2-2-2-1-1 cm from the division, decrease 2 stitches under the sleeve – read DECREASE TIP. Decrease like this every 4-3½-2-1-1-1 cm a total of 4-4-6-8-8-8 times = 60-64-68-72-76-80 stitches. Continue working until the sleeve measures 15-14-13-12-11-9 cm. Knit 1 round and increase 2 stitches evenly spaced = 62-66-70-74-78-82 stitches. Change to double pointed needles size 3 mm. Work rib (knit 1, purl 1) for 4 cm. Cast off a little loosely. The sleeve measures approx. 19-18-17-16-15-13 cm. Work the other sleeve in the same way. ASSEMBLY: Sew the buttons onto the left band. |
|||||||||||||||||||
Diagram explanations |
|||||||||||||||||||
|
|||||||||||||||||||
 |
|||||||||||||||||||
 |
|||||||||||||||||||
Have you finished this pattern?Tag your pictures with #dropspattern #hopebaycardigan or submit them to the #dropsfan gallery. Do you need help with this pattern?You'll find 34 tutorial videos, a Comments/Questions area and more by visiting the pattern on garnstudio.com. © 1982-2026 DROPS Design A/S. We reserve all rights. This document, including all its sub-sections, has copyrights. Read more about what you can do with our patterns at the bottom of each pattern on our site. |
|||||||||||||||||||


With over 40 years in knitting and crochet design, DROPS Design offers one of the most extensive collections of free patterns on the internet - translated to 17 languages. As of today we count 324 catalogues and 12290 patterns translated into English (UK/cm). 12290
We work hard to bring you the best knitting and crochet have to offer, inspiration and advice as well as great quality yarns at incredible prices! Would you like to use our patterns for other than personal use? You can read what you are allowed to do in the Copyright text at the bottom of all our patterns. Happy crafting!
Post a comment to pattern DROPS 241-31
We would love to hear what you have to say about this pattern!
If you want to leave a question, please make sure you select the correct category in the form below, to speed up the answering process. Required fields are marked *.