
Popular categories
Looking for a yarn?


Comments / Questions (105)
![]() Jessica wrote:
Jessica wrote:
„In dieser Weise 18-15-14-16 x in der Höhe am Rumpfteil zunehmen (9-7-7-8 x an den Ärmeln). Es wurde nun insgesamt 24-27-28-31 x am Rumpfteil und 15-19-21-23 x an den Ärmeln zugenommen. Nach der letzten Zunahme sind 248-280-296-320 Maschen auf der Nadel. Wie unter ALLE GRÖSSEN beschrieben weiterstricken. „ Ist es richtig, dass bei Größe S mehr zugenommen wird, als bei den anderen Größen? Wie kann das sein?
26.01.2024 - 19:15DROPS Design answered:
Liebe Jessica, zuerst haben Sie in S nur 2 Mal in jeder 2. Runde zugenommen (mehr in die anderen Grössen), dann nehmen Sie insgesamt 18 Mal beim Rumpfteil in jeder 2. Runde/9 Mal bei den Ärmeln in jeder 4. Runde, so insgesamt 24 bzw 15 Mal, so weniger als in den anderen Grössen. Viel Spaß beim stricken!
29.01.2024 - 11:28
![]() Myriam Bakens wrote:
Myriam Bakens wrote:
Ik ben aangekomen bij de halslijn en moet nu met naalden nr 5 beginnen. Maar wanneer moet ik de langere rondbreinaald/draad gaan gebruiken? Ik zie daarvoor geen melding. Alvast hartelijk dank voor uw antwoord.
18.01.2024 - 12:28DROPS Design answered:
Dag Myriam,
Je begint met de korte rondbreinaald en als je te veel steken op de naald krijgt waardoor het niet meer past ga je over op de lange rondbreinaald. Dit merk je dus vanzelf.
18.01.2024 - 19:41
![]() Patricia Aumercier wrote:
Patricia Aumercier wrote:
Je n'arrive pas à faire l'encolure, je suis surprise d'augmenter des mailles à chaque marqueur à l'endroit ET à l'envers
03.12.2023 - 16:59DROPS Design answered:
Bonjour Mme Aumercier, pour les rangs raccourcis de l'encolure, on va augmenter de chaque côté de chacune des 4 mailles avec 1 marqueur, aussi bien sur l'endroit que sur l'envers comme expliqué sous RAGLAN au début des explications; autrement dit, tricotez les jetés des augmentations précédentes comme indiqué avant/après le marqueur et augmentez ensuite avant/après le marqueur; et ce sur les 8 rangs de l'encolure. Bon tricot!
04.12.2023 - 08:24
![]() Helle wrote:
Helle wrote:
Hej, er det muligt at strikke denne trøje nedefra og op - og bruge samme opskrift? Bare strikke i modsat rækkefølge? Jeg synes, det virker svært at strikke fra halsen og nedefter. På forhånd tak
26.11.2023 - 16:33DROPS Design answered:
Hei Helle. Det kan du fint gjøre :) mvh DROPS Design
27.11.2023 - 09:53
![]() Konstanze wrote:
Konstanze wrote:
Vielen Dank für Eure schnelle Antwort. Jetzt bin ich bei den verkürzten Reihen am Halsausschnitt. Ich stricke den Pullover in Größe L. Ihr schreibt, dass sowohl in den Hinreihen als auch in den Rückreihen der verkürzten Reihen jeweils 8 Maschen zugenommen werden = 32 Maschen. Im Video werden aber in den Rückreihen nur die Umschläge abgeschickt, das heißt es wird nicht zugenommen. Nach den verkürzten Reihen komme ich auf 116 statt auf 132 Maschen. Wie nimmt man in der Rückreihe zu?
16.11.2023 - 22:33DROPS Design answered:
Liebe Konstanze, das Video zeigt die Technik aber je nach dem Modell wird es entweder in jeder Hinreihe (wie im Video) oder in jeder Reihe (wie hier) zugenommen, so hier soll man wirklich bei den Hin- sowie bei den Rückreihen zunehmen. Viel Spaß beim stricken!
17.11.2023 - 08:29
![]() Konstanze wrote:
Konstanze wrote:
Hallo, die Antwort auf Bettina Schrecks Frage verstehe ich leider auch nicht: (10+1)+1+(21)+1+(21+2)+1+(21)+1+(11+1)=92 In der Anleitung steht, dass am Hals 4 Maschen zugenommen werden müssen. Eigentlich sind es 8 Maschen. Was bedeuten die Summen in Klammern genau?
13.11.2023 - 16:12DROPS Design answered:
Liebe Konstanze, in die 1. Größe haben Sie (10 M für 1/2 Rückenteil + 1 Zunahme) + 1 Masche mit einer Markierung + 21 Maschen für den 1. Ärmel + 1 Masche mit einer Markierung + (21 Maschen für das Vorderteil + 2 Zunahmen) + 1 Masche mit einer Markierung + 21 Maschen für den 2. Ärmel + 1 Masche mit einer Markierung + (11 Maschen für das 2. Rückenteil + 1 Zunahme) so haben Sie: 10+1+1+21+1+21+2+1+21+1+11+1=92 Maschen, so nur 4 Zunahmen (1 bei jeder Hälfte vom Rückenteil + 2 beim Vorderteil). Viel Spaß beim stricken!
14.11.2023 - 10:07
![]() Helena wrote:
Helena wrote:
Hej, Jag förstår inte avsnittet när man ska börja öka mindre för oket. Jag stickar storlek L och har 212 maskor. Sedan ska det ökas varannan gång endast på fram - och bakstycket och var fjärde gång för ärm. Hur vet jag var fram- och bakstycke resp ärm är någonstans bland mina markörer? Ökar jag bara en gång vid varje markör eller före och efter två av de fyra markörerna?\\r\\n\\r\\nTack på förhand\\r\\nHelena
12.11.2023 - 16:34DROPS Design answered:
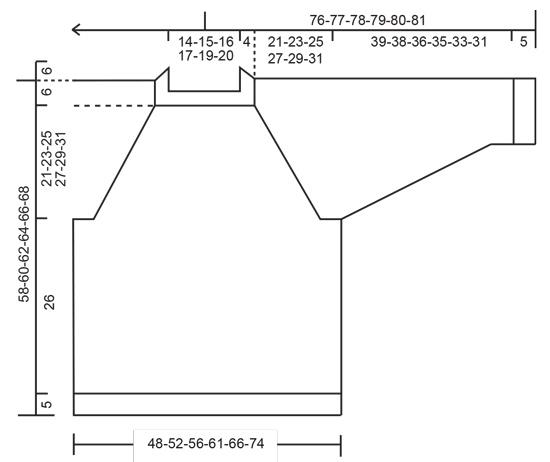
Hej Helena, jo maskorna som är i varje sida i arbetet innanför markörerna är till ärmen. När du bara ökar på fram och bakstycke, ökar du i de maskor på den sida av markören som hör till framstycket och igen på bakstycket. Om du tittar på måttskissen ser du framstycket och de 2 raglan är ritat in i varje sida, maskorna mellan strecken är till framstycket :)
15.11.2023 - 07:29
![]() Zahra wrote:
Zahra wrote:
Hei, Jeg lurer på hvordan er det man finner ut av hvilken størrelsen på plagget man skal strikke, small, medium, large system gir ikke noe overdel verdi som jeg kan gå etter. Har dere en tabell hvor dere har predefinert hva small medium og large er ?
06.11.2023 - 12:42DROPS Design answered:
Hej Zahra, ja du finder målene på de forskellige størrelser i måleskitsen nederst i opskriften. Følger du strikkefastheden som står i opskriften får du også de rigtige mål :)
09.11.2023 - 15:10
![]() Bettina Schreck wrote:
Bettina Schreck wrote:
Die Angaben für die Zunahme beim Hals stimmen nicht, wenn man die Maschen so stichtkommt malauf exaktdiesselbe MaschenanzahI (88bei Größe S)10+1+21+21.+2+21+1+=88 statt 92? Den Hinweismit dem Markierenden sie hier schon gegeben haben verstehe ich nicht.
01.11.2023 - 18:56DROPS Design answered:
Liebe Frau Schreck, bitte beachten Sie, daß jede Markierung wird in eine Masche und nicht zwischen Maschen eingesetzt, so haben Sie: (10+1)+1+(21)+1+(21+2)+1+(21)+1+(11+1)=92 Maschen. Viel Spaß beim stricken!
03.11.2023 - 07:05
![]() Isabelle Paternotte wrote:
Isabelle Paternotte wrote:
Bonjour, Je mis sous la description de ce modèle ceci Correction en ligne le: 17.02.2023 Correction de l'emplacement des marqueurs pour le raglan. Dois je en conclure que ces corrections sont déjà incluses dans la description de la marche à suivre? Je ne vois pas de traces de ces corrections. Bien à vous
29.10.2023 - 17:25DROPS Design answered:
Bonjour Mme Paternotte, tout à fait, les corrections ne s'appliquent que lorsque vous avez imprimé la date avant la date de la correction, sinon, les explications sont déjà corrigées. Bon tricot!
30.10.2023 - 16:43
|
|
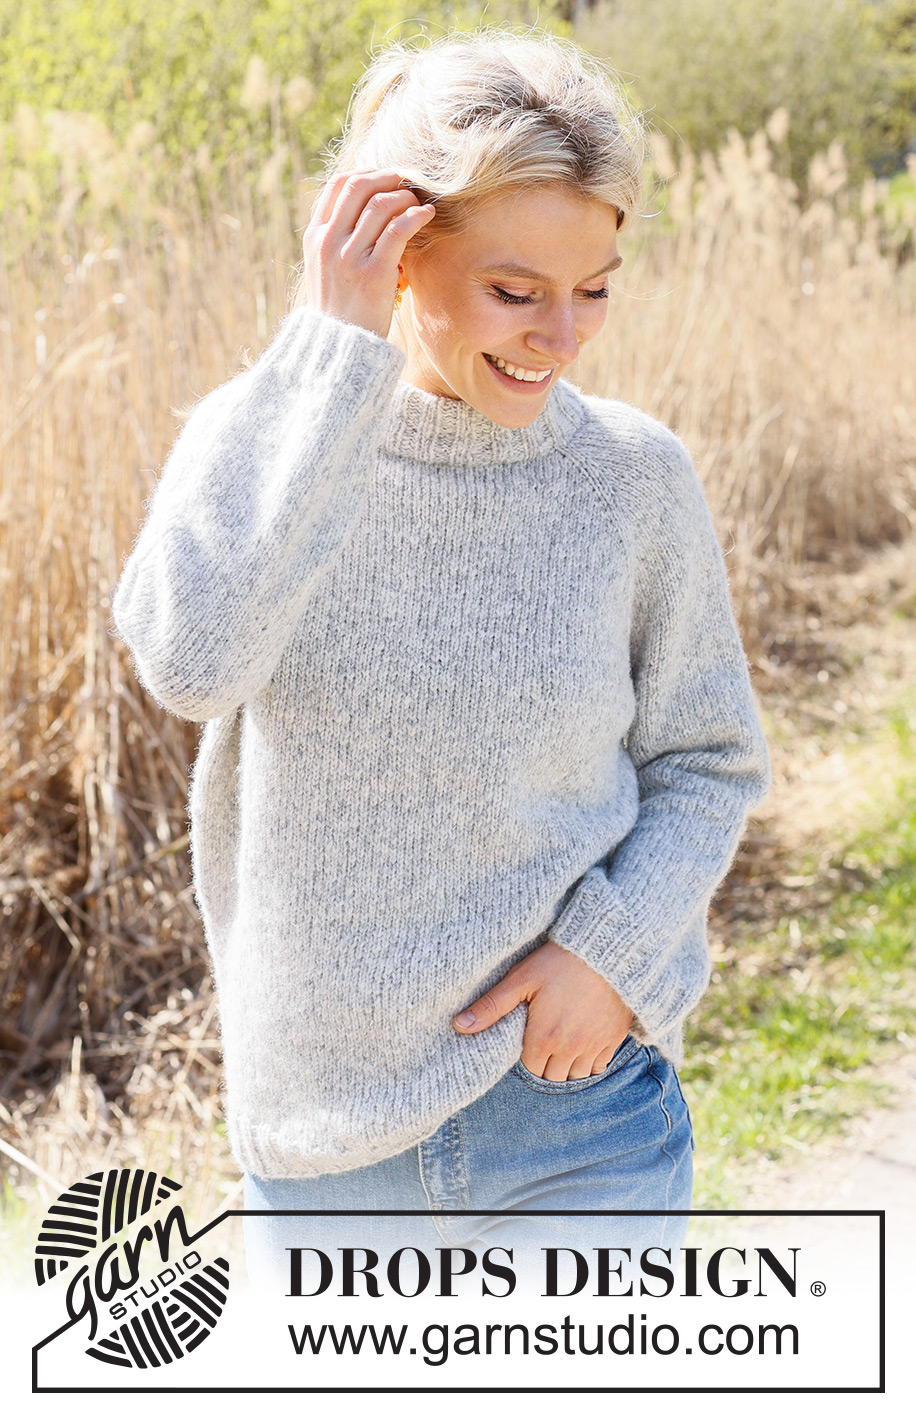
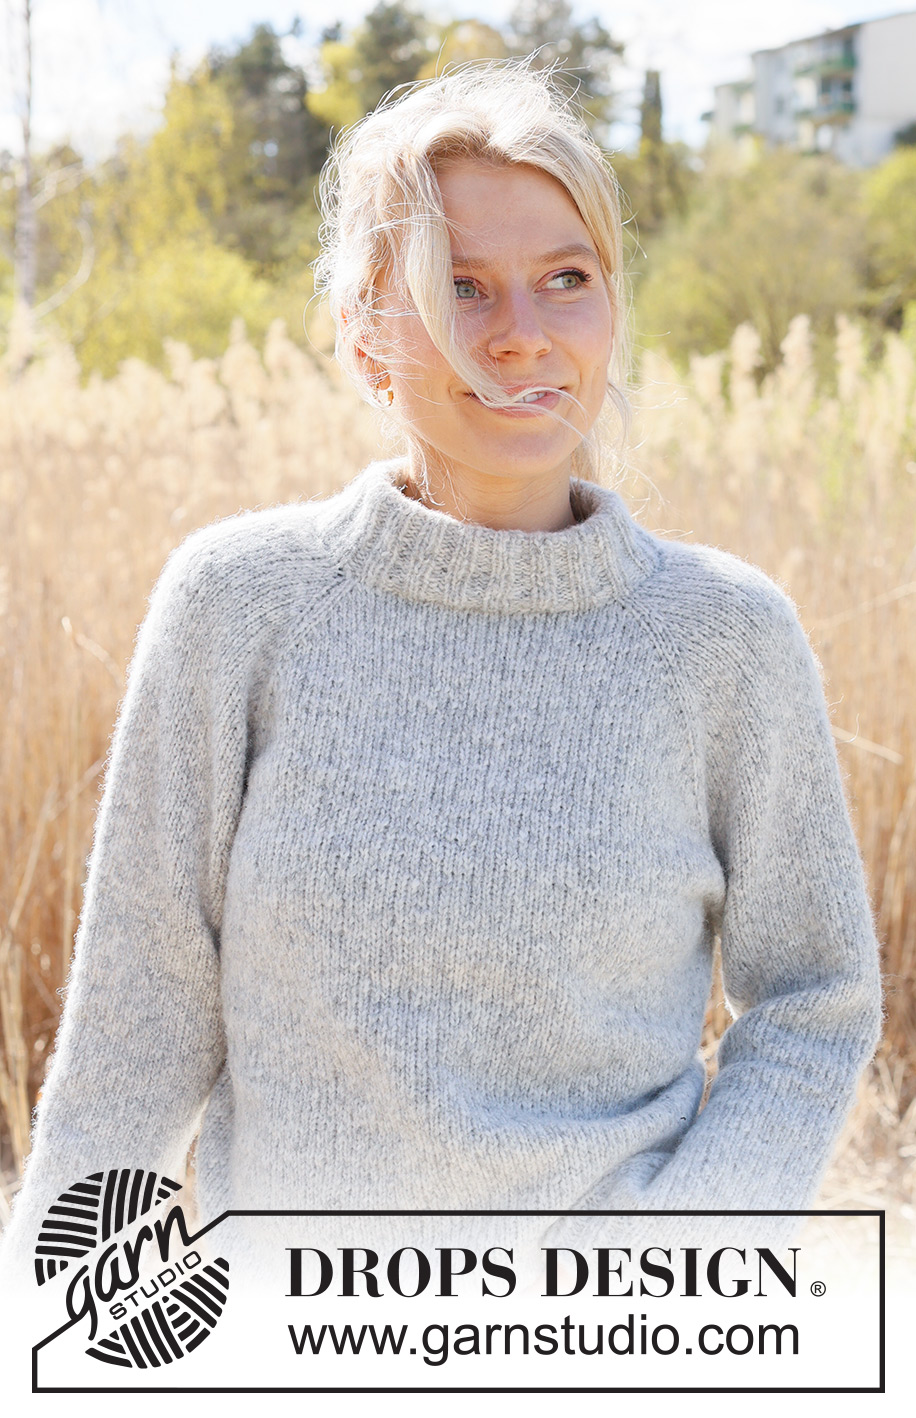
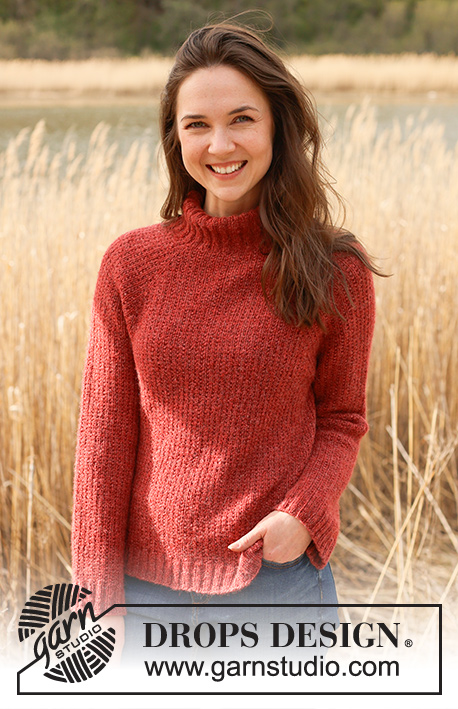
Early Moorning Mist#earlymoorningmistsweater |
|
 |
 |
Knitted jumper in DROPS Air. The piece is worked top down with stocking stitch, double neck and raglan. Sizes S - XXXL.
DROPS 236-16 |
|
|
------------------------------------------------------- EXPLANATIONS FOR THE PATTERN: ------------------------------------------------------- RAGLAN: All increases before/after 1 stitch in stocking stitch (the stitch with the marker). Increase for the body before markers 1 and 3 and after markers 2 and 4 when working from the right side/after markers 1 and 3 and before markers 2 and 4 when working from the wrong side. Increase for the sleeves after markers 1 and 3 and before markers 2 and 4 when working from right side / before marker 1 and 3 and after marker 2 and 4 when working from wrong side. Increase 1 stitch by making 1 yarn over. The yarn overs are worked as follows from the wrong side: BEFORE MARKER: Purl the back loop. No hole. AFTER MARKER: Slip the yarn over off the left needle and place it back twisted (insert the left needle from the back when replacing it). Purl the front loop. No hole. The yarn overs are worked as follows from the right side: BEFORE MARKER: Slip the yarn over off the left needle and place it back twisted (insert the left needle from the back when replacing it). Knit the front loop; the stitch twists to the right. No hole. AFTER MARKER: Knit the back loop (the stitch twists to the left). No hole. DECREASE TIP (for sleeves): Start 3 stitches before the marker, knit 2 together, knit 2 (marker sits between these 2 stitches), slip 1 stitch as if to knit, knit 1 and pass the slipped stitch over the knitted stitch. ------------------------------------------------------- START THE PIECE HERE: ------------------------------------------------------- JUMPER – SHORT OVERVIEW OF THE PIECE: The neck and yoke are worked in the round with circular needle, from mid back and top down. The yoke is divided for body and sleeves and the body is continued in the round with circular needle. The sleeves are worked with short circular needle/double pointed needles. DOUBLE NECK: Cast on 88-92-96-100-104-108 stitches with short circular needle size 5 mm and DROPS Air. Change to circular needle size 4 mm. Work rib in the round (knit 2, purl 2) for 13 cm. On the next round insert 4 markers at the same time as you increase 4 stitches on the round as follows – the markers are used when increasing for raglan: Knit 10-12-12-14-14-16 and increase 1 stitch (half back piece), insert marker-1 in the next stitch, knit 21 (sleeve), insert marker-2 in the next stitch, knit 21-23-25-27-29-31 and increase 2 stitches evenly spaced (front piece), insert marker-3 in the next stitch, knit 21 (sleeve), insert marker-4 in the next stitch, knit the last 11-11-13-13-15-15 stitches and increase 1 stitch (half back piece) = 92-96-100-104-108-112 stitches. Cut the strand. NECKLINE: Change to circular needle size 5 mm and work the neckline with short rows AT THE SAME TIME as increasing to raglan as follows: Start from the right side, 2 stitches before marker-3 (left front of neck when the garment is worn). Work stocking stitch, increase to RAGLAN – read description above, on each side of the 4 marker-stitches and until you have worked 2 stitches past marker-2 (right front of neck – 8 stitches increased for raglan). Turn, tighten the strand, work back from the wrong side, increase for raglan to 2 stitches past the beginning of the short rows by marker-3 (8 stitches increased for raglan). Turn, tighten the strand, work back from the right side, increase for raglan to 2 stitches past where you turned last time by marker-2 (8 stitches increased for raglan). Turn, tighten the strand, work back from the wrong side, increase for raglan to 2 stitches past marker-3 (8 stitches increased for raglan). Cut the strand. YOKE: = 124-128-132-136-140-144 stitches. Now work in the round as follows: SIZES S, M, L and XL: Start mid-back, work stocking stitch and increase for raglan on the body and sleeves (on each side of all 4 marker-stitches) every 2nd round 2-8-10-11 times = 140-192-212-224 stitches. Continue to increase but now every 2nd increase is only on the body (4 stitches increased); you are now increasing every 2nd round on the body and every 4th round on the sleeves. Increase like this 18-15-14-16 times on the body (9-7-7-8 times on the sleeves). A total of 24-27-28-31 times on the body and 15-19-21-23 times on the sleeves = 248-280-296-320 stitches. Go to ALL SIZES. SIZES XXL and XXXL: Start mid-back, work stocking stitch and increase for raglan every round on the body 2-6 times and every 2nd round on the sleeves 1-3 times = 152-180 stitches. Then increase on both the body and sleeves every 2nd round (on each side of all 4 marker-stitches) 10-7 times = 232-236 stitches. Continue to increase, but now every 2nd increase is only on the body (4 stitches increased); you are now increasing every 2nd round on the body and every 4th round on the sleeves. Increase like this 18-22 times on the body (9-11 times on the sleeves). A total of 34-39 times on the body and 24-25 times on the sleeves = 340-368 stitches. Go to ALL SIZES. ALL SIZES. = 248-280-296-320-340-368 stitches. Continue working without further increases until the yoke measures 21-23-25-27-29-31 cm measured mid-front after the rib on the neck. Divide for the body and sleeves as follows: Work 37-42-43-48-51-58 stitches (half back piece), place the next 49-57-61-65-67-69 stitches on a thread for the sleeve, cast on 6-6-8-8-10-10 stitches (in side under sleeve), work 75-83-87-95-103-115 stitches (front piece), place the next 49-57-61-65-67-69 stitches on a thread for the sleeve, cast on 6-6-8-8-10-10 stitches (in side under sleeve), work 38-41-44-47-52-57 stitches (half back piece). The body and sleeves are finished separately. The piece is now measured from here! BODY: = 162-178-190-206-226-250 stitches. Continue with stocking stitch in the round for a further 26 cm. Knit 1 round and increase 18-22-22-26-26-34 stitches evenly spaced = 180-200-212-232-252-284 stitches. Change to circular needle size 4 mm. Work rib (knit 2, purl 2) for 5 cm. Cast off a little loosely with knit over knit and purl over purl. The jumper measures approx. 58-60-62-64-66-68 cm from the shoulder down. SLEEVES: Place the 49-57-61-65-67-69 stitches from the thread on the one side of the piece on short circular needle/double pointed needles size 5 mm and knit up 1 stitch in each of the new stitches cast on under the sleeve = 55-63-69-73-77-79 stitches. Insert a marker in the middle of the new stitches under the sleeve; allow the marker to follow your work onwards, it is used when decreasing under the sleeve. Continue with stocking stitch in the round for 4 cm. Now decrease 2 stitches mid-under the sleeve – read DECREASE TIP. Decrease like this every 7-4-3-2½-2-2 cm a total of 5-8-10-11-12-12 times = 45-47-49-51-53-55 stitches. Continue working until the sleeve measures 39-38-36-35-33-31 cm from the division (or to desired length. There is approx. 5 cm left). Knit 1 round and increase 7-5-7-5-7-5 stitches evenly spaced = 52-52-56-56-60-60 stitches. Change to double pointed needles size 4 mm and work rib (knit 2, purl 2) for 5 cm. Loosely cast off with knit over knit and purl over purl. The sleeve measures approx. 44-43-41-40-38-36 cm from the division. Work the other sleeve in the same way. . ASSEMBLY: Fold the neck double to the inside and fasten with a stitch in each raglan-line. |
|
 |
|
Have you finished this pattern?Tag your pictures with #dropspattern #earlymoorningmistsweater or submit them to the #dropsfan gallery. Do you need help with this pattern?You'll find 32 tutorial videos, a Comments/Questions area and more by visiting the pattern on garnstudio.com. © 1982-2026 DROPS Design A/S. We reserve all rights. This document, including all its sub-sections, has copyrights. Read more about what you can do with our patterns at the bottom of each pattern on our site. |
|


With over 40 years in knitting and crochet design, DROPS Design offers one of the most extensive collections of free patterns on the internet - translated to 17 languages. As of today we count 324 catalogues and 12290 patterns translated into English (UK/cm). 12290
We work hard to bring you the best knitting and crochet have to offer, inspiration and advice as well as great quality yarns at incredible prices! Would you like to use our patterns for other than personal use? You can read what you are allowed to do in the Copyright text at the bottom of all our patterns. Happy crafting!
Post a comment to pattern DROPS 236-16
We would love to hear what you have to say about this pattern!
If you want to leave a question, please make sure you select the correct category in the form below, to speed up the answering process. Required fields are marked *.