
Popular categories
Looking for a yarn?


Comments / Questions (28)
![]() Zofia wrote:
Zofia wrote:
Jestem na etapie kończenia rękawa. Po dodaniu 12 razy co 3,5 cm mam 64 oczka i niestety dalej do góry zrobiłam do wys. 54 cm prosto wg opisu. Tam chyba jest błąd w wysokosci. Nie rozumiem jak dojść do końca rękawa. Jak zamykać oczka żeby uzyskać 22 oczka i ta wysokośc??? Cały rękae ma mieć 56 cm?? Proszę o pomoc.
15.04.2026 - 22:57DROPS Design answered:
Witaj Zofio, po dodaniu oczek na formowanie rękawa (ostatnie dodawanie oczek powinno się skończyć ok. na 50-51 cm), dalej przerabiasz prosto, aż długość rękawa ma 54 cm (pamiętaj żeby się tego tak sztywno nie trzymać, możesz dopasować długość rękawa do swoich potrzeb). Teraz zamykasz 6 oczek na środku pod rękawem i dalej przerabiasz w tę i z powrotem zamykając oczka z każdej strony robótki-formowanie główki rękawa. Zamykasz 9 oczek na początku każdego rzędu, łącznie 4 razy: przerobione 4 rzędy (ok. 2 cm na wysokość), zamkniętych 9x4=36 oczek. 58-36=22 oczka. Pozdrawiamy!
16.04.2026 - 09:42
![]() Zofia wrote:
Zofia wrote:
Dot. Zamykania oczek rękawa np. Rozm M - na wys . 54 cm zamykamy przy markerze 6 oczek/64-6=58/. Następnie w każdym kolejnym rzędzie zamykamy 9 razy po 2 oczka z każdej syrony/ 9x2x2/ z czego pozostaje : 54-36 = 22 oczka. W opisie jest - zamykamy 2x9 oczk???
14.04.2026 - 21:48DROPS Design answered:
Witaj Zofio, niestety nie wiem, w którym miejscu się znajdujesz? W rozmiarze M zamykamy po 6 oczek z każdej strony na podkroje rękawów na wys. 44 cm, nie 54? Proszę napisz dokładnie gdzie się teraz znajdujesz. Pozdrawiamy!
15.04.2026 - 11:38
![]() Mechtild wrote:
Mechtild wrote:
Hallo! Könnten Sie mir bitte mitteilen, wieviel ich für die Größe L an Wollmenge gebrauche , wenn ich mit Drops belle und Drops Safran arbeiten möchte ?
03.03.2026 - 09:53DROPS Design answered:
Liebe Mechtild, benutzen Sie den Garnumrechner für beide Garne, beachten Sie aber, daß Sie die richtige Maschenprobe bekommen und daß Ihnen die Textur gefällt. Hier zeigen wir so eine Garnkombination, mit einer anderen Maschenprobe. Viel Spaß beim Stricken!
04.03.2026 - 07:10
![]() Mechtild wrote:
Mechtild wrote:
Hallo , ich möchte diesen Tweed mit Baumwolle stricken. Welche Baumwollfaden -Stärke käme dafür in Frage ?
26.02.2026 - 18:06DROPS Design answered:
Liebe Mechthild, Sie müssen auf eine Maschenprobe von 16 Maschen in der Breite kommen. Dafür können Sie entweder einen Faden DROPS Paris nehmen oder Sie nehmen 2 Fäden DROPS Safran oder DROPS Loves You 9. Auch DROPS Belle oder DROPS Muskat jeweils zusammen z.B. mit dem dünneren Garn DROPS Safran wäre möglich. Viel Spaß beim Stöbern!
26.02.2026 - 21:41
![]() Elena wrote:
Elena wrote:
A me le maniche sembrano strette, sto facendo la taglia L e il polsino ma anche il braccio sembrano davvero slim.
21.02.2026 - 14:18DROPS Design answered:
Buonasera Elena, può provare a lavorare le maniche con un ferro più grande, probabilmente la sua tensione con le piccole circonferenze cambia. Buon lavoro!
21.02.2026 - 16:38
![]() Iwona wrote:
Iwona wrote:
Na początku wzoru wymienione są trzy rozmiary drutów : nr 4; 4,5; oraz 5. W opisie napisano że ściągacz jest robiony na drutach nr 4. Nie wiem na jakich drutach jest robiony tułów. Obszycia na 4,5 natomiast nigdzie nie mogę doszukać się drutów nr 5. Czy tył i przody robi się właśnie na drutach nr 5?
28.01.2026 - 15:57DROPS Design answered:
Witaj Iwono, ściągacz wykonujesz na drutach nr 4, tułów na drutach nr 5. Druty nr 4,5 będą potrzebne na obszycia przodów. Pozdrawiamy!
29.01.2026 - 07:47
![]() Wil wrote:
Wil wrote:
Goedeavond Dropsteam, ik vind de bies aanbreien voor dit vest erg ingewikkeld. Ik heb het vest met nummer 246-7 van Drops design ook gebreid. Mijn vraag is, kan ik bij dit patroonvest de aangebreide biezen gebruiken van 246-7 ? De vesten zijn bijna hetzelfde gebreid, alleen de biezen zijn anders.
11.11.2025 - 22:04DROPS Design answered:
Dag Wil,
Ja, je zou er ook een bies in boordsteekpatroon aan kunnen breien, maar in een van de video's die bij het patroon staat, wordt ook uitgelegd hoe je de bies maakt.
12.11.2025 - 10:36
![]() Sylke wrote:
Sylke wrote:
Hallo ! Bis wohin wird die doppelte Blende rechts und links gestrickt?
05.09.2025 - 12:33DROPS Design answered:
Liebe Sylke, Sie fassen die Maschen von unten nach ganz oben aus dem Vorderteil auf, d.h. bis zur Schulternaht. Beim anderen Vorderteil beginnen Sie oben an der Schulternaht. Am hinteren Halsrand wird die Blende später angenäht.
25.10.2025 - 17:02
![]() Karin wrote:
Karin wrote:
Ich benötige Hilfe beim Ärmel stricken. Können Sie mir bitte mitteilen bei welcher Masche ich den Markierungsfaden anbringen muss - also wieviel Maschen davor und wieviel danach. Ich stricke Größe L = 42 Maschen nach der Abnahme nach dem Bündchen. Danke.
01.12.2024 - 21:41DROPS Design answered:
Liebe Karin, der Markierungsfaden setzen Sie am Anfang der Runde ein, dh nach der letzten Maschen der Runde und vor der ersten Maschen der Runde. Viel Spaß beim Stricken!
02.12.2024 - 10:44
![]() Gabi Bär wrote:
Gabi Bär wrote:
Die doppelte Blende wird glatt rechts gestrickt oder rechts/links im Wechsel?
24.11.2024 - 20:03DROPS Design answered:
Liebe Frau Bär, die doppelte Blende wird mit Knopflöcher wie in diesem Video und ohne Knopflöcher wie in diesem Video gestrickt. Viel Spaß beim Stricken!
25.11.2024 - 09:34
|
|||||||||||||
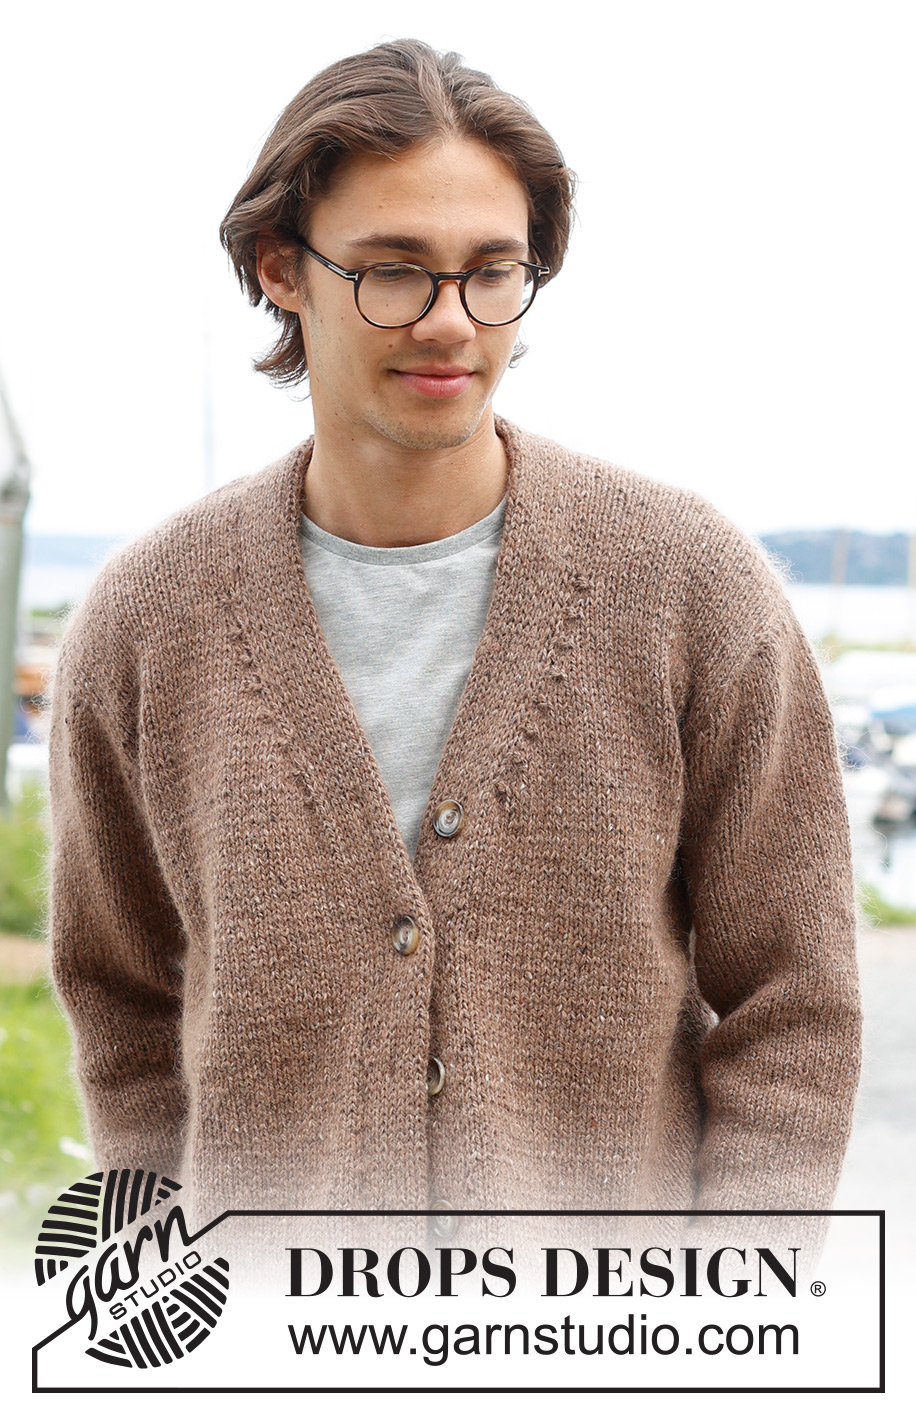
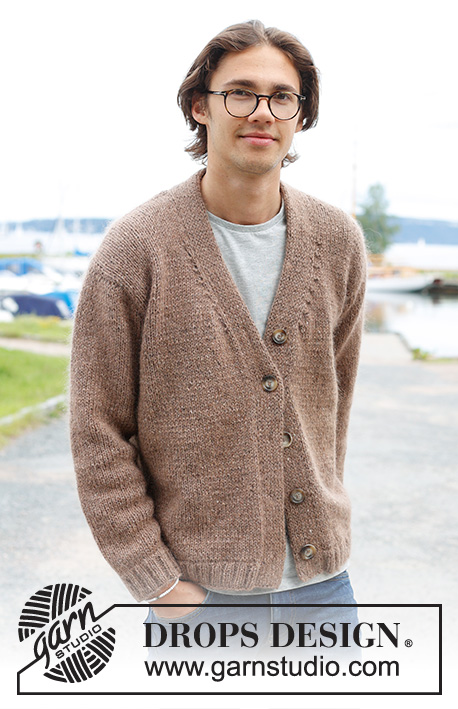
Tweed Casual#tweedcasualsweater |
|||||||||||||
 |
 |
||||||||||||
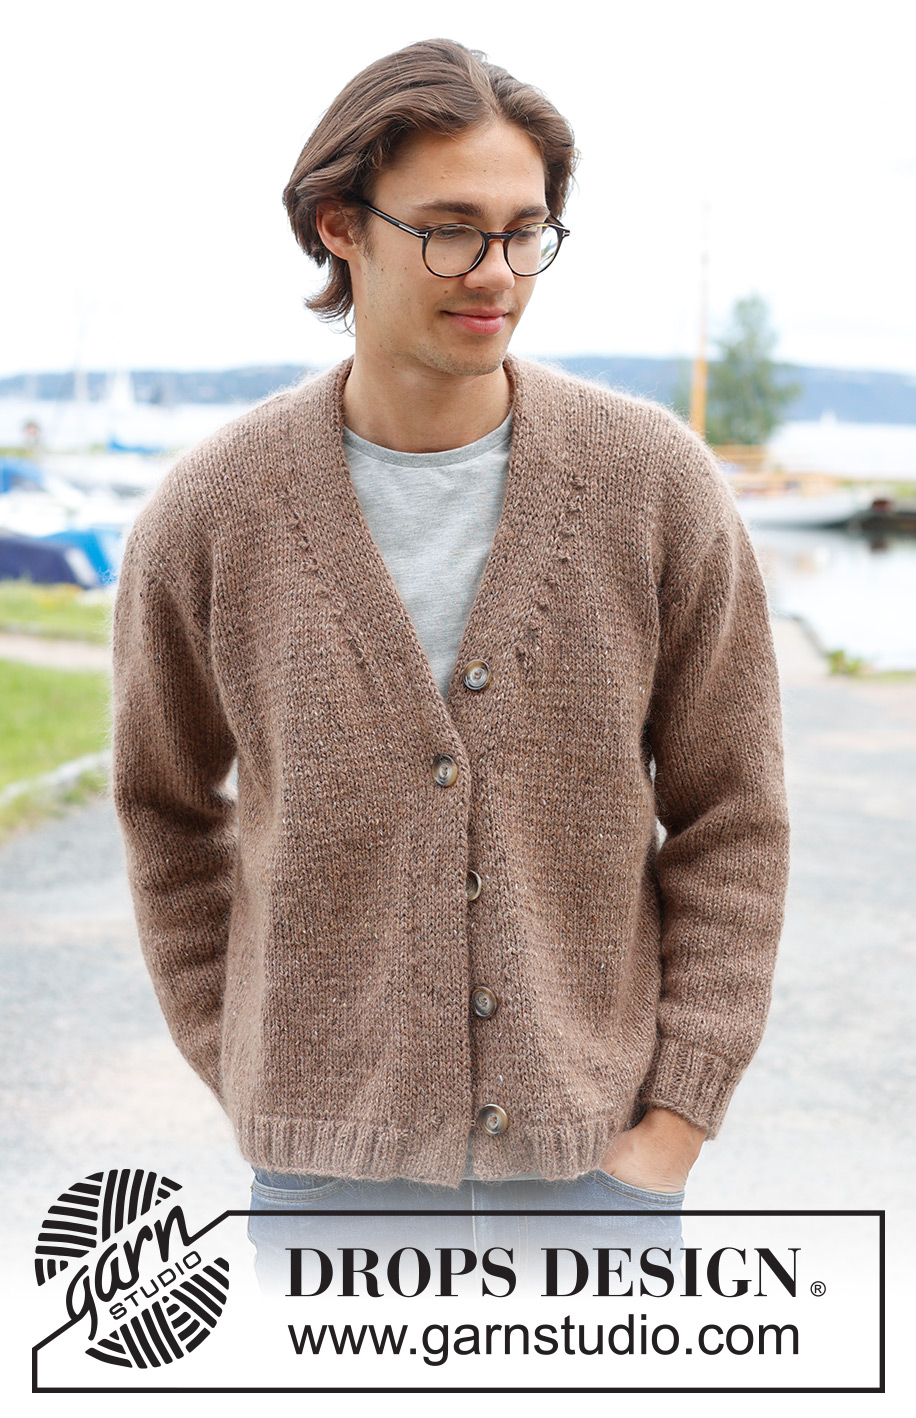
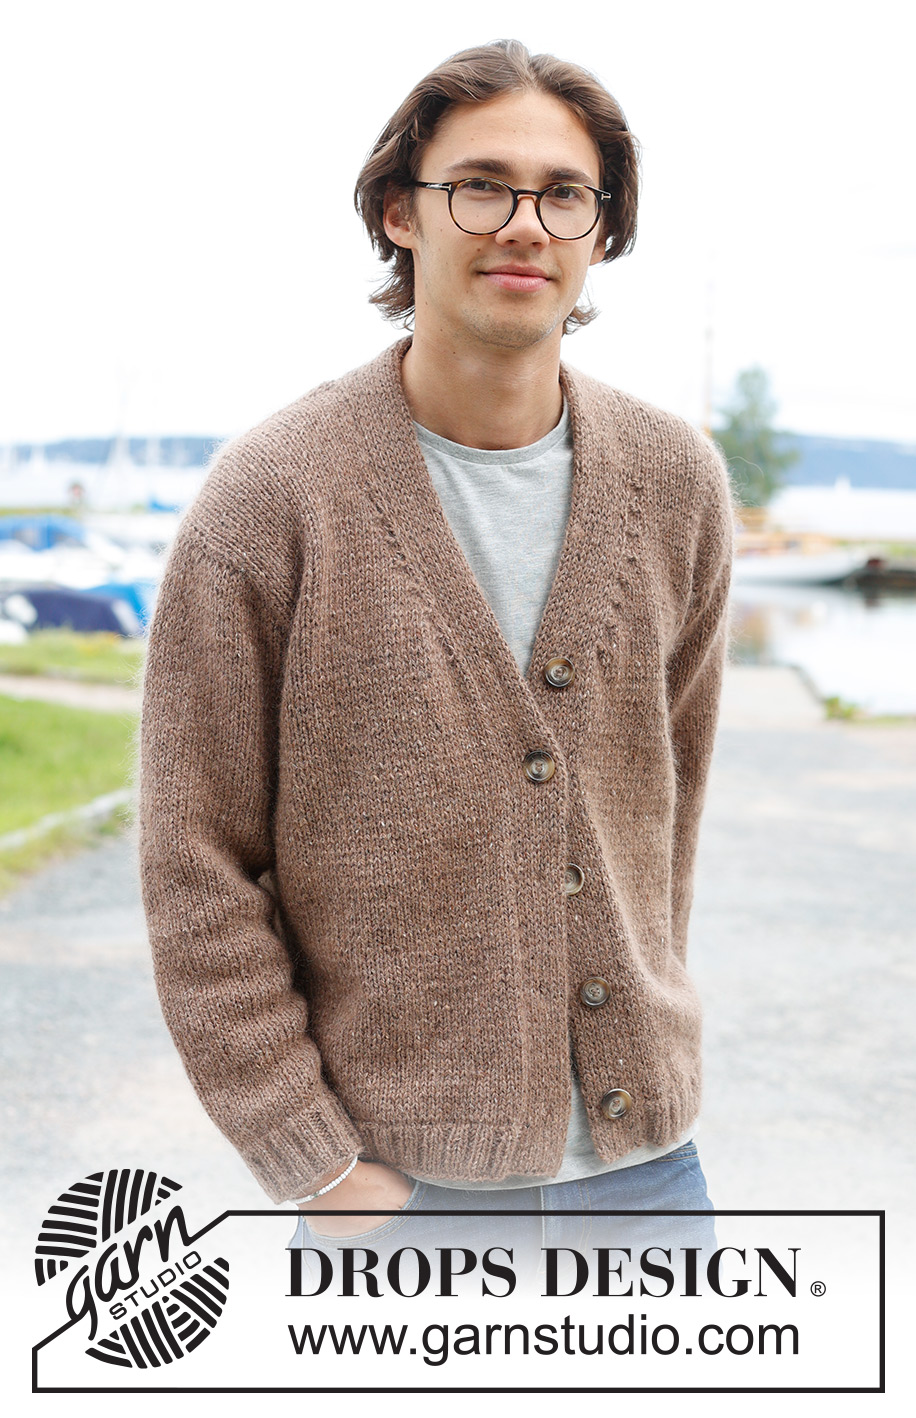
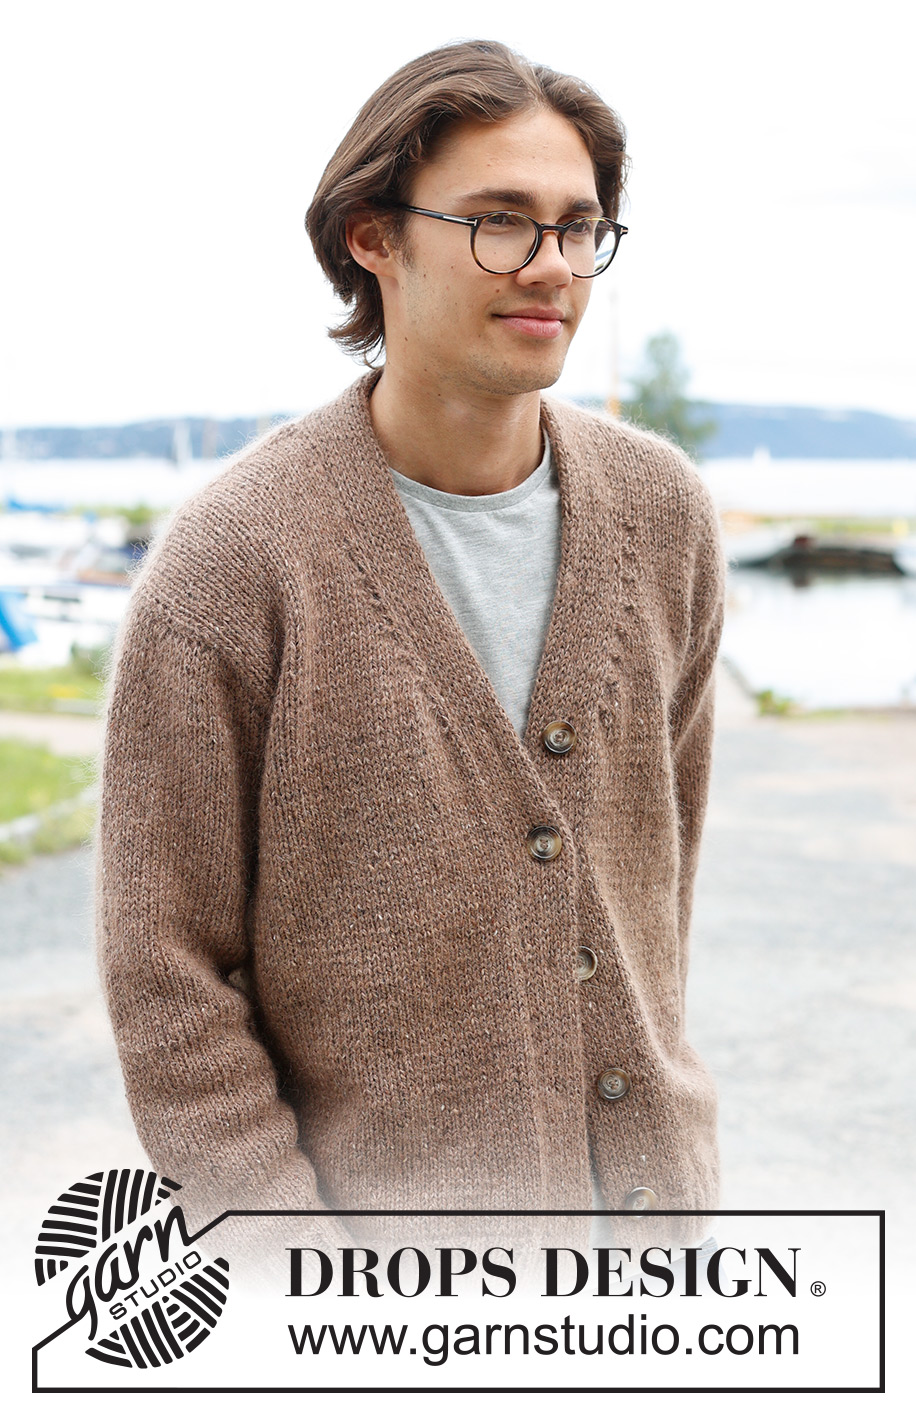
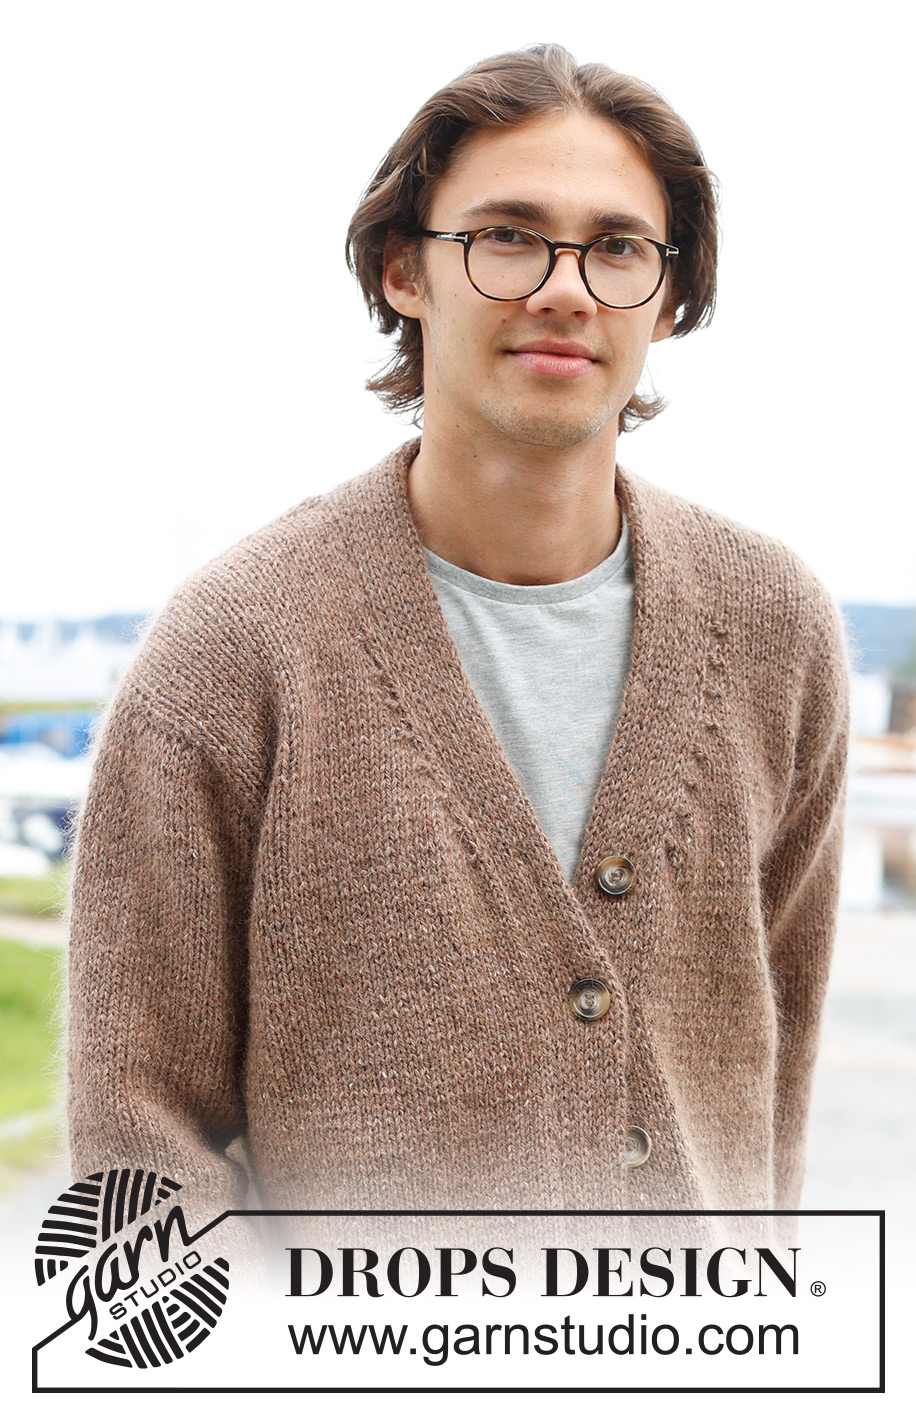
Knitted jacket for men in DROPS Soft Tweed and DROPS Kid-Silk. The piece is worked bottom up with V-neck and double bands. Sizes S - XXXL.
DROPS 233-9 |
|||||||||||||
|
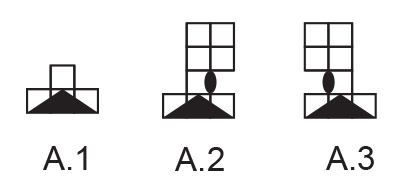
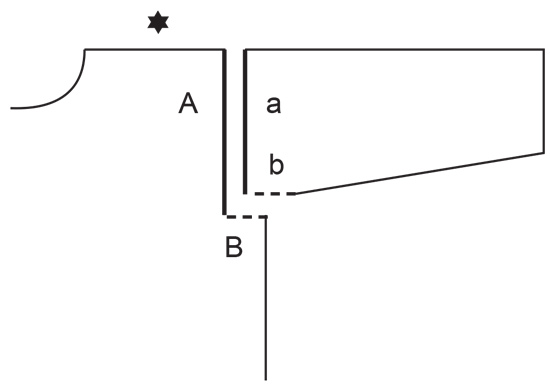
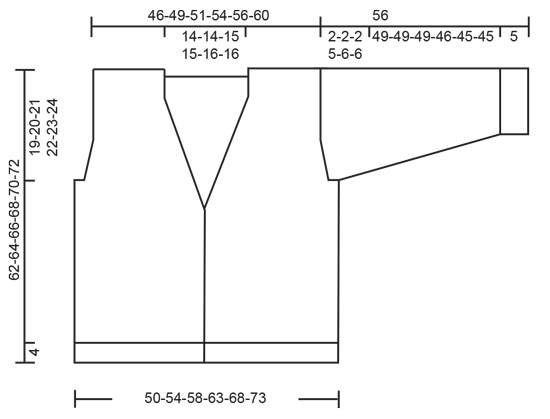
------------------------------------------------------- EXPLANATIONS FOR THE PATTERN: ------------------------------------------------------- PATTERN : See diagrams A.1 to A.3. The diagrams show all rows in the pattern from the right side. RIDGE/GARTER STITCH (worked back and forth): Knit all rows. 1 ridge = knit 2 rows. DECREASE TIP (V-neck and armholes): All decreases are worked from the right side! DECREASE 2 STITCHES AT THE BEGINNING OF THE ROW: Work 1 edge stitch in garter stitch, knit 1, work A.1 over the next 3 stitches. DECREASE 2 STITCHES AT THE END OF THE ROW: Work until there are 5 stitches left, work A.1 over the next 3 stitches, knit 1 and 1 edge stitch in garter stitch. DECREASE 1 STITCH AT THE BEGINNING OF THE ROW: Work 1 edge stitch in garter stitch, knit 1, work A.2 over the next 3 stitches. DECREASE 1 STITCH AT THE END OF THE ROW: Work until there are 5 stitches left, work A.3 over the next 3 stitches, knit 1 and 1 edge stitch in garter stitch. INCREASE TIP (sleeves): Knit 1 after the marker, make 1 yarn over, knit until there is 1 stitch left before the marker, 1 yarn over. On the next round knit the yarn overs twisted. BUTTONHOLES: Work buttonholes starting from the right side as follows: Work the first 8 stitches as before, turn and work back, turn and work these stitches 1 more time (right side). Cut the strand. Work 4 rows as before over the other 8 band stitches (first row from the right side) and work together the last stitch from the right side with the first stitch along the edge of the jacket. On the next row from the wrong side work all the band stitches as before. Work buttonholes when the band measures: S: 6, 13, 21, 29 and 37 cm. M: 6, 13, 21, 29 and 37 cm. L: 6, 13, 21, 29 and 37 cm. XL: 6, 14, 22, 30 and 38 cm. XXL: 6, 15, 23, 31 and 39 cm. XXXL: 6, 15, 24, 32 and 40 cm. ------------------------------------------------------- START THE PIECE HERE: ------------------------------------------------------- JACKET – SHORT OVERVIEW OF THE PIECE: The piece is worked bottom up, back and forth on circular needle as far as the armholes, then divided and the front and back pieces finished separately back and forth on circular needle. The sleeves are worked in the round on double pointed needles/short circular needle from bottom up as far as the sleeve cap, which is finished back and forth. Stitches are knitted up along the front pieces and the bands worked to finish. BODY: Cast on 192-208-224-240-264-280 stitches with circular needle size 4 mm and 1 strand DROPS Soft Tweed and 1 strand DROPS Kid-Silk. Purl 1 row from the wrong side. On the next row (right side) work rib as follows: 1 edge stitch in GARTER STITCH – read description above, * purl 2, knit 2 *, work from *-* until there are 3 stitches left, purl 2 and 1 edge stitch in garter stitch. When the rib measures 4 cm, knit 1 row from the right side and decrease 30-34-38-38-46-46 stitches evenly spaced = 162-174-186-202-218-234 stitches. Change to circular needle size 5 mm. Insert a marker 41-44-47-51-55-59 stitches in from each side (= 80-86-92-100-108-116 stitches on the back piece between the markers). Allow the markers to follow your work onwards; they are used when casting off for the armholes. Continue with stocking stitch and 1 edge stitch in garter stitch on each side. REMEMBER THE KNITTING TENSION! OVERVIEW OF THE NEXT SECTION: When the piece measures 38-38-38-39-40-41 cm, start to decrease for the V-neck. AT THE SAME TIME as you work these decreases, you cast off/decrease for the armholes and finish each shoulder separately. Read V-NECK and ARMHOLES before continuing. V-NECK: When the piece measures 38-38-38-39-40-41 cm, on the next row from the right side, decrease for the V-neck on each side– read DECREASE TIP. Decrease 2 stitches on each side every 4th row 4 times in all sizes. Then decrease 1 stitch on each side every 4th row 3-3-4-4-5-5 times. ARMHOLES: AT THE SAME TIME, when the piece measures 43-44-45-46-47-48 cm and the next row is from the right side, cast off for the armholes: Work as before until there are 2-3-4-4-4-5 stitches left before the first marker, cast off 4-6-8-8-8-10 stitches, work until there are 2-3-4-4-4-5 stitches left before the second marker, cast off 4-6-8-8-8-10 stitches and work to the end of the row. The front and back pieces are finished separately. LEFT FRONT PIECE (when the garment is worn): Start from the wrong side, work stocking stitch with 1 edge stitch in garter stitch on each side and continue to decrease for the V-neck. In addition, decrease for the armhole as follows: ARMHOLE: At the beginning of the next row from the right side decrease 1-1-1-2-2-2 stitches, then decrease 1 stitch on every 4th row 0-0-0-1-3-3 times – remember DECREASE TIP. After all the decreases for the V-neck and armhole there are 27-29-30-32-33-36 stitches on the shoulder. Continue with stocking stitch and 1 edge stitch in garter stitch on each side. Cast off when the piece measures 62-64-66-68-70-72 cm. RIGHT FRONT PIECE: Start from the wrong side, work stocking stitch with 1 edge stitch in garter stitch on each side and continue to decrease for the V-neck. In addition, decrease for the armhole as follows: ARMHOLE: At the end of the next row from the right side decrease 1-1-1-2-2-2 stitches, then decrease 1 stitch on every 4th row 0-0-0-1-3-3 times. After all the decreases for the V-neck and armhole there are 27-29-30-32-33-36 stitches on the shoulder. Continue with stocking stitch and 1 edge stitch in garter stitch on each side. Cast off when the piece measures 62-64-66-68-70-72 cm. BACK PIECE: = 76-80-84-92-100-106 stitches. Start from the wrong side and work stocking stitch with 1 edge stitch in garter stitch on each side. In addition decrease for the armholes as follows: On the next row from the right side decrease 1-1-1-2-2-2 stitches on each side, then decrease 1 stitch on each side every 4th row 0-0-0-1-3-3 times = 74-78-82-86-90-96 stitches. When the piece measures 59-61-63-65-67-69 cm cast off the middle 18-18-20-20-22-22 stitches for the neck (28-30-31-33-34-37 stitches on each shoulder). Finish each shoulder separately. On the next row cast off 1 stitch from the neck = 27-29-30-32-33-36 stitches. Cast off when the piece measures 62-64-66-68-70-72 cm. Work the other shoulder in the same way. SLEEVES: Cast on 44-44-48-48-52-52 stitches with double pointed needles size 4 mm and 1 strand of each quality. Knit 1 round, then work rib (knit 2, purl 2) for 5 cm. Knit 1 round and decrease 6-4-6-4-6-6 stitches evenly spaced = 38-40-42-44-46-46 stitches. Insert a marker at the beginning of the round (mid-under sleeve). Allow the marker to follow your work onwards; it is used when increasing under the sleeve. Change to double pointed needles size 5 mm and work stocking stitch in the round. When the sleeve measures 12-12-10-12-10-12 cm, increase 1 stitch on each side of the marker – read INCREASE TIP. Increase like this every 4-3½-3½-3-32½. cm a total of 11-12-13-13-14-15 times = 60-64-68-70-74-76 stitches. When the sleeve measures 54-54-54-51-50-50 cm, work the next round as follows: Start 2-3-4-4-4-5 stitches before the marker, cast off 4-6-8-8-8-10 stitches, work to the end of the round = 56-58-60-62-66-66 stitches. Start from the wrong side and work the sleeve cap in stocking stitch back and forth as follows: Cast off 9-9-10-5-4-4 stitches at the beginning of each row 2-2-2-5-6-6 times = 20-22-20-12-18-18 stitches. Cast off. The sleeve measures approx. 56 cm. Work the other sleeve in the same way. ASSEMBLY: Sew the shoulder seams inside the cast-off edge. Sew in the sleeves inside the 1 edge stitch along the armholes. RIGHT BAND: The band is worked bottom up. Using a strand end of 1½ to 2 metres, knit up stitches along the front piece (this allows you to continue working without cutting the strand) as follows: Start at the bottom and pick up 1 stitch in each row, inside the 1 edge stitch, using circular needle size 4.5 mm and 1 strand of each quality. Continue working from the end with the ball = bottom of the front piece. Cast on 16 stitches as an extension of the picked up stitch at the bottom of the front piece (cast on from the wrong side). Work the band over these 16 stitches at the same time as it is worked together with the knitted-up stitches along the front piece: ROW 1 (right side): Slip the first stitch onto the right needle as if to purl with the strand in front, * knit 1, slip 1 stitch onto the right needle as if to purl with the strand in front *, work from *-* until there is 1 band stitch left, slip 1 stitch onto the right needle as if to knit with the strand behind, knit 1 and pass the slipped stitch over the knitted stitch, turn. ROW 2 (wrong side): * Slip the first/next stitch onto the right needle as if to purl with the strand in front, knit 1 *, work from *-* over all 16 band stitches, turn. Repeat rows 1 and 2. NB! If the band becomes too long for the front piece, the band stitches can be worked together with 1 extra stitch from the front piece. Then work every 10th row as follows from the right side: Work until 1 stitch remains of the 16 band stitches, slip the last stitch onto the right needle as if to knit, with the yarn behind the work, knit the next 2 stitches together, pass the slipped stitch over the stitches knitted together, turn. Work the BUTTONHOLES – read description above. When all the stitches from the front piece are knitted together with the band, work the back of the neck. BACK OF NECK: Work the 16 band stitches as follows: ROW 1: * Slip the first/next stitch onto the right needle as if to purl with the strand in front, knit 1 *, work from *-* over all 16 band stitches. Repeat this row for 8-8-9-9-10-10 cm. On the last row from the right side knit all stitches together 2 and 2, then cast off. LEFT BAND: Start at the top of the front piece and knit up 1 stitch in each row, inside the 1 edge stitch, using circular needle size 4.5 mm and 1 strand of each quality. Cast on 16 stitches as an extension of the picked up stitch at the bottom of the front piece. Work the band over these 16 stitches at the same time as the band is worked together with the knitted-up stitches along the front piece: ROW 1(wrong side): Knit 1, *slip the first stitch onto the right needle as if to purl with the strand in front, knit 1 *, work from *-* until there is 1 band stitch left, slip the next 2 stitches onto the right needle as if to purl them together with the strand in front, turn. ROW 2 (right side): Knit 2 together, * slip 1 stitch onto the right needle as if to purl with the strand in front, knit 1 *, work from *-* until there is 1 stitch left, slip 1 stitch onto the right needle as if to purl with the strand in front, turn. Repeat rows 1 and 2. NB! If the band becomes too long for the front piece, the band stitches can be worked together with 1 extra stitch from the front piece on every 9th and 10th row as follows: slip 3 stitches onto the right needle at the end of the row from the wrong side and knit 3 together from the right side. When all the stitches from the front piece are knitted together with the band, work the back of the neck. BACK OF NECK: Work the 16 band stitches as follows: ROW 1: * Knit 1, slip the next stitch onto the right needle as if to purl with the strand in front *, work from *-* over all 16 band stitches. Repeat this row for 8-8-9-9-10-10 cm. On the last row from the right side work all stitches together as follows: Slip 1 stitch onto the right needle as if to knit, knit 1 and pass the slipped stitch over. Cast off. ASSEMBLY: Sew the bands together mid-back and sew them to the neckline. Sew the buttons onto the left band. |
|||||||||||||
Diagram explanations |
|||||||||||||
|
|||||||||||||
 |
|||||||||||||
 |
|||||||||||||
 |
|||||||||||||
Have you finished this pattern?Tag your pictures with #dropspattern #tweedcasualsweater or submit them to the #dropsfan gallery. Do you need help with this pattern?You'll find 28 tutorial videos, a Comments/Questions area and more by visiting the pattern on garnstudio.com. © 1982-2026 DROPS Design A/S. We reserve all rights. This document, including all its sub-sections, has copyrights. Read more about what you can do with our patterns at the bottom of each pattern on our site. |
|||||||||||||


With over 40 years in knitting and crochet design, DROPS Design offers one of the most extensive collections of free patterns on the internet - translated to 17 languages. As of today we count 324 catalogues and 12290 patterns translated into English (UK/cm). 12290
We work hard to bring you the best knitting and crochet have to offer, inspiration and advice as well as great quality yarns at incredible prices! Would you like to use our patterns for other than personal use? You can read what you are allowed to do in the Copyright text at the bottom of all our patterns. Happy crafting!
Post a comment to pattern DROPS 233-9
We would love to hear what you have to say about this pattern!
If you want to leave a question, please make sure you select the correct category in the form below, to speed up the answering process. Required fields are marked *.