
Popular categories
Looking for a yarn?


Comments / Questions (30)
![]() Franca wrote:
Franca wrote:
Hello, I'm a beginner and need advice on the following instructions for the front piece. Continue by decreasing on each row from the right side 7 times – read DECREASE TIP = 29-33-34-36-39-43 stitches on the shoulder. Does this mean there is a decrease of 1 stitch for the each of the next 7 rows? If so, where does the decrease happen? Would it be in the middle of the row or elsewhere. Thank you, Franca
12.03.2026 - 15:46DROPS Design answered:
Dear France, you will decrease as explained under DECREASE TIP at the beg of the pattern, this means inrease only from right side, after the first 4 sts on right shoulder and before the last 4 sts on left shoulder. Happy knitting!
13.03.2026 - 06:58
![]() Soili Kotamäki wrote:
Soili Kotamäki wrote:
Mistä löytyy selvitys siitä, mitä vartalonmittoja annetut kirjainkoot (S,M,L….) vastaavat?
01.12.2025 - 13:39DROPS Design answered:
Hi Soili Kotamäki, please see the lesson Drops HERE. Happy knitting!
01.12.2025 - 16:34
![]() Tiia wrote:
Tiia wrote:
Pitääkö saumat ommella käsin neulalla vai ompelukoneella?
13.07.2025 - 07:48DROPS Design answered:
Hei, yleensä neulotun työn saumat ommellaan käsin, mutta voit halutessasi ommella saumat ompelukoneella.
14.07.2025 - 16:37
![]() Bryt-Mari Morsay wrote:
Bryt-Mari Morsay wrote:
Jag ska börja med halskanten. Vilken längd ska jag använda på rundstickan (3,5) Det står i mönstret ” sticka upp 108 till 126 maskor på kort rundsticka 3,5 innanför 1 kantmaska runt halsen. Vad innebär ”innanför 1 kantmaska runt halsen”. Ska det stickas runt eller ska det vara en öppning i kragen? Sorry om jag är trögfattad 😅
15.06.2025 - 17:42DROPS Design answered:
Hei Bryt-Mari. Du kan bruke 3,5 mm og 40 cm. Bakstykket og forskykket skal ha blitt strikket med 1 kantmaske i rille i hver siden. Når det skal strikkes opp masker, strikkes det opp innenfor denne kantmasken. mvh DROPS Design
16.06.2025 - 14:14
![]() Frédérique wrote:
Frédérique wrote:
Bonjour Pour le modèle 227-4 on me dis de relever 108 à 126 maille pour aiguille circulaire. Mais je tricote ce modèle à plat et donc comment je dois faire pour tricoter mon col et combien de mail me faut il pour un pull taille S. Merci
19.02.2025 - 12:50DROPS Design answered:
Bonjour Frédérique, si vous tricotez tout en allers et retours, faites la couture d'une seule des 2 épaules et relevez les mailles comme indiqué soit 108 environ (votre nombre de mailles doit être divisible par 3) + 2 m lisières, tricotez le col en alles et retours puis terminez par la couture de l'épaule et du col. Bon tricot!
20.02.2025 - 11:48
![]() Frédérique wrote:
Frédérique wrote:
Bonjour Pour le modèle 227-4 on me dis de relever 108 à 126 maille pour aiguille circulaire. Mais je tricote ce modèle à plat et donc comment je dois faire pour tricoter mon col et combien de mail me faut il pour un pull taille S. Merci
19.02.2025 - 12:50
![]() Frédérique MOURGUES wrote:
Frédérique MOURGUES wrote:
Bonjour je ne comprend pas ce que je dois faire des 19 mailles en attente pour le Devant après être monté à 44 cm ? Merci
19.11.2024 - 22:31
![]() Frédérique MOURGUES wrote:
Frédérique MOURGUES wrote:
Bonjour je ne comprend pas ce que je dois faire des 19 mailles en attente pour le Devant après être monté à 44 cm ? Merci
19.11.2024 - 22:31DROPS Design answered:
Bonjour Mme Mourgues, les 19 mailles centrales du devant sont mises en attente pour l'encolure, vous les reprendrez au moment de tricoter le col et de relever les mailles du col tout autour de l'encolure. Bon tricot!
20.11.2024 - 08:03
![]() María José Palacios De Gurtubay wrote:
María José Palacios De Gurtubay wrote:
Bonjour, je viens de tricoter un gilet avec votre laine Karisma et des aiguilles n⁰ 4 ce qui était conforme aux indications sur l'étiquette. Or, pour ce modèle, vous préconisez un échantillon moins dense, avec des aiguilles n⁰ 4,5 c'est normal? J'attends votre réponse pour passer ma commande, merci.
19.10.2024 - 13:32DROPS Design answered:
Bonjour Mme Palacios De Gurtubay, la taille des aiguilles va changer en fonction de l'effet recherché par la styliste pour chaque modèle, dans ce cas précis, on doit avoir 20 mailles x 26 rangs jersey = 10 x 10 cm, ajustez la taille des aiguilles si besoin - retrouvez plus d'infos ici. Bon tricot!
21.10.2024 - 07:59
![]() Cécile Taillat wrote:
Cécile Taillat wrote:
Bonjour J'ai fini de tout tricoter mais je m'interroge...faut-il laver et bloquer les pièces avant ou après de coudre les manches et "l'ourlet" du col?
09.10.2024 - 11:21DROPS Design answered:
Bonjour Mme Taillat, c'est une question très personnelle: certaines tricoteuses bloquent tout, d'autres jamais, faites comme vous en avez l'habitude (ou demandez conseil à votre magasin -même par mail ou téléphone - si besoin), mais rappelez-vous de toujours bien suivre les consignes d'entretien en toute circonstances. Bon tricot!
09.10.2024 - 15:32
|
|||||||||||||
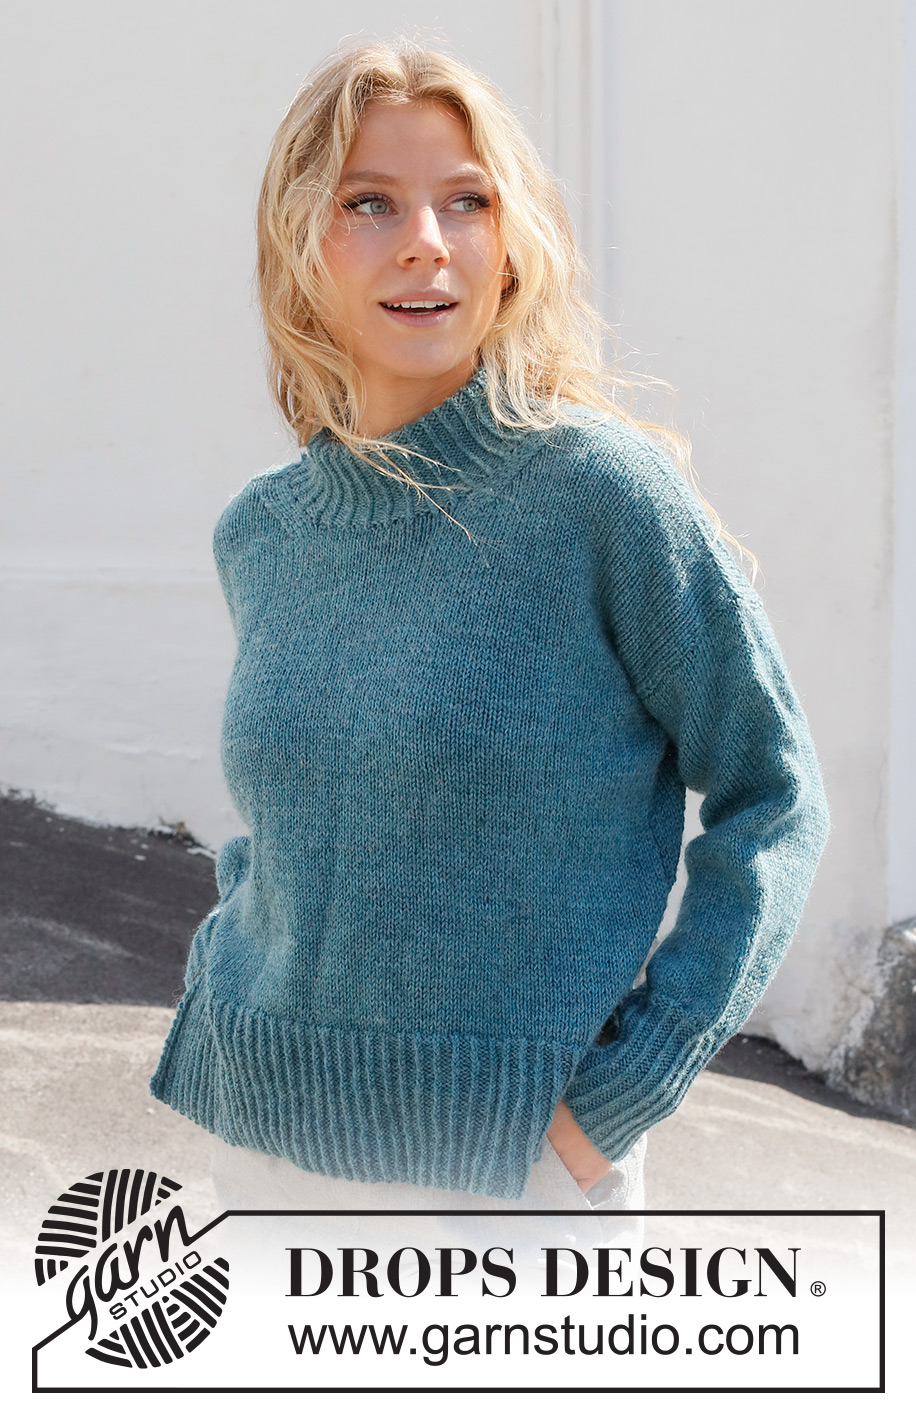
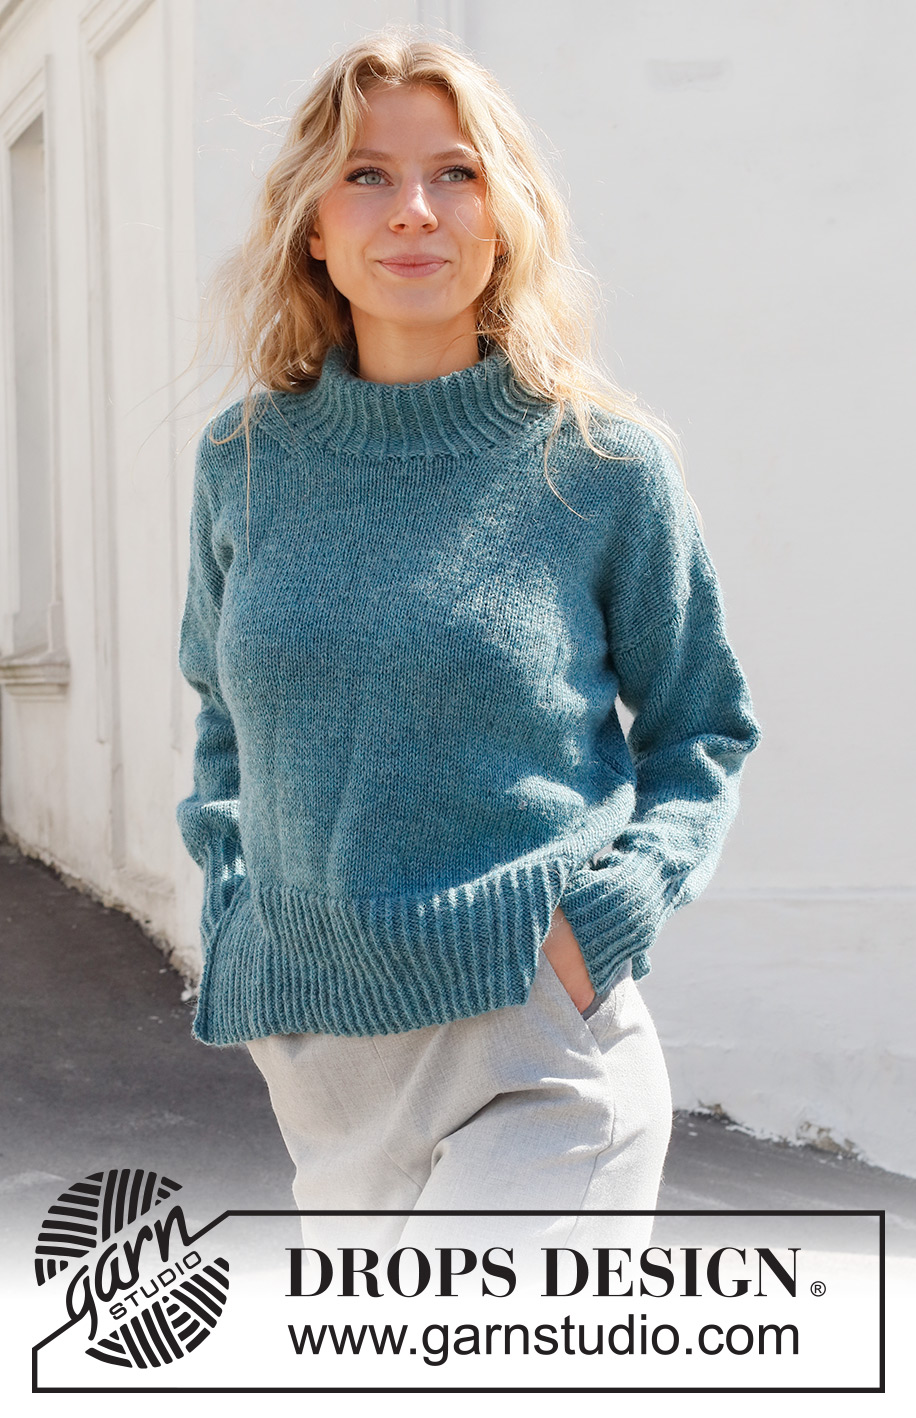
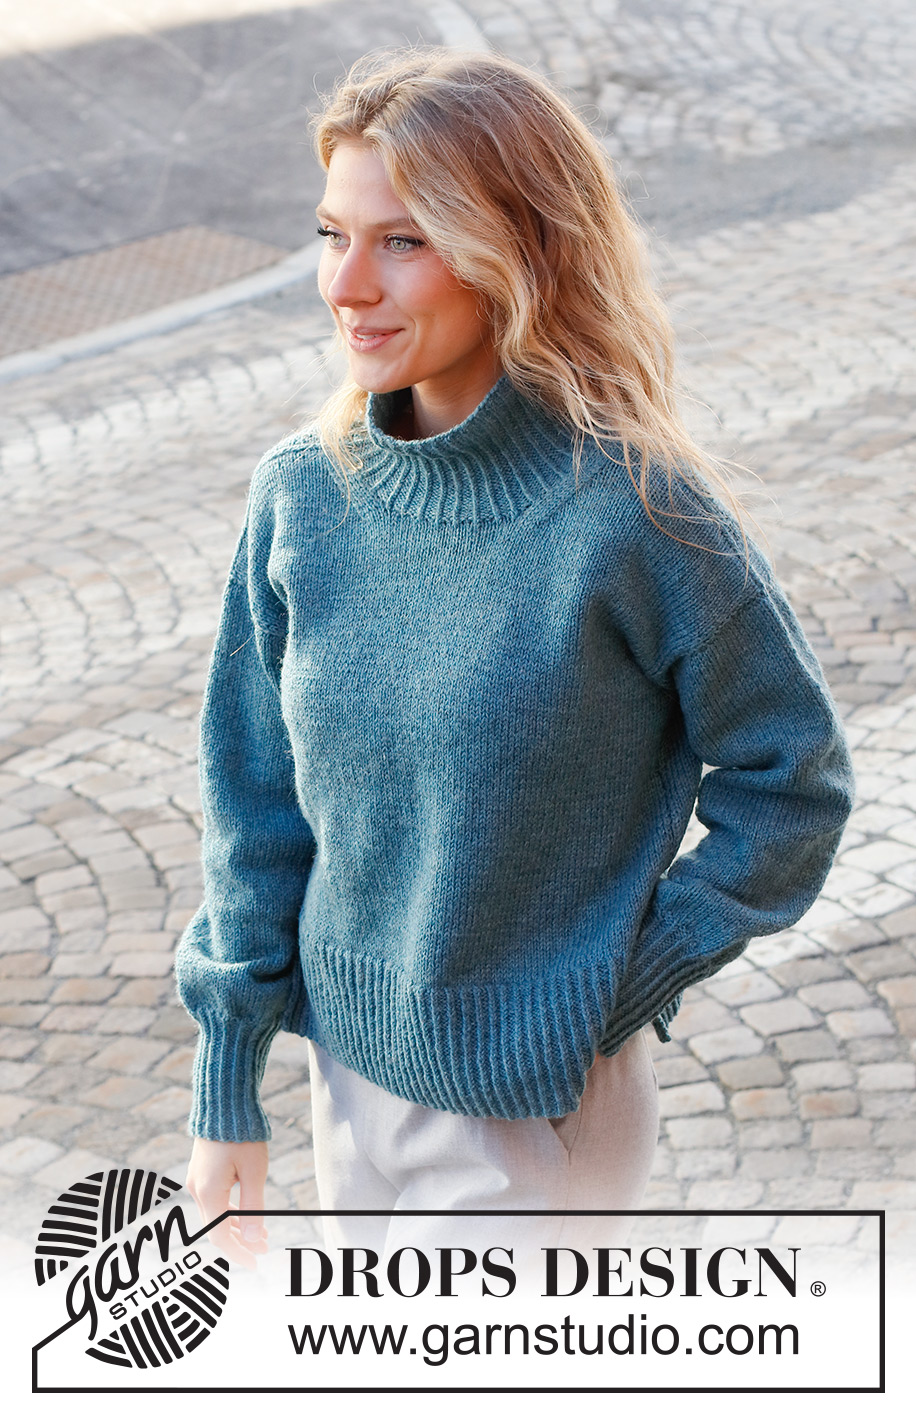
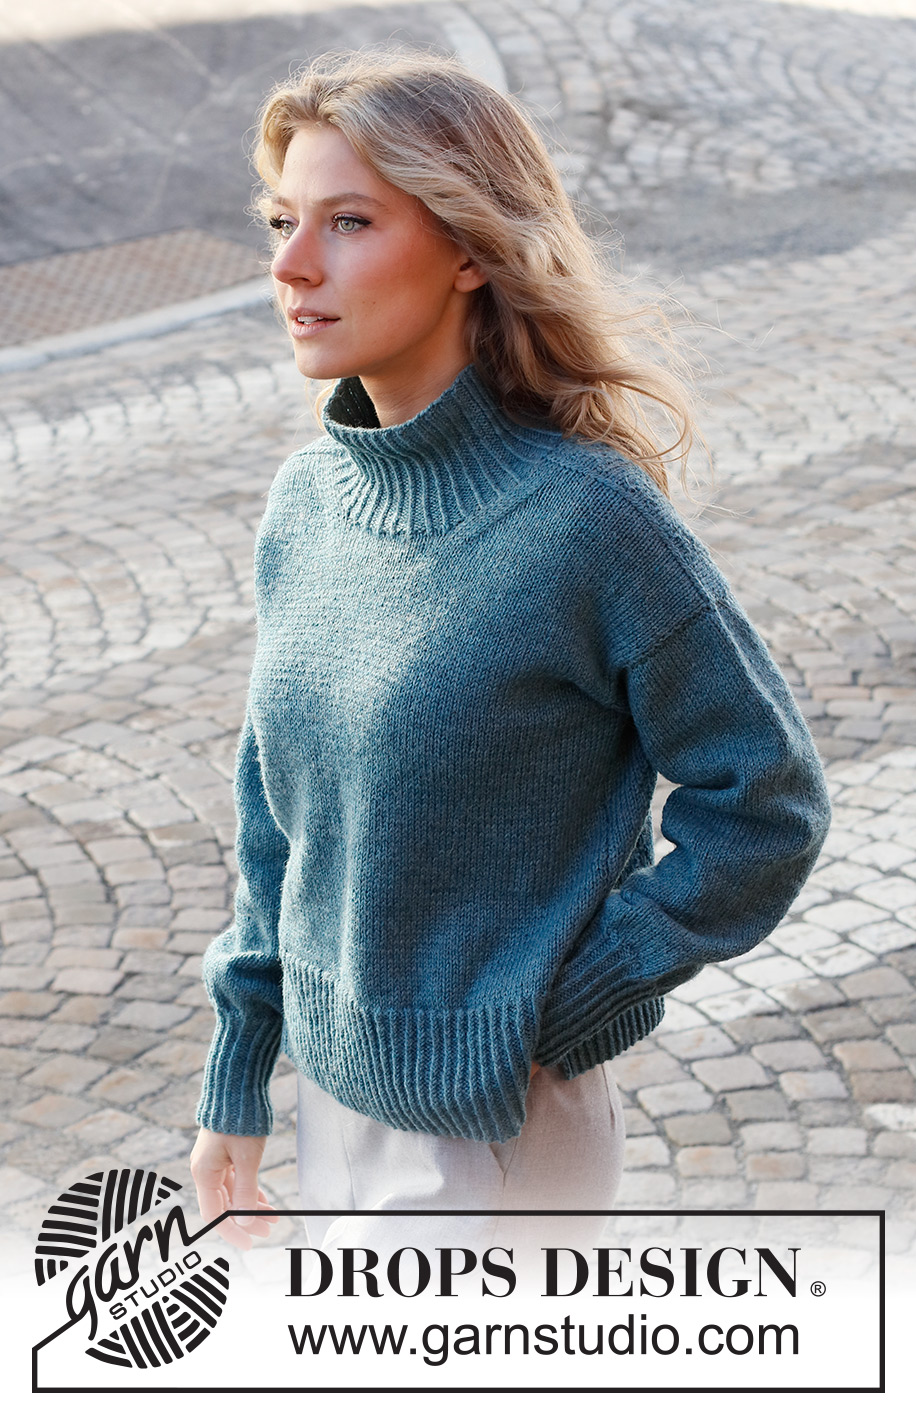
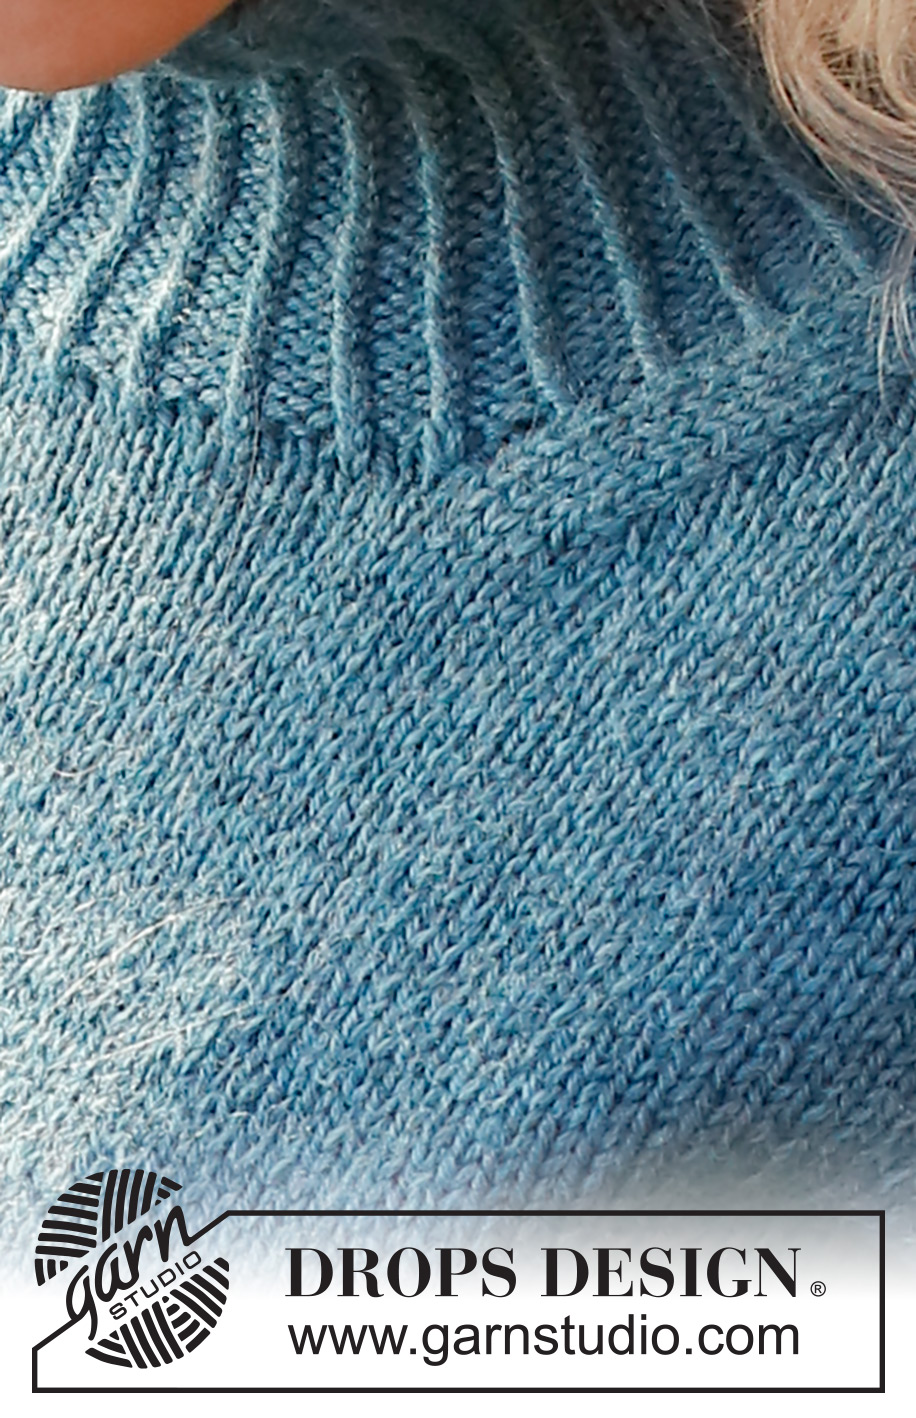
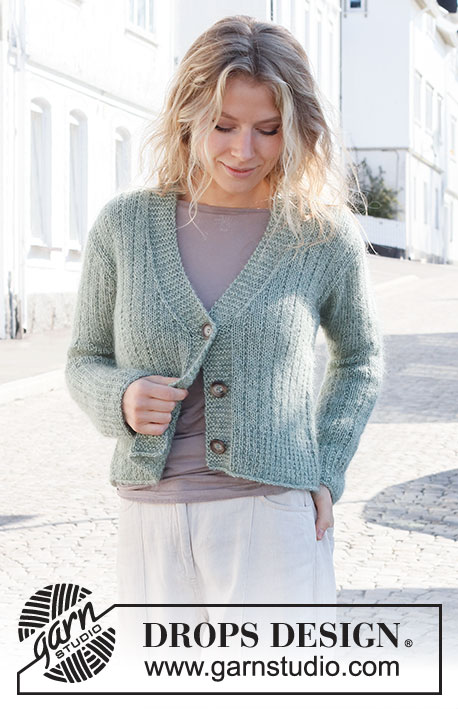
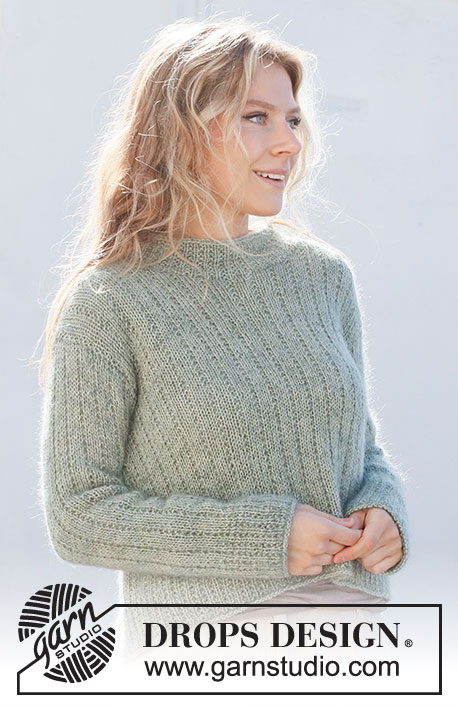
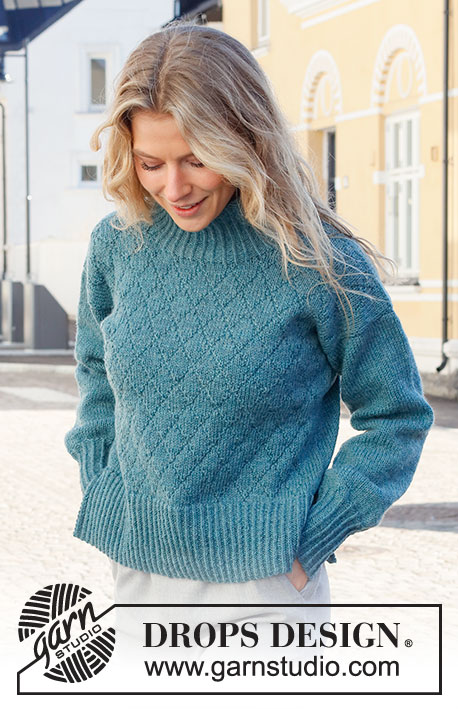
Polar Daylight#polardaylightsweater |
|||||||||||||
 |
 |
||||||||||||
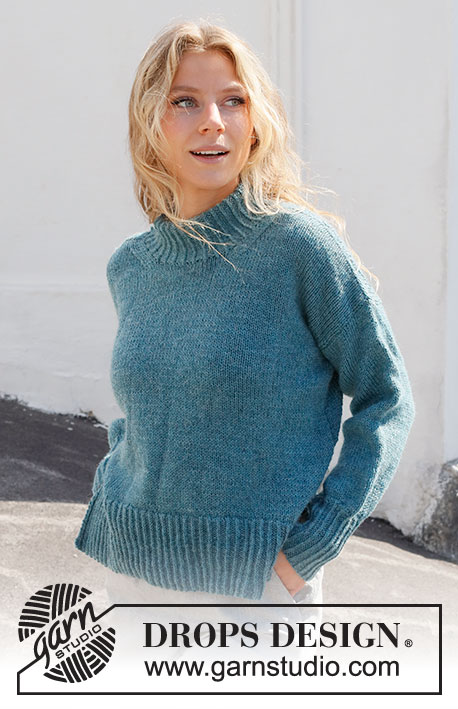
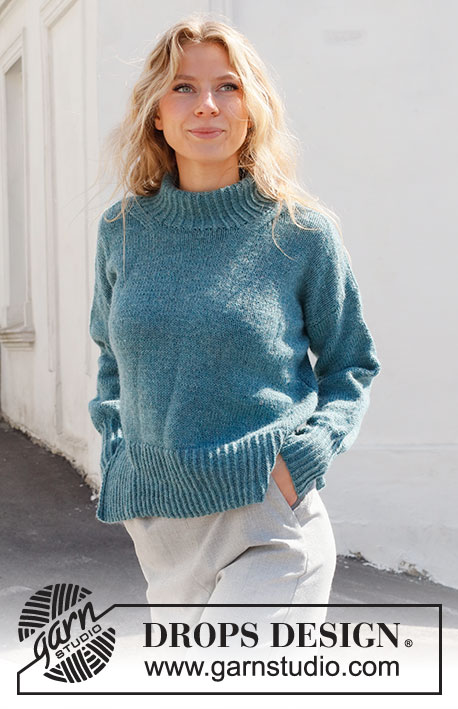
Knitted jumper in DROPS Karisma or DROPS Daisy. The piece is worked with a high or double neck and ribbed edges. Sizes S - XXXL.
DROPS 227-4 |
|||||||||||||
|
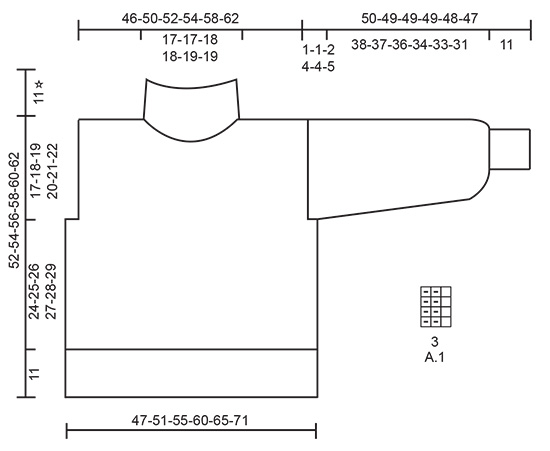
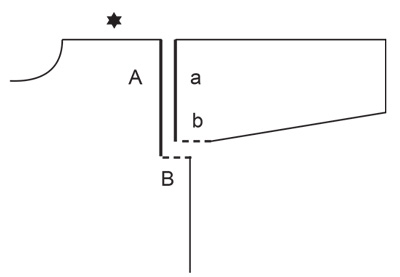
------------------------------------------------------- EXPLANATIONS FOR THE PATTERN: ------------------------------------------------------- RIDGE/GARTER STITCH (worked back and forth): Knit all rows. 1 ridge = knit 2 rows. PATTERN: See diagram A.1. The diagram shows all rows in the pattern from the right side. INCREASE/DECREASE TIP (evenly spaced): To work out how to increase/decrease evenly, count the total number of stitches on needle (e.g. 127 stitches), minus the edge stitches (e.g. 2 stitches) and divide the remaining stitches by the number of increases/decreases to be made (e.g. 32) = 3.9. In this example, increase by making 1 yarn over after approx. each 4th stitch. Do not increase over the edge stitches. On the next row work the yarn overs twisted to avoid holes. When decreasing, knit together each 3rd and 4th stitch. DECREASE TIP: All decreases are worked from the right side. Before the neck: Work until there are 6 stitches left, knit 2 together (= 1 stitch decreased), work the last 4 stitches as before. From the neck: Work the first 4 stitches as before, slip 1 stitch as if to knit, knit 1 and pass the slipped stitch over the knitted stitch (= 1 stitch decreased). INCREASE TIP (for sleeves): Work until there are 2 stitches left before the marker thread, 1 yarn over, knit 4 (marker thread sits between these 4 stitches), 1 yarn over. On the next round knit the yarn overs twisted to avoid holes. Then work the new stitches in stocking stitch. CASTING-OFF TIP: To avoid the cast-off edge being tight you can cast off with a larger size needle. If the edge is still tight, make 1 yarn over after approx. each 4th stitch at the same time as casting off; the yarn overs are cast off as normal stitches. ------------------------------------------------------- START THE PIECE HERE: ------------------------------------------------------- JUMPER – SHORT OVERVIEW OF THE PIECE: The front and back pieces are worked back and forth separately. The sleeves are worked in the round with double pointed needles. The pieces are sewn together and the neck worked in the round to finish. BACK PIECE: Cast on 127-136-148-160-172-190 stitches with circular needle size 3.5 mm and DROPS Karisma or DROPS Daisy. Work rib as follows: 3 edge stitches in GARTER STITCH – read description above, A.1 until there are 4 stitches left, work the first stitch in A.1 (so the pattern is symmetrical) and 3 edge stitches in garter stitch. Continue this rib back and forth for 11 cm. Knit 1 row from the right side where you decrease 32-33-37-39-41-47 stitches evenly spaced – read INCREASE/DECREASE TIP = 95-103-111-121-131-143 stitches. Change to circular needle size 4.5 mm. Purl 1 row from the wrong side (the first and last stitch are knitted). Continue with stocking stitch and 1 edge stitch in garter stitch on each side. REMEMBER THE KNITTING TENSION! When the piece measures 35-36-37-38-39-40 cm, cast off 2-2-4-7-8-10 stitches for the armholes at the beginning of the next 2 rows = 91-99-103-107-115-123 stitches. Continue working until the piece measures 50-52-54-56-58-60 cm. On the next row cast off the middle 31-31-33-33-35-35 stitches for the neck and finish each shoulder separately. Then cast off 1 stitch on the next row from the neck = 29-33-34-36-39-43 stitches on the shoulder. When the piece measures 52-54-56-58-60-62 cm, cast off. Work the other shoulder in the same way. FRONT PIECE: Cast on 127-136-148-160-172-190 stitches with circular needle size 3.5 mm and DROPS Karisma or DROPS Daisy. Work rib as follows: 3 edge stitches in garter stitch, work A.1 until there are 4 stitches left, work the first stitch in A.1 and 3 edge stitches in garter stitch. Continue this rib back and forth for 11 cm. Knit 1 row from the right side where you decrease 32-33-37-39-41-47 stitches evenly spaced = 95-103-111-121-131-143 stitches. Change to circular needle size 4.5 mm. Purl 1 row from the wrong side (the first and last stitch are knitted). Continue with stocking stitch and 1 edge stitch in garter stitch on each side. When the piece measures 35-36-37-38-39-40 cm, cast off 2-2-4-7-8-10 stitches for the armholes at the beginning of the next 2 rows = 91-99-103-107-115-123 stitches. Continue working until the piece measures 44-46-47-49-50-52 cm. Place the middle 19-19-21-21-23-23 stitches on a thread for the neck and finish each shoulder separately. Continue by decreasing on each row from the right side 7 times – read DECREASE TIP = 29-33-34-36-39-43 stitches on the shoulder. When the piece measures 52-54-56-58-60-62 cm, cast off. Work the other shoulder in the same way. SLEEVES: Cast on 51-54-57-60-63-66 stitches with double pointed needles size 3.5 mm. Work A.1 in the round for 11 cm. Knit 1 round where you increase 13-12-11-10-9-8 stitches evenly spaced - read INCREASE/DECREASE TIP = 64-66-68-70-72-74 stitches. Insert a marker at the beginning of the round (= mid-under sleeve). Allow the marker to follow your work onwards; it will be used when increasing later! Change to double pointed needles size 4.5 mm and work stocking stitch in the round. When the sleeve measures 15-15-15-15-15-17 cm, increase 1 stitch on each side of the marker – read INCREASE TIP. Increase like this every 15-14-9-6½-5-3½ cm a total of 2-3-4-5-6-7 times = 68-72-76-80-84-88 stitches. Continue working until the sleeve measures 49-48-47-45-44-42 cm. Continue working stocking stitch but now back and forth so you get a small split under the sleeve. When the sleeve measures 50-49-49-49-48-47 cm cast off. Work the other sleeve in the same way. ASSEMBLY: Sew the shoulder seams inside the cast-off edge. Sew in the sleeves – see illustration. Sew the side seams from the armholes down as far as the rib (= 11 cm split on each side). HIGH NECK: Knit up 108 to 126 stitches with short circular needle size 3.5 mm and DROPS Karisma or DROPS Daisy, inside the 1 edge stitch around the neck. The number of stitches should be divisible by 3. Work A.1 in the round for 11 cm. Cast off with knit over knit and purl over purl – read CASTING-OFF TIP. DOUBLE NECK: Knit up 108 to 126 stitches (including stitches on a thread on mid front) with short circular needle size 3.5 mm and DROPS Karisma or DROPS Daisy, inside the 1 edge stitch around the neck. The number of stitches should be divisible by 3. Work A.1 in the round for 12 cm. Now increase 1 stitch in each purled section. Continue the new rib until the neck measures 16 cm. Cast off with knit over knit and purl over purl – read CASTING-OFF TIP. Fold the neck double to the inside and sew down. To avoid the neck being tight and rolling outwards, it is important that the seam is elastic. |
|||||||||||||
Diagram explanations |
|||||||||||||
|
|||||||||||||
 |
|||||||||||||
 |
|||||||||||||
Have you finished this pattern?Tag your pictures with #dropspattern #polardaylightsweater or submit them to the #dropsfan gallery. Do you need help with this pattern?You'll find 34 tutorial videos, a Comments/Questions area and more by visiting the pattern on garnstudio.com. © 1982-2026 DROPS Design A/S. We reserve all rights. This document, including all its sub-sections, has copyrights. Read more about what you can do with our patterns at the bottom of each pattern on our site. |
|||||||||||||


With over 40 years in knitting and crochet design, DROPS Design offers one of the most extensive collections of free patterns on the internet - translated to 17 languages. As of today we count 324 catalogues and 12290 patterns translated into English (UK/cm). 12290
We work hard to bring you the best knitting and crochet have to offer, inspiration and advice as well as great quality yarns at incredible prices! Would you like to use our patterns for other than personal use? You can read what you are allowed to do in the Copyright text at the bottom of all our patterns. Happy crafting!
Post a comment to pattern DROPS 227-4
We would love to hear what you have to say about this pattern!
If you want to leave a question, please make sure you select the correct category in the form below, to speed up the answering process. Required fields are marked *.