Comments / Questions (37)
![]() A Eriksen wrote:
A Eriksen wrote:
Ift. strikkefasthed er der for pandebånd og hals angivet 18 masker i bredden og 23 pinde i højden - men hvilken pind er det beregnet på? Er det pind 4,5 eller 5,5? Ligeledes ved handsker hvilken pind er strikkefastheden beregnet ud fra - er det pind 3,5 eller 4?
03.01.2021 - 14:26DROPS Design answered:
Hej, vi har brugt pind 5,5 til glatstrik og 18 masker i bredden, men stemmer det ikke for dig, så prøv med en tykkere eller tyndere pind. Det som er vigtigt er at du får den strikkefasthed som står i opskriften. God fornøjelse!
11.01.2021 - 13:53
![]() Élise Deschatelets wrote:
Élise Deschatelets wrote:
Pouvez-vous m’éclairer sur la façon de faire les diminutions (Diminuer ainsi 5 fois tous les 2 tours et 2 fois tous les tours. ) moufles. Dois je diminuer 5 mailles à la fois?
21.12.2020 - 17:46DROPS Design answered:
Bonjour Mme Deschatelets, vous diminuez comme indiqué sous DIMINUTIONS autrement dit, vous diminuez 2 mailles, 1 m après le marqueur + 1 m avant le marqueur. Vous répétez ces diminutions 5 fois au total tous les 2 tours (= 1 tour en diminuant 2 m, 1 tour sans diminuer) x 5 , puis diminuez à chacun des 2 tours suivants, - en même temps, diminuez comme dans A.5 côté dos de la main. Bon tricot!
22.12.2020 - 09:30
![]() Caroline Marceau wrote:
Caroline Marceau wrote:
Bonjour je ne comprend les explications dans moufles gauche quand ça dit: Tricoter le tour suivant ainsi: 0-3 mailles endroit. Qu'est ce que ça veut dire 0-3?
13.12.2020 - 06:03DROPS Design answered:
Bonjour Mme Marceau, dans la 1ère taille, vous ne décalez pas le début du tour, seulement dans la 2ème taille. Autrement dit, en S/M, sautez cette phrase et placez votre marqueur du début du tour avant la 1ère maille du tour. En taille L/XL , tricotez 3 mailles endroit et mettez votre marqueur de début du tour ici et continuez comme indiqué sur les 44 mailles. Bon tricot!
14.12.2020 - 10:26
![]() Anne-Louise wrote:
Anne-Louise wrote:
Når man strikker halsen står der at man skal slå 76 masker op, men inddeling bagefter hedder 12, 12,24,12,12 det giver kun 72? Hvad er rigtigt?
04.11.2020 - 17:27DROPS Design answered:
Hej Anne-Louise. Du missar 4 maskor, jag har markerat de i fet stil: Strik (2 ret / 2 vrang) over de første 12-16 masker, sæt 1.mærke her, strik A.2 over de næste 12 masker (= skuldermasker), sæt 2.mærke her, strik 2 vrang , (2 ret / 2 vrang) over de næste 24-28 masker, sæt 3.mærke her, strik A.2 over de næste 12 masker (= skuldermasker), sæt 4.mærke her, strik 2 vrang , (2 ret / 2 vrang) over de sidste 12-12 masker. Mvh DROPS Design
05.11.2020 - 08:27
![]() Nelli wrote:
Nelli wrote:
Een fout in de werkbeschrijving van de halswarmer, maat s/m: daar moeten niet 76, maar 72 steken voor worden opgezet: 24 per pand en 12 per schouder.
19.10.2020 - 21:50
![]() Line Vesterheim wrote:
Line Vesterheim wrote:
Kan dere sjekke inndelingen ? Får ikke maskeantallet til å gå opp
12.10.2020 - 12:44DROPS Design answered:
Hej Line. Vad stickar du och var menar du att det är fel? Mvh DROPS Design
15.10.2020 - 13:34
![]() Rosy wrote:
Rosy wrote:
Le plastron bien couvrant est parfait pour les grands froids
05.06.2020 - 09:10
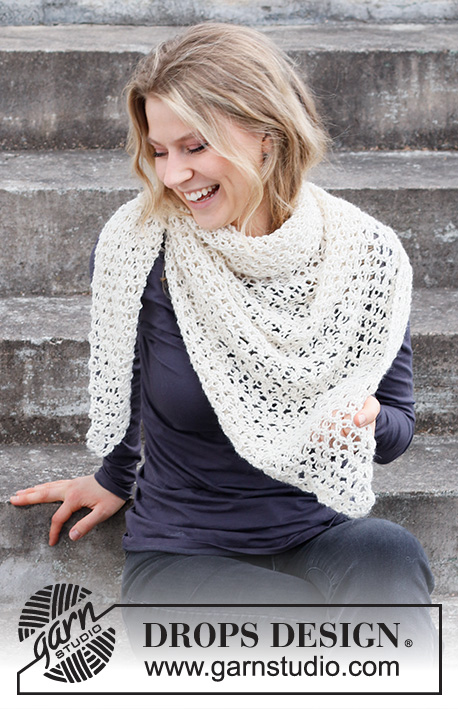
Winter Wisps Set#winterwispsset |
||||||||||||||||||||||||||||||||||||||||
 |
 |
|||||||||||||||||||||||||||||||||||||||
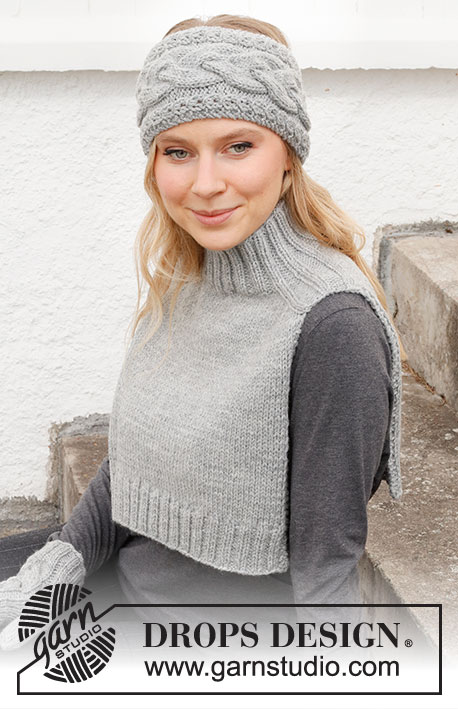
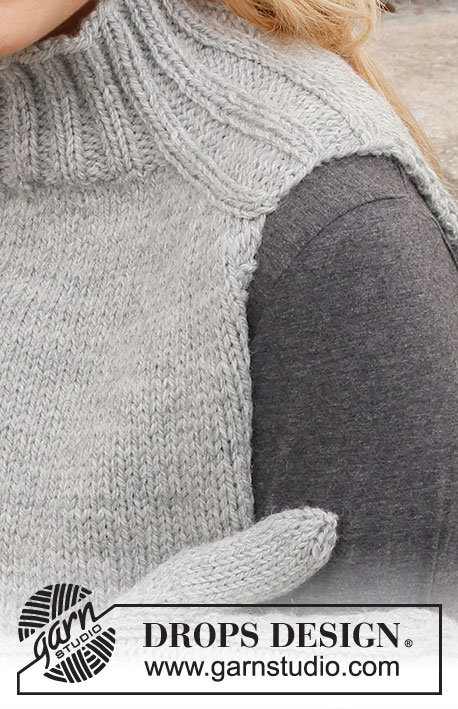
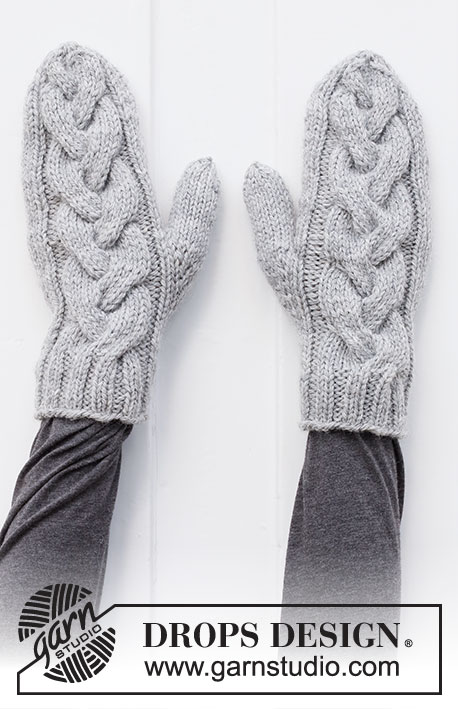
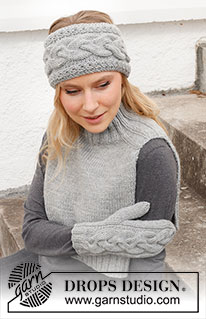
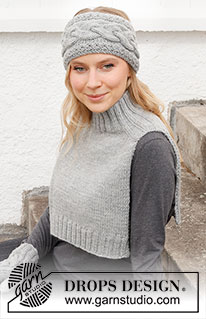
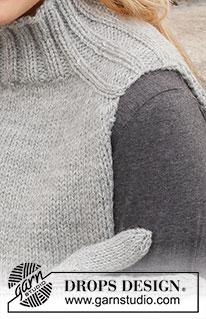
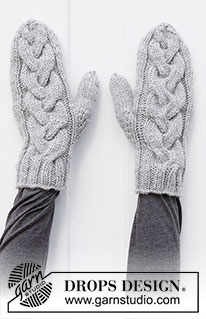
Knitted head band, neck warmer and mittens in DROPS Alaska. Piece is worked with cables and increase for saddle shoulders.
DROPS 214-49 |
||||||||||||||||||||||||||||||||||||||||
|
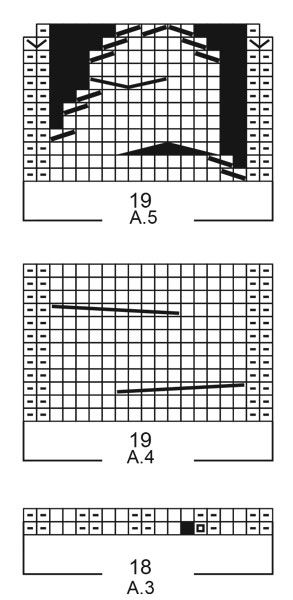
------------------------------------------------------- EXPLANATION FOR THE PATTERN: ------------------------------------------------------- GARTER STITCH (back and forth): Knit all rows. 1 ridge vertically = knit 2 rows. PATTERN: Head band: See diagram A.1. Neck warmer: See diagram A.2. Mittens: See diagrams A.3, A.4 and A.5. Diagrams show all rows in pattern seen from the right side. INCREASE TIP-1 (applies to neck warmer): BEFORE MARKER: The new stitch will be twisted, leaning towards the right. Use left needle to pick up strand between 2 stitches from the round below, pick up strand from behind and knit stitch in front loop. AFTER MARKER: The new stitch will be twisted, leaning towards the left. Use left needle to pick up strand between 2 stitches from the round below, pick up strand from the front and knit stitch in back loop. INCREASE TIP-2 (evenly): To calculate how to increase evenly, use the total number of stitches on row (e.g. 54 stitches), and minus stitches in garter stitch in each side (e.g. 4 stitches) and divide stitches by number of increases to be done (e.g. 12) = 4.1. In this example increase by making 1 yarn over after approx. every 4th stitch. On next row work yarn overs twisted to avoid holes. INCREASE TIP-3 (applies to mittens): Increase 1 stitch by making 1 yarn over. On next round knit yarn over twisted to avoid holes. DECREASE TIP: Decrease in stocking stitch section on the under side of mitten as follows: Decrease as follows after marker: Slip 1 stitch knitwise, knit 1, pass slipped stitch over (= 1 stitch decreased), work until 2 stitches remain before next marker, knit 2 together (= 1 stitch decreased). ------------------------------------------------------- START THE PIECE HERE: ------------------------------------------------------- HEAD BAND - SHORT OVERVIEW OF THE PIECE: Work piece back and forth on circular needle and sew together when finished. HEAD BAND: Cast on 31 stitches on circular needle size 4.5 mm with Alaska. Purl 1 row from wrong side. Then work pattern from right side as follows: 2 edge stitches in GARTER STITCH - see explanation above, A.1 over the next 27 stitches, 2 edge stitches in garter stitch. Continue back and forth like this. REMEMBER THE KNITTING TENSION! Continue like this until piece measures 49 cm, or desired length - adjust to finish after or 4th or 10th row in A.1. Cast off. Sew together head band inside cast-on and cast-off edge. ------------------------------------------------------- NECK WARMER - SHORT SUMMARY OF PIECE: Worked top down. First work in the round until increase for shoulder is done. Then finish front piece and back piece separately. NECK WARMER: Cast on 76-84 stitches on a short circular needle size 4.5 mm with Alaska. Knit 1 round. Then work rib as follows: (Knit 2/purl 2) over the first 12-16 stitches, insert 1st marker here, work A.2 over the next 12 stitches (= shoulder stitches), insert 2nd marker here, purl 2, (knit 2/purl 2) over the next 24-28 stitches, insert 3rd marker here, work A.2 over the next 12 stitches (= shoulder stitches), insert 4th marker here, purl 2, (knit 2/purl 2) over the last 12-12 stitches. Continue in the round like this for 8 cm. Switch to circular needle size 5.5 mm. Insert a marker at beginning of round. Now measure piece from here. Now work pattern as follows: SADDLE SHOULDER INCREASE: Continue with A.2 over shoulder stitches in each side and work in stocking stitch over the remaining stitches on round, at the same time on first round increase 4 stitches: Increase BEFORE 1st and 3rd marker, and AFTER 2nd and 4th marker- read INCREASE TIP-1. There are only increases on back piece and front piece and number of shoulder stitches remains the same. Increase like this on every round 14-16 times in total = 132-148 stitches. REMEMBER THE KNITTING TENSION! Work next round as follows: Knit until shoulder stitches, cast off with knit over knit and purl over purl over the 12 shoulder stitches, knit over the next 54-62 stitches before slipping them on a stitch holder for front piece, cast off the next 12 shoulder stitches, knit over all the 54-62 stitches on back piece. BACK PIECE: Work in stocking stitch back and forth with 2 edge stitches in GARTER STITCH - read explanation above, in each side. When neck warmer measures 27-29 cm from marker inserted after the neck, increase 12-16 stitches evenly - read INCREASE TIP-2 = 66-78 stitches. Switch to circular needle size 4.5 mm. Now work rib from right side as follows: 2 stitches in garter stitch, (knit 2/purl 2) until 4 stitches remain, knit 2, 2 stitches in garter stitch. Continue rib like this for 5 cm. Cast off with knit over knit and purl over purl (cast off stitches in garter stitch by knitting). Neck warmer measures approx. 32-34 cm from marker. FRONT PIECE: Slip stitches from stitch holder back on circular needle 5.5 and work as back piece. ------------------------------------------------------- MITTENS - SHORT OVERVIEW OF THE PIECE: Worked in the round on double pointed needles. LEFT MITTEN: Cast on 40-44 stitches on double pointed needles size 3.5 mm with Alaska. Knit 1 round. Work rib (knit 2/purl 2) in the round for 4 cm. Work next round as follows: Knit 0-3 stitches. Insert a marker here. This is beginning of round. Work next round as follows: Knit 2-3, work A.3 over the next 18 stitches (= 1 stitch increased), knit 2-3, knit 2 together (= 1 stitch decreased), knit the last 16-18 stitches = 40-44 stitches. Work 1 round with knit over knit and A.3 over A.3. Switch to double pointed needles size 4 mm. Then work pattern as follows: Knit 2-3, A.4 over A.3, knit the next 19-22 stitches on round. REMEMBER THE KNITTING TENSION! When piece measures 8-8 cm, increase 1 stitch on each side of last stitch on round for thumb (= 2 stitches increased) - read INCREASE TIP-3. Increase like this on outside of the increased stitches every other round 5-6 times in total = 50-56 stitches. Now slip the 11-13 thumb stitches on 1 stitch holder. Work pattern in the round as before in the round on mitten and cast on 1 new stitch behind thumb on next round = 40-44 stitches. Continue like this until A.4 has been worked 4 times vertically. Mitten now measures approx. 23 cm from cast-on edge. Insert 1 marker at beginning of round and 1 marker after 23-25 stitches (= 23-25 stitches on top of mitten and 17-19 stitches on the under side of mitten). Now work A.5 over A.4, AT THE SAME TIME on next round decrease on the under side of mitten - read DECREASE TIP. Decrease like this every other round 5 times and every round 2 times. When diagram has been worked vertically, there are 12-16 stitches on round. Work 1 round where all stitches are knitted together 2 by 2 = 6-8 stitches. Cut the yarn and pull it through the remaining stitches, tighten together and fasten. THUMB: Slip the 11-13 thumb stitches back on double pointed needles size 4 mm. Pick in addition up 4 stitches behind thumb = 15-17 stitches. Work in stocking stitch until the thumb itself measures approx. 5-5½ cm (try on the mitten, approx. ½ cm remains until finished measurements). Knit 2 rounds AT THE SAME TIME knit all stitches together 2 by 2 on both rounds. Cut the yarn and pull it through the remaining stitches, tighten together and fasten. RIGHT MITTEN: Cast on and work as left mitten but increase for thumb on each side of the 24th-26th stitch (= 3rd-4th stitch with stocking stitch after A.4). |
||||||||||||||||||||||||||||||||||||||||
Diagram explanations |
||||||||||||||||||||||||||||||||||||||||
|
||||||||||||||||||||||||||||||||||||||||
 |
||||||||||||||||||||||||||||||||||||||||
 |
||||||||||||||||||||||||||||||||||||||||
Have you finished this pattern?Tag your pictures with #dropspattern #winterwispsset or submit them to the #dropsfan gallery. Do you need help with this pattern?You'll find 33 tutorial videos, a Comments/Questions area and more by visiting the pattern on garnstudio.com. © 1982-2025 DROPS Design A/S. We reserve all rights. This document, including all its sub-sections, has copyrights. Read more about what you can do with our patterns at the bottom of each pattern on our site. |
||||||||||||||||||||||||||||||||||||||||






Post a comment to pattern DROPS 214-49
We would love to hear what you have to say about this pattern!
If you want to leave a question, please make sure you select the correct category in the form below, to speed up the answering process. Required fields are marked *.