
Popular categories
Looking for a yarn?








































Comments / Questions (3)
 Daguet Sylviane wrote:
Il y a une erreur dans les explications des diagramme le o de le tricoter torse pour qu'il ne fasse pas de trou et il faut qu'il fasse un trou
29.10.2026 - 16:20DROPS Design answered:
Bonjour Mme Daguet, tout à fait, la correction a été faite, merci pour votre retour. Bon tricot!
30.10.2026 - 08:07
Véro wrote:
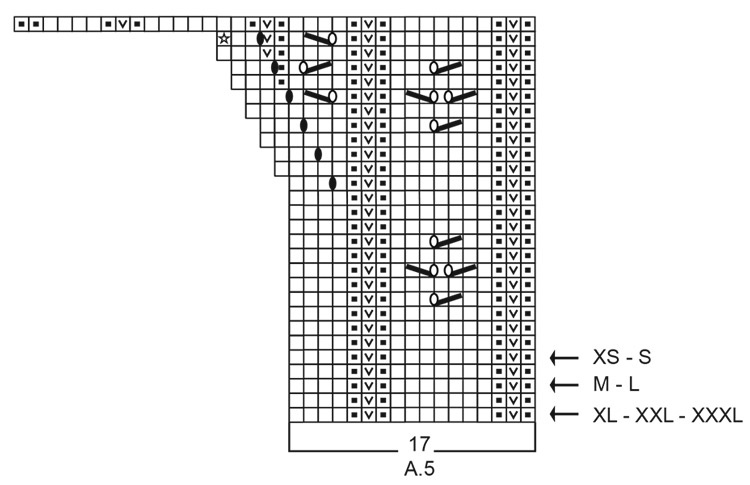
Bonjour. Tout d'abord ce gilet est magnifique. Sur les diagrammes, au niveau des ronds blancs, faut-il vraiement réaliser le rang envers en tricotant le jeté torse? La photo me laisse penser que ce jeté est tricoté à l'endroit pour réaliser un trou. Merci pour votre réponse. Bonne journée.
29.10.2026 - 01:25DROPS Design answered:
Bonjour Véro et merci, effectivement les jetés = ovales blancs se tricotent en jersey endroit (à l'envers sur l'envers) pour former les trous du motif ajouré - cf. 6ème symbole. Bon tricot!
29.10.2026 - 10:04
 Christiane wrote:
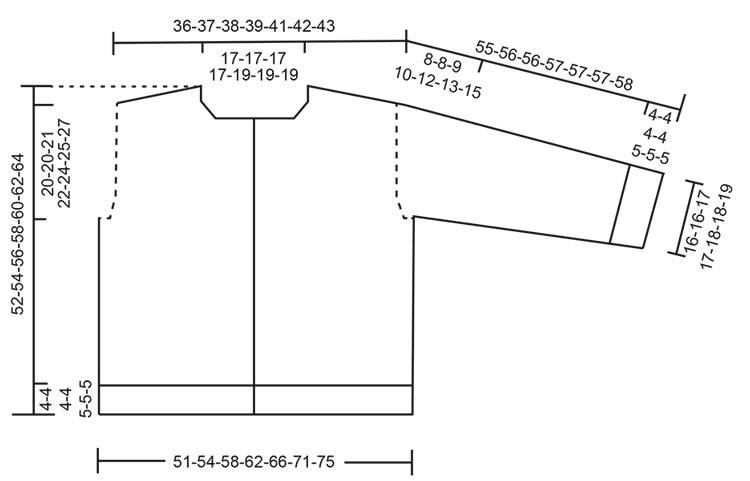
Hallo, ich vermisse die Maßskizze zu dieser sehr schönen Jacke. Wird die noch eingefügt?
28.10.2026 - 10:25DROPS Design answered:
Liebe Christiane, die Maßskizze finden Sie ganz unten, unter alle Diagramme. Viel Spaß beim Stricken!
29.10.2026 - 08:41
|
|||||||||||||||||||||||||
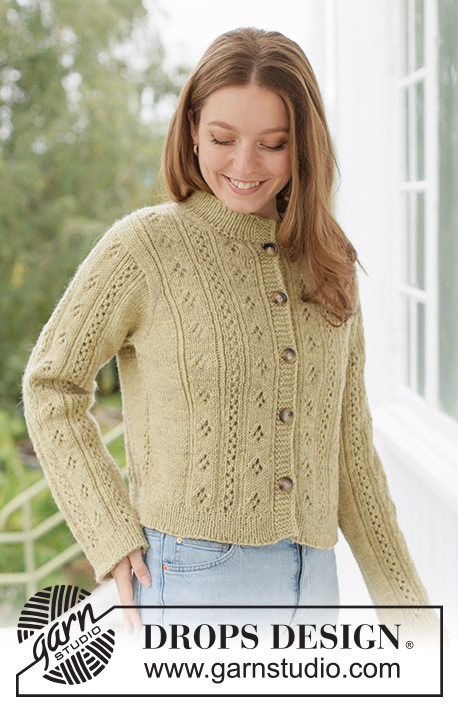
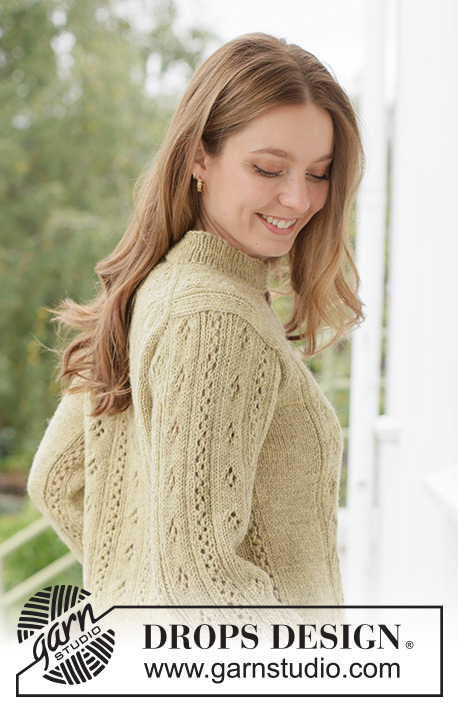
Linden Bloom Cardigan#lindenbloomcardigan |
|||||||||||||||||||||||||
 |
 |
||||||||||||||||||||||||
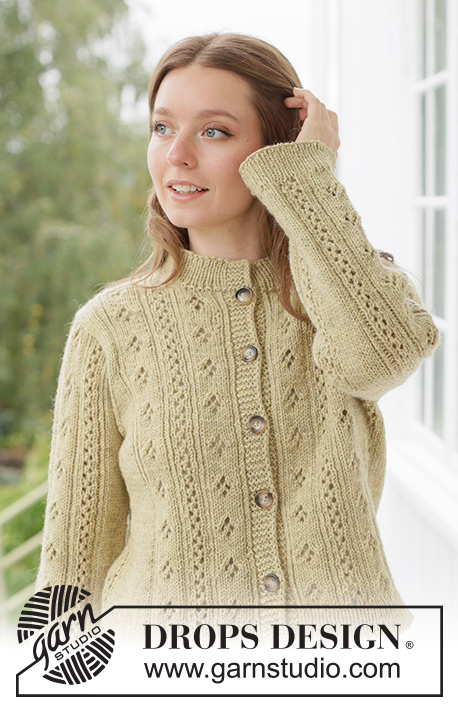
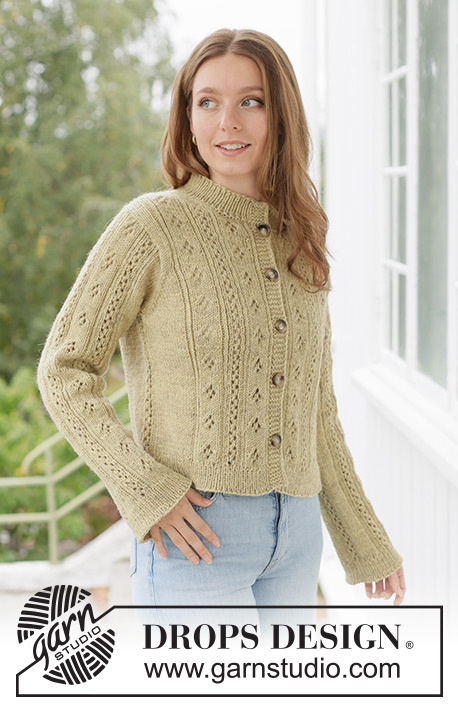
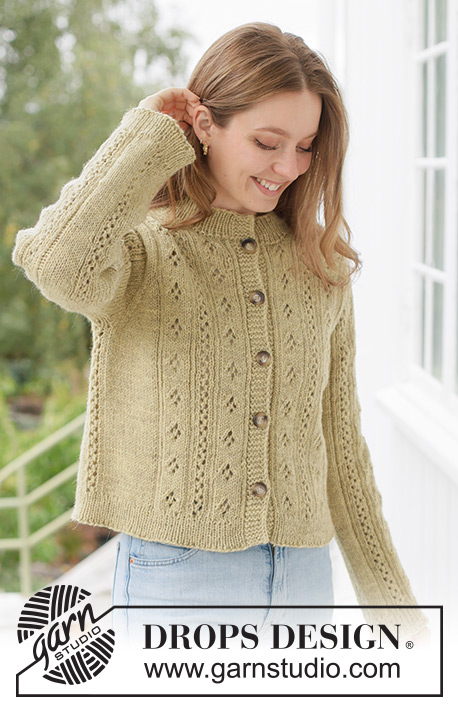
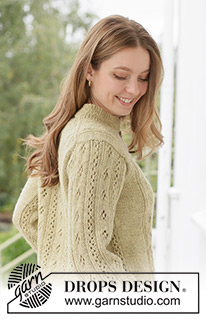
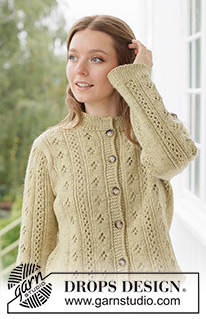
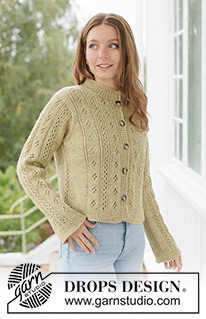
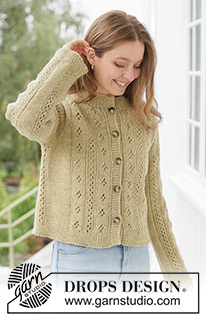
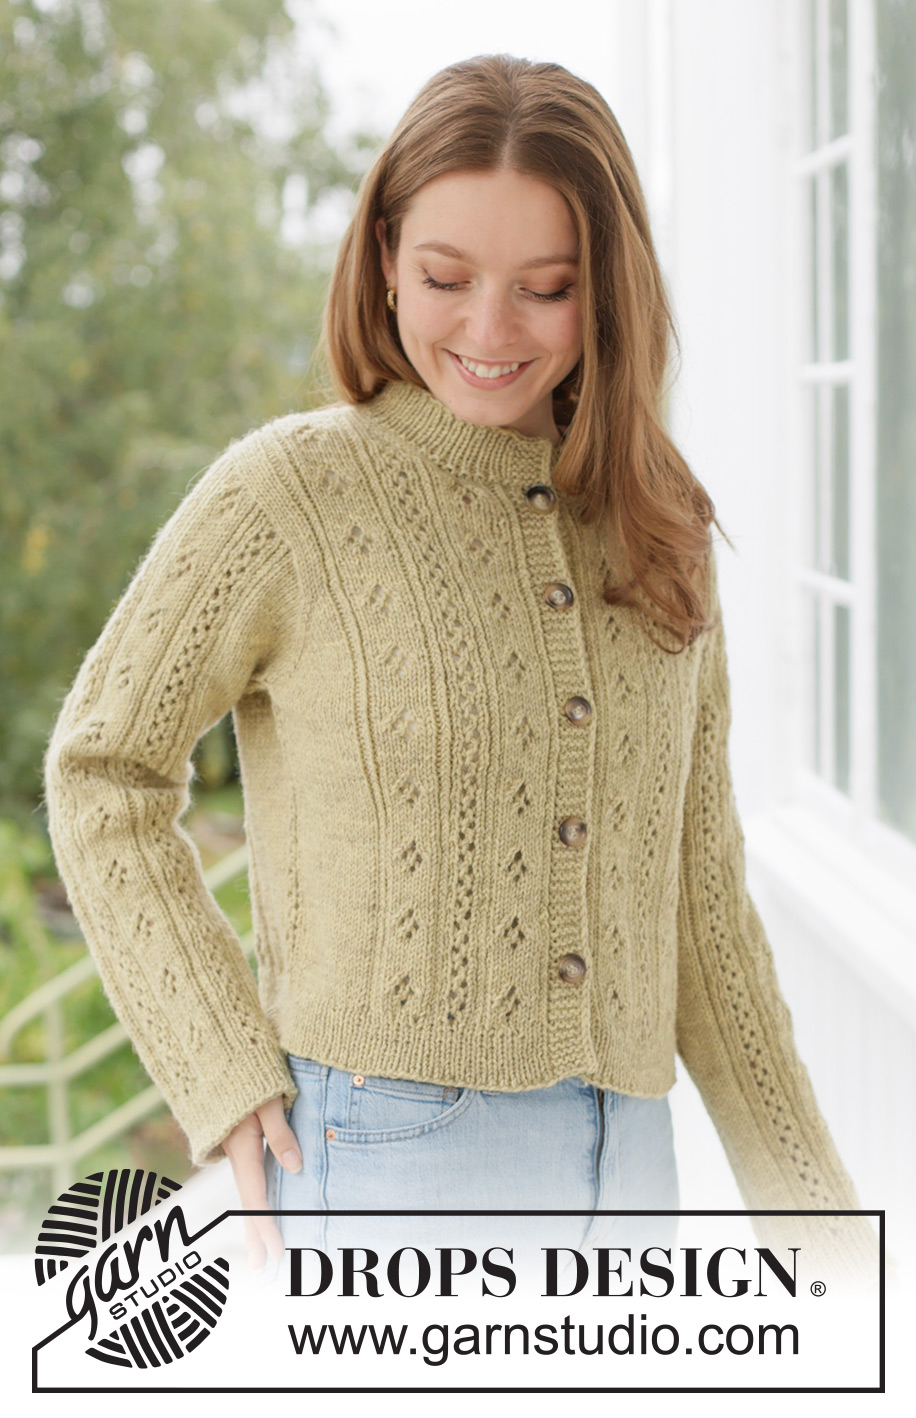
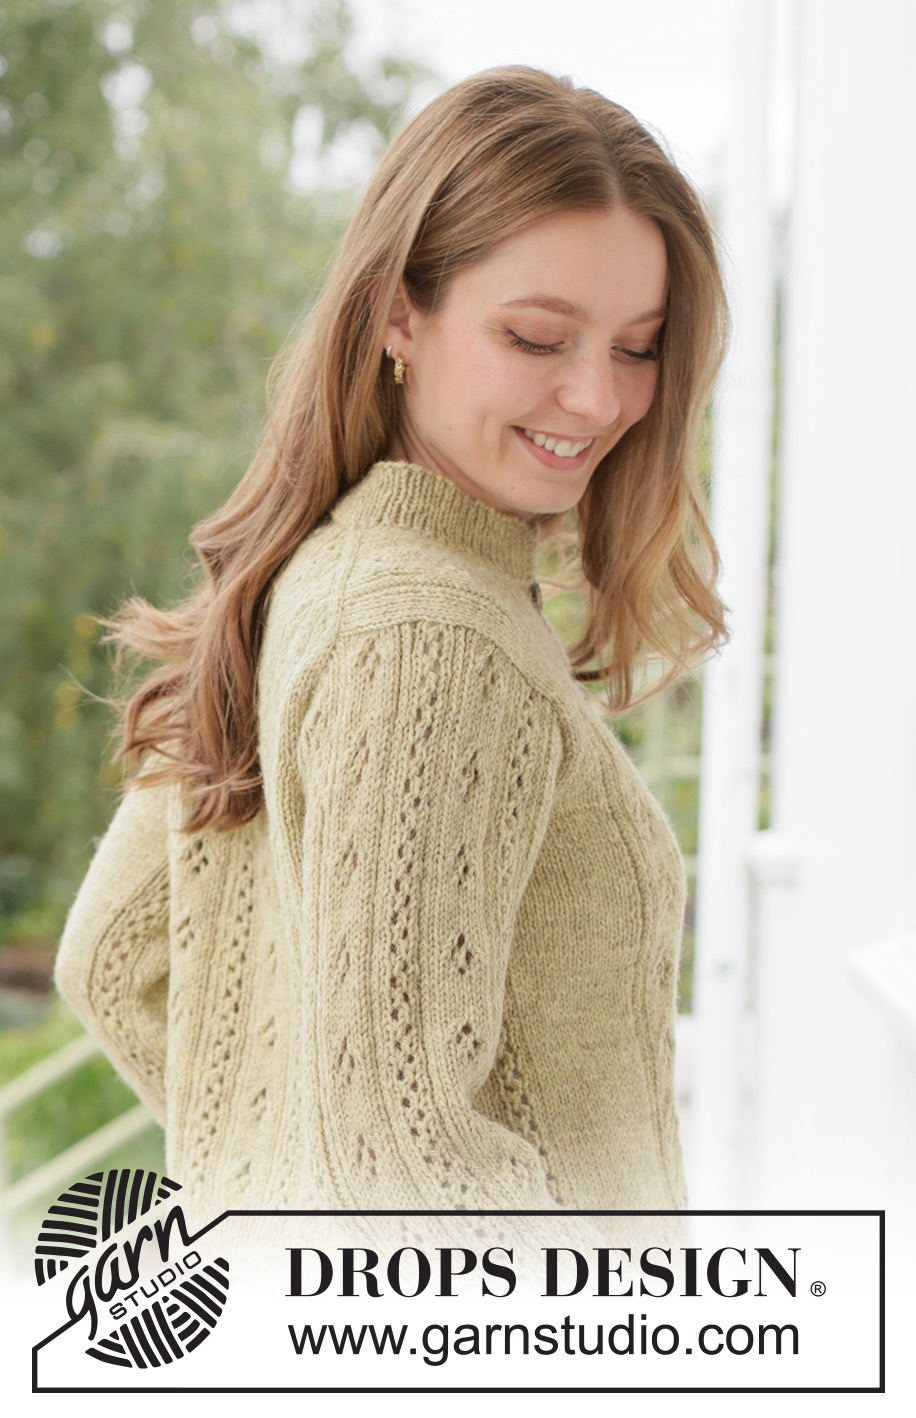
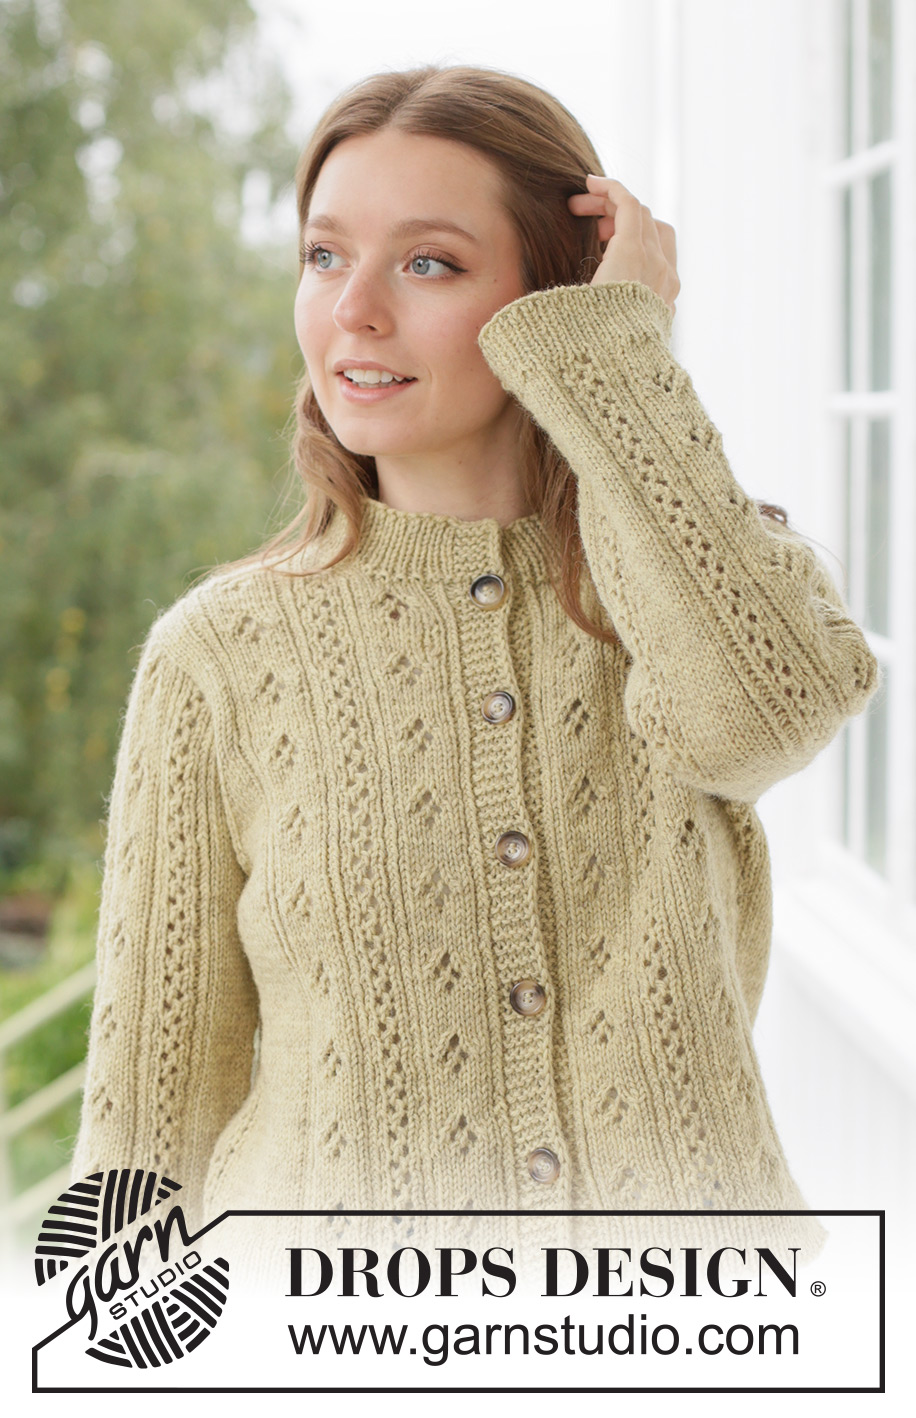
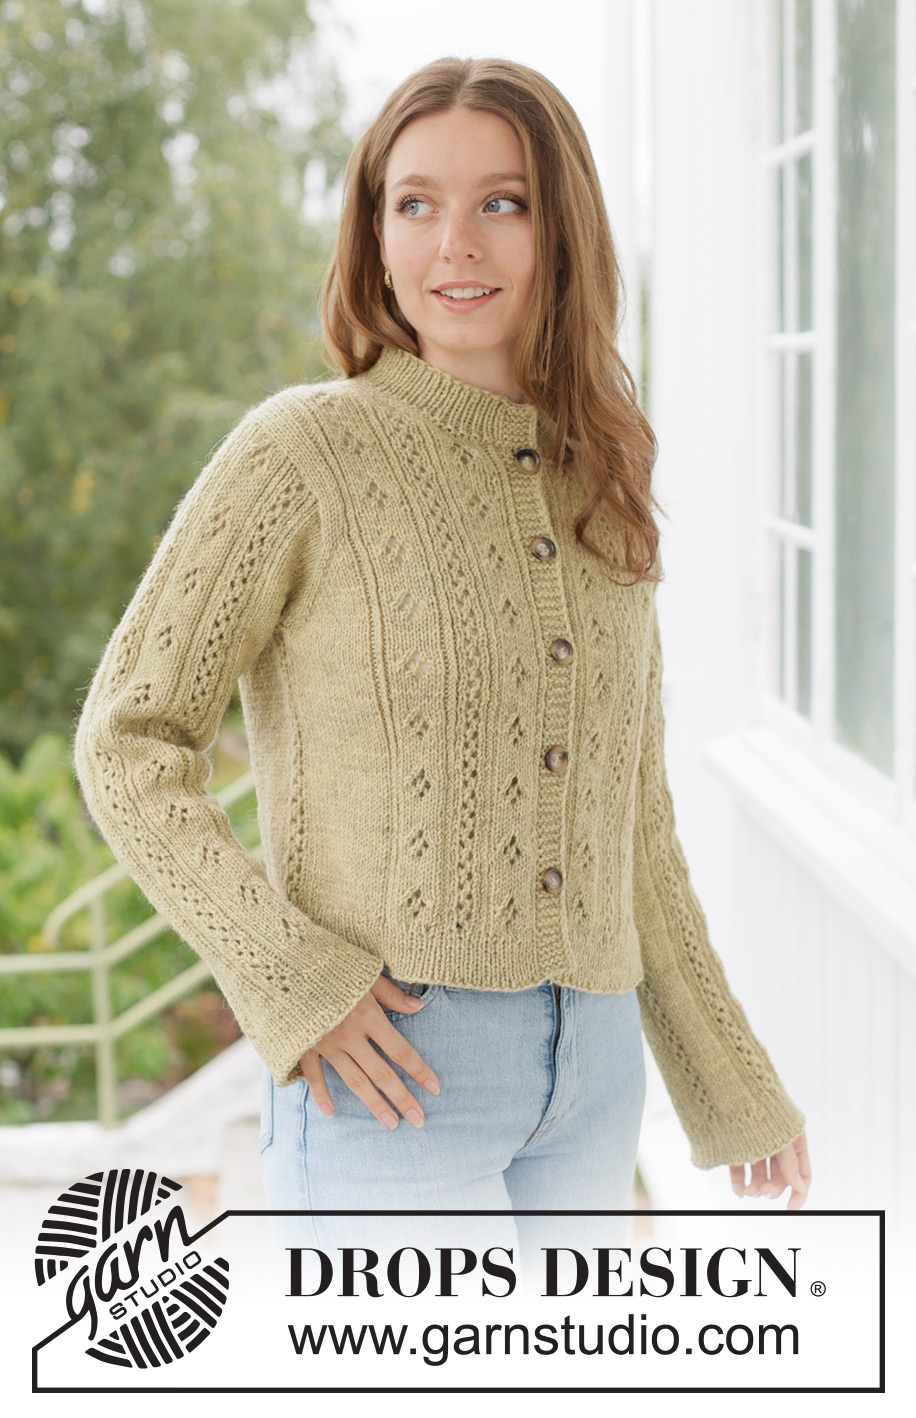
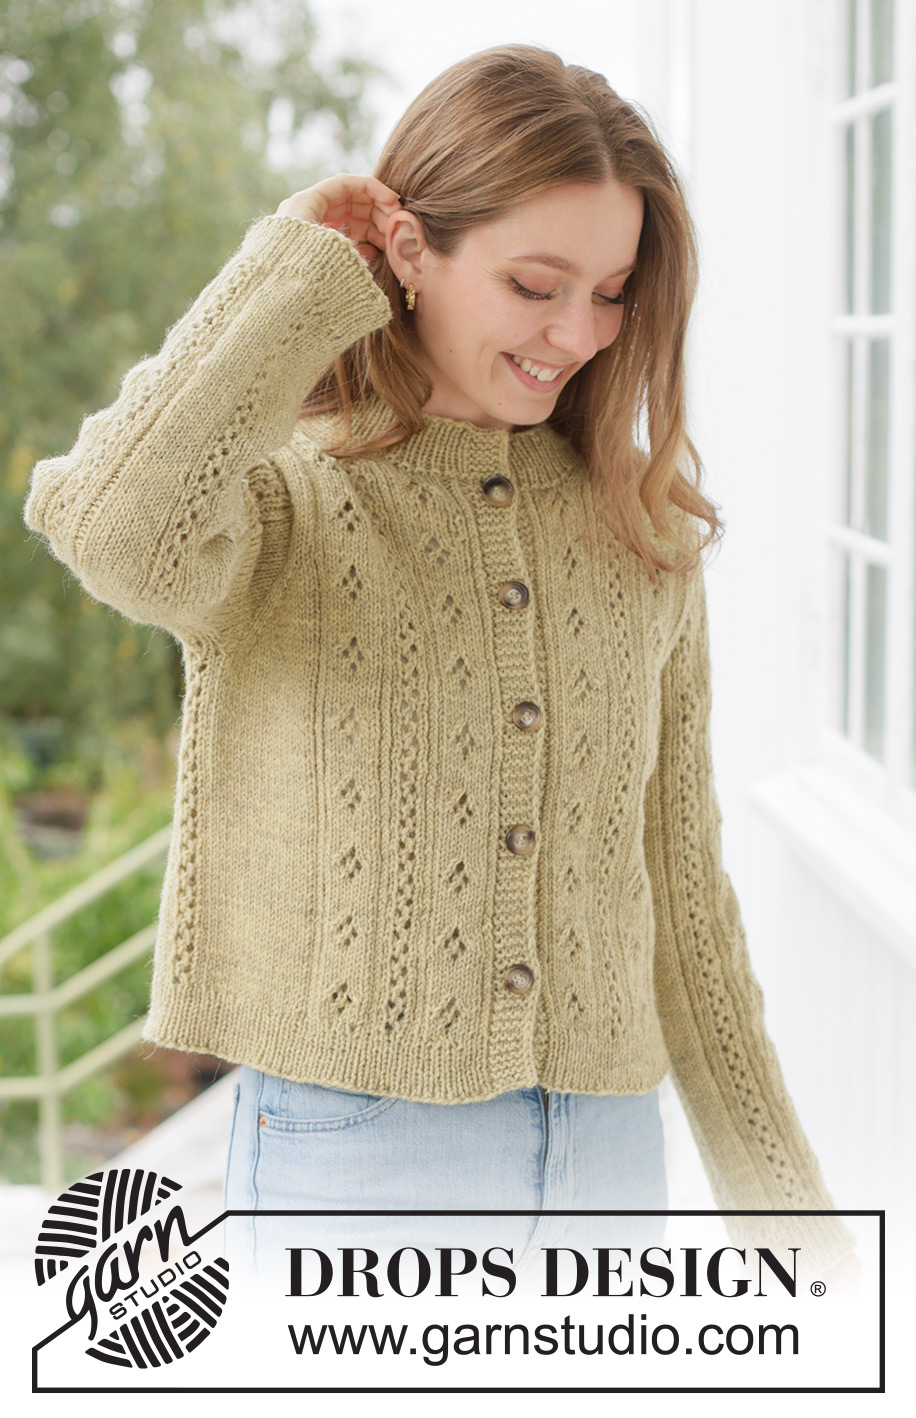
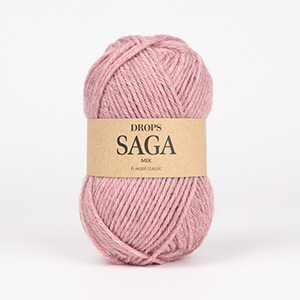
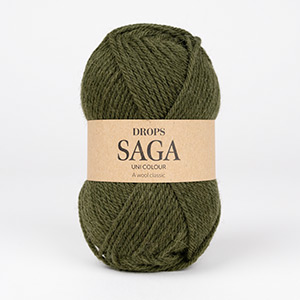
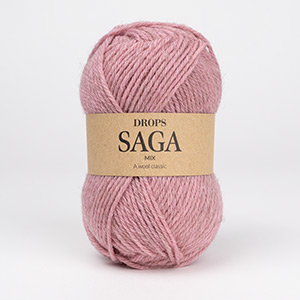
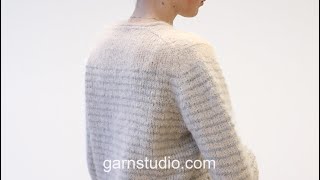
Knitted jacket in DROPS Saga. The piece is worked top down with European yoke and lace pattern. Sizes XS - XXXL.
DROPS 272-51 |
|||||||||||||||||||||||||
|
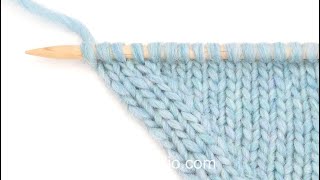
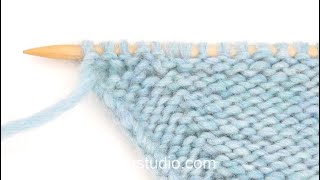
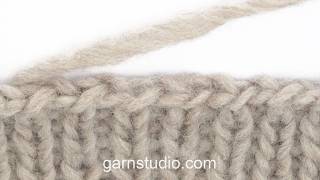
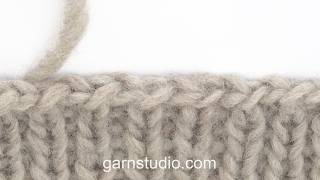
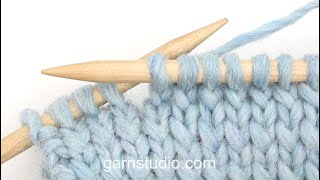
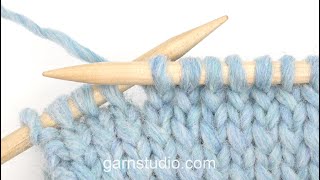
------------------------------------------------------- EXPLANATIONS FOR THE PATTERN: ------------------------------------------------------- PATTERN: See diagrams A.1 to A.6. The diagrams show the pattern from the right side. The diagram is worked from right to left when working from the right side and from left to right when working from the wrong side. INCREASE TIP-1: INCREASE 1 STITCH TOWARDS LEFT – from RIGHT SIDE: Use the left needle to pick up the strand between 2 stitches from the row below, pick up the strand from the front and knit through the stitch-loop that lies on the back of the needle. INCREASE 1 STITCH TOWARDS THE RIGHT- from RIGHT SIDE: Use the left needle to pick up the strand between 2 stitches from the row below, pick up the strand from the back and knit through the stitch-loop that lies on the front of the needle. Work the new stitches into the pattern. INCREASE TIP-2: INCREASE 1 STITCH TOWARDS THE RIGHT- from WRONG SIDE: Use the left needle to pick up the strand between 2 stitches from the row below, pick up the strand from the back and purl through the stitch-loop that lies on the front of the needle. INCREASE 1 STITCH TOWARDS LEFT – from WRONG SIDE: Use the left needle to pick up the strand between 2 stitches from the row below, pick up the strand from the front and purl through the stitch-loop that lies on the back of the needle. Work the new stitches into the pattern. GARTER STITCH (back and forth): Knit all rows, from both the right and wrong side. 1 ridge in height = knit 2 rows. BANDS WITH I-CORD: BEGINNING OF ROW: Work the band as follows: Slip 1 stitch purl-wise with yarn in front, knit 1, work 4 garter stitches. END OF ROW: Work the band as follows: Work until there are 6 stitches left on the row, work 4 garter stitches, slip 1 stitch purl-wise with yarn in front, knit 1. Work like this from both the right and wrong side. BUTTONHOLES: Work the buttonholes on the right band (when the garment is worn) from the right side, when there are 5 stitches left on the row as follows: ROW 1 (right side): Make 1 yarn over, knit 2 together, knit 1, slip 1 stitch purl-wise with the strand in front, knit 1. ROW 2 (wrong side): Work the band as before, knitting the yarn over to leave a hole. The first buttonhole is worked on the first row from the right side after the neck-increases are finished. Then work the other 4-5-5-5-5-5-5 buttonholes with 10-8½-9-9-9-9½-10 cm between each one. The bottom buttonhole is worked in the transition between the stocking stitch and rib. INCREASE TIP for transition to rib: When increasing evenly on the first round of rib, it is important to increase in the stitches that will subsequently be purled, so the knitted stitches continue neatly from the stocking stitch. SLEEVE TIP: When knitting up stitches under the sleeve, you can be left with a small hole in the transition between the stitches on the body and sleeve. This hole can be closed by picking up the strand between 2 stitches and working this strand twisted together with the first stitch between body and sleeve. DECREASE TIP: Decrease 1 stitch on each side of the A.2x mid-under the sleeve as follows: Work until there are 2 stitches left before A.2x, knit 2 together, work A.2x across 6 stitches, slip 1 stitch knit-wise, knit 1 and pass the slipped stitch over the knitted stitch (2 stitches decreased). ------------------------------------------------------- START THE PIECE HERE: ------------------------------------------------------- JACKET – SHORT OVERVIEW OF THE PIECE. The pattern uses both long and short needles; start with the length which fits the number of stitches and change when necessary. If there is a «0» in your chosen size, skip the information and go straight to the next instruction. Work according to points 1 – 5. 1. BACK PIECE: Cast on stitches for the back of the neck. Work the back piece back and forth, increasing stitches on each side until the shoulder stitch count has been achieved. The back piece has slightly diagonal shoulder. 2. FRONT PIECES: Start by knitting up stitches along one back shoulder, working downwards and increasing for the neckline. Repeat on the other shoulder. 3. YOKE: Join the front and back pieces, working first 1 front piece, knitting up stitches for the sleeve along the side of the front piece, working the back piece, knitting up stitches for the sleeve along the side of the second front piece, then working this front piece. The yoke is continued back and forth from mid-front. 4. INCREASE FOR BODY AND SLEEVES: While working the yoke, you increase stitches first for the sleeves, then for the body and sleeves. 5. BODY AND SLEEVES: When all the increases are finished and the yoke is the correct length, it is divided for the body and sleeves. The body is continued back and forth while the sleeves wait. Then the sleeves are worked in the round, top down. Stitches are knitted up around the neckline and the neck is worked back and forth to finish. ------------------------------------------------------- BACK PIECE: The piece is worked back and forth on circular needle. Cast on 36-36-36-36-40-40-40 stitches with circular needle size 4.5 mm and DROPS Saga. Purl 1 row from the wrong side. Now work PATTERN back and forth while increasing – read INCREASE TIP-1 and INCREASE TIP -2. NOTE: From the right side, increase towards the left at the beginning of the row and towards the right at the end of the row, from the wrong side increase towards the right at the beginning of the row and towards the left at the end of the row. Work as follows; NOTE: In sizes XS to L begin the diagrams on row-1, in sizes XL to XXXL begin the diagrams on row-3: ROW 1 (right side): Work A.1a, A.2, A.3a. ROW 2 (wrong side): Continue A.3a, A.2, A.1a. Work ROWS 1 and 2 a total of 9-9-9-9-8-8-8 times (18-18-18-18-16-16-16 rows worked); A.1a and A.3a are finished in height = 72 stitches in all sizes. Continue A.1b, A.2 and A.3b across the middle 64 stitches and increase in the stocking stitches on each side as follows: Work 3 stocking stitches, increase 1 stitch, continue the stocking stitch and pattern until there are 3 stitches left, increase 1 stitch, work 3 stocking stitches. Increase like this every row a total of 1-2-3-4-6-7-8 times (1-2-3-4-6-7-8 rows worked) = 74-76-78-80-84-86-88 stitches. Insert 1 marker outermost on one side. The pattern is established with 5-6-7-8-10-11-12 stocking stitches on each side. Continue the pattern across the middle 64 stitches and stocking stitch on each side without increasing until A.2 has been worked a total of 3 times in height, finishing with the last row in A.2 (the piece measures approx. 14-14-14-14-13-13-13 cm from the cast-on edge and 6½-6-6-5½-4½-4-4 cm from the marker on the side). Remember to maintain the knitting tension. Cut the strand and place the stitches on a stitch holder. RIGHT FRONT PIECE: Find the right back shoulder as follows: Lay the back piece flat, right side up, with the stitch holder/thread towards you; right-hand side of piece = right shoulder. Start by knitting up 1 stitch outermost on the shoulder (= edge-stitch), then knit up 1 stitch in each row worked inside 1 stitch as far as the neck (19-20-21-22-22-23-24 stitches) = 20-21-22-23-23-24-25 shoulder-stitches. Insert 1 marker by the neck. All measurements on the front piece are taken from this marker measured in the knitting direction. Purl the first row from the wrong side, increasing 2-2-2-2-4-4-4 stitches evenly on this row = 22-23-24-25-27-28-29 stitches. Continue with pattern A.5 back and forth as follows: ROW 1 (right side): Knit 5-6-7-8-10-11-12, work A.5. ROW 2 (wrong side): Work A.5, purl 5-6-7-8-10-11-12. When A.5 is finished, the front piece measures approx. 9-9-10-10-11-11-11 cm, with 41-42-43-44-46-47-48 stitches. Approx. 3 cm of the neckline depth will lie on the back piece. Continue as follows ROW 1 (right side): Knit 5-6-7-8-10-11-12, work A.4 until there are 6 stitches left, work 6 stitches according to BANDS WITH I-CORD (see above). ROW 2 (wrong side): Work 6 stitches according to bands with I-cord, continue A.4 until there are 5-6-7-8-10-11-12 stitches left, purl 5-6-7-8-10-11-12. Work until the front piece measures 18-18-19-19-20-20-20 cm, finishing with the last row in A.4. Cut the strand and place the stitches on a stitch holder. Work the left front piece along the left back shoulder. LEFT FRONT PIECE: Start from the right side by the neck on the left back shoulder and knit up 1 stitch in each row worked, inside 1 stitch, as far as the shoulder (19-20-21-22-22-23-24 stitches), then knit up 1 stitch outermost on the shoulder = 20-21-22-23-23-24-25 shoulder-stitches. Insert 1 marker by the neck. All measurements on the front piece are taken from this marker measured in the knitting direction. Purl the first row from the wrong side, increasing 2-2-2-2-4-4-4 stitches evenly on this row = 22-23-24-25-27-28-29 stitches. Continue with pattern A.6 back and forth as follows: ROW 1 (right side): Work A.6, knit 5-6-7-8-10-11-12. ROW 2 (wrong side): Purl 5-6-7-8-10-11-12, work A.6. When A.6 is finished, the front piece measures approx. 9-9-10-10-11-11-11 cm, with 41-42-43-44-46-47-48 stitches. Continue as follows (remember the BUTTONHOLES): ROW 1 (right side): Work 6 stitches according to bands with I-cord, work A.4 until there are 5-6-7-8-10-11-12 stitches left, knit 5-6-7-8-10-11-12 ROW 2 (wrong side): Purl 5-6-7-8-10-11-12, continue A.4 until there are 6 stitches left, work 6 stitches according to bands with I-cord. Work until the front piece measures 18-18-19-19-20-20-20 cm, finishing with the last row in A.4. Do not cut the strand; all the pieces are now joined and stitches are knitted up for the sleeves. Continue the established pattern on the front and back pieces. YOKE: ROW 1 (right side): Start from the right side and work 6 band-stitches as before, continue the pattern and stocking stitch until there is 1 stitch left on the front piece, insert 1 marker on the needle, knit the last stitch on the front piece, knit up 48 stitches along the side of the left front piece, knitting up inside the outermost stitch, knit the first stitch on the back piece (= 50 sleeve-stitches), insert 1 marker on the needle, continue the pattern and stocking stitch until there is 1 stitch left on the back piece, insert 1 marker on the needle, knit the last stitch on the back piece, knit up 48 stitches along the side of the right front piece, knitting up inside the outermost stitch, knit the first stitch on the right front piece (= 50 sleeve-stitches), insert 1 marker on the needle, continue the pattern and stocking stitch until there are 6 stitches left on the front piece, work 6 band-stitches as before. There are 50 stitches on each sleeve, 40-41-42-43-45-46-47 stitches on each front piece and 72-74-76-78-82-84-86 stitches on the back piece = 252-256-260-264-272-276-280 stitches. From the wrong side: Work as before to the first marker, move the marker onto the right needle, * purl 3, knit 1, purl 1 twisted, knit 1, purl 4, knit 1, purl 1 twisted, knit 1, purl 7, knit 1, purl 1 twisted, knit 1, purl 4, knit 1, purl 1 twisted, knit 1, purl 7, knit 1, purl 1 twisted, knit 1, purl 4, knit 1, purl 1 twisted, purl 3 *, move the marker onto the right needle, work as before to the next marker, move the marker onto the right needle, work from *-* 1 more time, move the marker onto the right needle, work to end of row as before. Continue pattern A.2 across the middle 44 stitches on each sleeve; i.e., the sleeve begins and ends with 3 stocking stitches. The pattern on the sleeves is started on the same row as the pattern on the body (i.e., the first time A.2 is worked begin with row-3). You increase on both the body and sleeves, increasing 2 stitches inside the markers on the body so there are 2 stitches between increases on the body and sleeves. Work as follows: ROW 1 (right side): Work until there are 2 stitches left on the front piece before the first marker, increase 1 stitch towards the right, work 2 stitches, move the marker onto the right needle, increase 1 stitch towards the left, work to the next marker (with A.2 across the 44 middle stitches on the sleeve), increase 1 stitch towards the right, move the marker onto the right needle, work 2 stitches, increase 1 stitch towards the left, work until there are 2 stitches left on the back piece before the next marker, increase 1 stitch towards the right, work 2 stitches, move the marker onto the right needle, increase 1 stitch towards the left, work to the next marker (with A.2 across the 44 middle stitches on the sleeve), increase 1 stitch towards the right, move the marker onto the right needle, work 2 stitches, increase 1 stitch towards the left, work to end of row (8 increased stitches, i.e., 1 stitch on each side of 2 stitches in each transition between the body and sleeves). ROW 2 (wrong side): Continue stocking stitch and pattern without increasing, working the new stitches in stocking stitch. Work ROWS 1 and 2 a total of 10-11-12-13-15-17-19 times (20-22-24-26-30-34-38 rows worked). There are 70-72-74-76-80-84-88 stitches on each sleeve, 50-52-54-56-60-63-66 stitches on each front piece and 92-96-100-104-112-118-124 stitches on the back piece = 332-344-356-368-392-412-432 stitches. The sleeve measures approx. 8-8-9-10-12-13-15 cm; when the piece is folded double at the shoulder, it measures approx. 20-20-21-22-24-25-27 cm from outermost on the shoulder and down the armhole. Now divide for the body and sleeves. DIVIDE FOR BODY AND SLEEVES: NOTE: You do not divide at the markers. Work 52-54-56-59-63-67-70 stitches as before (= front piece), place the next 66-68-70-70-74-76-80 stitches on a stitch holder for the sleeve, cast on 6-8-12-14-14-16-18 stitches (mid-under the sleeve), work 96-100-104-110-118-126-132 stitches as before (= back piece), place the next 66-68-70-70-74-76-80 stitches on a stitch holder for the sleeve, cast on 6-8-12-14-14-16-18 stitches (mid-under the sleeve), work the last 52-54-56-59-63-67-70 stitches as before (= front piece). The body and sleeves are finished separately. BODY: = 212-224-240-256-272-292-308 stitches. Across the middle 6 of the 6-8-12-14-14-16-18 cast-on stitches under each sleeve, work A.2x, the other 0-1-3-4-4-5-6 stitches on each side of A.2x are worked in stocking stitch. Continue stocking stitch, pattern and the bands until the piece measures 45-47-49-51-52-54-56 cm from the cast-on edge mid-back. On the next row from the right side, begin the rib. AT THE SAME TIME increase 35-37-39-41-43-47-49 stitches evenly on this row (do not increase across the bands) - read INCREASE TIP-3, as follows: Change to circular needle size 3 mm. Work the 6 band-stitches as before, rib (knit 1 and purl 1 – remember to increase) until there are 7 stitches left, knit 1 and work the band as before = 247-261-279-297-315-339-357 stitches. When the rib measures 4-4-4-4-5-5-5 cm, cast off with knit above knit and purl above purl. The jacket measures approx. 49-51-53-55-57-59-61 cm from mid-back and 52-54-56-58-60-62-64 cm from the shoulder. SLEEVES: Place the 66-68-70-70-74-76-80 sleeve-stitches from one stitch holder onto circular needle size 4.5 mm and knit up 1 stitch in each of the 6-8-12-14-14-16-18 cast-on stitches under the sleeve – read SLEEVE TIP = 72-76-82-84-88-92-98 stitches. Insert a marker-thread before the 6-8-12-14-14-16-18 new stitches under the sleeve. The round starts by the marker-thread. Continue in the round, with stocking stitch and pattern and the middle 6 new stitches under the sleeve worked in A.2x as on the body (the other 0-1-3-4-4-5-6 stitches on each side of A.2x are worked in stocking stitch.. Work until the sleeve measures 1 cm from the division. On the next round decrease on each side of A.2x – read DECREASE TIP as follows: Decrease 2 stitches every 8-7-5-5-4-4-3 cm 5-6-8-8-9-10-12 times = 62-64-66-68-70-72-74 stitches. Continue working until the sleeve measures 43-44-43-43-40-39-38 cm from the division, adjusting so the last round is without lace pattern (the sleeve measures approx. 51-52-52-53-52-52-53 cm from the knitted-up row on the shoulder. Change to double pointed needles size 3 mm. Work rib (knit 1 and purl 1), AT THE SAME TIME increase 10 stitches evenly on the first round = 72-74-76-78-80-82-84 stitches. When the rib measures 4-4-4-4-5-5-5 cm, cast off with rib. The sleeve measures approx. 47-48-47-47-45-44-43 cm from the division and 55-56-56-57-57-57-58 cm from the knitted-up row on the shoulder. NECK: Use circular needle size 3 mm. Start from the right side mid-front and knit up approx. 115-115-119-119-131-131-131 stitches along the neckline, inside 1 stitch (knit up 1 stitch in each band-stitch); the stitch count should be divisible by 2 + 1. Knit 1 row from the wrong side. Work rib (knit 1 and purl 1) back and forth, with 6 band-stitches on each side) for 4 cm. Cast off with knit above knit and purl above purl. ASSEMBLY: Sew the buttons onto the left band. |
|||||||||||||||||||||||||
Diagram explanations |
|||||||||||||||||||||||||
|
|||||||||||||||||||||||||
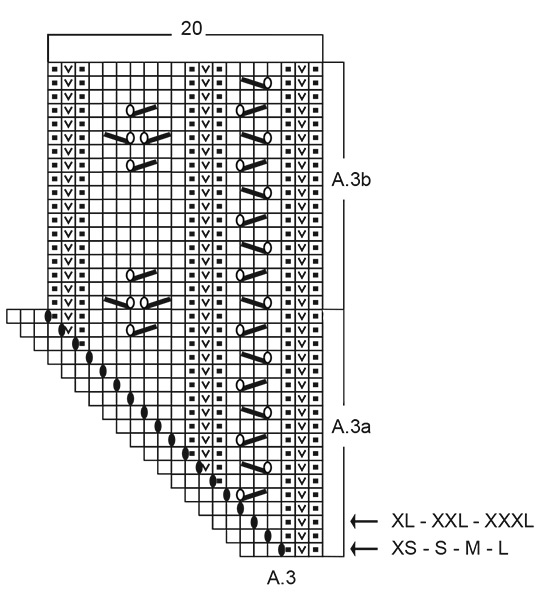 |
|||||||||||||||||||||||||
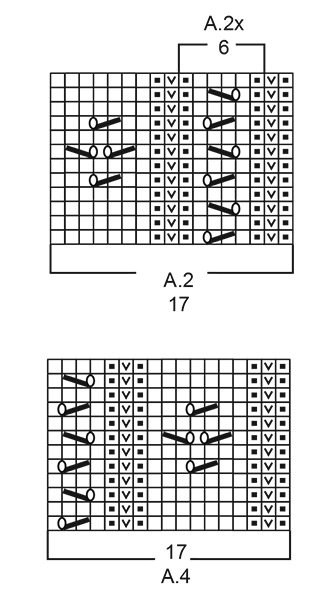 |
|||||||||||||||||||||||||
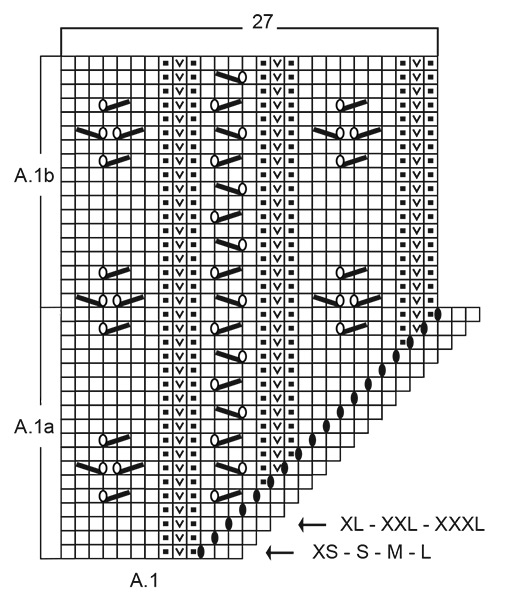 |
|||||||||||||||||||||||||
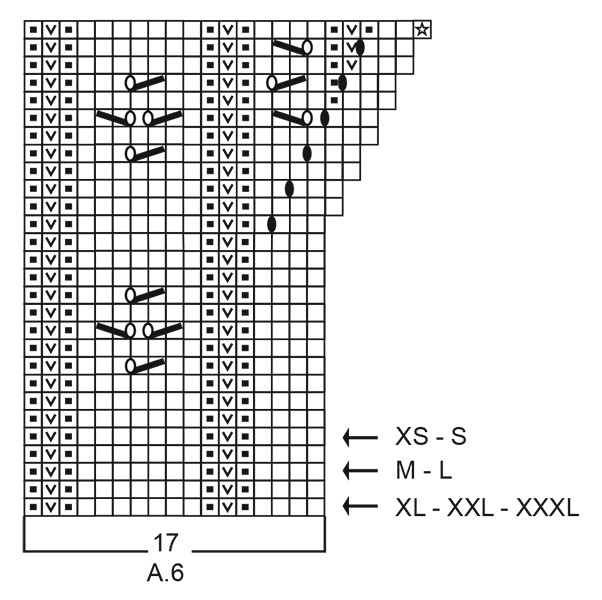 |
|||||||||||||||||||||||||
 |
|||||||||||||||||||||||||
 |
|||||||||||||||||||||||||
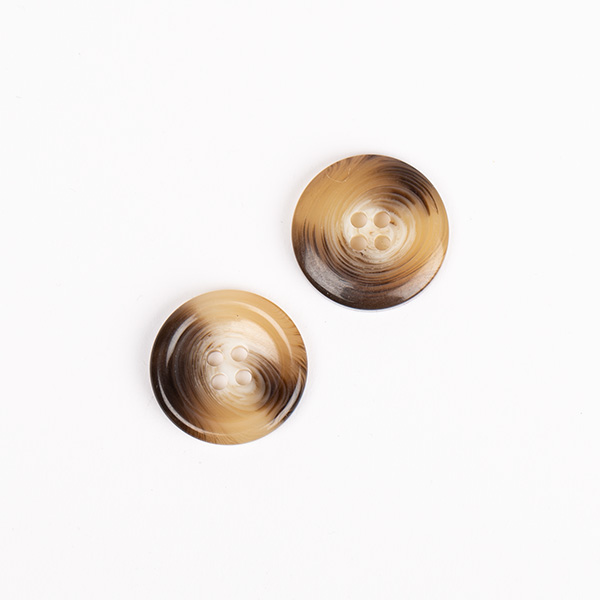
Have you finished this pattern?Tag your pictures with #dropspattern #lindenbloomcardigan or submit them to the #dropsfan gallery. Do you need help with this pattern?You'll find 45 tutorial videos, a Comments/Questions area and more by visiting the pattern on garnstudio.com. © 1982-2026 DROPS Design A/S. We reserve all rights. This document, including all its sub-sections, has copyrights. Read more about what you can do with our patterns at the bottom of each pattern on our site. |
|||||||||||||||||||||||||






With over 40 years in knitting and crochet design, DROPS Design offers one of the most extensive collections of free patterns on the internet - translated to 17 languages. As of today we count 333 catalogues and 12532 patterns translated into English (UK/cm). 12532
We work hard to bring you the best knitting and crochet have to offer, inspiration and advice as well as great quality yarns at incredible prices! Would you like to use our patterns for other than personal use? You can read what you are allowed to do in the Copyright text at the bottom of all our patterns. Happy crafting!
Post a comment to pattern DROPS 272-51
We would love to hear what you have to say about this pattern!
If you want to leave a question, please make sure you select the correct category in the form below, to speed up the answering process. Required fields are marked *.