
Popular categories
Looking for a yarn?


Comments / Questions (3)
![]() Jakobina wrote:
Jakobina wrote:
Det er noe som skurer der hvor mann øker ut til raglan på kun bak og forstykke . Det stemmer ikke å det blir over 300 masker. Jeg strikker størrelse xxL. Jeg har 285 masker på pinnene. Som passer med mindre størrelse.
16.07.2025 - 00:32
![]() Maarit wrote:
Maarit wrote:
En löydä ohjeesta ruutupiirrosta. Missä se on?
10.07.2025 - 08:45DROPS Design answered:
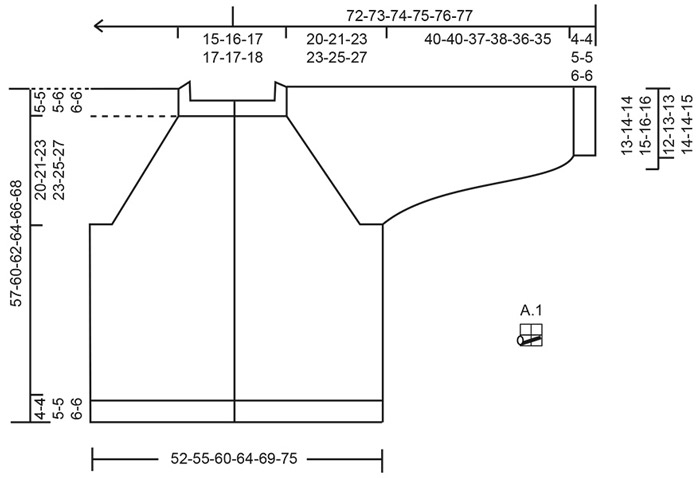
Hei, piirros löytyy mittapiirroksen oikealta puolelta.
10.07.2025 - 17:33
![]() Julie wrote:
Julie wrote:
Jeg forstår ikke helt hvordan man skal strikke diagrammet A1 samtidig som man øker til raglan. Hvordan strikker man raglanøkningene? Blir forvirra av at det står strikk 1 maske rett før raglan og raglanmaska rett. Strikker man da to sammen, kast, 1 maske rett, kast, raglan? Hva gjør man etter raglanmaska og kast? Kan du skrive hva man skal gjøre maskene før og etter raglanmaskene når man øker og strikker A1?
05.04.2025 - 02:23
|
||||||||||
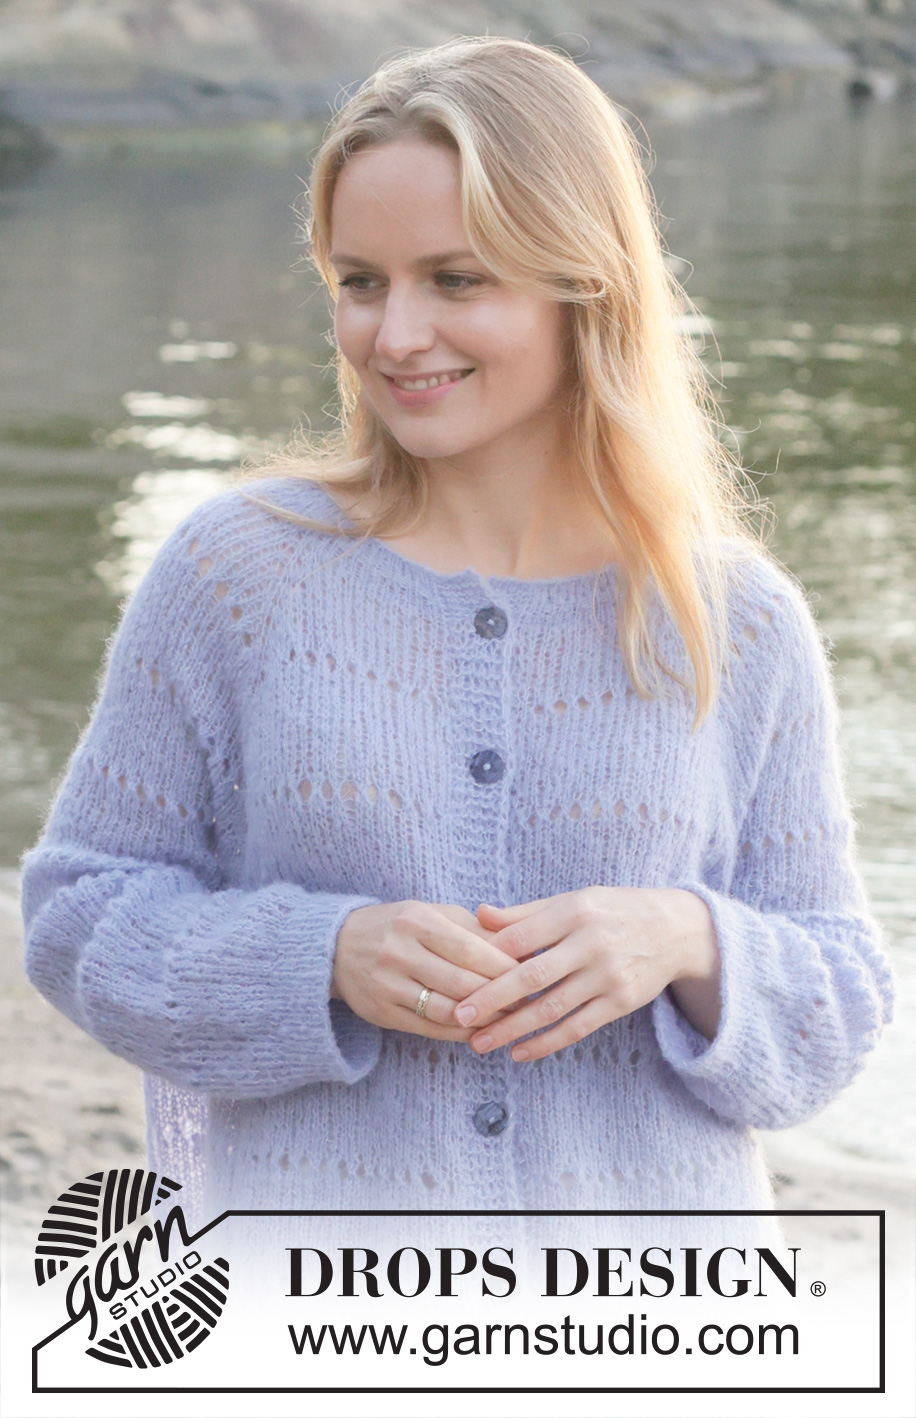
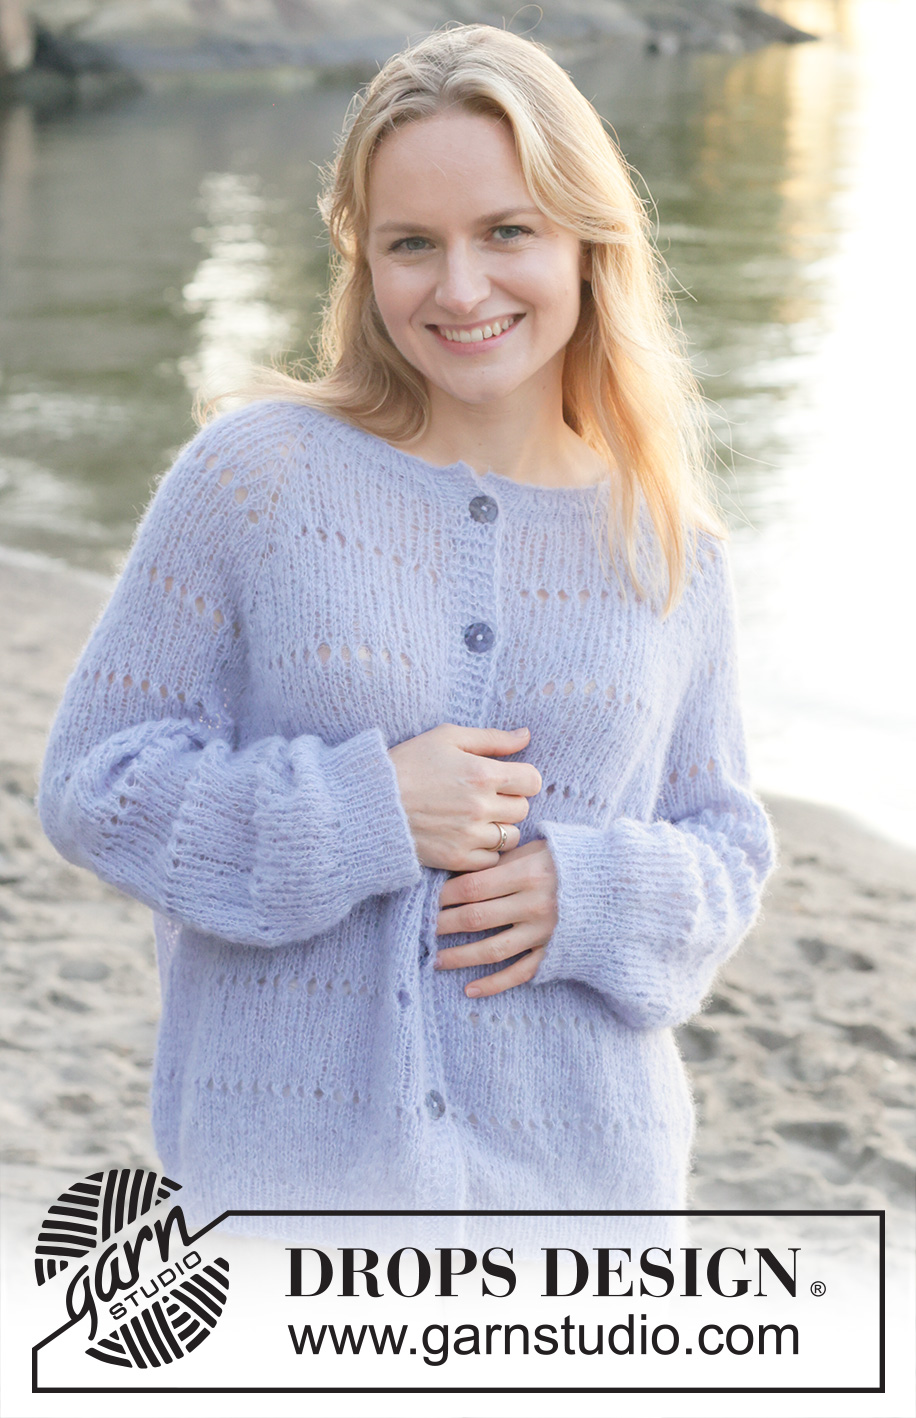
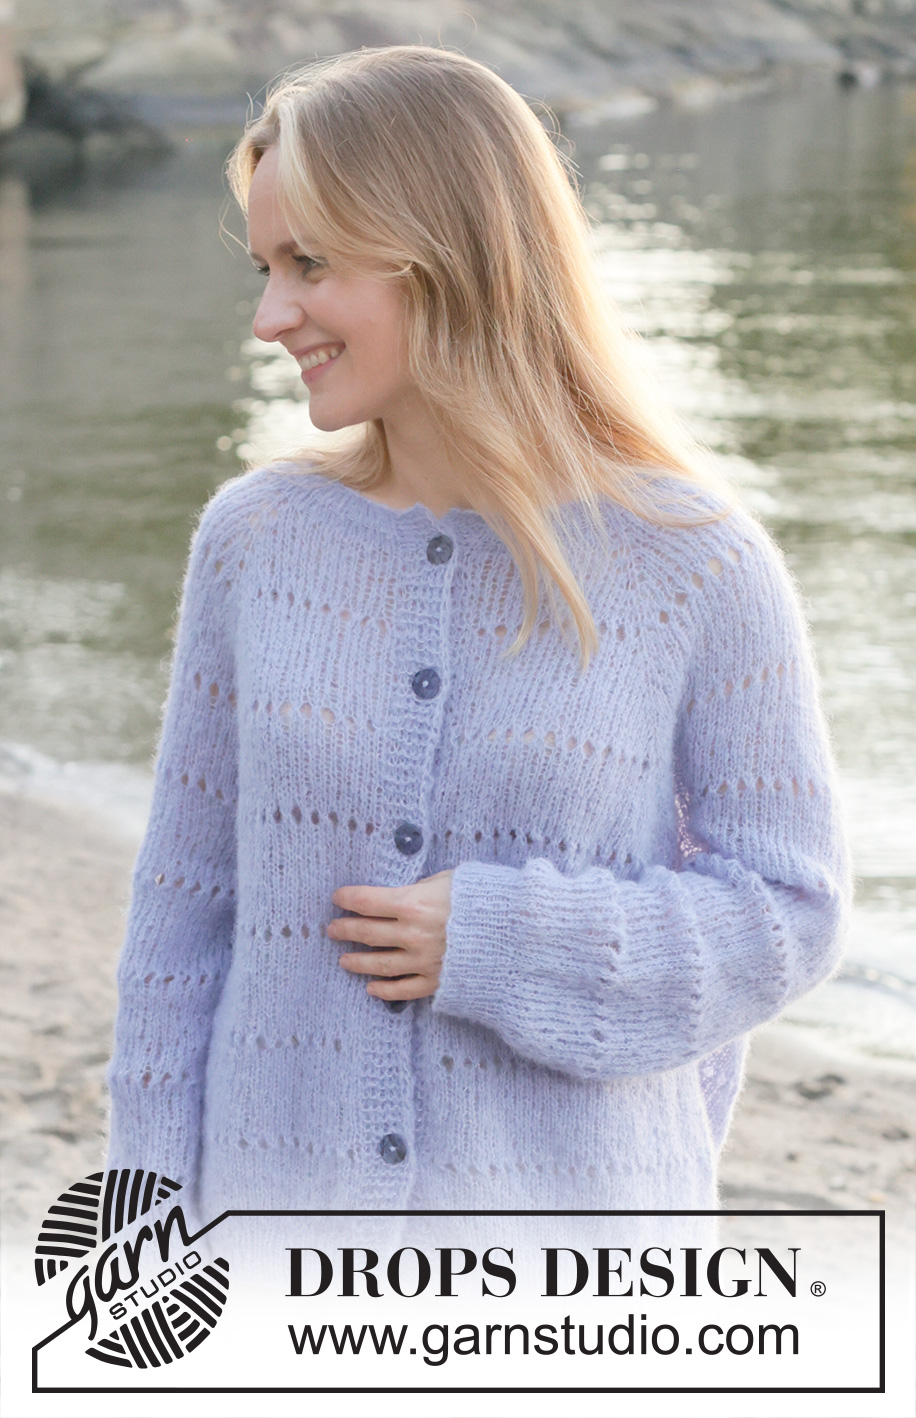
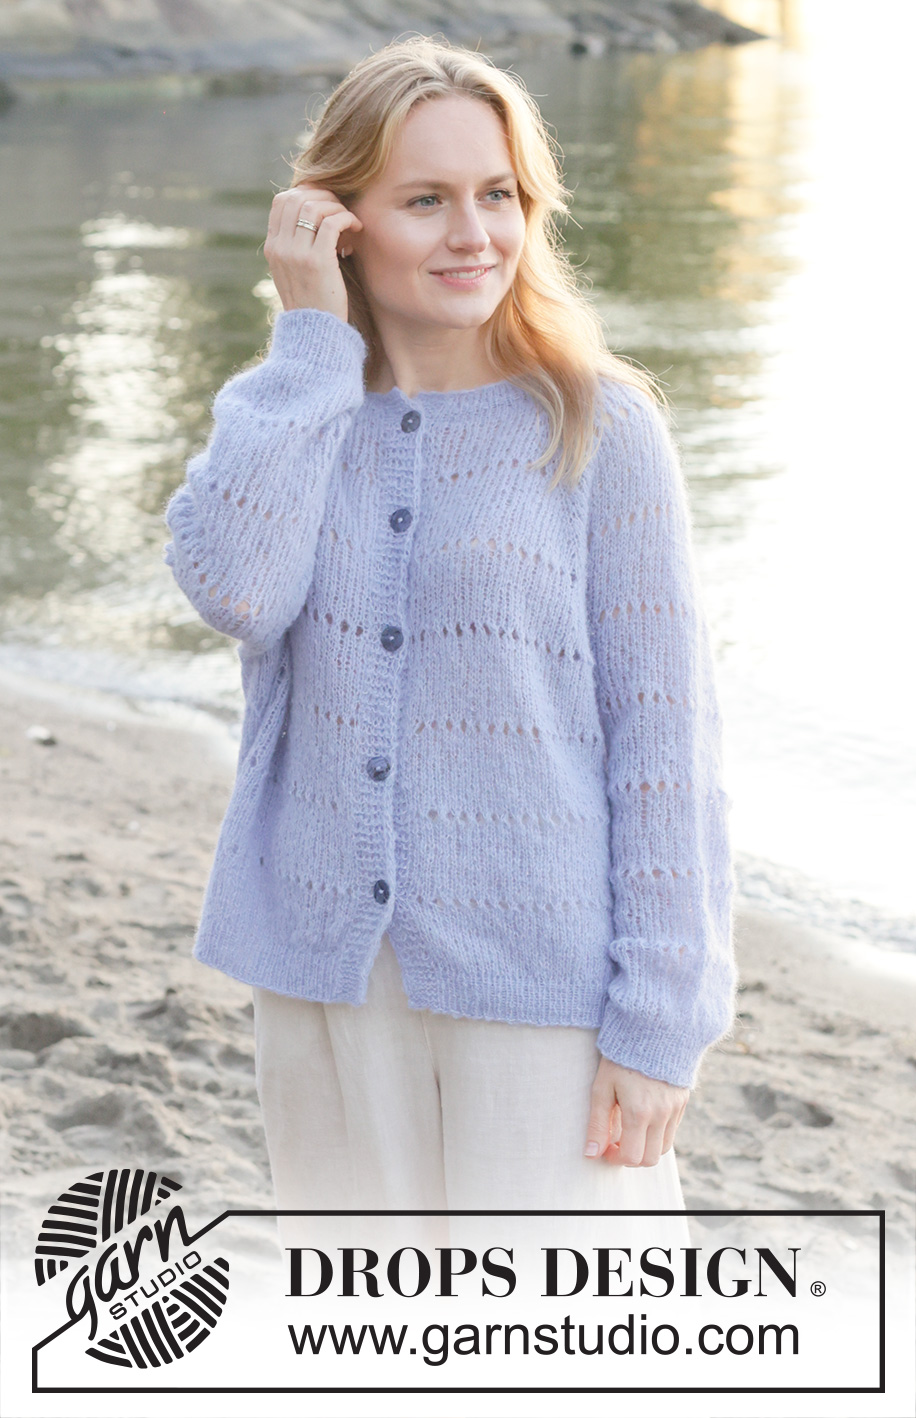
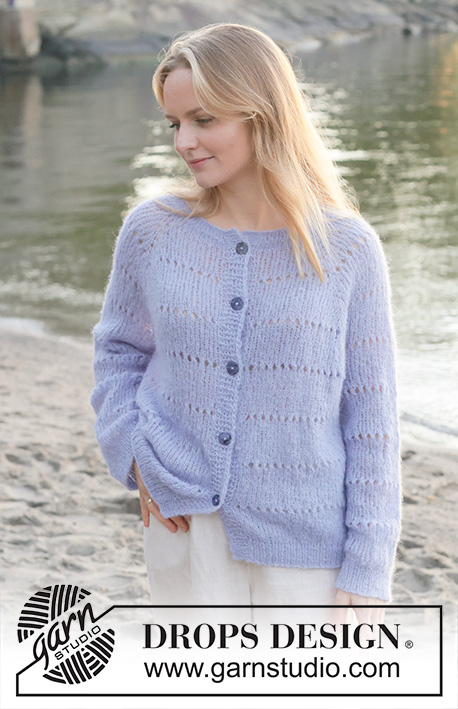
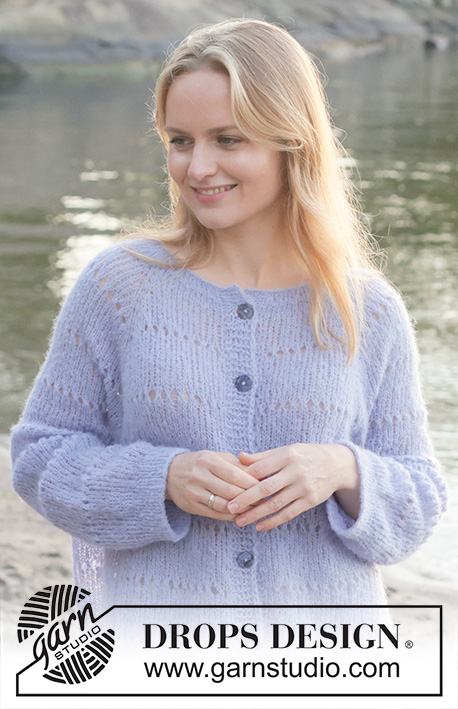
Lavender Oasis Cardigan#lavenderoasiscardigan |
||||||||||
 |
 |
|||||||||
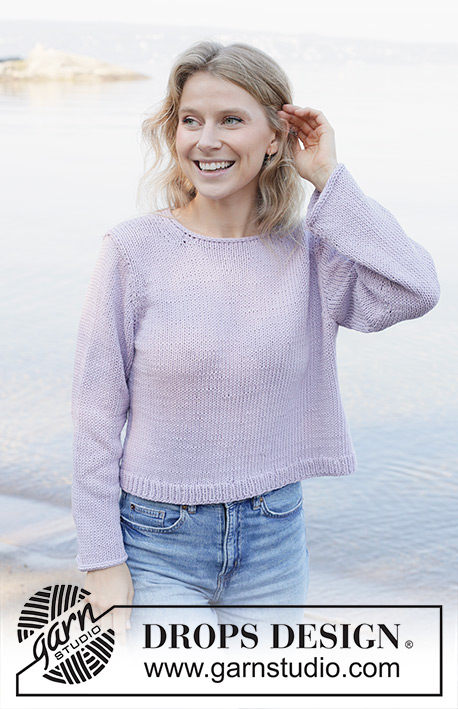
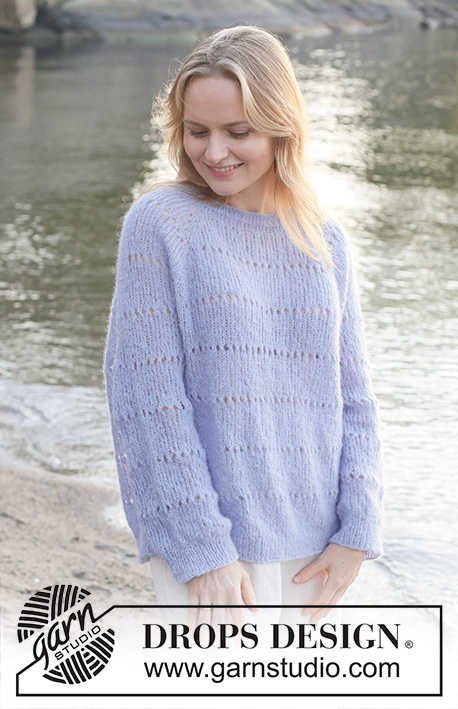
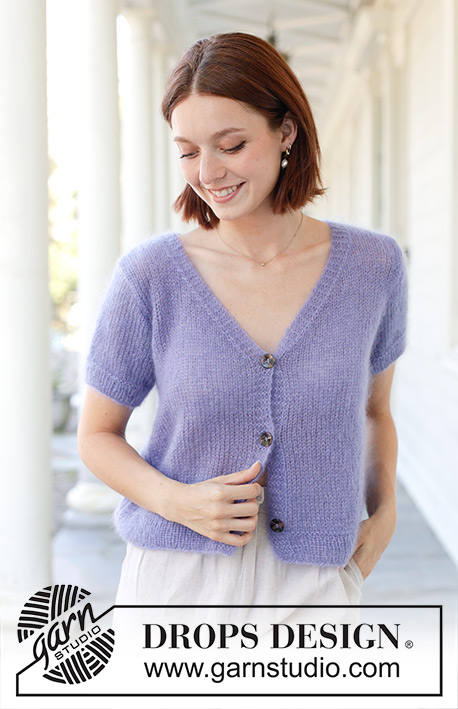
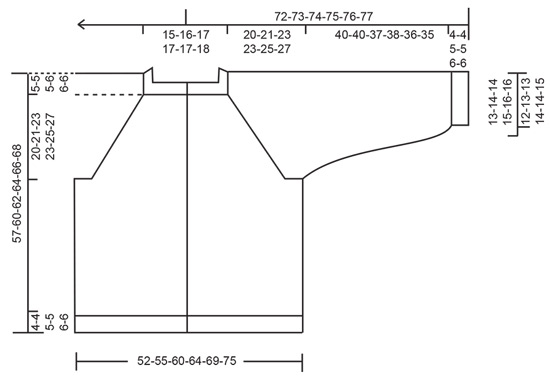
Knitted oversized jacket in DROPS Brushed Alpaca Silk. Piece is knitted top down with raglan, lace pattern in stripes, rolling edge and i-cord. Size XS – XXXL.
DROPS 259-18 |
||||||||||
|
---------------------------------------------------------- EXPLANATION FOR THE PATTERN: ---------------------------------------------------------- GARTER STITCH (when working back and forth): Knit on all rows, i.e. knit from right side and knit from wrong side. 1 ridge vertically = knit 2 rows. BAND WITH I-CORD: BEGINNING OF ROW: Work band as follows: Slip 1 stitch purlwise with strand in front of piece, knit 1 and work 5 stitches in garter stitch. END OF ROW: Work band as follows: Work until 7 stitches remain on row, work 5 stitches in garter stitch, slip 1 stitch purlwise with strand in front of piece, knit 1. Work the same way both from right side and wrong side. BUTTONHOLES: Decrease for buttonholes on right band (when garment is worn). Decrease from right side when 5 stitches remain on row as follows: ROW 1 (= right side): Make 1 yarn over, knit 2 together, knit 1, slip 1 stitch purlwise with strand in front of piece, knit 1. ROW 2 (= wrong side): Work band as before and knit yarn over to make a buttonhole. Decrease for first buttonhole on first row from right side after neck edge has been worked. Then decrease the next 4-4-4-5-5-5 buttonholes, approx. 10½-10½-11-9-9-9½ cm apart. Place bottom buttonhole on the same line as last stripe with pattern. RAGLAN: Increase 1 stitch by making 1 yarn over as explained below: INCREASE 1 STITCH TOWARDS THE RIGHT BEFORE MARKER: Make a yarn over on right needle by placing the yarn around right needle from behind and forwards, on next row purl yarn over in front loop of stitch. Then work the new stitches in stocking stitch. INCREASE 1 STITCH TOWARDS THE LEFT AFTER MARKER: Make a yarn over on right needle by placing the yarn around right needle in front of needle and then pull the yarn backwards, on next row purl yarn over in back loop of stitch. Then work the new stitches in stocking stitch. PATTERN: See diagram A.1. Diagrams show all rows in pattern seen from the right side. Work approx. 6-6-6½-6½-6½-7 cm stocking stitch between every time pattern is worked as explained below (work bands as before) – adjust so that first row in A.1 is worked from right side and that pattern is always worked on a row where number of stitches on front pieces is uneven between band and raglan stitch (applies to when pattern is worked on yoke, on body and sleeves work pattern as explained below BODY and SLEEVES). NOTE! At the same time as working pattern as explained below, continue increase for raglan (i.e. work increases in addition). WORK AS FOLLOWS (number of stitches on front pieces is uneven between band and raglan stitch): ROW 1 (= right side): Work band as before, work A.1 until 1 stitch remains before raglan stitch, knit 1, knit raglan stitch, * work A.1 until 1 stitch remain before next raglan stitch, knit 1, knit raglan stitch *, work from * to * 3 times in total, work A.1 until 1 stitch remains before band, knit 1 and work band as before. ROW 2 (= wrong side): Work band as before, purl until 7 stitches remain, work band as before. INCREASE TIP (evenly): To calculate how to increase evenly, use the total number of stitches on row (e.g. 191 stitches), minus bands (e.g. 14 stitches) and divide the remaining stitches by number of increases to be done (e.g. 42) = 4.2. In this example increase by making 1 yarn over after approx. every 4th stitch (do not increase over bands). On next row work yarn overs twisted to avoid holes. DECREASE TIP: Decrease 1 stitch on each side of marker thread as follows: Work until 3 stitches remain before marker thread, knit 2 together, knit 2 (marker thread is between these 2 stitches), slip 1 stitch knitwise, knit 1, pass slipped stitch over stitch worked (= 2 stitches decreased). SLEEVE TIP: When picking up stitches mid under sleeve, there will be a small hole in the transition between stitches on body and sleeves. The holes can be closed by picking up the strand between two stitches - work this strand twisted together with the first stitch between body and sleeve so that the holes closes. ---------------------------------------------------------- START THE PIECE HERE: ---------------------------------------------------------- JACKET - SHORT OVERVIEW OF THE PIECE: In this pattern needles of different length have been used, begin with fitting length for number of stitches and switch as needed. Work neck edge and yoke back and forth on circular needle from mid front, work top down. When yoke is done, divide piece for body and sleeves. Work body downwards back and forth on circular needle while putting the sleeves aside. Then work sleeves downwards in the round on needle. NECK EDGE: Cast on 109-113-117-125-125-129 stitches on circular needle size 3 mm with DROPS Brushed Alpaca Silk. Purl 1 row from wrong side. Then work as follows: ROW 1 (= right side): 7 stitches BAND WITH I-CORD - read explanation above, knit until 7 stitches remain, work 7 stitches band with i-cord. ROW 2 (= wrong side): 7 stitches band with i-cord, purl until 7 stitches remain, work 7 stitches band with i-cord. Work ROW 1 and 2 1 more time (= 5 rows in stocking stitch). Then work as follows: ROW 1 (= right side): Work band as before, work rib (= knit 1/purl 1) until 8 stitches remain, knit 1 and work band as before. ROW 2 (= wrong side): Work band as before, work rib (= purl 1/knit 1) until 8 stitches remain, purl 1 and work band as before. ROW 3 (= right side): Work band as before, work rib (= knit 1/purl 1) until 8 stitches remain, knit 1 and work band as before. Then work in stocking stitch (purl from wrong side / knit from right side) and bands as before until neck edge measures 4-4-4-5-5-5 cm from cast-on edge. Insert 1 marker on the inside of band in one side of piece (= mid front), measure piece from this marker. YOKE: Continue with circular needle size 5 mm. Insert 4 markers in piece without working the stitches, insert markers in a stitch and these stitches are called raglan stitches and worked in stocking stitch. Count 22-23-24-24-24-25 stitches (= front piece), insert 1 marker in next stitch, count 15-15-15-19-19-19 stitches (= sleeve), insert 1 marker in next stitch, count 31-33-35-35-35-37 stitches (= back piece), insert 1 marker in next stitch, count 15-15-15-19-19-19 stitches (= sleeve), insert 1 marker in next stitch. 22-23-24-24-24-25 stitches remain on row after last marker (= right front piece). INFORMATION BEFORE CONTINUING: Now work stocking stitch with bands as before and increase for RAGLAN - read explanation above and work as explained below. Decrease for BUTTONHOLES on right band - read explanation above. AT THE SAME TIME when 6-6-6½-6½-6½-7 cm in stocking stitch have been worked from marker mid front, work PATTERN – read explanation above. RAGLAN: ROW 1 (= right side): Work in stocking stitch (and pattern if any) and bands as before, and increase for raglan on each side of the 4 raglan stitches (= 8 stitches increased). ROW 2 (= wrong side): Work stocking stitch and bands as before. Work ROW 1 and 2 10-11-9-11-12-16 times (= 20-22-18-22-24-32 rows have been worked) = 189-201-189-213-221-257 stitches. Remember to follow the knitting tension! Then work and increase as follows: ROW 1 (= right side): Work in stocking stitch (and pattern if any) and bands as before, and increase for raglan on each side of the 4 raglan stitches (= 8 stitches increased). ROW 2 (= wrong side): Work stocking stitch and bands as before. ROW 3 (= right side): Work stocking stitch (and pattern if any) and bands as before, and increase for raglan before 1st and 3rd marker and after 2nd and 4th marker, i.e. increase only on front pieces and back piece, do not increase stitches on sleeves (= 4 stitches increased). ROW 4 (= wrong side): Work stocking stitch and bands as before. Work 1st to 4th ROW 6-6-8-7-8-7 times (= 24-24-32-28-32-28 rows have been worked = you have increased 6-6-8-7-8-7 times on sleeves and 12-12-16-14-16-14 times on front pieces/back piece) = 261-273-285-297-317-341 stitches on needle. All increases for raglan are now done, you have increased 16-17-17-18-20-23 times in total on sleeves, 22-23-25-25-28-30 times on front pieces/back piece and piece measures approx. 20-21-23-23-25-27 cm from marker mid front. If the piece measures less than this, work stocking stitch, pattern and bands as before without increasing until piece measures 20-21-23-23-25-27 cm from marker mid front. Now divide yoke for body and sleeves. DIVIDING FOR BODY AND SLEEVES: When the piece is divided, the raglan lines will be place somewhat in on front pieces/back piece, i.e. AT THE SAME TIME as next row is worked divide yoke for body and sleeves as follows: Work 47-49-52-53-56-61 stitches as before (= front piece), slip the next 43-45-45-49-53-55 stitches on a stitch holder for sleeve, cast on 8-10-12-16-18-20 new stitches on row (= in the side mid under sleeve), work 81-85-91-93-99-109 stitches as before (= back piece), slip the next 43-45-45-49-53-55 stitches on a stitch holder for sleeve, cast on 8-10-12-16-18-20 new stitches on row (= in the side mid under sleeve) and work the last 47-49-52-53-56-61 stitches as before (= front piece). Finish body and sleeves separately. BODY: = 191-203-219-231-247-271 stitches. Work stocking stitch, pattern and bands as before, but when working pattern work as follows from right side: 7 stitches band as before, work A.1 until 1 stitch remains before band, knit 1 and work band as before. NOTE! When 6 stripes in total have been worked with pattern, work stocking stitch and bands until correct measurements. Work until piece measures approx. 48-51-52-53-54-56 cm from marker mid front. On next row from right side begin rib while AT THE SAME TIME increasing 42-46-48-52-56-62 stitches evenly on needle = 233-249-267-283-303-333 stitches, work as follows: Switch to circular needle size 3 mm, work band as before, work rib (= knit 1/purl 1 - remember increase) until 8 stitches remain, knit 1 and band as before. When rib measures 4-4-5-5-6-6 cm cast off somewhat loosely. Jacket measures 52-55-57-58-60-62 cm from marker mid front and approx. 57-60-62-64-66-68 cm from the top of shoulder. SLEEVES: Slip 43-45-45-49-53-55 sleeve stitches from one thread on to circular needle size 5 mm and pick in addition up 1 stitch in each of the 8-10-12-16-18-20 stitches cast on under sleeve - read SLEEVE TIP = 51-55-57-65-71-75 stitches. Insert 1 marker thread in the middle of the 8-10-12-16-18-20 new stitches under sleeve - round begins at the marker thread. Work stocking stitch and pattern in the round on needle as before - make sure to work the same number of rounds with stocking stitch between every time A.1 is worked as on yoke/body and knit the last stitch on round that do not fit the pattern. AT THE SAME TIME when sleeve measures 2 cm from division, decrease mid under sleeve – read DECREASE TIP and decrease as follows: Decrease 2 stitches every 2-2-2-1½-1½-1½ cm 3-4-4-7-9-10 times in total = 45-47-49-51-53-55 stitches. Work until sleeve measures 40-40-37-38-36-35 cm from division. Switch to double pointed needles size 3 mm and work rib (= knit 1/purl 1) while AT THE SAME TIME increasing 7 stitches evenly on 1st round = 52-54-56-58-60-62 stitches. When rib measures 4-4-5-5-6-6 cm cast off somewhat loosely. Sleeve measures approx. 44-44-42-43-42-41 cm from division. ASSEMBLY: Sew the buttons on to the left band. |
||||||||||
Diagram explanations |
||||||||||
|
||||||||||
 |
||||||||||
 |
||||||||||
Have you finished this pattern?Tag your pictures with #dropspattern #lavenderoasiscardigan or submit them to the #dropsfan gallery. Do you need help with this pattern?You'll find 31 tutorial videos, a Comments/Questions area and more by visiting the pattern on garnstudio.com. © 1982-2026 DROPS Design A/S. We reserve all rights. This document, including all its sub-sections, has copyrights. Read more about what you can do with our patterns at the bottom of each pattern on our site. |
||||||||||


With over 40 years in knitting and crochet design, DROPS Design offers one of the most extensive collections of free patterns on the internet - translated to 17 languages. As of today we count 324 catalogues and 12290 patterns translated into English (UK/cm). 12290
We work hard to bring you the best knitting and crochet have to offer, inspiration and advice as well as great quality yarns at incredible prices! Would you like to use our patterns for other than personal use? You can read what you are allowed to do in the Copyright text at the bottom of all our patterns. Happy crafting!
Post a comment to pattern DROPS 259-18
We would love to hear what you have to say about this pattern!
If you want to leave a question, please make sure you select the correct category in the form below, to speed up the answering process. Required fields are marked *.