
Popular categories
Looking for a yarn?


Comments / Questions (23)
![]() Frage wrote:
Frage wrote:
1. Beim Rumpfteil steht: mit den Knopflöchern beginnen?? Ich dachte, da kommen keine mehr hin 2. Beim Annähen der beiden Blenden am hinteren Halsausschnitt dreht sich bei mir alles nach Außen, das sieht überhaupt nicht aus, dadurch wölbt sich auch die Naht nach Außen. Habe es schon mehrmals aufgetreten. Welche Alternative habe ich?
12.04.2026 - 17:58DROPS Design answered:
Hallo, die Knopflöcher beginnen wenn alle Maschen vom V-Halsausschnitt gestrickt werden, dh den Halsauschnitt misst ca 14 bis 16 cm. Sie sind aber nach Aufteilung nicht fertig in allen Größen. In diesem Video zeigen wir, wie man solche Blende zusammennäht, es kann Ihnen vielleicht helfen. Viel Spaß beim Stricken!
13.04.2026 - 10:37
![]() Tereza wrote:
Tereza wrote:
Dobrý den, mám trochu problém s porozuměním návodu.. nejprve upletu pravou legu, dám stranou, levou a na tu nahodím další oka a pak připojím pravou.. to ještě tak nějak chápu, ale ikdyz už jsou legy hotové, návod pořád zmiňuje po celou dobu pletení sedla že pořád pletu legu. Nějak si neumím představit jak to celé vypadá a jak se to k sobě připlete. Děkuji a přeji hezký den, Tereza :)
16.07.2025 - 08:58DROPS Design answered:
Dobrý den Terko, ony "počáteční" légy slouží namísto lemu průkrčníku na zadním dílu. V posledním odstavci návodu se dočtete, že légy nakonec sešijete k sobě a přišijete po obou stranách zadního průkrčníku (během práce Vám tak budou prozatím jen tak viset). :) Pletete shora dolů, v řadách - tedy pokračujete a raglánovým zkosením tvarujete sedlo a současně vyplétáte légy po obou stranách předního dílu (V-výstřih). Atd... I Vám krásný den, ať se daří! Markéta.
04.08.2025 - 12:27
![]() DUVERT ANNE-LISE wrote:
DUVERT ANNE-LISE wrote:
Ah ! voilà merci, je n 'avais jamais vu cette façon de faire pour un col c'est parti ; bonne journée
27.05.2025 - 10:13
![]() DUVERT ANNE-LISE wrote:
DUVERT ANNE-LISE wrote:
Ok merci pour la réponse. maintenant que deviennent les 2 bordures de 4m et 17 et demi cm de haut ? ( reliées entre elles par des mailles que l 'on montent ) il faut le coudre à la fin ? et ou ? grand merci , anne lise
27.05.2025 - 08:58DROPS Design answered:
Bonjour Mme Duvert, tout à fait, on va les coudre à la fin - cf ASSEMBLAGE autrement dit, vous allez coudre ensemble les mailles montées pour chacune des bordures (milieu dos) puis les coudre ensuite le long de l'encolure dos (les mailles montées entre les bordures). Retrouvez cette technique dans cette vidéo pour un autre modèle (avec rangs raccourcis sur les bordure, ce que l'on n'a pas ici). Bon tricot!
27.05.2025 - 09:54
![]() DUVERT ANNE-LISE wrote:
DUVERT ANNE-LISE wrote:
Bonjour , je ne comprend pas par ou se commence ce gilet? est ce un top down ? ou par le bas ? merci à vous anne lise
26.05.2025 - 11:08DROPS Design answered:
Bonjour Mme Duvert, ce gilet se tricote de haut en bas. Bon tricot!
26.05.2025 - 14:23
![]() Sabine wrote:
Sabine wrote:
Was passiert mit den 12 neu angeschlagenen Maschen unter dem Arm? Wie werden sie vernäht, damit kein Loch bleibt?
03.01.2025 - 19:29DROPS Design answered:
Liebe Sabine, wenn man die Ärmel später strickt, wird man 1 Masche in jeder von diesen 12 Maschen auffassen so gibt es kein Loch - siehe ab Bild 18A (diese Maschen werden angeschlagen) / 18B (diese Maschen werden aufgefassen) in dieser Lektion. Viel Spaß beim Stricken!
06.01.2025 - 08:19
![]() Catherine wrote:
Catherine wrote:
Bonjour La taille S est ce du 36/38 pour la France ? Je vous remercie pour votre réponse Catherine
11.12.2024 - 10:15DROPS Design answered:
Bonjour Catherine, mesurez un vêtement que vous avez et dont vous aimez la forme et comparez ces mesures à celles du schéma, vous trouverez ainsi la taille correspondante. Retrouvez plus d'infos ici. Bon tricot!
12.12.2024 - 08:48
![]() Federica wrote:
Federica wrote:
Salve ho bisogno di aiuto. Non capisco come si costruisce questo cardigan. Qui si parla di bordo destro e bordo sinistro. Ma non capisco se sono i bordi del collo o del davanti e dietro . E quando ho finito questi 17 cm. di bordo dice di tagliare il filo e quindi da dove riparto? Scusate sono io che non sono pratica . Grazie se potete darmi un aiuto
09.12.2024 - 15:31DROPS Design answered:
Buonasera Federica, si lavorano prima i bordi singolarmente poi si uniscono avviando le maglie per lo sprone. Dopo il primo bordo deve mettere il lavoro da parte e iniziare il 2° bordo. Buon lavoro!
13.12.2024 - 23:08
![]() Giovanna wrote:
Giovanna wrote:
Ciao. Non è chiaro nella traduzione italiana quando bisogna iniziare a fare la prima asola. Dalla foto capisco che occorre farla già dall'inizio del lavoro. Potrebbe specificare da quanti centimetri dall'inizio del lavoro? Inoltre ho notato un errore di ripetizione e lo cito ( ripetuto due volte bordo destro ) "Passare ai ferri circolari n° 4 mm. Lavorare il bordo destro come prima dal diritto del lavoro, avviare 76-76-78-78-80-82 maglie, lavorare il bordo destro ...."
30.06.2024 - 14:59DROPS Design answered:
Buonasera Giovanna, le asole vanno lavorate come indicato alla fine degli aumenti del collo, segua il numero indicato per la sua taglia. Grazie per la segnalazione: abbiamo corretto l'errore. Buon lavoro!
03.07.2024 - 18:25
![]() Claudia B wrote:
Claudia B wrote:
Ich bin jetzt am Ende des glatt rechten Rumpfteils angekommen und frage mich, mit welchen Knopflöchern ich beginnen soll?
31.05.2024 - 18:26
|
|||||||
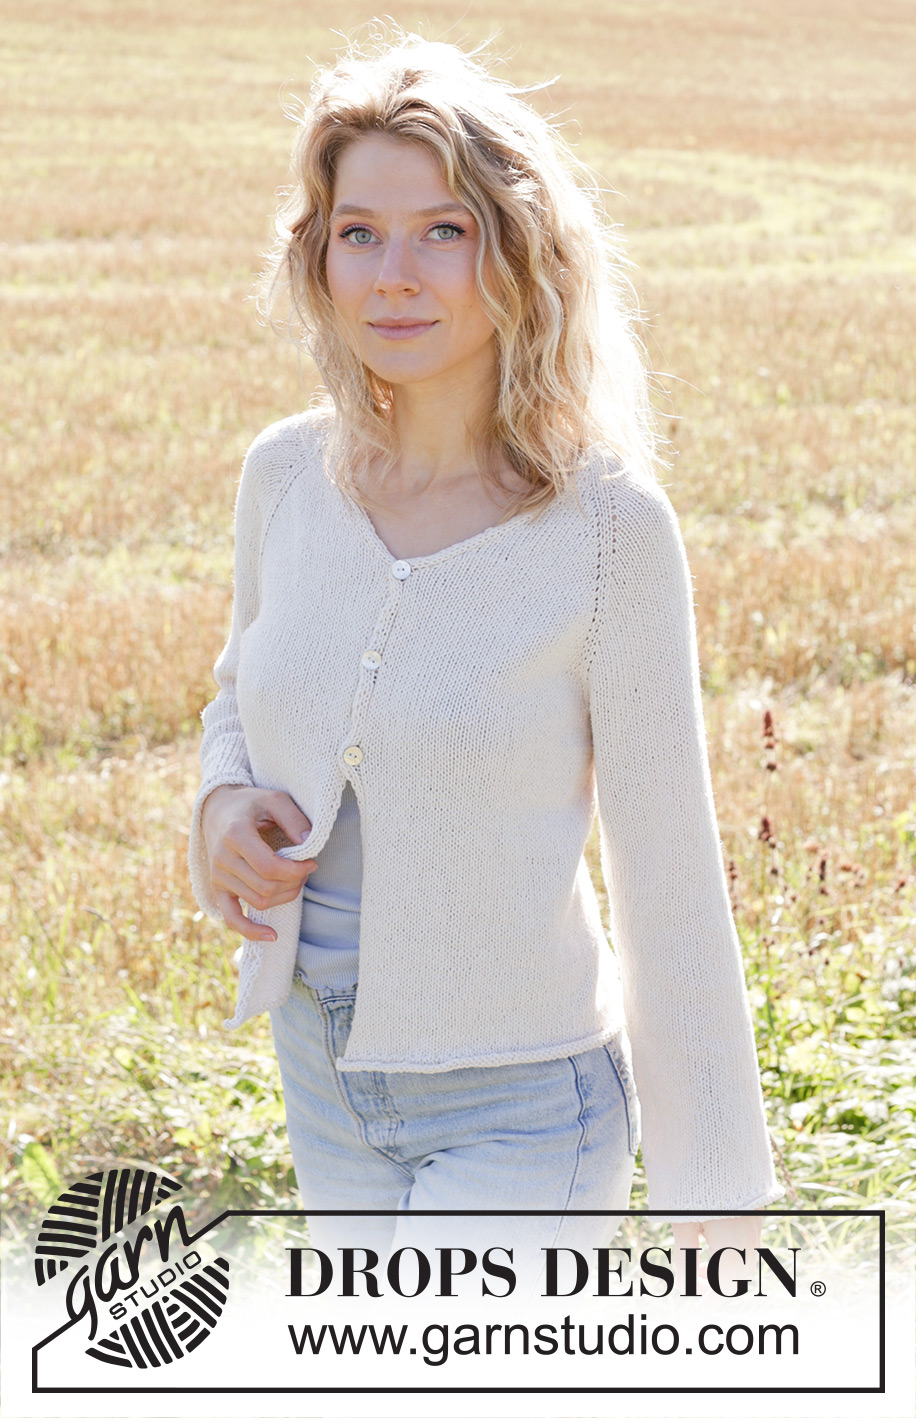
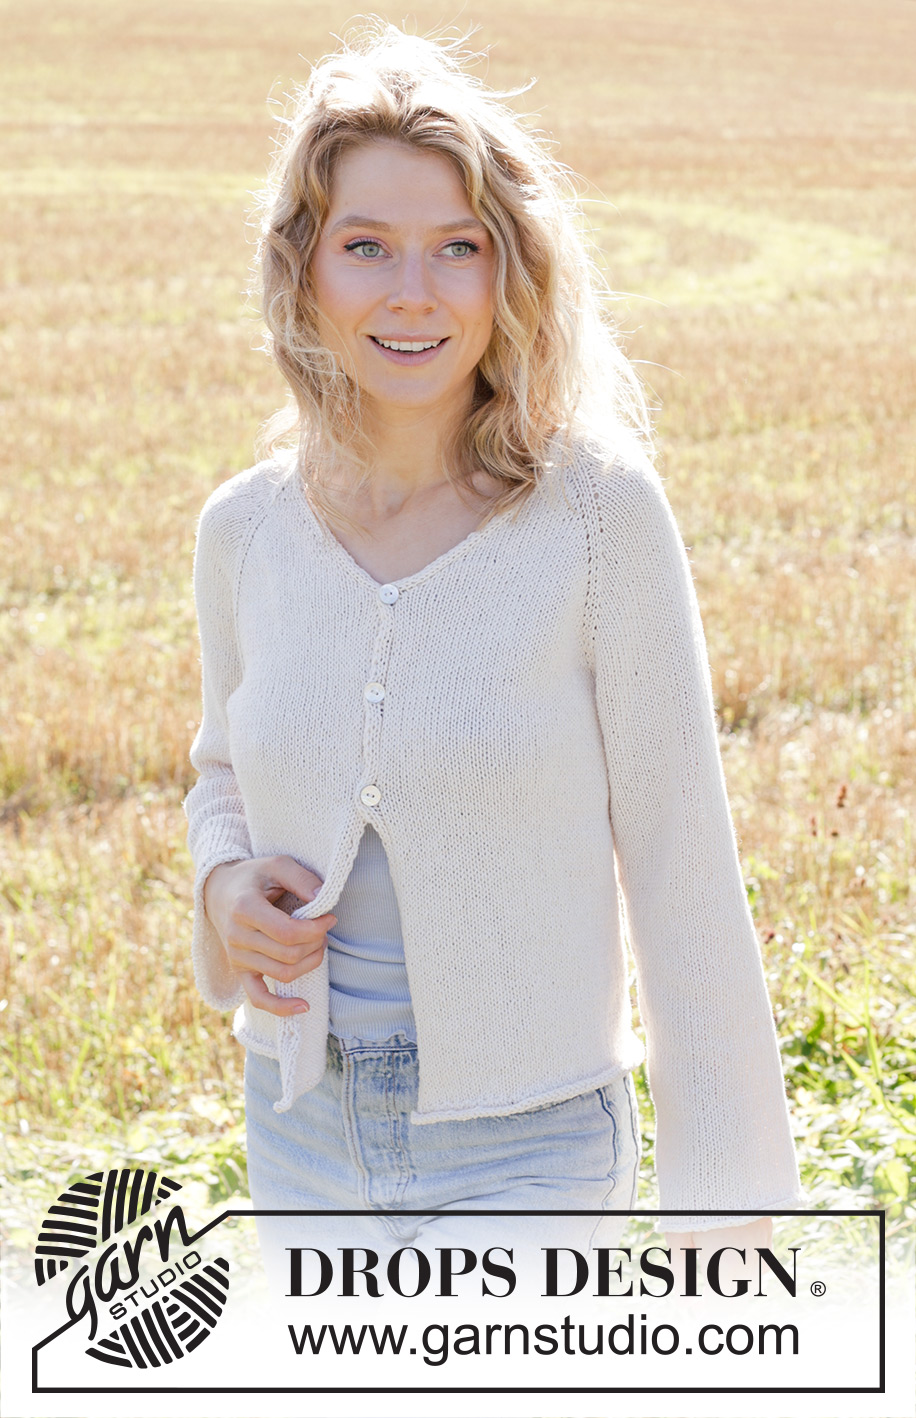
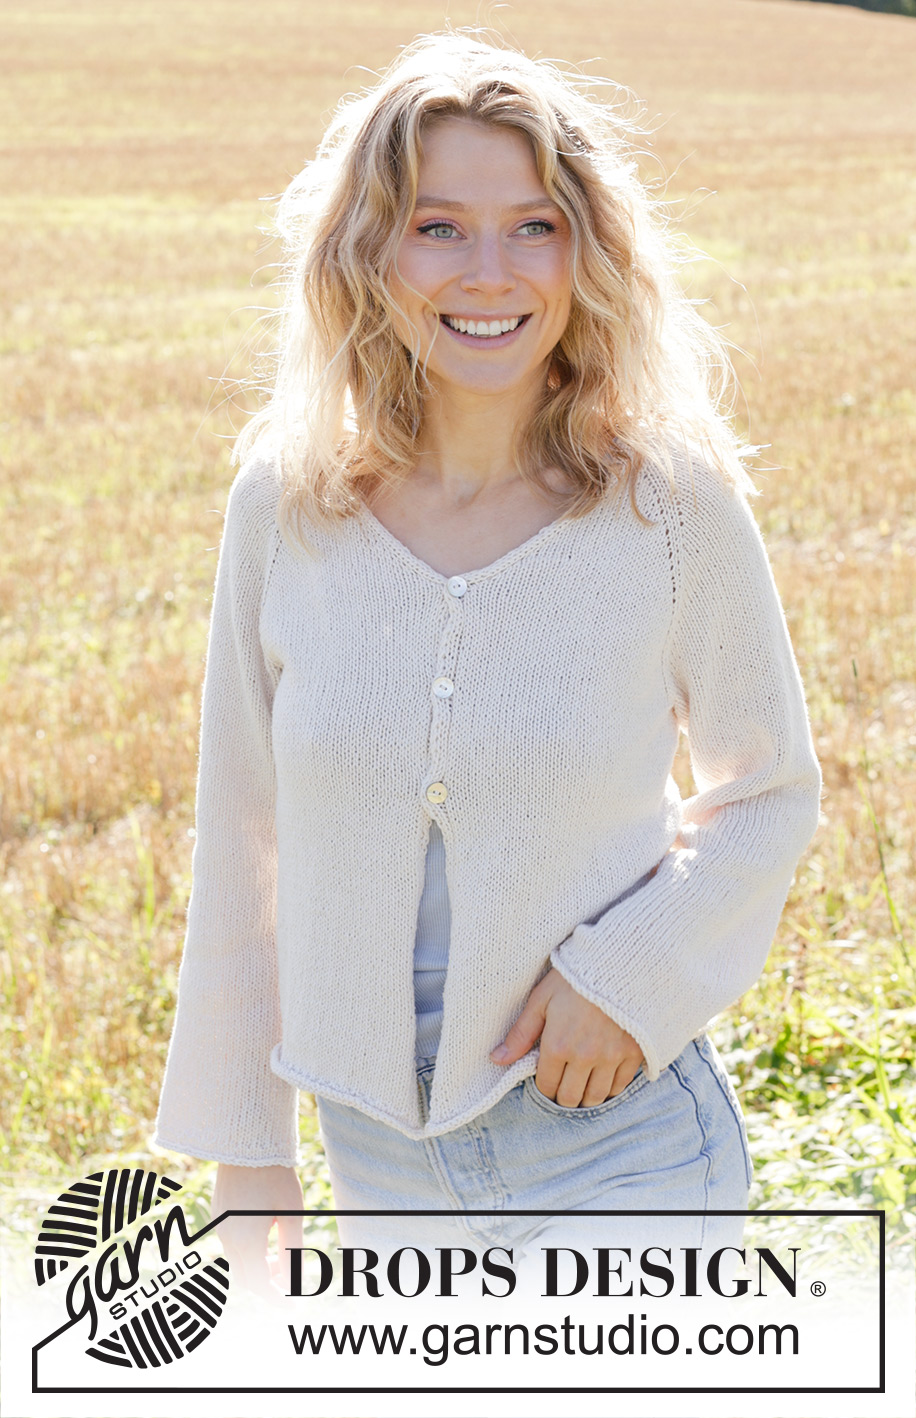
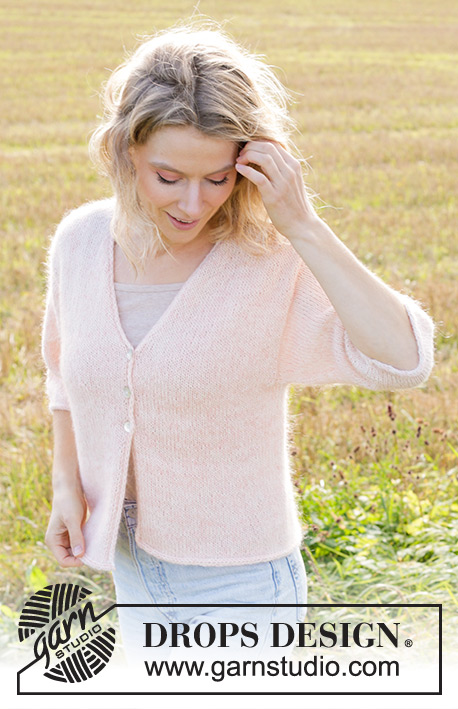
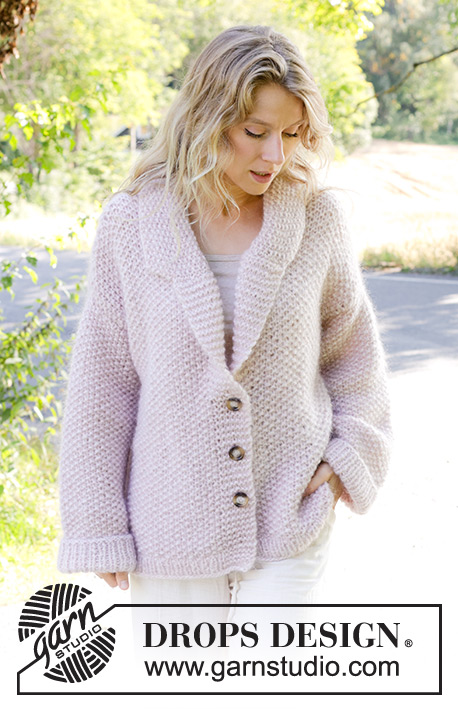
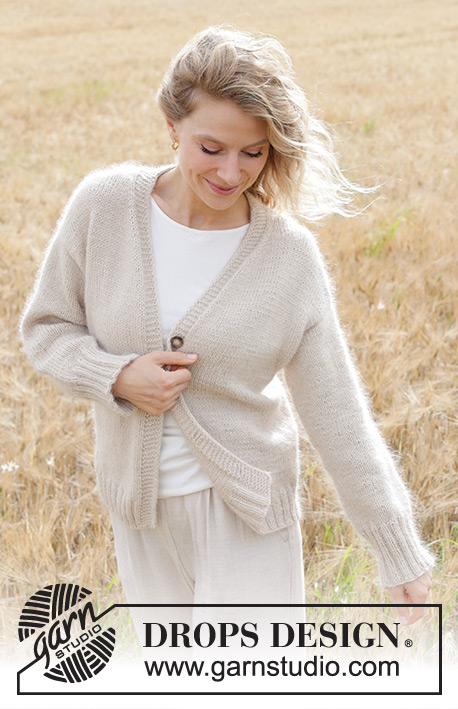
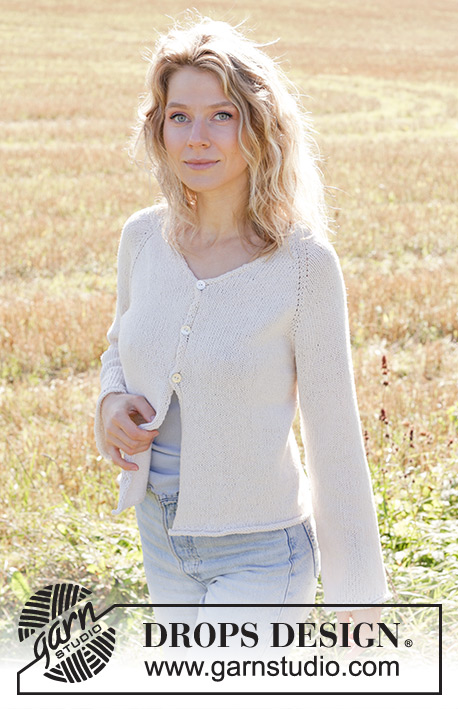
Morning Moon Cardigan#morningmooncardigan |
|||||||
 |
 |
||||||
Knitted jacket in DROPS Belle. The piece is worked top down with stocking stitch, raglan, V-neck and rolled edges. Sizes S-XXXL.
DROPS 249-16 |
|||||||
|
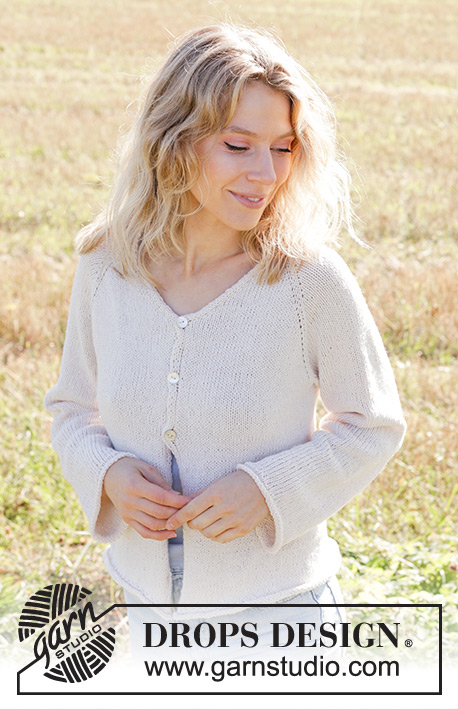
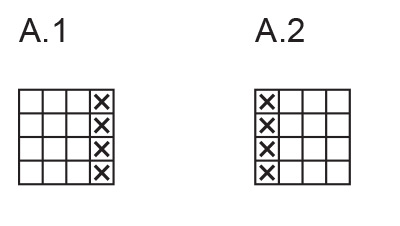
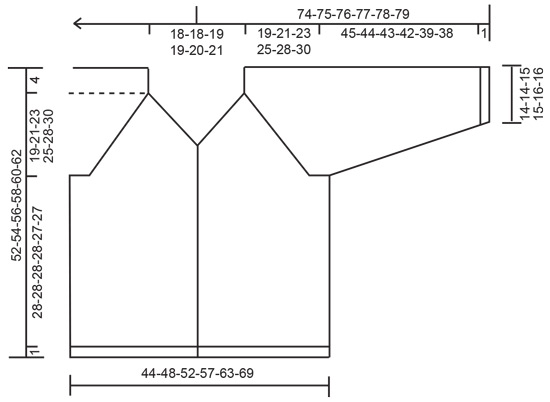
------------------------------------------------------- EXPLANATIONS FOR THE PATTERN: ------------------------------------------------------- PATTERN (for bands): See diagrams A.1 and A.2. The diagrams show all rows in the pattern from the right side. RAGLAN: All increases are worked from the right side! Increase for raglan before/after the marker-thread as follows: Work until there is 1 stitch left before the marker thread, make 1 yarn over, knit 2 (marker thread sits between these 2 stitches) make 1 yarn over. On the next row (wrong side) work the yarn overs as follows: BEFORE MARKER-THREAD: Purl the back loop. AFTER MARKER-THREAD: Slip the yarn-over off the left needle and replace it the other way round (insert left needle through back when replacing it). Purl the front loop. V-NECK: All increases are worked from the right side! Increase as follows: Work the left band as before, make 1 yarn over, work until there are 4 stitches left, make 1 yarn over, work the right band as before. On the next row (= wrong side) work the yarn overs as follows: AFTER RIGHT BAND: Slip the yarn-over off the left needle and replace it the other way round (insert left needle through back when replacing it). Purl the front loop. BEFORE LEFT BAND: Purl the back loop. BUTTONHOLES: Work buttonholes on the right band (when the garment is worn) from the wrong side: Work 4 band stitches as before, make 1 yarn over. On the next row (right side) work until there are 6 stitches left, slip 1 stitch knit-wise, knit the yarn over, pass the slipped stitch over, work 4 band stitches as before. The first buttonhole is worked when the increases for the V-neck are finished (neck measures approx. 14-14-15-15-16-16 cm). The other 2 buttonholes are worked with approx. 3½-3½-3½-4-4-4½ cm between each one. DECREASE TIP (for sleeves): Decrease 1 stitch on each side of the marker-thread as follows: Work until there are 3 stitches left before the marker-thread, knit 2 together, knit 2 (marker-thread sits between these 2 stitches), slip 1 stitch knit-wise, knit 1 and pass the slipped stitch over the knitted stitch. ------------------------------------------------------- START THE PIECE HERE: ------------------------------------------------------- JACKET – SHORT OVERVIEW OF THE PIECE: The pattern uses both long and short needles; start with the length which fits the number of stitches and change when necessary. The bands are worked first, then stitches are cast on between them and the yoke is worked with circular needle, back and forth from mid-front and top down. When the yoke is finished, it is divided for the body and sleeves. The body is continued back and forth, while the sleeves wait. The sleeves are worked in the round. RIGHT BAND: Cast on 4 stitches with double pointed needles size 4 mm and DROPS Belle. Work A.1 back and forth for 17-17-17½-17½-18-18½ cm. Cut the strand and lay the band to one side. LEFT BAND: Cast on 4 stitches with double pointed needles size 4 mm and DROPS Belle. Work A.2 back and forth for 17-17-17½-17½-18-18½ cm. The last row is from the wrong side. Now cast on stitches as follows: YOKE: Change to circular needle size 4 mm. Work the left band as before from the right side, cast on 76-76-78-78-80-82 stitches, work the right band as before from the right side = 84-84-86-86-88-90 stitches. Purl 1 row from the wrong side with 4 band-stitches worked as before on each side. Insert 4 marker-threads, without working the stitches: Count 6 stitches (= front piece), insert 1 marker-thread, count 18 stitches (= sleeve), insert 1 marker-thread, count 36-36-38-38-40-42 stitches (= back piece), insert 1 marker-thread, count 18 stitches (= sleeve), insert 1 marker-thread, there are 6 stitches left on the row (= front piece). Work stocking stitch back and forth with 4 band stitches on each side, AT THE SAME TIME increase for both RAGLAN and V-NECK – read description above. Therefore, read the next section before continuing. REMEMBER THE KNITTING TENSION! Increase for the V-neck on both front pieces every 2nd row 16-16-17-17-18-19 times, then every 4th row 2 times. A total of 18-18-19-19-20-21 increases for the V-neck on each front piece. Remember the BUTTONHOLES – read description above. Increase for raglan before and after all 4 marker-threads, every 2nd row (= 8 increased stitches) 22-26-29-34-35-36 times. Then only increase on the front and back pieces (= 4 increased stitches) 0-0-0-0-3-6 times = 176-208-232-272-292-312 increased stitches for raglan. When all the increases for both raglan and V-neck are finished, there are 296-328-356-396-420-444 stitches. Continue working without further increases until the yoke measures 19-21-23-25-28-30 cm from mid-back. DIVIDE FOR BODY AND SLEEVES: On the next row work as follows: 4 band stitches as before, work 43-47-51-56-61-66 stocking stitch (= front piece), place the next 60-68-74-84-86-88 stitches on 1 thread for the sleeve, cast on 10-10-12-12-14-16 stitches (in side under sleeve), work 82-90-98-108-118-128 stocking stitches (= back piece), place the next 60-68-74-84-86-88 stitches on 1 thread for the sleeve, cast on 10-10-12-12-14-16 stitches (in side under sleeve), work 43-47-51-56-61-66 stocking stitches and 4 band stitches as before (front piece). The body and sleeves are finished separately. The piece is now measured from here! BODY: = 196-212-232-252-276-300 stitches. Continue stocking stitch back and forth with 4 band stitches as before on each side until the body measures 28-28-28-28-27-27 cm from the division – remember the BUTTONHOLES. Now work a rolled edge and decrease 1 stitch mid-back by working 2 stitches together (195-211-231-251-275-299 stitches) as follows from the right side: Work the band as before, * knit 1, purl 1 * until there are 4 stitches left, work the band as before. Work 3 rows of stocking stitch. Cast off. The jacket measures approx. 52-54-56-58-60-62 cm from the shoulder. SLEEVES: Place the 60-68-74-84-86-88 stitches from the thread on the one side of the piece on short circular needle/double pointed needles size 4 mm and knit up 1 stitch in each of the 10-10-12-12-14-16 stitches cast on under the sleeve = 70-78-86-96-100-104 stitches. Insert a marker-thread in the middle of the new stitches under the sleeve. This is used when decreasing. The round starts here. Work stocking stitch in the round for 3-4-3-4-2-4 cm. Now decrease 2 stitches under the sleeve – read DECREASE TIP. Decrease like this every 6-4-3-2-2-1½ cm a total of 6-9-12-16-17-18 times = 58-60-62-64-66-68 stitches. Work until the sleeve measures 45-44-43-42-39-38 cm (with 1 cm left to finished length). Work rib for 1 round (knit 1, purl 1), then knit 3 rounds. Cast off. The sleeve measures approx. 46-45-44-43-40-39 cm. ASSEMBLY: Sew the buttons onto the left band. Sew together the bands from the front pieces (mid-back), then sew the bands to the neckline. |
|||||||
Diagram explanations |
|||||||
|
|||||||
 |
|||||||
 |
|||||||
Have you finished this pattern?Tag your pictures with #dropspattern #morningmooncardigan or submit them to the #dropsfan gallery. Do you need help with this pattern?You'll find 26 tutorial videos, a Comments/Questions area and more by visiting the pattern on garnstudio.com. © 1982-2026 DROPS Design A/S. We reserve all rights. This document, including all its sub-sections, has copyrights. Read more about what you can do with our patterns at the bottom of each pattern on our site. |
|||||||


With over 40 years in knitting and crochet design, DROPS Design offers one of the most extensive collections of free patterns on the internet - translated to 17 languages. As of today we count 324 catalogues and 12290 patterns translated into English (UK/cm). 12290
We work hard to bring you the best knitting and crochet have to offer, inspiration and advice as well as great quality yarns at incredible prices! Would you like to use our patterns for other than personal use? You can read what you are allowed to do in the Copyright text at the bottom of all our patterns. Happy crafting!
Post a comment to pattern DROPS 249-16
We would love to hear what you have to say about this pattern!
If you want to leave a question, please make sure you select the correct category in the form below, to speed up the answering process. Required fields are marked *.