Comments / Questions (14)
![]() Sabine wrote:
Sabine wrote:
Hallo, fehlt hier das Diagramm? Kann ich das Muster aus der Pulloveranleitung verwenden? Danke und liebe Grüße
03.11.2023 - 08:06DROPS Design answered:
LiebeSabine, das Diagram finden Sie unten, nach der schriftlichen Anleitung; hier finden Sie die Anleitung von dem Pullover. Viel Spaß beim stricken!
03.11.2023 - 13:58
![]() Mina wrote:
Mina wrote:
Autumn parade
07.08.2023 - 10:08
![]() Lígia Rodrigues wrote:
Lígia Rodrigues wrote:
Warm Forest
07.08.2023 - 10:02
![]() Valentina wrote:
Valentina wrote:
Fairy tale
06.08.2023 - 14:42
![]() Flocaeymaex wrote:
Flocaeymaex wrote:
Promenade d'automne
05.08.2023 - 16:56
![]() Małgorzata wrote:
Małgorzata wrote:
I love it 🍄 Wild September
05.08.2023 - 10:56
![]() Laura wrote:
Laura wrote:
« Fun guy » cardigan
04.08.2023 - 21:25
![]() Franzi wrote:
Franzi wrote:
'Cottage Dream'
04.08.2023 - 16:25
![]() Kristina wrote:
Kristina wrote:
'A Walk in the Forest'
04.08.2023 - 14:25
![]() Mila wrote:
Mila wrote:
Skulle vilja välja två till. Mvh Mila
04.08.2023 - 04:13
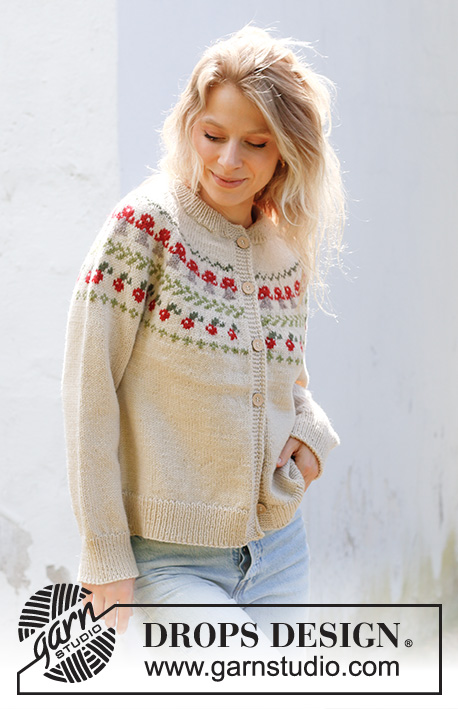
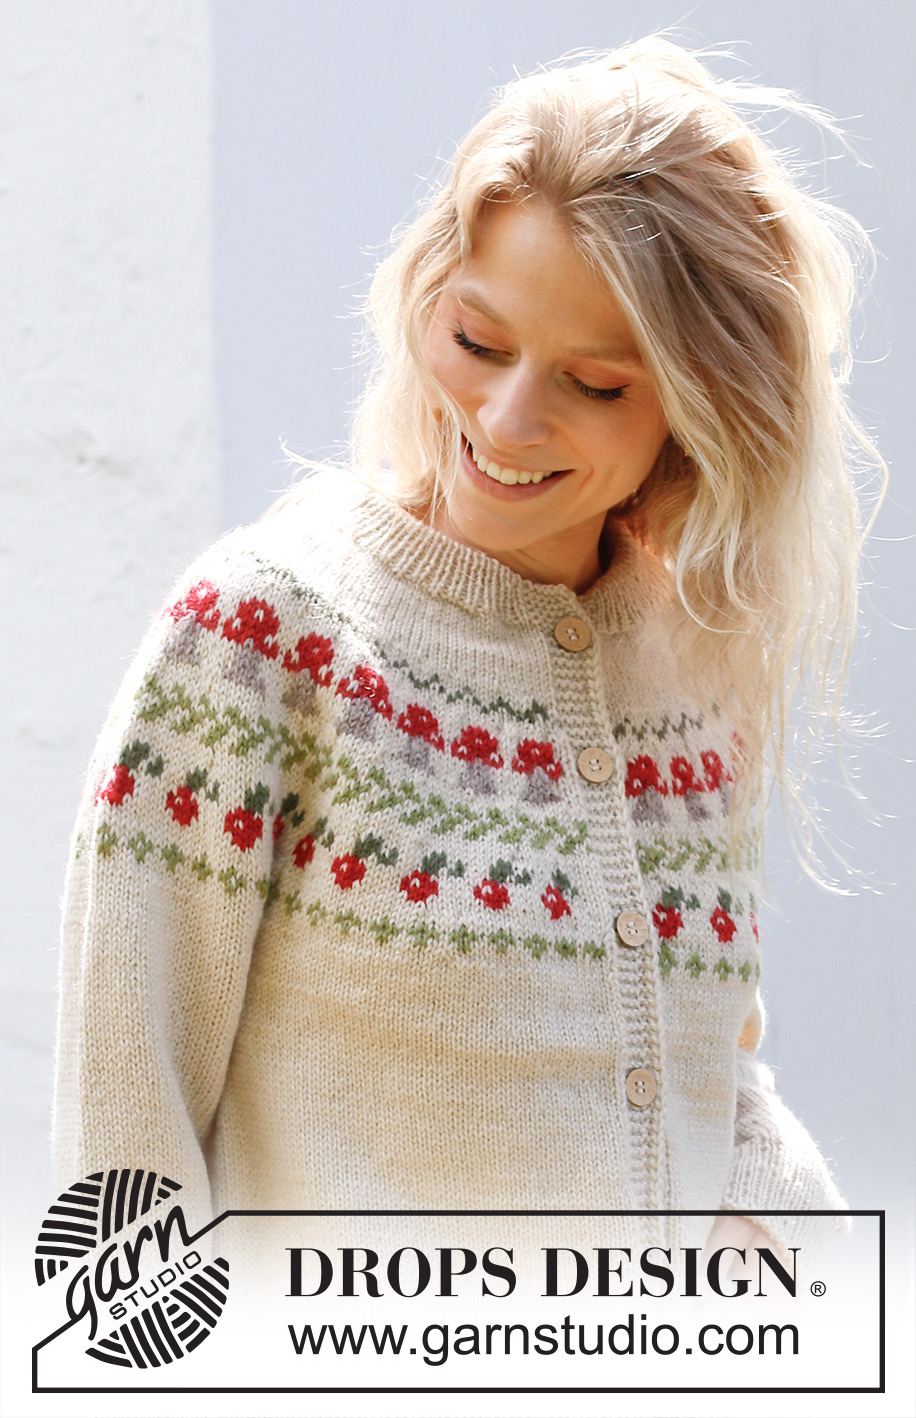
Mushroom Season Cardigan#mushroomseasoncardigan |
|||||||||||||||||||
 |
 |
||||||||||||||||||
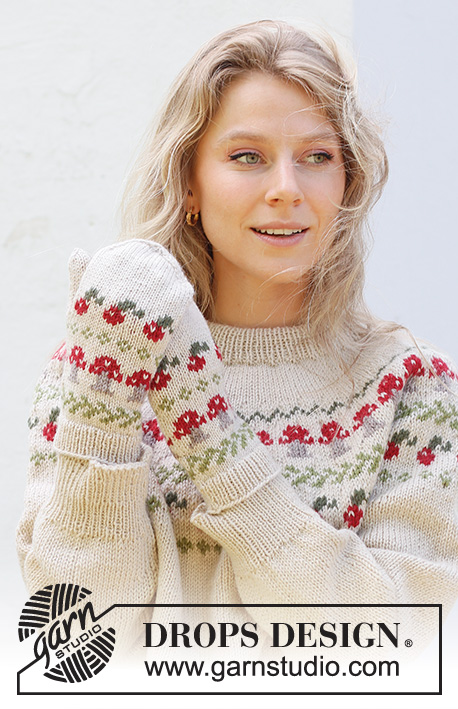
Knitted jacket in DROPS Karisma. The piece is worked top down with double neck, round yoke, split in sides and multi-coloured pattern with fungi and berries. Sizes S - XXXL.
DROPS 245-12 |
|||||||||||||||||||
|
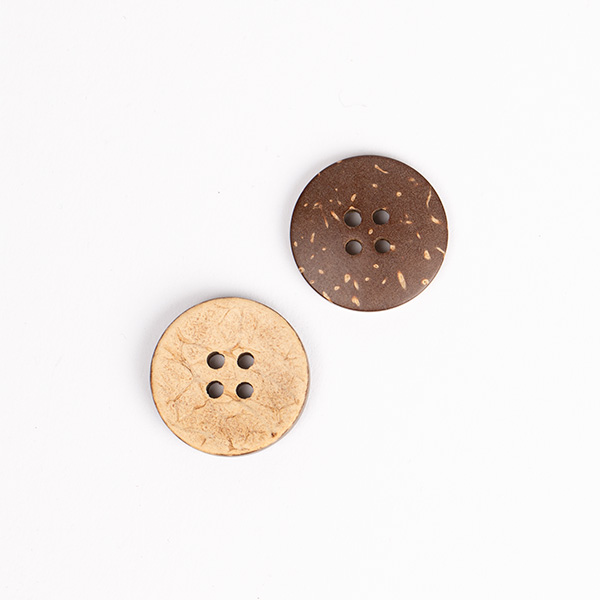
------------------------------------------------------- EXPLANATIONS FOR THE PATTERN: ------------------------------------------------------- GARTER STITCH (worked back and forth): Knit all rows. 1 ridge = knit 2 rows. BANDS: AT BEGINNING OF ROW: Slip 1 stitch purl-wise with the strand in front, knit 1, work 5 garter stitches. AT END OF ROW: Work until there are 7 stitches left, 5 garter stitches, slip 1 stitch purl-wise with strand in front, knit 1. ELEVATION: To make the jumper slightly higher at the back of the neck, you can work an elevation as described here. Skip this section if you do not want an elevation. Insert 1 marker in the middle of the row. Start from the right side and knit 16-17-18-19-20-21 stitches from the marker (band worked as before), turn, tighten strand and purl 32-34-36-38-40-42 stitches back. Turn, tighten strand and knit 48-51-54-57-60-63 stitches, turn, tighten strand and purl 64-68-72-76-80-84 stitches back. Turn, tighten strand and knit 80-85-90-95-100-105 stitches, turn, tighten strand and purl 96-102-108-114-120-126 stitches back. Turn, tighten the strand and knit to the end of row, turn and purl 1 row (bands are worked as before). Work then yoke as explained below. PATTERN: See diagram A.1. The pattern is worked in stocking stitch. KNITTING TIP: To avoid the knitting tension losing its elasticity when working pattern, it is important that the strands at the back are not tight. Use a size larger needle when working pattern if the piece becomes tight. INCREASE TIP (evenly spaced): Increase 1 stitch by making 1 yarn over which is worked twisted on the next row/round to avoid a hole. Then work the new stitches in stocking stitch. BUTTONHOLES: Work buttonholes on the right band (when the garment is worn). Work from the right side when there are 5 stitches left on the row as follows: Make 1 yarn over, knit 2 together and knit 1, 2 edge stitches. On the next row (wrong side), knit the yarn over to leave a hole. The first buttonhole is worked on the first row from the right side after the neck. The other 5-5-6-6-6-6 buttonholes are then worked with approx. 8½-9-8-8-8½-9 cm between each one. DECREASE TIP (for sleeves): Decrease 1 stitch on each side of the marker-thread as follows: Work until there are 3 stitches left before the marker-thread, knit 2 together, knit 2 (marker-thread sits between these 2 stitches), slip 1 stitch knit-wise, knit 1 and pass the slipped stitch over the knitted stitch (2 decreased stitches). ------------------------------------------------------- START THE PIECE HERE: ------------------------------------------------------- JACKET – SHORT OVERVIEW OF THE PIECE: The neck and yoke are worked back and forth with circular needle, top down. The yoke is divided for the body and sleeves and the body continued back and forth with circular needle. The sleeves are worked in the round with short circular needle/double pointed needles. DOUBLE NECK: Cast on 111-115-119-123-129-133 stitches with colour light beige DROPS Karisma, using short circular needles size 3 and 4.5 mm held together. Remove the needle size 4.5 mm keeping stitches on needle size 3 mm (this gives you an elastic cast-on edge). Work from the right side as follows: 1 GARTER STITCH – see explanation above, * knit 1, purl 1*, work from *-* until there are 2 stitches left, knit 1 and 1 garter stitch. Continue this rib back and forth for 4 cm. Cast on 6 stitches at the end of the next 2 rows = 123-127-131-135-141-145 stitches. Continue the rib with 7 BAND stitches on each side – read explanation above. When the neck measures 8 cm and the next row is from the right side, fold the neck double to the inside and work as follows: 7 band stitches as before, rib as before and work every 2nd stitch together with its corresponding stitch on the cast-on edge, finish with 7 band stitches as before. You now have a double neck. YOKE: Change to circular needle size 4.5 mm. Purl 1 row from the wrong side and increase 27-29-31-33-37-41 stitches evenly spaced – read INCREASE TIP (band stitches as before, do not increase over the bands) = 150-156-162-168-178-186 stitches. Insert 1 marker after the band at the beginning of the row; the yoke is measured from this marker. You can now work an ELEVATION at the back – read description above. If you do not want an elevation, continue as described below. Work stocking stitch back and forth with 7 band stitches as before on each side. REMEMBER THE KNITTING TENSION and BUTTONHOLES on the right band – read description above. When there are 2 rounds left before the yoke measures 4-5-5-6-6-7 cm from the marker, and the next row is from the right side, increase 41-43-45-47-53-53 stitches evenly spaced (do not increase over the bands) = 191-199-207-215-231-239 stitches. Work back from the wrong side. Now work pattern and increase as described below – read KNITTING TIP and PATTERN above. The bands are always worked in colour light beige. Work 7 band stitches as before, A.1 22-23-24-25-27-28 times in width, work the first stitch in A.1 so the pattern is symmetrical, 7 band stitches as before. Continue this pattern. AT THE SAME TIME on each row with an arrow in the diagram, increase as described below (do not increase over the bands): ARROW-1: Increase 40-48-48-48-56-56 stitches evenly spaced = 231-247-255-263-287-295 stitches. ARROW-2: Increase 32-40-40-40-48-48 stitches evenly spaced = 263-287-295-303-335-343 stitches. ARROW-3: Increase 24-24-32-32-32-40 stitches evenly spaced = 287-311-327-335-367-383 stitches. ARROW-4: Increase 16-16-24-24-24-32 stitches evenly spaced = 303-327-351-359-391-415 stitches. ARROW-5: Increase 4-4-12-4-4-12 stitches evenly spaced = 307-331-363-363-395-427 stitches. When A.1 is finished, continue with stocking stitch, colour light beige and 7 band stitches as before on each side. DIVIDE FOR BODY AND SLEEVES: Work until the yoke measures 21-23-24-25-27-29 cm from the marker. Work 51-55-59-60-66-72 stitches as before (front piece), place the next 58-62-70-68-72-76 stitches on a thread for the sleeve, cast on 8-8-8-16-16-16 stitches (in side under sleeve), knit 89-97-105-107-119-131 (back piece), place the next 58-62-70-68-72-76 stitches on a thread for the sleeve, cast on 8-8-8-16-16-16 stitches (in side under sleeve), work the last 51-55-59-60-66-72 stitches as before (front piece). The body and sleeves are finished separately. The piece is now measured from here. BODY: = 207-223-239-259-283-307 stitches. Insert 1 marker-thread 55-59-63-68-74-80 stitches in from each side (= 97-105-113-123-135-147 stitches on the back piece). Allow the threads to follow your work onwards; they are used when dividing for the split in each side. Work stocking stitch back and forth with colour light beige and 7 band stitches as before on each side. When the body measures 22-22-23-24-24-24 cm from the division, divide the piece at each marker-thread and finish the back and front pieces separately. LEFT FRONT PIECE: = 55-59-63-68-74-80 stitches. Change to circular needle size 3 mm. Knit 1 row from the right side and increase 12-14-14-17-17-19 stitches evenly spaced (do not increase over the band) = 67-73-77-85-91-99 stitches. Work as follows from the wrong side: 1 garter stitch, * purl 1, knit 1 *, work from *-* until there are 8 stitches left, purl 1, 7 band stitches as before. Continue this rib for 6 cm. Cast off a little loosely. The jacket measures approx. 54-56-58-60-62-64 cm from the shoulder. RIGHT FRONT PIECE: = 55-59-63-68-74-80 stitches. Change to circular needle size 3 mm. Knit 1 row from the right side and increase 12-14-14-17-17-19 stitches evenly spaced (do not increase over the band) = 67-73-77-85-91-99 stitches. Work as follows from the wrong side: 7 band stitches as before, * purl 1, knit 1 *, work from *-* until there are 2 stitches left, purl 1, 1 garter stitch. Continue this rib for 6 cm. Cast off a little loosely. BACK PIECE: = 97-105-113-123-135-147. Change to circular needle size 3 mm. Knit 1 row from the right side and increase 24-26-28-32-34-38 stitches evenly spaced = 121-131-141-155-169-185 stitches. Work the next row from the wrong side as follows: 1 garter stitch, * purl 1, knit 1 *, work from *-* until there are 2 stitches left, purl 1 and 1 garter stitch. Continue this rib back and forth for 6 cm. Cast off a little loosely. SLEEVES: Place the 58-62-70-68-72-76 stitches from the thread on the one side of the piece on short circular needle/double pointed needles size 4.5 mm and knit up 1 stitch in each of the new stitches cast on under the sleeve with colour light beige = 66-70-78-84-88-92 stitches. Insert a marker-thread in the middle of the new stitches under the sleeve. Allow the thread to follow your work onwards, it is used when decreasing under the sleeve. Start at the marker-thread and work stocking stitch in the round. When the sleeve measures 4-4-4-3-3-3 cm from the division, decrease 2 stitches mid-under the sleeve – read DECREASE TIP. Decrease like this every 5½-4½-3-2½-2-2 cm a total of 6-7-10-12-13-14 times = 54-56-58-60-62-64 stitches. Work until the sleeve measures 36-34-34-33-32-30 cm from the division (or to desired length. There is approx. 8 cm left). Change to double pointed needles size 3 mm. Knit 1 round and increase 20-22-22-24-24-26 stitches evenly spaced = 74-78-80-84-86-90 stitches. Work rib (knit 1, purl 1) for 8 cm. Cast off a little loosely. The sleeve measures approx. 44-42-42-41-40-38 cm from the division. Work the other sleeve in the same way. ASSEMBLY: Sew the openings on the neck mid-front with small stitches. Sew the buttons onto the left band. |
|||||||||||||||||||
Diagram explanations |
|||||||||||||||||||
|
|||||||||||||||||||
 |
|||||||||||||||||||
 |
|||||||||||||||||||
Have you finished this pattern?Tag your pictures with #dropspattern #mushroomseasoncardigan or submit them to the #dropsfan gallery. Do you need help with this pattern?You'll find 38 tutorial videos, a Comments/Questions area and more by visiting the pattern on garnstudio.com. © 1982-2025 DROPS Design A/S. We reserve all rights. This document, including all its sub-sections, has copyrights. Read more about what you can do with our patterns at the bottom of each pattern on our site. |
|||||||||||||||||||











Post a comment to pattern DROPS 245-12
We would love to hear what you have to say about this pattern!
If you want to leave a question, please make sure you select the correct category in the form below, to speed up the answering process. Required fields are marked *.