
Popular categories
Looking for a yarn?


Comments / Questions (35)
![]() Elsa wrote:
Elsa wrote:
Bonjour, Au moment de diviser le tricot pour le dos le devant et les manches est ce que je dois couper le fil à chaque fois ? Avant et après avoir mis les manches en attente ? Merci
28.03.2026 - 09:50DROPS Design answered:
Bonjour Elsa, au moment de tricoter la division, vous n'avez pas besoin de couper le fil, car on tricote les mailles des manches avant de les mettre en attente. À la fin de ce rang, coupez le fil, et tricotez d'abord le devant en allers et retours puis tricotez ensuite le dos en allers et retours puis réunissez les 2 parties et continuez en rond (après avoir monté les mailles des emmanchures entre le devant et le dos, de chaque côté). Bon tricot!
07.04.2026 - 08:49
![]() Kristina wrote:
Kristina wrote:
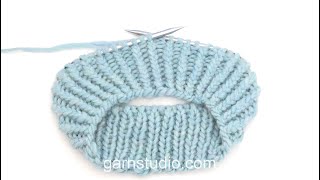
Fin tröja men det fattas lite i beskrivningen! När man stickat de förkortade varven i ärmkullen måste man sticka några cm fram och tillbaka för att få kanten "b" som ska sys ihop med "B" (de nya maskorna men lade upp under ärmen när man började sticka runt på bålen). Därefter kan man börja sticka runt på ärmen.
04.12.2025 - 17:20
![]() Linda wrote:
Linda wrote:
Ciao, è possibile farlo senza i ferri circolari e quelli a doppia punta? Sono alle prime armi e in casa ho solo ferri normali da 4.0 Grazie mille :)
23.07.2025 - 12:19DROPS Design answered:
Buonasera Linda, questo modello è lavorato in tondo: se vuole lavorarlo in piano deve adattare la lavorazione. Buon lavoro!
31.07.2025 - 22:42
![]() Louise Hansen wrote:
Louise Hansen wrote:
Jeg forstår ikke helt ærme-delen. Man skal samle masker op langs hhv. for- og bagstykkes ærmegab, men skal man slet ikke samle masker op over de 8 (str. xl) masker, der blev slået op da for- og bagstykke blev samlet? Jeg formoder, det er det hul, I mener, man skal sy til sidst, men samler man også masker op her, og er de så med i de 25 m langs for/bagstykke? Håber I kan hjælpe :-) Tak! Vh Louise
27.02.2025 - 12:43DROPS Design answered:
Hej Louise, nej du samler ikke masker op under ærmet i denne opskrift. Du syr hullet sammen til sidst :)
06.03.2025 - 11:13
![]() Jessica wrote:
Jessica wrote:
Ik heb een vraag bij het meerderen voor de zadelschouders. Hier wordt het werk verdeeld in voor, achter en schouders. Is het de bedoeling dat alle steken volgens boordsteek verder gebreid worden OF geldt dit alleen voor de schouder en brei ik het voor en achterpand al meteen recht? Ik hoor het graag. Met vriendelijke groet, Jessica
10.02.2025 - 12:50DROPS Design answered:
Dag Jessica,
Er wordt gewoon tricotsteek gebreid op de schouders. Het lijkt misschien op de foto zo dat het boordsteek is, maar het is tricotsteek.
11.02.2025 - 21:06
![]() ID wrote:
ID wrote:
In het patroon lucky sweater (DROPS 244-27) staat dat je na het breien van de verkorte toeren van de mouwen, de mouw moet samenvoegen en dan later pas, bij de afwerking, het armsgat moet dichtnaaien. Ik ben gewend om de steken van het armsgat op te nemen zodat de mouw meteen gesloten is maar dan wordt de mouw te wijd. Vraag: hoe strak moet ik de mouw samenvoegen om later een mooie afwerking te verkrijgen? De laatste en de eerste steek helemaal aansluitend of beter beetje losjes?
19.12.2024 - 12:35DROPS Design answered:
Dag ID,
Je kan gewoon op een normale manier het werk samenvoegen, niet te strak en niet te los.
19.12.2024 - 18:08
![]() Giusy Cordaro wrote:
Giusy Cordaro wrote:
Buongiorno, da dove conto le maglie da lavorare e aumentare nelle maniche? Dall'incavo o dalle maglie della spalla?
18.12.2024 - 11:24DROPS Design answered:
Buongiorno Giusy, a quale parte del lavoro sta facendo riferimento? Buon lavoro!
22.12.2024 - 09:21
![]() Giusy wrote:
Giusy wrote:
Mi serve un chiarimento riguardo il passaggio delle maniche dal ferro 1 al ferro 4.Dopo aver ottenuto le 69 maglie, devo lavorare solo 23? E da dove?
17.12.2024 - 23:31DROPS Design answered:
Buongiorno Giusy, in quel punto si lavora a ferri accorciati, ciò significa che non si lavora su tutte le maglie sul ferro ma solo su quelle indicate, deve seguire le istruzioni. Buon lavoro!
17.12.2024 - 23:33
![]() Marianne Nielsen wrote:
Marianne Nielsen wrote:
Hvordan skal maskerne over saddelskulderen strikkes? Ret over ret / vrang over vrang som på halsen eller skal det hele strikkes ret? Det fremgår ikke af opskriften andet end at blusen er i retstrik.
22.10.2024 - 16:49DROPS Design answered:
Hej Marianne, blusen strikkes i glatstrik fra halsen og nedad :)
23.10.2024 - 15:20
![]() Ida wrote:
Ida wrote:
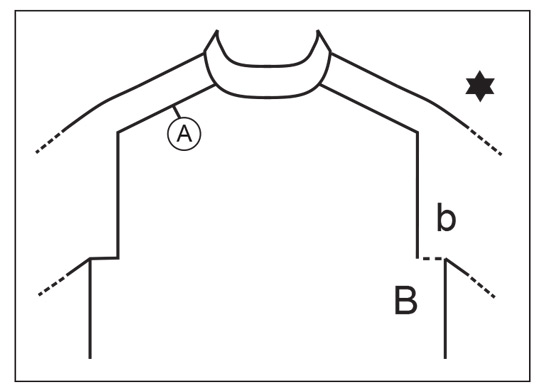
Hei! Kan jeg få en forklaring på hvordan ermehullet skal syes? Jeg forsår ikke diagrammet og det er jo ikke noe hull å tette hvis jeg har forstått oppskriften rett. Har det med hvordan genseren legger seg å gjøre? På forhånd takk for svar, mvh. Ida :)
20.10.2024 - 16:19DROPS Design answered:
Hei Ida, Det er de lagt opp maskene i sidene på bolen som skal syes sammen til slutt. Her er en lenke til en video som kanskje kunne være til hjelp under monteringen: https://www.garnstudio.com/video.php?id=1396&lang=no God fornøyelse!
21.10.2024 - 07:20
|
|||||||
Lucky Sweater#luckysweater |
|||||||
 |
 |
||||||
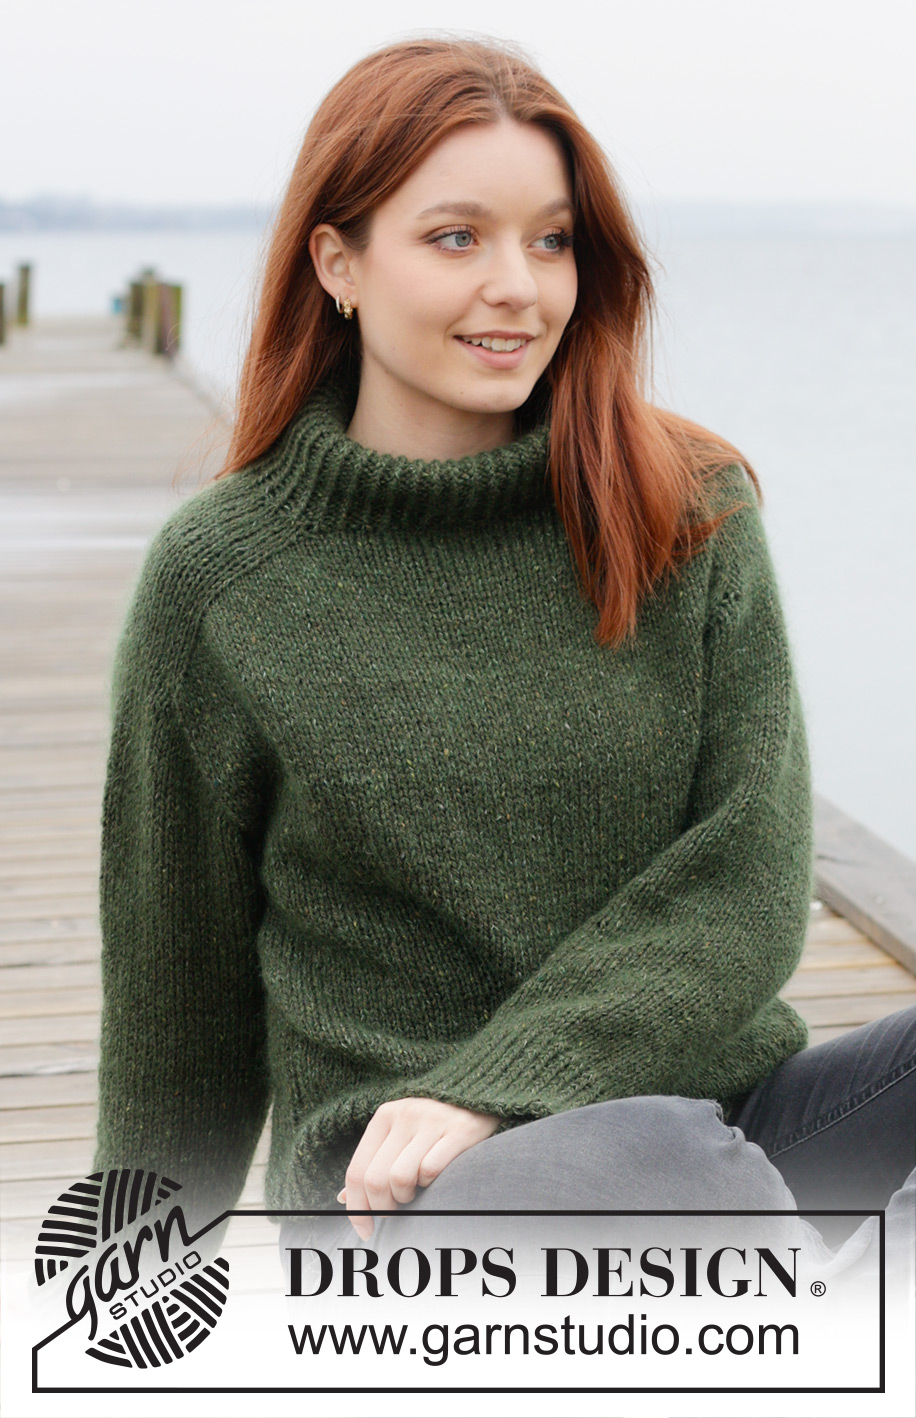
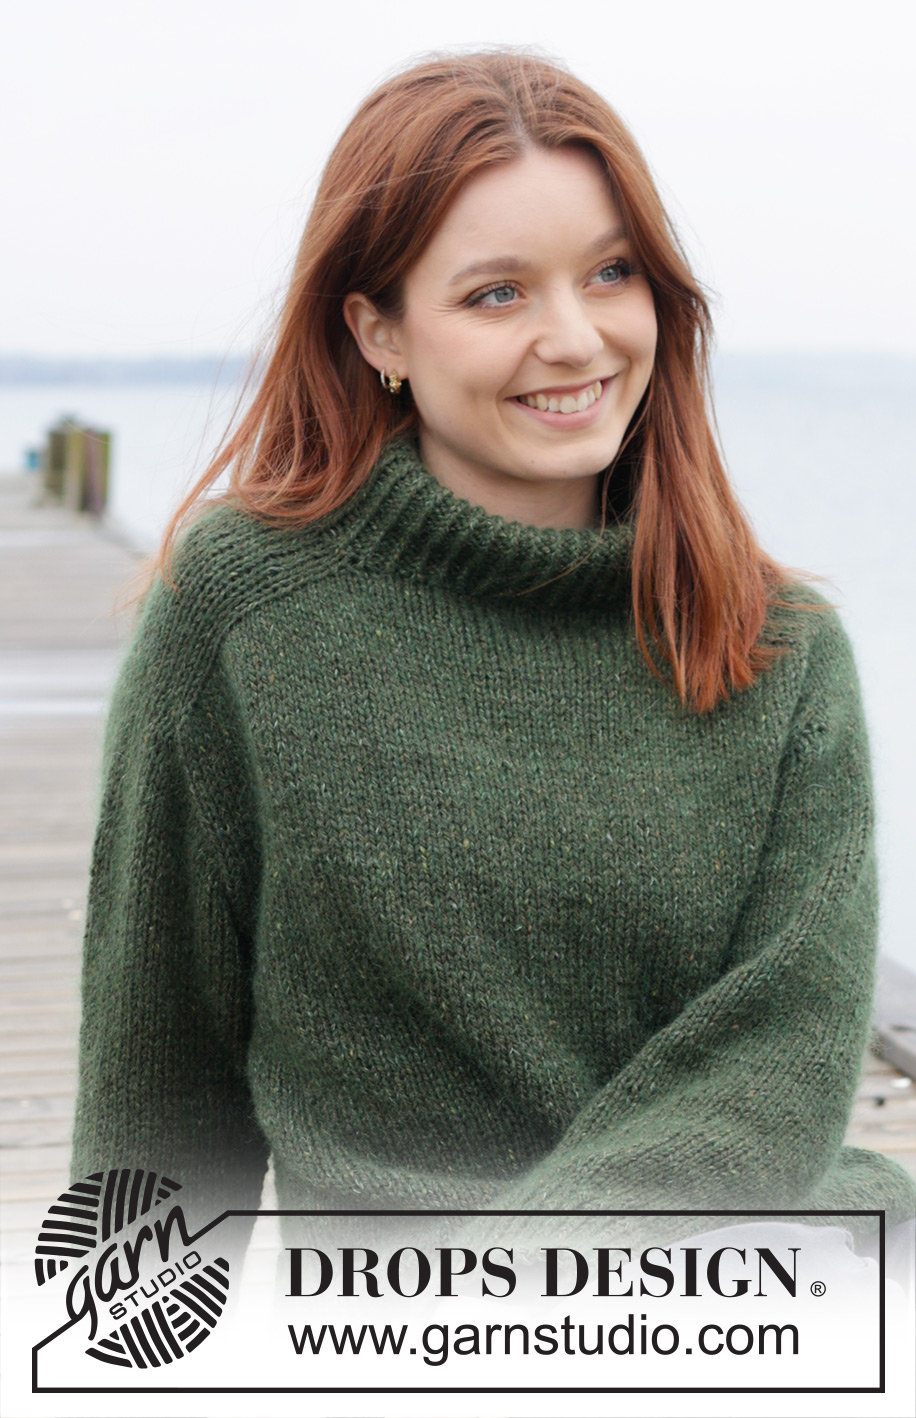
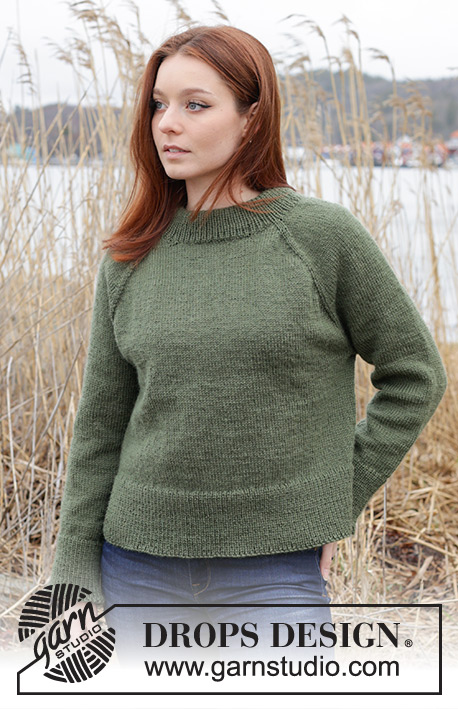
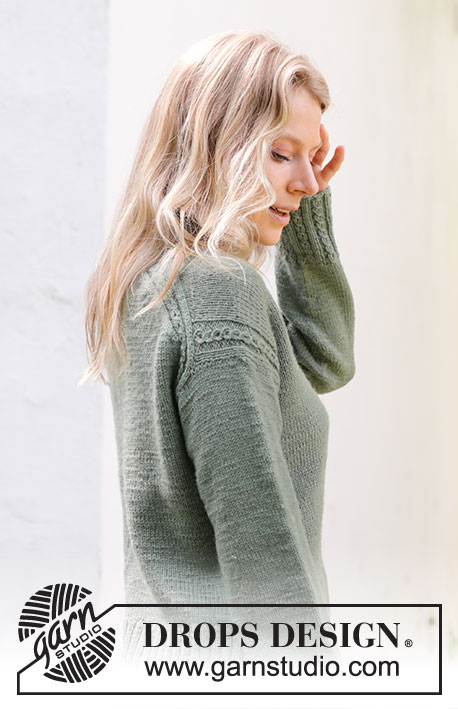
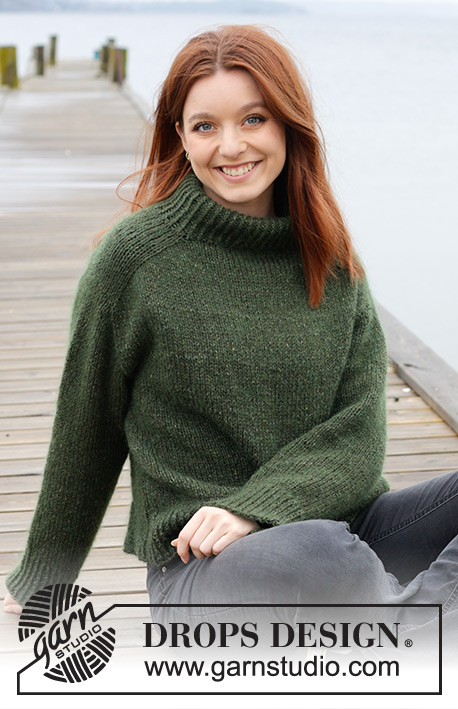
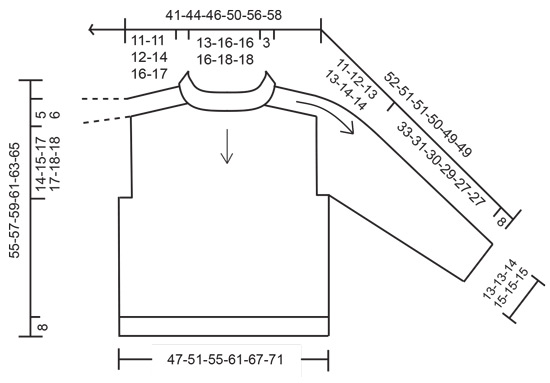
Knitted jumper in DROPS Soft Tweed and DROPS Kid-Silk. The piece is worked top down with double neck, saddle shoulders and stocking stitch. Sizes S - XXXL.
DROPS 244-27 |
|||||||
|
------------------------------------------------------- EXPLANATIONS FOR THE PATTERN: ------------------------------------------------------- INCREASE TIP (for saddle shoulders): BEFORE MARKER: The stitch is twisted towards the right. Use left needle to pick up thread between 2 stitches from round/row below, pick up thread from behind and knit stitch in front loop. AFTER MARKER: The stitch is twisted towards the left. Use left needle to pick up thread between 2 stitches from round/row below, pick up thread from front and knit stitch in back loop. DECREASE TIP (for sleeves): Work until there are 3 stitches left before the marker-thread, knit 2 together, knit 2 (marker-thread sits between these 2 stitches), slip 1 stitch knit-wise, knit 1 and pass the slipped stitch over the knitted stitch (2 stitches decreased). ------------------------------------------------------- START THE PIECE HERE: ------------------------------------------------------- JUMPER – SHORT OVERVIEW OF THE PIECE: The neck and yoke are worked in the round with circular needle, from mid back and top down until the increases for the shoulders are finished. Stitches are placed on threads for the shoulders and the front and back pieces worked separately back and forth with circular needle until the yoke is finished. The body is continued in the round with circular needle. The sleeves are worked with short circular needle/double pointed needles, top down. NECK: Cast on 84-92-92-100-108-108 stitches with circular needle size 4 mm and 1 strand of each quality (2 strands). Work rib in the round (knit 1 twisted, purl 1) for 13 cm. Insert 1 marker at the beginning of the round (mid-back); the yoke is measured from this marker. YOKE: Change to circular needle size 5.5 mm. Insert 4 new markers, without working the stitches, each marker inserted between 2 stitches. These markers are used when increasing for the shoulders and should have a different colour to the marker mid-back. Marker-1: Count 14-16-16-16-18-18 stitches (half back piece), insert marker before next stitch. Marker-2: Count 15-15-15-19-19-19 stitches (shoulder), insert marker before next stitch. Marker-3: Count 27-31-31-31-35-35 stitches (front piece), insert marker before next stitch. Marker-4: Count 15-15-15-19-19-19 stitches (shoulder), insert marker before next stitch. There are 13-15-15-15-17-17 stitches left after marker-4 (half back piece). Allow these 4 markers to follow your work onwards. Now increase for the shoulders as follows. INCREASE FOR SADDLE SHOULDERS: Continue working in the round from mid-back. On the first round increase 4 stitches as follows: Increase BEFORE markers 1 and 3 and AFTER markers 2 and 4 - read INCREASE TIP. You increase only on the front and back pieces; the number of shoulder-stitches remains the same. Continue working and increase like this every round a total of 21-21-23-26-30-32 times. REMEMBER THE KNITTING TENSION! After the last increase there are 168-176-184-204-228-236 stitches and the piece measures approx. 11-11-12-14-16-17 cm from the marker. Now divide for the sleeves, front and back pieces: Work 35-37-39-42-48-50 stitches (approx. half back piece), work the next 15-15-15-19-19-19 stitches and place them on a thread for the sleeve, work the next 69-73-77-83-95-99 stitches (front piece), work the next 15-15-15-19-19-19 stitches and place them on a thread for the sleeve, work the last 34-36-38-41-47-49 stitches (approx. half back piece). Cut the strand. Place the back-piece stitches on a thread. FRONT PIECE: = 69-73-77-83-95-99 stitches. Insert 1 marker in the middle of the row; it is used to measure from. Work stocking stitch back and forth until the piece measures 14-15-17-17-18-18 cm from the marker, finishing after a row from the wrong side. Lay the piece to one side. BACK PIECE: Work in the same way as the front piece but finish after a row from the right side. Now join the front and back pieces: Cast on 2-4-6-8-6-8 stitches at the end of the row (under the sleeve), work the front piece and cast on 2-4-6-8-6-8 stitches at the end of the row (under the sleeve). BODY: = 142-154-166-182-202-214 stitches. Work stocking stitch in the round until the jumper measures 47-49-51-53-55-57 cm from the top of the shoulder. Change to circular needle size 4 mm. Knit 1 round and increase 44-48-52-60-62-66 stitches evenly spaced = 186-202-218-242-264-280 stitches. Work rib (knit 1 twisted, purl 1) for 8 cm. Cast off. The jumper measures approx. 55-57-59-61-63-65 cm from the top of the shoulder. SLEEVES: Using circular needle size 5.5 mm and 1 strand of each quality (2 strands), knit up from the right side 21-23-26-25-27-27 stitches from the bottom of the armhole and up the front piece, work the 15-15-15-19-19-19 shoulder-stitches, knit up 21-23-26-25-27-27 stitches from the shoulder and down the back piece to the bottom of the armhole = 57-61-67-69-73-73 stitches. Work stocking stitch and short rows back and forth as follows: ROW 1 (= wrong side): Work stocking stitch until you are 2 stitches past the shoulder stitches. Turn and tighten the strand to avoid a hole. ROW 2: Work 19-19-19-23-23-23 stitches, turn, tighten the strand. ROW 3: Work 21-21-21-25-25-25 stitches, turn, tighten the strand. ROW 4: Work 23-23-23-27-27-27 stitches, turn, tighten the strand. Continue back and forth like this, working 2 more stitches each time you turn until you have worked all stitches on each side. The sleeve cap measures approx. 11-12-13-13-14-14 cm. (In some sizes the last row will be from the right side; work 1 row back from the wrong side). Insert 1 marker in the middle of the row to measure from. Using short circular needle/double pointed needles size 5.5 mm the sleeve is now joined and continued in the round. Insert 1 marker-thread at the beginning of the round (mid-under sleeve) and allow it to follow your work onwards. Start at the marker-thread and work stocking stitch in the round. When the sleeve measures 3-2-2-3-3-3 cm after the join, decrease 2 stitches under the sleeve – read DECREASE TIP. Decrease like this every 3-2½-2-2-1½-1½ cm a total of 10-11-13-13-15-14 times = 37-39-41-43-43-45 stitches. Continue working until the sleeve measures 33-31-30-29-27-27 cm. Change to double pointed needles size 4 mm. Knit 1 round and increase 13-13-13-13-15-15 stitches evenly spaced = 50-52-54-56-58-60 stitches. Work rib (knit 1 twisted, purl 1) for 8 cm. Cast off. The sleeve measures approx. 41-39-38-37-35-35 cm. Work the other sleeve in the same way. ASSEMBLY: Sew the openings at the bottom of the armholes - see sketch. Fold the neck double to the inside and fasten down with a couple of stitches. |
|||||||
Diagram explanations |
|||||||
|
|||||||
 |
|||||||
 |
|||||||
Have you finished this pattern?Tag your pictures with #dropspattern #luckysweater or submit them to the #dropsfan gallery. Do you need help with this pattern?You'll find 30 tutorial videos, a Comments/Questions area and more by visiting the pattern on garnstudio.com. © 1982-2026 DROPS Design A/S. We reserve all rights. This document, including all its sub-sections, has copyrights. Read more about what you can do with our patterns at the bottom of each pattern on our site. |
|||||||


With over 40 years in knitting and crochet design, DROPS Design offers one of the most extensive collections of free patterns on the internet - translated to 17 languages. As of today we count 324 catalogues and 12291 patterns translated into English (UK/cm). 12291
We work hard to bring you the best knitting and crochet have to offer, inspiration and advice as well as great quality yarns at incredible prices! Would you like to use our patterns for other than personal use? You can read what you are allowed to do in the Copyright text at the bottom of all our patterns. Happy crafting!
Post a comment to pattern DROPS 244-27
We would love to hear what you have to say about this pattern!
If you want to leave a question, please make sure you select the correct category in the form below, to speed up the answering process. Required fields are marked *.