DROPS Soft Tweed
DROPS Soft Tweed
50% Wool, 25% Alpaca, 25% Viscose
from 4.00 £ /50g
DROPS Kid-Silk
DROPS Kid-Silk
75% Mohair, 25% Silk
from 4.60 £ /25g
Get the yarn to make this pattern from 42.40£.

The yarn cost is calculated from the pattern’s smallest size and the yarn’s cheapest product type. Looking for an even better price? You might find it on the DROPS Deals!

DROPS SS24

Lucky Sweater

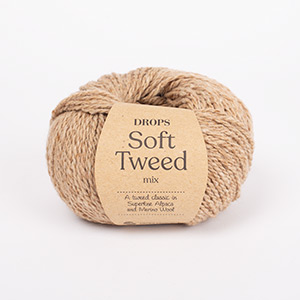
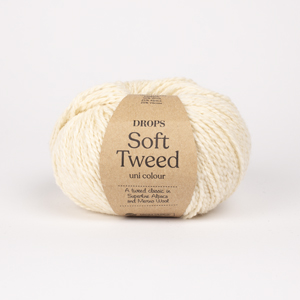
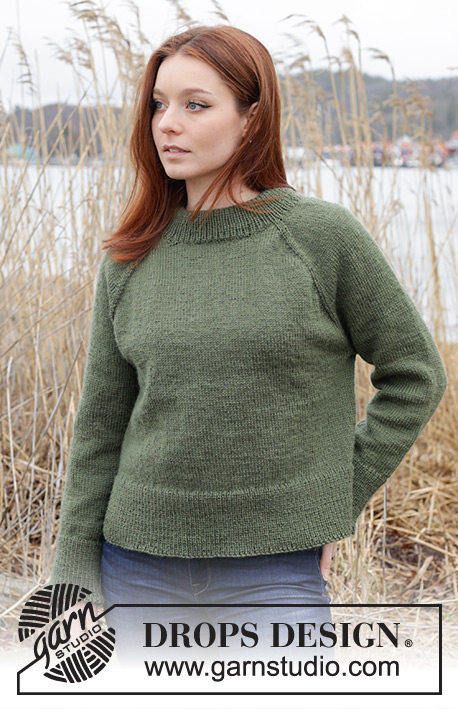
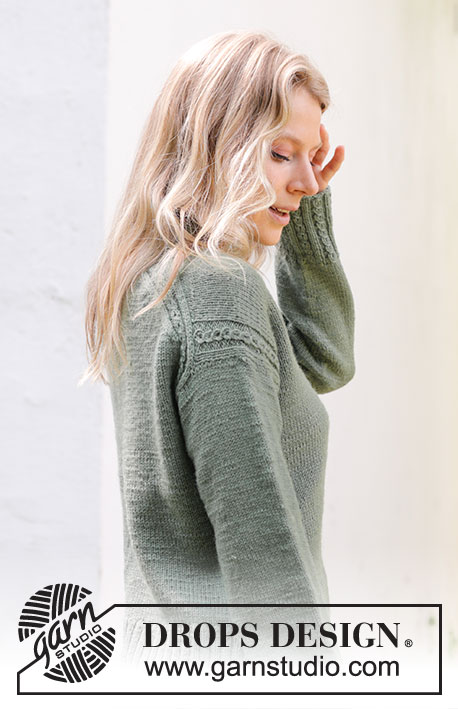
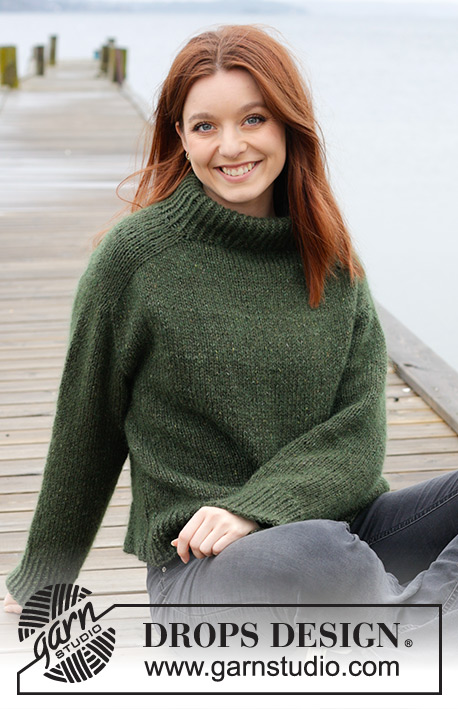
Knitted jumper in DROPS Soft Tweed and DROPS Kid-Silk. The piece is worked top down with double neck, saddle shoulders and stocking stitch. Sizes S - XXXL.

DROPS 244-27
DROPS Design: Pattern st-037
Yarn group B + A or C
-------------------------------------------------------

SIZES:
S - M - L - XL - XXL - XXXL

YARN:
DROPS SOFT TWEED from Garnstudio (belongs to yarn group B)
300-350-350-400-450-500 g colour 17, spinach pie
And use:
DROPS KID-SILK from Garnstudio (belongs to yarn group A)
100-100-125-125-150-150 g colour 19, dark green

NEEDLES:
DROPS CIRCULAR NEEDLE SIZE 5.5 MM: Length 40 cm and 80 cm.
DROPS CIRCULAR NEEDLE SIZE 4 MM: Length 40 cm and 80 cm.
DROPS DOUBLE POINTED NEEDLES SIZE 5.5 MM.
DROPS DOUBLE POINTED NEEDLES SIZE 4 MM.
The technique MAGIC LOOP can be used – you then only need 80 cm circular needle in each size.

KNITTING TENSION:
15 stitches in width and 19 rows in height with stocking stitch and 1 strand of each quality = 10 x 10 cm.
NOTE: Needle size is only a guide. If you get too many stitches on 10 cm, change to a larger needle size. If you get too few stitches on 10 cm, change to a smaller needle size.

-------------------------------------------------------

Alternative Yarn – See how to change yarns here
Yarn Groups A to F – Use the same pattern and change the yarn here
Yarn usage using an alternative yarn – Use our yarn converter here

-------------------------------------------------------

DROPS Soft Tweed
DROPS Soft Tweed
50% Wool, 25% Alpaca, 25% Viscose
from 4.00 £ /50g
DROPS Kid-Silk
DROPS Kid-Silk
75% Mohair, 25% Silk
from 4.60 £ /25g
Get the yarn to make this pattern from 42.40£.

The yarn cost is calculated from the pattern’s smallest size and the yarn’s cheapest product type. Looking for an even better price? You might find it on the DROPS Deals!

Pattern instructions

NOTE: This pattern is written in British English. All measurements in charts are in cm. For conversion from cm to inches - click here. There are different terms for crocheting in British and American English. If this pattern includes crochet, click for "crochet terms" here. For this pattern in American English, please click here.
-------------------------------------------------------

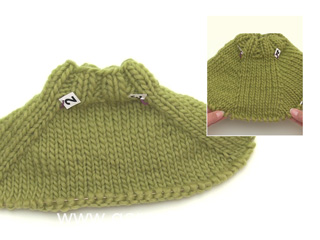
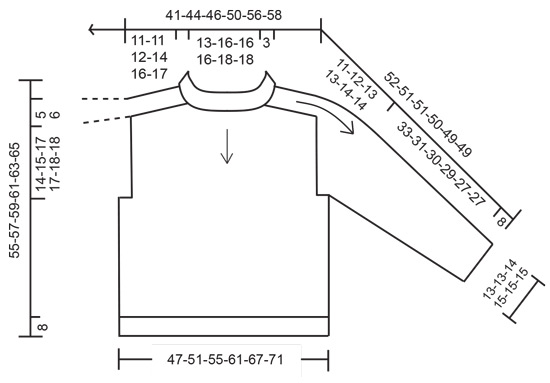
EXPLANATIONS FOR THE PATTERN:
-------------------------------------------------------

INCREASE TIP (for saddle shoulders):
BEFORE MARKER:
The stitch is twisted towards the right.
Use left needle to pick up thread between 2 stitches from round/row below, pick up thread from behind and knit stitch in front loop.
AFTER MARKER:
The stitch is twisted towards the left.
Use left needle to pick up thread between 2 stitches from round/row below, pick up thread from front and knit stitch in back loop.

DECREASE TIP (for sleeves):
Work until there are 3 stitches left before the marker-thread, knit 2 together, knit 2 (marker-thread sits between these 2 stitches), slip 1 stitch knit-wise, knit 1 and pass the slipped stitch over the knitted stitch (2 stitches decreased).

-------------------------------------------------------

START THE PIECE HERE:

-------------------------------------------------------

JUMPER – SHORT OVERVIEW OF THE PIECE:
The neck and yoke are worked in the round with circular needle, from mid back and top down until the increases for the shoulders are finished. Stitches are placed on threads for the shoulders and the front and back pieces worked separately back and forth with circular needle until the yoke is finished. The body is continued in the round with circular needle. The sleeves are worked with short circular needle/double pointed needles, top down.

NECK:
Cast on 84-92-92-100-108-108 stitches with circular needle size 4 mm and 1 strand of each quality (2 strands). Work rib in the round (knit 1 twisted, purl 1) for 13 cm. Insert 1 marker at the beginning of the round (mid-back); the yoke is measured from this marker.

YOKE:
Change to circular needle size 5.5 mm.
Insert 4 new markers, without working the stitches, each marker inserted between 2 stitches. These markers are used when increasing for the shoulders and should have a different colour to the marker mid-back.
Marker-1: Count 14-16-16-16-18-18 stitches (half back piece), insert marker before next stitch.
Marker-2: Count 15-15-15-19-19-19 stitches (shoulder), insert marker before next stitch.
Marker-3: Count 27-31-31-31-35-35 stitches (front piece), insert marker before next stitch.
Marker-4: Count 15-15-15-19-19-19 stitches (shoulder), insert marker before next stitch.
There are 13-15-15-15-17-17 stitches left after marker-4 (half back piece).
Allow these 4 markers to follow your work onwards. Now increase for the shoulders as follows.

INCREASE FOR SADDLE SHOULDERS:
Continue working in the round from mid-back.
On the first round increase 4 stitches as follows:
Increase BEFORE markers 1 and 3 and AFTER markers 2 and 4 - read INCREASE TIP. You increase only on the front and back pieces; the number of shoulder-stitches remains the same.
Continue working and increase like this every round a total of 21-21-23-26-30-32 times. REMEMBER THE KNITTING TENSION! After the last increase there are 168-176-184-204-228-236 stitches and the piece measures approx. 11-11-12-14-16-17 cm from the marker.

Now divide for the sleeves, front and back pieces: Work 35-37-39-42-48-50 stitches (approx. half back piece), work the next 15-15-15-19-19-19 stitches and place them on a thread for the sleeve, work the next 69-73-77-83-95-99 stitches (front piece), work the next 15-15-15-19-19-19 stitches and place them on a thread for the sleeve, work the last 34-36-38-41-47-49 stitches (approx. half back piece). Cut the strand. Place the back-piece stitches on a thread.

FRONT PIECE:
= 69-73-77-83-95-99 stitches. Insert 1 marker in the middle of the row; it is used to measure from. Work stocking stitch back and forth until the piece measures 14-15-17-17-18-18 cm from the marker, finishing after a row from the wrong side. Lay the piece to one side.

BACK PIECE:
Work in the same way as the front piece but finish after a row from the right side. Now join the front and back pieces: Cast on 2-4-6-8-6-8 stitches at the end of the row (under the sleeve), work the front piece and cast on 2-4-6-8-6-8 stitches at the end of the row (under the sleeve).

BODY:
= 142-154-166-182-202-214 stitches. Work stocking stitch in the round until the jumper measures 47-49-51-53-55-57 cm from the top of the shoulder. Change to circular needle size 4 mm. Knit 1 round and increase 44-48-52-60-62-66 stitches evenly spaced = 186-202-218-242-264-280 stitches.
Work rib (knit 1 twisted, purl 1) for 8 cm. Cast off. The jumper measures approx. 55-57-59-61-63-65 cm from the top of the shoulder.

SLEEVES:
Using circular needle size 5.5 mm and 1 strand of each quality (2 strands), knit up from the right side 21-23-26-25-27-27 stitches from the bottom of the armhole and up the front piece, work the 15-15-15-19-19-19 shoulder-stitches, knit up 21-23-26-25-27-27 stitches from the shoulder and down the back piece to the bottom of the armhole = 57-61-67-69-73-73 stitches.
Work stocking stitch and short rows back and forth as follows:
ROW 1 (= wrong side): Work stocking stitch until you are 2 stitches past the shoulder stitches. Turn and tighten the strand to avoid a hole.
ROW 2: Work 19-19-19-23-23-23 stitches, turn, tighten the strand.
ROW 3: Work 21-21-21-25-25-25 stitches, turn, tighten the strand.
ROW 4: Work 23-23-23-27-27-27 stitches, turn, tighten the strand.
Continue back and forth like this, working 2 more stitches each time you turn until you have worked all stitches on each side. The sleeve cap measures approx. 11-12-13-13-14-14 cm. (In some sizes the last row will be from the right side; work 1 row back from the wrong side). Insert 1 marker in the middle of the row to measure from.

Using short circular needle/double pointed needles size 5.5 mm the sleeve is now joined and continued in the round. Insert 1 marker-thread at the beginning of the round (mid-under sleeve) and allow it to follow your work onwards. Start at the marker-thread and work stocking stitch in the round. When the sleeve measures 3-2-2-3-3-3 cm after the join, decrease 2 stitches under the sleeve – read DECREASE TIP. Decrease like this every 3-2½-2-2-1½-1½ cm a total of 10-11-13-13-15-14 times = 37-39-41-43-43-45 stitches. Continue working until the sleeve measures 33-31-30-29-27-27 cm. Change to double pointed needles size 4 mm. Knit 1 round and increase 13-13-13-13-15-15 stitches evenly spaced = 50-52-54-56-58-60 stitches. Work rib (knit 1 twisted, purl 1) for 8 cm. Cast off. The sleeve measures approx. 41-39-38-37-35-35 cm. Work the other sleeve in the same way.

ASSEMBLY:
Sew the openings at the bottom of the armholes - see sketch. Fold the neck double to the inside and fasten down with a couple of stitches.

This pattern has been corrected.

Updated online: 04.01.2024
Pattern has been updated. Needle size for casting on has been updated.

Diagram

symbols = Increases for saddle shoulders
symbols = Sew bottom of armhole: b to B
diagram
diagram

Each of our patterns has specific tutorial videos to help you.

Do you have a question? See a list of frequently asked questions (FAQ)

Knitting tension is what determines the final measurements of your work, and is usually measured per 10 x 10 cm. It is provided like so: number of stitches in width x number of rows in height - eg: 19 stitches x 26 rows = 10 x 10 cm.

The knitting tension is very individual; some people knit/crochet loosely while others work tightly. You adjust the knitting tension with the needle size, which is why the suggested needle size is only meant as a guide! You need to adjust this (up or down) to ensure that YOUR knitting tension matches the knitting tension provided in the pattern. If you work with a different knitting tension than provided you will have a different yarn consumption, and your work will have different measurements than what the pattern suggests.

The knitting tension also determines which yarns can replace each other. As long as you achieve the same knitting tension you can replace one yarn with another.

See DROPS lesson: How to measure your tension/gauge

See DROPS video: How to make a gauge tension swatch

The required amount of yarn is provided in grams, eg: 450 g. To calculate how many balls you’ll need you first need to know how many grams are in 1 ball (25g, 50g or 100g). This information is available if you click on the individual yarn quality on our pages. Divide the amount required with the amount of each ball. For example, if each ball is 50g (the most common amount), the calculation will be as follows: 450 / 50 = 9 balls.

The important thing when changing from one yarn to another is that the knitting/crochet tension remains the same. This is so that the measurements of the finished piece will be the same as on the sketch provided. It is easier to achieve the same knitting tension using yarns from the same yarn group. It is also possible to work with multiple strands of a thinner yarn to achieve the knitting tension of a thicker one. Please try our yarn converter. We recommend you to always work a test swatch.

Please NOTE: when changing yarn the garment might have a different look and feel to the garment in the photo, due to individual properties and qualities of each yarn.

See DROPS lesson: Can I use a different yarn than the one mentioned in the pattern?

All our yarns are categorised into yarn groups (from A to F) according to thickness and knitting tension – group A contains the thinnest yarns and group F the thickest. This makes it easier for you to find alternative yarns to our patterns, should you wish to switch yarn. All yarns within the same group have a similar knitting tension and can easily replace each other. However, different yarn qualities have different structures and properties which will give the finished work a unique look and feel.

Click here for an overview of the yarns in each yarn group

At the top of all our patterns you’ll find a link to our yarn calculator, which is a helpful tool should you wish to use a different yarn than suggested. By filling in the yarn quality you wish to replace, the amount (in your size) and number of strands, the calculator will present good alternative yarns with the same knitting tension. Additionally it will tell you how much you’ll require in the new qualities and whether you’ll need to work with multiple strands. Most skeins are 50g (some are 25g or 100g).

If the pattern is worked with multiple colours, every colour will have to be calculated separately. Similarly, if the pattern is worked with several strands of different yarns (for example 1 strand Alpaca and 1 strand Kid-Silk) you will have to find alternatives for each, individually.

Click here to see our yarn calculator

Since different yarns have different qualities and textures we have chosen to keep the original yarn in our patterns. However, you can easily find options among our available qualities by using our yarn calculator, or simply pick a yarn from the same yarn group.

It is possible that some retailers still have discontinued yarns in stock, or that someone has a few skeins at home that they would like to find patterns for.

The yarn calculator will provide both alternative yarn as well as required amount in the new quality.

If you think it's hard to decide what size to make, it can be a good idea to measure a garment you own already and like the size of. Then you can pick the size by comparing those measures with the ones available in the pattern's size chart.

You'll find the size chart at the bottom of the pattern.

See DROPS lesson: How to read size chart

The needle size provided in the pattern serves only as a guide, the important thing is to follow the knitting tension. And since knitting tension is very individual, you will have to adjust the needle size to ensure that YOUR tension is the same as in the pattern – maybe you’ll have to adjust 1, or even 2 needle sizes, up or down to achieve the correct tension. For this, we recommend that you work test swatches.

Should you work with a different knitting tension than the one provided, the measurements of the finished garment might deviate from the measurement sketch.

See DROPS lesson: How to measure your tension/gauge

See DROPS video: How to make a tension/gauge swatch

Working a garment top-down provides more flexibility and room for personal adjustment. For example it is easier to try the garment on while working, as well as making adjustments to length of yoke and shoulder caps.

The instructions are carefully explaining every step, in the correct order. Diagrams are adjusted to the knitting direction and are worked as usual.

The diagram depicts all rows/rounds, and every stitch seen from the right side. It is read from bottom to top, from right to left. 1 square = 1 stitch.

When working back and forth, every other row is worked from the right side and every other row is worked from the wrong side. When working from the wrong side, the diagram will have to be worked reversed: from left to right, knit stitches are purled, purl stitches are knit etc.

When working in the round every round is worked from the right side and the diagram are worked from right to left on all rounds.

See DROPS lesson: How to read knitting diagrams

The diagram depicts all rows/rounds, and every stitch seen from the right side. It is worked from bottom to top, from right to left.

When working back and forth every other row is worked from the right side: from right to left and every other row is worked from the wrong side: from left to right.

When working in the round, every row in the diagram are worked from the right side, from right to left.

When working a circular diagram you start in the middle and work your way outwards, counter clockwise, row by row.

The rows usually start with a given number of chain stitches (equivalent to the height of the following stitch), this will either be depicted in the diagram or explained in the pattern.

See DROPS lesson: How to read crochet diagrams

Instructions for working several diagrams after each other on the same row/round, will often be written like so: “work A.1, A.2, A.3 a total of 0-0-2-3-4 times". This means you work A.1 once, then A.2 is worked once, and A.3 is repeated (in width) the number of times provided for your size – in this case like so: S = 0 times, M = 0 times, L=2 times, XL= 3 times and XXL = 4 times.

The diagrams are worked as usual: begin with the first row in A.1, then work the first row in A.2 etc.

See DROPS lesson: How to read knitting diagrams

See DROPS lesson: How to read crochet diagrams

The total width of the garment (from wrist-to-wrist) will be larger in the larger sizes, despite the actual sleeves being shorter. The larger sizes have longer sleeve caps and wider shoulders, so there will be a good fit in all sizes.

The measurement sketch/schematic drawing provides information regarding the full length of the garment. If it’s a jumper or a jacket the length is measured from the highest point on the shoulder closest to the neckline, and straight down to the bottom of the garment. It is NOT measured from the tip of shoulder. Similarly, the length of yoke is measured from the highest point on the shoulder and down to where yoke is split into body and sleeves.

On a jacket measures are never taken along bands, unless specifically stated. Always measure inside band stitches when measuring the length.

See DROPS lesson: How to read a schematic drawing

Diagrams are often repeated on the round or in height. 1 repeat is the diagram the way it appears in the pattern. If it says to work 5 repeats of A.1 in the round, then you work A.1 a total of 5 times after/next to each other in the round. If it says to work 2 repeats of A.1 vertically/in height you work the entire diagram once, then begin again at the start and work the entire diagram one more time.

Chain stitches are slightly narrower than other stitches and to avoid working the cast-on edge too tight, we simply chain more stitches to begin with. The stitch count will be adjusted on the following row to fit the pattern and measurement sketch.

The rib edge is more elastic and will contract slightly compared to, for example, stocking stitch. By increasing before the rib edge, you avoid a visible difference in width between the rib edge and the rest of the body.

It’s very easy to cast off too tightly, and by making yarn overs while casting off (and simultaneously casting these off) you avoid a too tight cast off edge.

See DROPS video: How to bind off with yarn overs (yo)

To achieve an even increase (or decrease) you can increase on, for example: every 3rd and 4th row alternately, like so: work 2 rows and increase on the 3rd row, work 3 rows and increase on the 4th. Repeat this until the increase is complete.

See DROPS lesson: Increase or decrease 1 st on every 3rd and 4th row alternately

Should you prefer to work in the round instead of back and forth, you may of course adjust the pattern. You’ll need to add steeks mid-front (usually 5 stitches), and follow the instructions. When you would normally turn and work from the wrong side, simply work across the steek and continue in the round. At the end you’ll cut the piece open, pick up stitches to work bands, and cover the cut edges.

See DROPS video: How to knit steeks and cut open

Should you prefer to work back and forth instead of in the round, you may of course adjust the pattern so you work the pieces separately and then assemble them at the end. Divide the stitches for the body in 2, add 1 edge stitch in each side (for sewing) and work the front and back pieces separately.

See DROPS lesson: Can I adapt a pattern for circular needles into straight needles?

Pattern repeats can vary slightly in the different sizes, in order to get the correct proportions. If you’re not working the exact same size as the garment in the photo, yours might deviate slightly. This has been carefully developed and adjusted so that the complete impression of the garment is the same in all sizes.

Make sure to follow instructions and diagrams for your size!

If you have found a pattern you like which is available in women’s size it’s not very difficult to convert it to men’s size. The biggest difference will be the length of sleeves and body. Start working on the women size that you think would fit across the chest. The additional length will be worked right before you cast off for the armhole/sleeve cap. If the pattern is worked top-down you can add the length right after the armhole or before the first decrease on sleeve.

Regarding additional yarn amount, this will depend on how much length you add, but it is better with a skein too many than too few.

All yarns will have excess fibres (from production) that might come off as lint or shedding. Brushed yarns (ie hairier yarns) have more of these loose, excess fibres, causing more shedding.

Shedding also depends on what is worn under or over the garment, and whether this pulls at the yarn fibres. It’s therefore not possible to guarantee that there will be no shedding

Below are some tips on how to get the best result when working with hairier yarns:

1. When the garment is finished (before you wash it) shake it vigorously so the looser hairs come off. NOTE: do NOT use a lint roller, brush or any method that pulls at the yarn.

2. Place the garment in a plastic bag and put it in your freezer - the temperature will cause the fibres to become less attached to each other, and excess fibres will come off easier.

3. Leave in the freezer for a few hours before taking it out and shaking it again.

4. Wash the garment according to the instructions on the yarn label.

Pilling is a natural process that happens to even the most exclusive of fibers. It's a natural sign of wear and tear that is hard to avoid, and that is most visible in high friction areas of your garment like a sweater's arms and cuffs.

You can make your garment look as new by removing the pilling, using a fabric comb or a pill/lint remover.

Still can't find the answer you need? Then scroll down and leave your question so one of our experts can try to help you. This will be done normally within 5 to 10 working days.
In the meantime, you can read the questions and answers that others have left to this pattern or join the DROPS Workshop on Facebook to get help from fellow knitters/crocheters!

You might also like...

Post a comment to pattern DROPS 244-27

We would love to hear what you have to say about this pattern!

If you want to leave a question, please make sure you select the correct category in the form below, to speed up the answering process. Required fields are marked *.

Comments / Questions (23)

country flag Monica wrote:

Sul davanti, finire dopo un ferro dal rovescio del lavoro, significa che devo fare una ferro a dritto e sospendo prima di iniziare un ferro a rovescio? Grazie

09.03.2024 - 16:02

DROPS Design answered:

Buonasera Monica, vuol dire che deve finire dopo aver lavorato un ferro dal rovescio del lavoro. Buon lavoro!

09.03.2024 - 17:01

country flag Hieke Reijnhoudt wrote:

In the pattern it is stated to Cast on 84-92-92-100-108-108 stitches with circular needle size 4.5 MM = US 7 . However, in the description of the needles needed for this garment, only US 6 and US 9 are listed. What is the recommended needle size?

03.01.2024 - 16:47

DROPS Design answered:

Dear Mrs Reijnhoudt, pattern will be edited, you need here the smaller needles, ie size 4 mm / US6 to cast on. Thanks for noticing. Happy knitting!

04.01.2024 - 09:07

country flag Maria Teresa wrote:

Alla fine del davanti cosa significa esattamente mettere il lavoro da parte? Tagliare il filo e sospendere i punti? Grazie

01.01.2024 - 23:32

DROPS Design answered:

Buongiorno Maria Teresa, sì, deve lasciare in sospeso il davanti per lavorare il dietro. Buon lavoro!

02.01.2024 - 08:22

country flag Ria Taat wrote:

In patroon staat hals beginnen met naald 4,5. Moet dit niet nr4 zijn?

24.12.2023 - 14:00

DROPS Design answered:

Dag Ria,

Dit moet inderdaad 4 mm zijn. Het is inmiddels aangepast.

07.01.2024 - 13:49

country flag Monika wrote:

Wenn ich diesen Pullover aus Soft Tweed Kirschsorbet stricken möchte, welche Kid Silk Farbe passt dazu? Irgendwie sieht Kirschsorbet bei Kid Silk ganz anders aus.

04.11.2023 - 20:57

DROPS Design answered:

Liebe Monika, am besten wenden Sie sich direkt an Ihrem DROPS Händler, dort wird man Ihnen gerne die besten passenden Farbkombinationen empfehlen (auch per Telefon oder per E-Mail). Viel Spaß beim stricken!

06.11.2023 - 08:22

country flag Regina wrote:

Hi! Frage: Bei mir ist es beim Abschnitt wo man hin und her strickt jetzt ganz wuselig geworden. Also man sieht gleich das nicht mehr mit der Rundstricknadeln gestrickt wurde. Legt sich das dann noch beim fixieren oder muss ich alles nochmal machen?? LG Regina

02.11.2023 - 09:34

DROPS Design answered:

Liebe Regina, vielleicht stricken Sie nicht genauso gleich in Runden und in Reihen - sowas kann nach 1. Waschen weg, am besten beachten Sie, daß Ihre Maschenprobe immer stimmt, und vielleicht sollten Sie die Nadelgröße so anpassen damit die Maschenprobe bei Reihen sowie bei Runden stimmt. Viel Spaß beim stricken!

02.11.2023 - 17:44

country flag Ursula Kries wrote:

Gibt es ein Video wie man die armkugel bei der sattelschulter strickt?

21.10.2023 - 15:31

DROPS Design answered:

Liebe Frau Kreis, ja genau, in diesem Video zeigen wir (für ein anderes Modell, aber die Technik ist die gleiche), wie man für die Sattelschulter zunimmt. Viel Spaß beim stricken!

23.10.2023 - 09:40

country flag Christina Kingo Rahr wrote:

Er det retstrik efter man har strikket halsen og der sættes 4 nye mærker

17.10.2023 - 00:25

DROPS Design answered:

Hej Christina, hele blusen strikkes i glatstrik efter halskanten :)

18.10.2023 - 07:28

country flag Daniela wrote:

Forest Walk

06.08.2023 - 21:01

country flag Marita Løken wrote:

Autumm blizz

06.08.2023 - 10:01