
Popular categories
Looking for a yarn?


Comments / Questions (81)
![]() Nicole wrote:
Nicole wrote:
Bonjour madame je suis en train de tricoter les manches du modèle en 6 9 mois et donc on me dit de diminuer tous les un rangs et demi comment calcule-t-on un rang et demi en sachant que un rang et demi n'existe pas mais de 1 - 2-3 et 4 rang puisque les diminutions se font sous la Manche comment calcule-t-on un rang et demi merci de votre réponse je vous souhaite une très bonne journée
30.11.2025 - 10:52
![]() Clémence wrote:
Clémence wrote:
Même problème que Nikki, en taille 6/9 il y a un problème au moment du placement des marqueurs avant les augmentations de raglan. Le compte de mailles n’est pas bon, nous avons 92 mailles mais les explications correspondent à 88 mailles. Nous avons 4 mailles en trop. Je vais déplacer mes marqueurs pour les intégrer au dos et aux demi-devants.
22.11.2025 - 17:28DROPS Design answered:
Bonjour Clémence, notes que les marqueurs doivent être placés dans une maille et pas entre les mailles, ainsi vous retrouverez vos 4 mailles manquantes. Bon tricot!
24.11.2025 - 09:30
![]() Nikki wrote:
Nikki wrote:
Am i missing something ? If you've increased by 7 stitches for the 3rd size. Then the stitch markers division - there's 88 stitches accounted for ???
09.11.2025 - 20:07DROPS Design answered:
Hi Nikki, If you are working the third size, you cast on 85 stitches. Increasing 7 stitches will then leave you with 92 stitches. Regards, Drops Team.
10.11.2025 - 06:52
![]() Samira wrote:
Samira wrote:
Bonjour, Je tricote actuellement la taille12/18 mois, j'ai fait les séparations pour l'empiecement et mis 12 mailles pour les manches, j'ai fini les augmentations du raglan, mais je n'ai pas le bon nombre de mailles pour les manches. J'ai fait 17 augmentations de chaque côtés soit 34 mailles supplémentaire plus les 12 mailles de bases, cela me fait 46 mailles pour la manche et non 50.
12.10.2025 - 19:30DROPS Design answered:
Bonjour Samira, notez que la division ne se fait pas aux raglans, autrement dit, vous avez 6 m bordure devant + 16 m jersey pour le devant + 17 augmentations = soit 6 + 33 m , mais vous ne gardez que 6+32 m pour le devant, ainsi la dernière maille du devant et la 1ère maille du dos appartiennent toutes les 2 à la manche, vous avez ainsi: 1 m du devant + 1 m raglan + 46 m manche + 1 m raglan + 1 m du dos = 50 m pour la manche (de même pour la 2ème manche). Bon tricot!
15.10.2025 - 08:32
![]() Paula wrote:
Paula wrote:
I would like to see patterns worked flat on two needs rather than working in the round. I find that too complicated so it puts me off
19.09.2025 - 16:41
![]() Gisela wrote:
Gisela wrote:
Ich habe es gerade rausgefunden. Vielen Dank
30.08.2025 - 19:03
![]() Gisela wrote:
Gisela wrote:
Ich habe es gerade rausgefunden. Vielen Dank
30.08.2025 - 19:02
![]() Gisela wrote:
Gisela wrote:
Oder wird die markierte Masche gar nicht gestrickt sondern nur abgehoben??????
30.08.2025 - 10:55
![]() Gisela wrote:
Gisela wrote:
Hallo, wie soll denn der gesetzte Markierer für den Raglan in der Rückreihe abgestrickt werden? Rechts oder links? Liebe Grüße
30.08.2025 - 10:34DROPS Design answered:
Liebe Gisela, die 4 Maschen mit je einer Markierung (für die RAglanzunahmen) werden glattrechts gestrickt. Viel Spaß beim Stricken!
01.09.2025 - 17:05
![]() Kerstin Davidsson wrote:
Kerstin Davidsson wrote:
Hur gör man markören vid en raglanärm. Sätter man tråden före eller efter maskan.
17.08.2025 - 13:09
|
|||||||
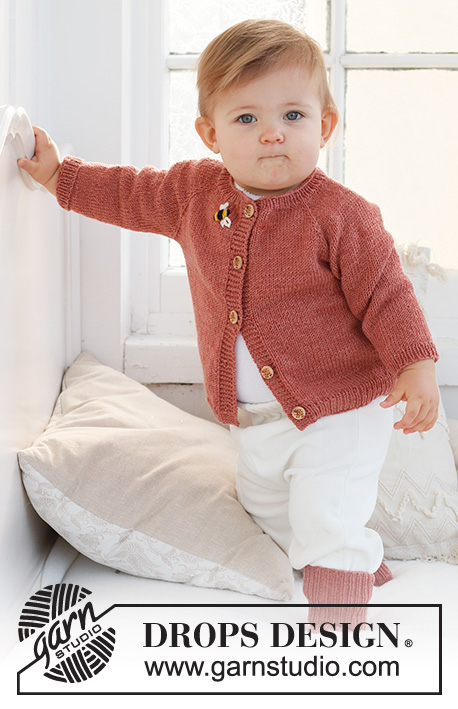
Little Bee Cardigan#littebeecardigan |
|||||||
 |
 |
||||||
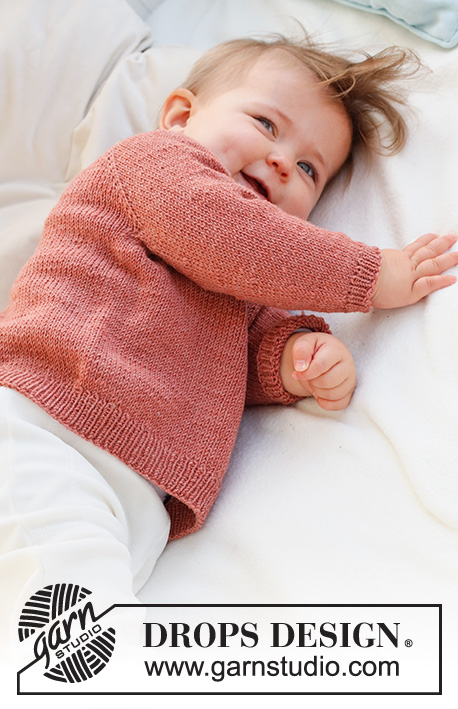
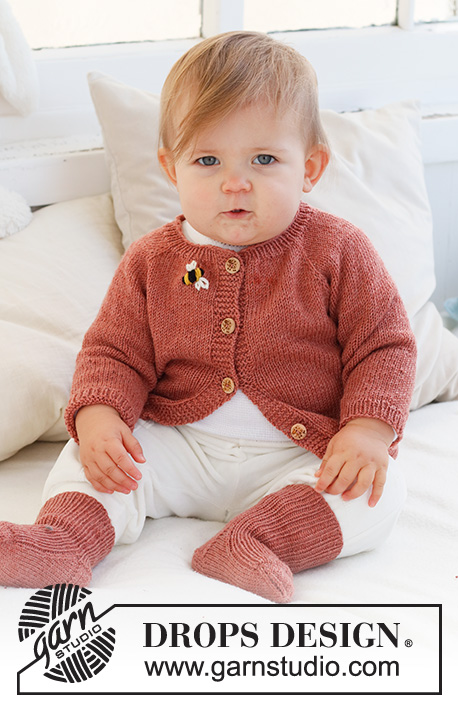
Knitted jacket for babies and children in DROPS BabyMerino. The piece is worked top down, with raglan and embroidered bee. Sizes 0 - 4 years.
DROPS Baby 42-4 |
|||||||
|
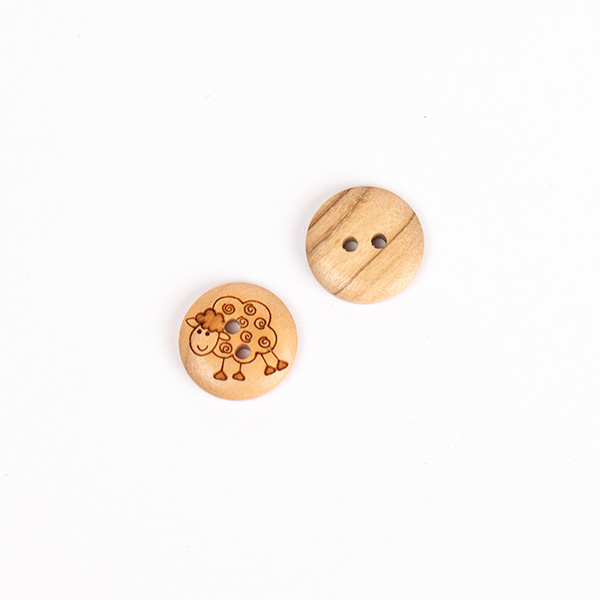
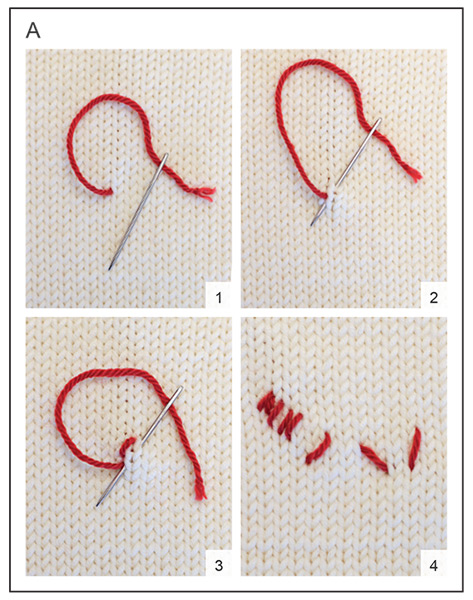
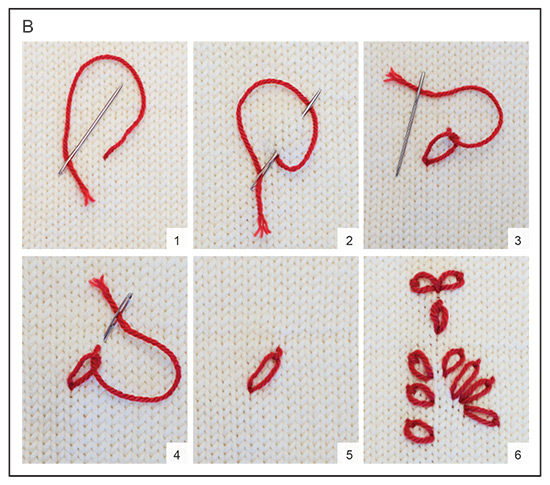
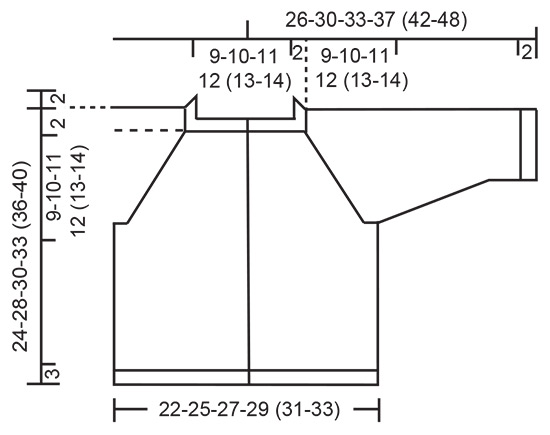
------------------------------------------------------- EXPLANATIONS FOR THE PATTERN: ------------------------------------------------------- RIDGE/GARTER STITCH (worked back and forth): Knit all rows. 1 ridge = knit 2 rows. RAGLAN: All increases are worked from the right side! Work to the marker-stitch, 1 yarn over, knit the marker-stitch, 1 yarn over. Increase like this at each marker-stitch (8 stitches increased). On the next row purl the yarn overs twisted to avoid holes. Then work the new stitches in stocking stitch. DECREASE TIP (sleeves): Decrease 1 stitch on either side of the marker as follows: Work until there are 3 stitches left before the marker, knit 2 together, knit 2 (marker sits between these 2 stitches), slip 1 stitch as if to knit, knit 1 and pass the slipped stitch over the knitted stitch. BUTTONHOLES: Work buttonholes on the right band (when the garment is worn). Work from the right side when there are 3 stitches left on the row as follows: Make 1 yarn over, knit 2 together and knit 1. On the next row, knit the yarn over to leave a hole. The first buttonhole is worked when the neck measures 2 cm. Then work the other 4-4-4-4 (5-5) buttonholes with after 5-6-6½-7 (6½-7) cm between each one. ------------------------------------------------------- START THE PIECE HERE: ------------------------------------------------------- JACKET – SHORT OVERVIEW OF THE PIECE: The yoke is worked back and forth with circular needle. It is divided for the body and sleeves and the body continued back and forth. The sleeves are worked in the round with double pointed needles. NECK: Cast on 75-81-85-91 (95-99) stitches with circular needle size 2.5 mm and DROPS Baby Merino. Purl 1 row from the wrong side with 6 band stitches in GARTER STITCH on each side – read description above. Then work rib as follows: 6 band stitches in garter stitch, * knit 1, purl 1 *, work from *-* until there are 7 stitches left, knit 1 and 6 band stitches in garter stitch. When the rib measures 2 cm, change to circular needle size 3 mm. Insert 1 marker after the band at the beginning of the row, the yoke is measured from this marker! YOKE: Work the next row from the right side: 6 band stitches in garter stitch, knit 63-69-73-79 (83-87) and increase 9-11-7-13 (13-17) stitches evenly spread and 6 band stitches in garter stitch = 84-92-92-104 (108-116) stitches. Work the first BUTTONHOLE – read description above. On the next row insert 4 markers as follows: Work 6 band stitches in garter stitch, purl 11-13-13-16 (17-19), insert 1 marker in the next stitch, purl 12, insert 1 marker in the next stitch, purl 22-26-26-32 (34-38), insert 1 marker in the next stitch, purl 12, insert 1 marker in the next stitch, purl 11-13-13-16 (17-19) and 6 band stitches in garter stitch. Continue with stocking stitch and 6 band stitches in garter stitch on each side, increasing as follows: On the next row from the right side increase 1 stitch on each side of all the markers – read RAGLAN! Increase like this every row from the right side 12-14-16-17 (18-19) times = 180-204-220-240 (252-268) stitches. REMEMBER THE KNITTING TENSION! When the piece measures 9-10-11-12 (13-14) cm from the marker, divide for the body and sleeves as follows: Work 6 band stitches in garter stitch, 23-27-29-32 (34-37) stitches in stocking stitch, place the next 38-42-46-50 (52-54) stitches on a thread for the sleeve, cast on 6 stitches, work 46-54-58-64 (68-74) stitches in stocking stitch, place the next 38-42-46-50 (52-54) stitches on a thread for the sleeve, cast on 6 stitches, work 23-27-29-32 (34-37) stitches in stocking stitch and 6 band stitches in garter stitch. BODY: = 116-132-140-152 (160-172) stitches. Continue back and forth with stocking stitch and 6 band stitches in garter stitch on each side. When the piece measures 10-13-14-16 (18-21) cm from the division, increase 13-13-15-15 (17-19) stitches evenly spaced on the next row from the right side (do not increase over the bands) = 129-145-155-167 (177-191) stitches. Change to circular needle size 2.5 mm and work rib, starting from the wrong side as follows: 6 band stitches in garter stitch, * purl 1, knit 1 *, work from *-* until there are 7 stitches left, purl 1 and 6 band stitches in garter stitch. Continue this rib for 3 cm. Cast off. SLEEVES: Place the 38-42-46-50 (52-54) stitches from the thread on the one side of the piece on double pointed needles size 3 mm and knit up 1 stitch in each of the 6 stitches cast on under the sleeve = 44-48-52-56 (58-60) stitches. Insert a marker in the middle of the new stitches under the sleeve. Start at the marker and work stocking stitch in the round. When the sleeve measures 1 cm from the division, decrease 1 stitch on each side of the marker - read DECREASE TIP! Decrease like this every 2½-2½-1½-2 (2-3) cm a total of 3-4-6-7 (7-7) times = 38-40-40-42 (44-46) stitches. When the sleeve measures 8-11-12-15 (18-23) cm, increase 4-4-4-4 (6-6) stitches evenly spaced = 42-44-44-46 (50-52) stitches. Change to double pointed needles size 2.5 mm and work rib (knit 1, purl 1) for 2 cm. Cast off. Work the other sleeve in the same way. BEE: Embroider a bee on the right front piece – see photo. The bee is worked with a single strand and flat stitch, the wings are worked with chain stitch. BEE – BLACK STRIPES: See diagram A and diagram explanations. Using black, start 3 cm below the neck and 4 cm from the band. Embroider 2 flat stitches, diagonally up to the right (towards the band), close together and 0.5 cm in length. Skip 0.5 cm diagonally up to the left and embroider 4 flat stitches close together and parallel to the first 2 stitches, 1 cm in length (= middle of body), skip 0.5 cm, work 2 flat stitches close together and parallel to the 4 stitches, 0.5 cm in length. BEE – MUSTARD STRIPES: Change to mustard. Embroider flat stitches between the black stripes - 4 stitches of the same length as the black stitches they are close to (2 mustard stripes). BEE - WINGS: Use colour off white; the wings consist of 2 chain stitches, both starting from the same hole. Work as follows: STITCH 1: Work 1 chain stitch, 1-1.5 cm in length from the middle of the bee - see diagram B and diagram explanations. STITCH 2: Work 1 chain stitch, 1-1.5 cm in length, starting from the same place. Embroider a set of wings on the other side of the bee. ASSEMBLY: Sew the buttons onto the left band. |
|||||||
Diagram explanations |
|||||||
|
|||||||
 |
|||||||
 |
|||||||
 |
|||||||
Have you finished this pattern?Tag your pictures with #dropspattern #littebeecardigan or submit them to the #dropsfan gallery. Do you need help with this pattern?You'll find 31 tutorial videos, a Comments/Questions area and more by visiting the pattern on garnstudio.com. © 1982-2026 DROPS Design A/S. We reserve all rights. This document, including all its sub-sections, has copyrights. Read more about what you can do with our patterns at the bottom of each pattern on our site. |
|||||||


With over 40 years in knitting and crochet design, DROPS Design offers one of the most extensive collections of free patterns on the internet - translated to 17 languages. As of today we count 324 catalogues and 12290 patterns translated into English (UK/cm). 12290
We work hard to bring you the best knitting and crochet have to offer, inspiration and advice as well as great quality yarns at incredible prices! Would you like to use our patterns for other than personal use? You can read what you are allowed to do in the Copyright text at the bottom of all our patterns. Happy crafting!
Post a comment to pattern DROPS Baby 42-4
We would love to hear what you have to say about this pattern!
If you want to leave a question, please make sure you select the correct category in the form below, to speed up the answering process. Required fields are marked *.