
Popular categories
Looking for a yarn?


Comments / Questions (29)
![]() Barbara wrote:
Barbara wrote:
Hallo, mir ist nicht klar wie die Maschen für die halsblende gezählt werden ? Müssen es insgesamt 76 bis 84 einschließlich der stillgelegten Maschen von vorder- und Rückenteil ? Oder kommen die extra dazu? Liebe Grüße Babsi
22.01.2026 - 20:52DROPS Design answered:
Liebe Barbara, die stillgelegten Maschen sind darin enthalten, Sie haben dann also insgesamt 76 bis 84 Maschen auf der Nadel. Viel Spaß beim Stricken!
23.01.2026 - 11:03
![]() Sarah wrote:
Sarah wrote:
After completing first row using the A1 and A2 grid design, I don’t understand the instruction “continue back and forth like this”. Do I need to add the two purl stitches and if so, where?
14.01.2026 - 17:30DROPS Design answered:
Dear Sarah on next row from wrong side, continue as established with garter stitch on each side, stocking stitch (purl from wrong side) and work the 2nd row of diagrams: first A.1, then the last sts A.1, then A.2 and 2 repeats A.1 reading diagrams from the left towards the right. Happy knitting!
16.01.2026 - 07:17
![]() Claudine Charette wrote:
Claudine Charette wrote:
Bonjour, pour le dos après les 3 diminutions et qui nous reste 126 mailles (S/M) on doit tricoter un rang envers sur envers puiss changer xe grosseur d'aiguilles. Pour les informations du devant le début est identique jusqu'à la diminution de 3 mailles et qu'il nous reste 126 mailles sauf le rang envers sur envers avant de changer de grosseur de broches. Est-ce que c'est un oubli ou il ne faut vraiment pas faire ce rang envers sur envers sur le devant? Merci.
24.12.2025 - 20:20DROPS Design answered:
Bonjour Claudine, je pense que c'est un oublie. Je ferais le meme sur le devant avant changer le grosseur d'aiguilles. Bon tricot!
28.12.2025 - 20:49
![]() Odile Cazade wrote:
Odile Cazade wrote:
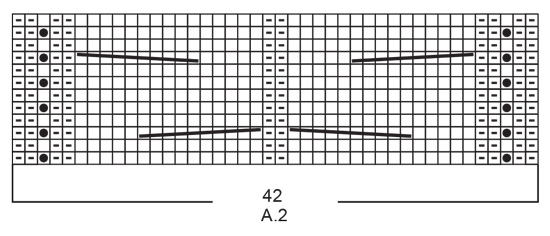
Bonjour Après le motif A2 sur 42 mailles, je ne comprends pas ce que veut dire tricoter les 12 dernières mailles de A1, A1 au dessus des 14 mailles suivantes. Merci pour vos explications
23.01.2025 - 10:16DROPS Design answered:
Bonjour Mme Cazade, lorsque vous avez tricotez les 42 mailles de A.2, tricotez les 12 dernières mailles de A.1 autrement dit, commencez par les mailles endroit sans tricoter les 2 premières mailles envers du digramme (on les a déjà à la fin de A.2), puis tricotez les 14 mailles de A.1 et tricotez encore 2 mailles, envers, ainsi, le motif est symétrique de chaque côté de A.2. Bon tricot!
24.01.2025 - 07:14
![]() Thiebaud Annie wrote:
Thiebaud Annie wrote:
Je tricote le numero drops 226-15 je n\'arrive pas à composer le point j\'ai 126 mailles je compte sur. vous pour avoir la solution . Merci beaucoup
23.12.2024 - 18:50
![]() Christelle wrote:
Christelle wrote:
Bonjour, j aimerais explication en français
20.09.2024 - 19:52
![]() Shez wrote:
Shez wrote:
Hi there,Please clarify...is the pattern worked over 24 rows in total? Are only the right side facing rows included in the diagrams?
16.06.2024 - 01:18DROPS Design answered:
Dear Shez, both pattern is worked over 12 rows, however, they show every row as you would see them from the right side. Happy Knitting!
16.06.2024 - 08:02
![]() Anja wrote:
Anja wrote:
Jammer dat er geen foto is van de zijkant van dit model zodat je de split en de knopen duidelijk kan zien.
08.02.2024 - 21:24
![]() Jude Simpson wrote:
Jude Simpson wrote:
Where is your size chart?
29.10.2023 - 08:54DROPS Design answered:
Dear Jude, you can see the size charts for this piece after the pattern instructions and the charts. The measurements are indicated in cm. You can read more information on this here: https://www.garnstudio.com/lesson.php?id=24&cid=19. Happy knitting!
29.10.2023 - 18:37
![]() Isabelle Lievin wrote:
Isabelle Lievin wrote:
Bonjour peut on tricoter ce modèle avec des aiguilles droites? Merci d'avance pour la réponse.
27.10.2023 - 11:49DROPS Design answered:
Bonjour Mme Lievin, tout à fait, on utilise ici des aiguilles circulaires pour avoir suffisamment de place pour y loger toutes les mailles, vous pouvez donc utiliser des aiguilles droites, surveillez juste votre tension car vos mailles seront plus serrées. Tricotez le col après avoir fait une seule des coutures côtés, puis cousez la 2ème épaule et le col. Découvrez plus d'infos sur les aiguilles circulaires ici. Bon tricot!
28.10.2023 - 08:21
|
||||||||||||||||||||||
Frozen in Time Slipover#frozenintimeslipover |
||||||||||||||||||||||
 |
 |
|||||||||||||||||||||
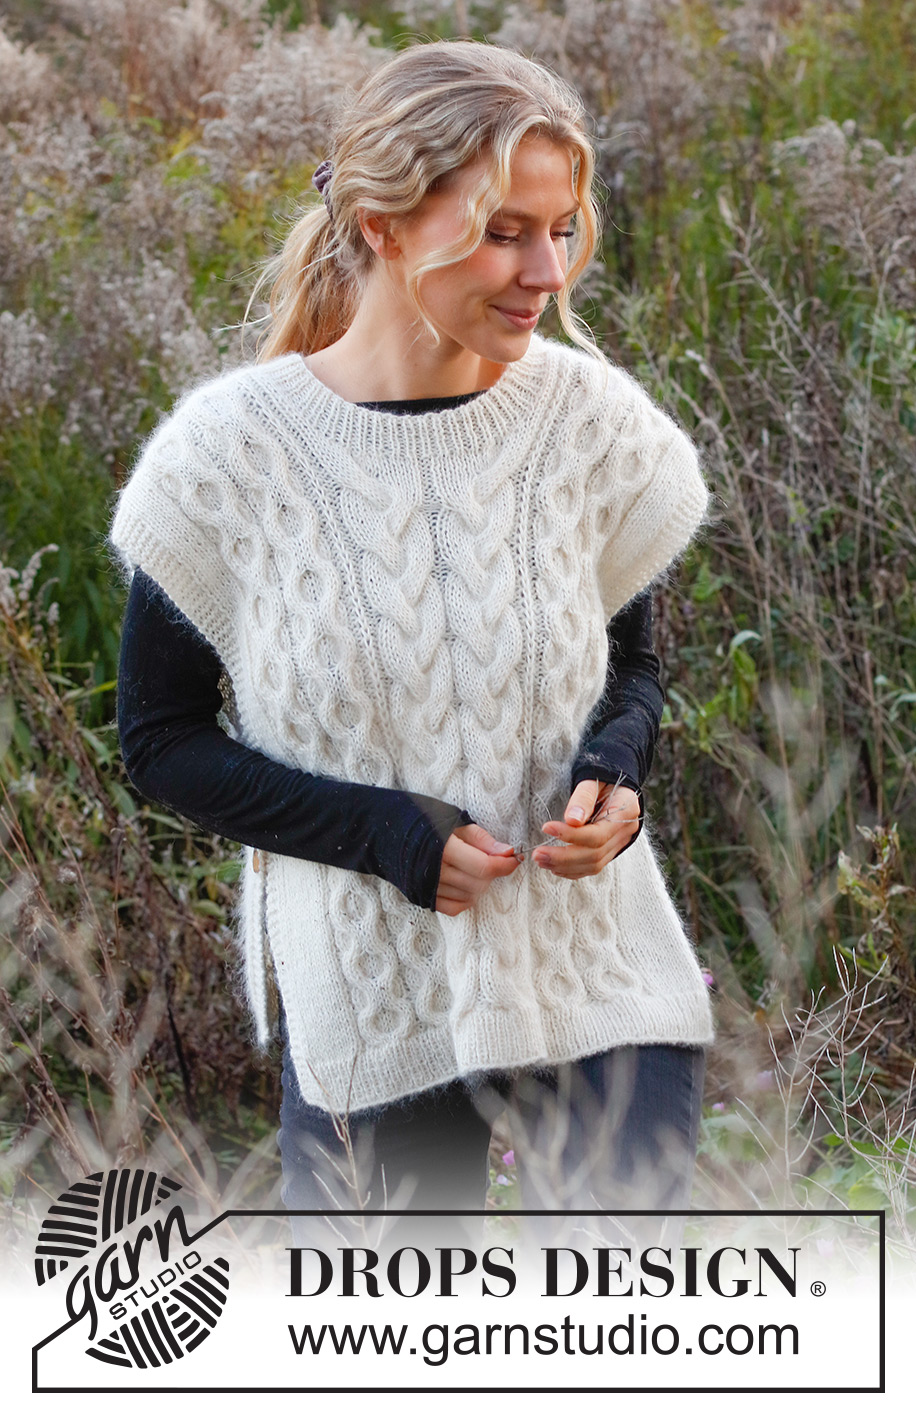
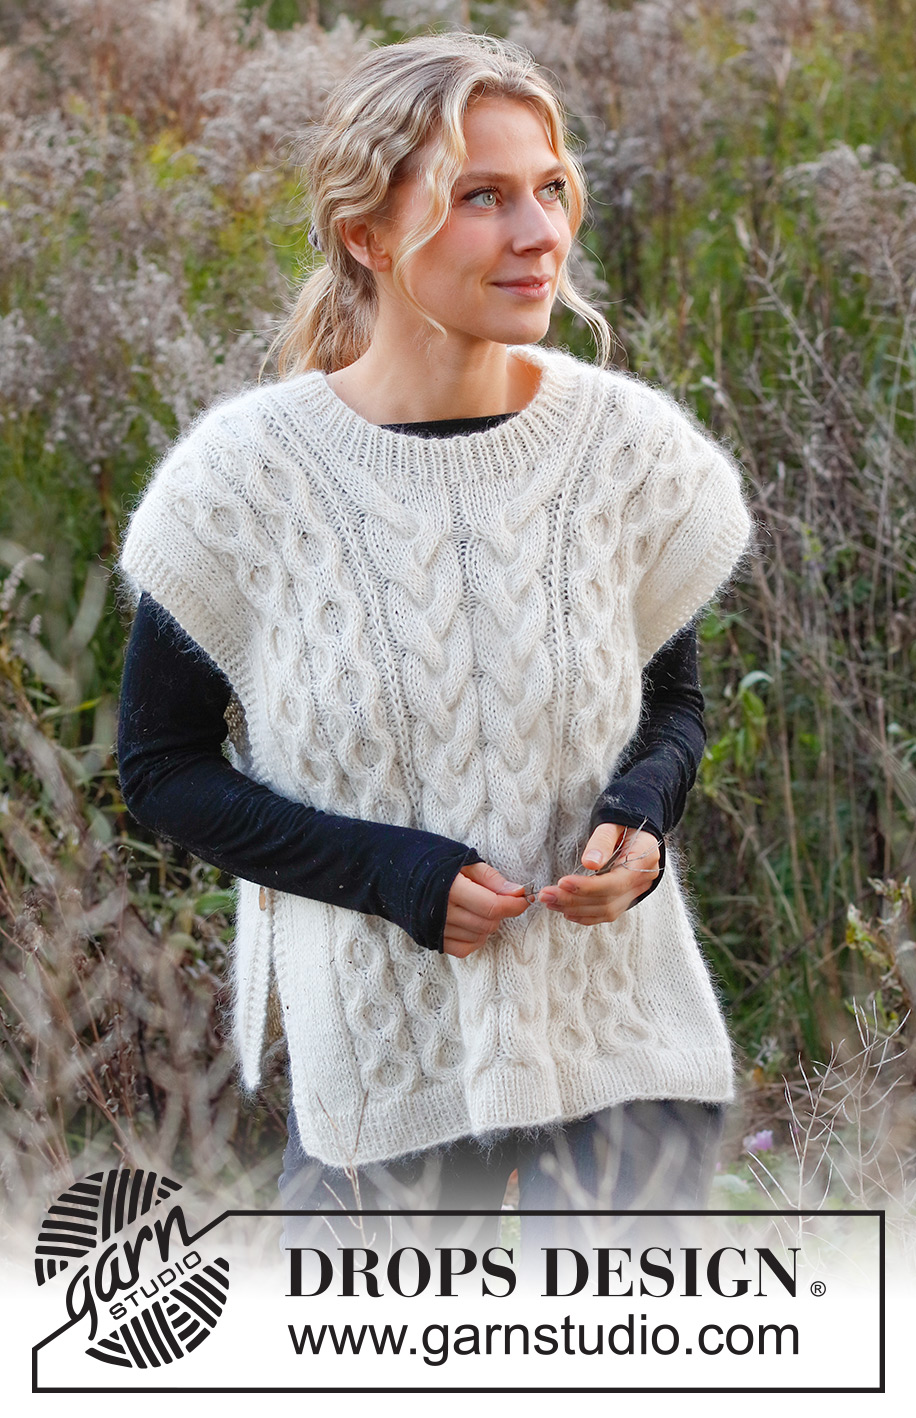
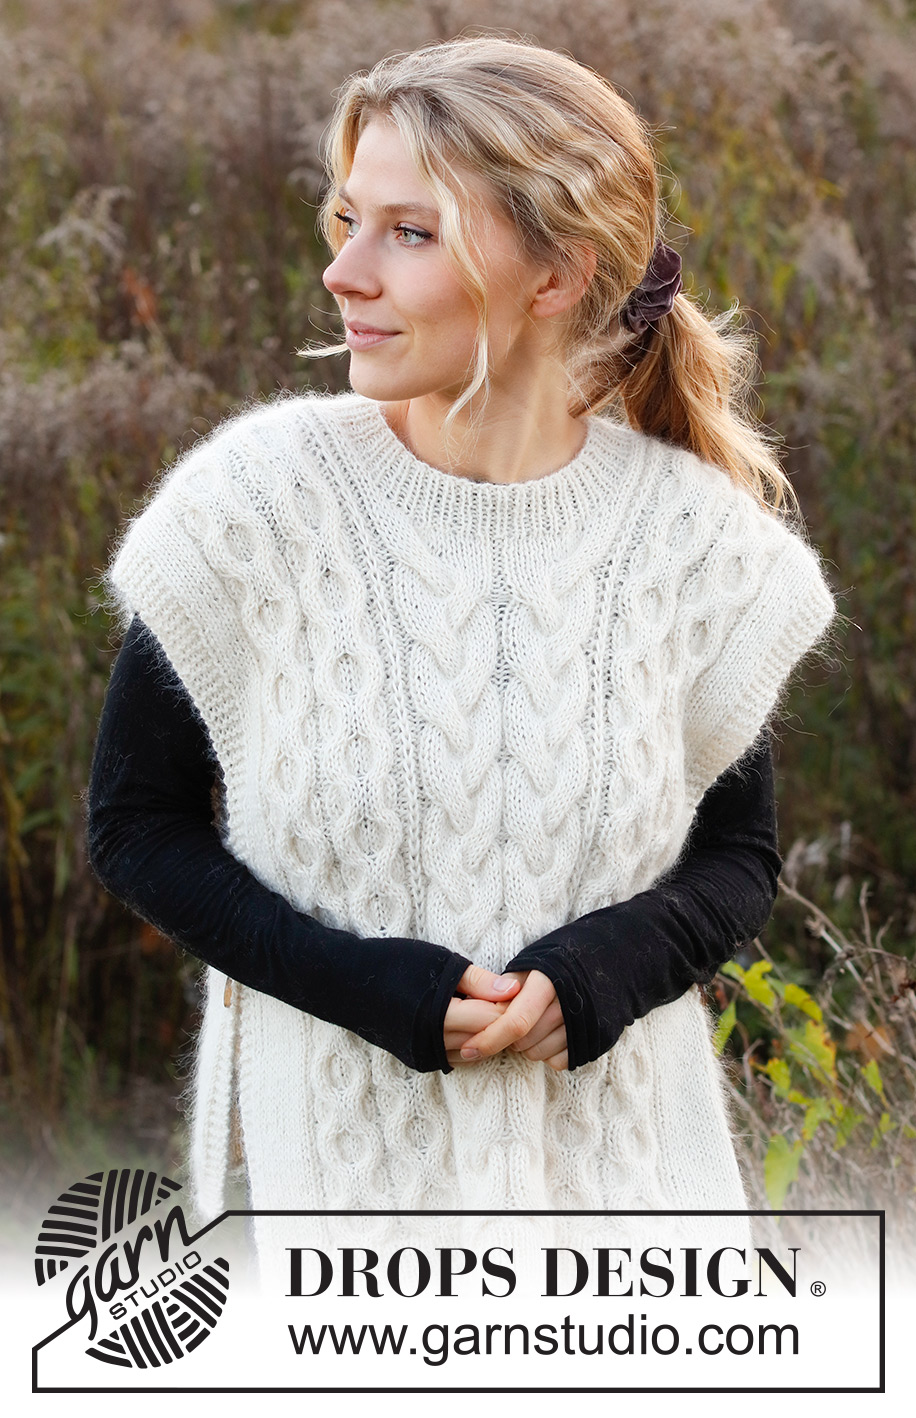
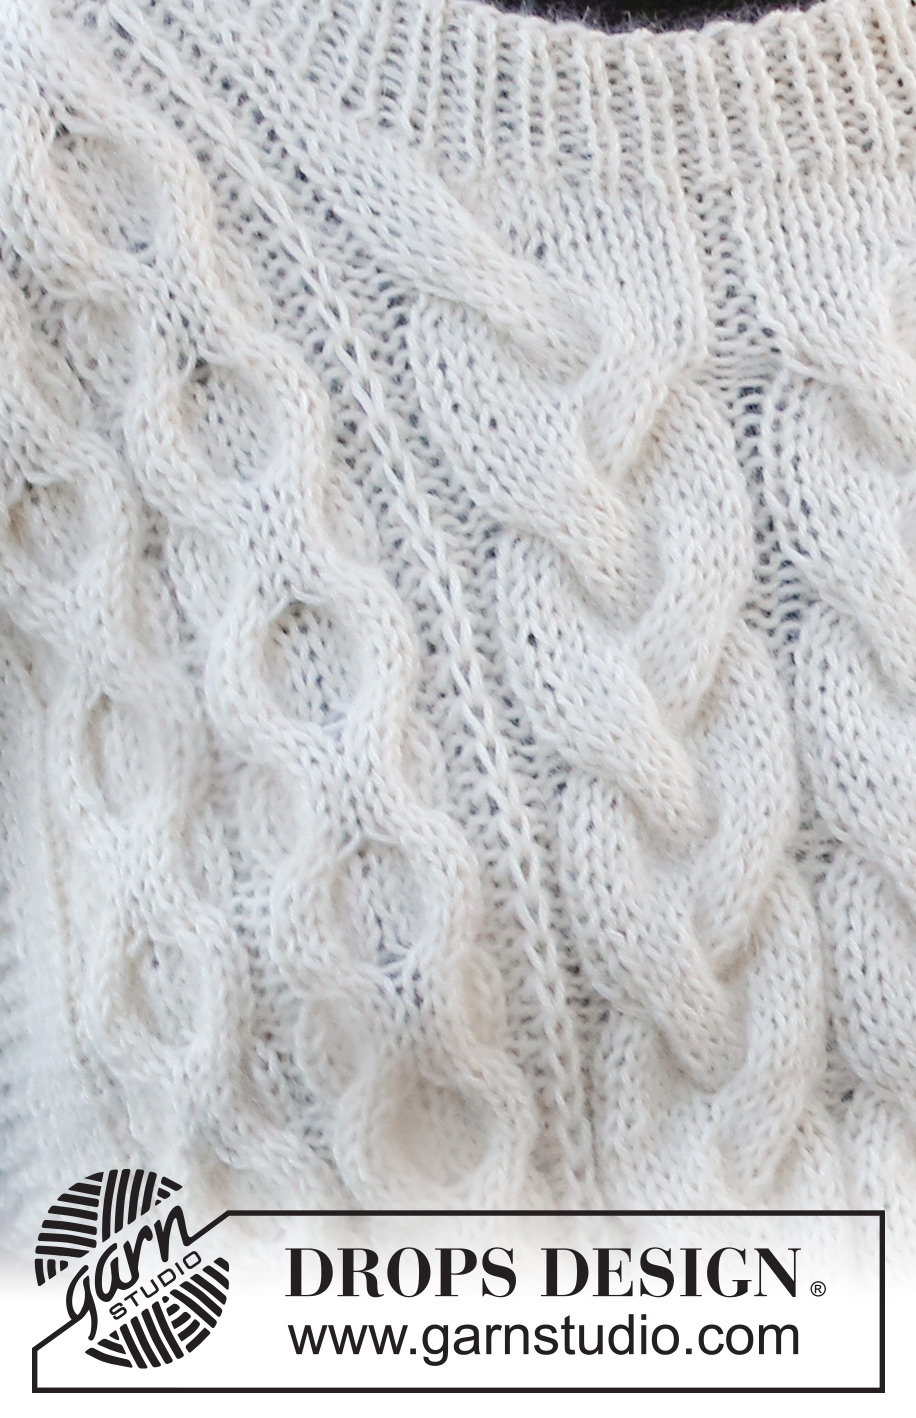
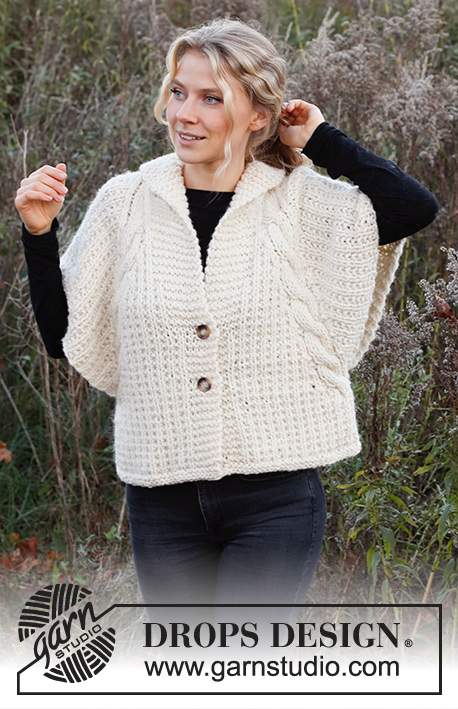
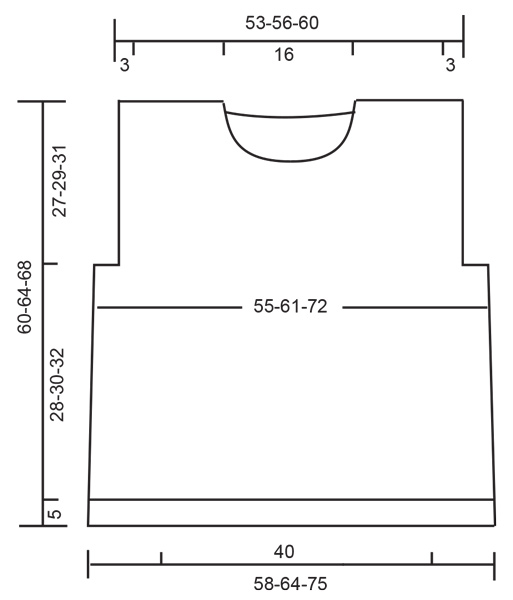
Knitted vest / slipover in DROPS Sky and DROPS Kid-Silk. Piece is knitted with cables and vents in the sides. Size: S - XXXL
DROPS 226-15 |
||||||||||||||||||||||
|
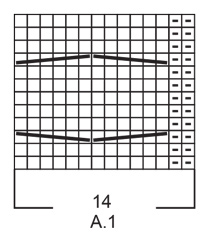
---------------------------------------------------------- EXPLANATION FOR THE PATTERN: ---------------------------------------------------------- GARTER STITCH (back and forth): Knit all rows. 1 ridge vertically = knit 2 rows. PATTERN: See diagrams A.1 and A.2. Diagrams show all rows in pattern seen from the right side. DECREASE TIP (evenly): To calculate how to decrease evenly, use the total number of stitches on row (e.g. 129 stitches) minus edge stitches in garter stitch (10 stitches), and divide the remaining stitches by number of decreases to be done (e.g. 3) = 39.7. In this example decrease by knitting approx. every 38th and 39th stitch together, and do not decrease of edge stitches in garter stitch. ---------------------------------------------------------- START THE PIECE HERE: ---------------------------------------------------------- VEST – SHORT SUMMARY OF PIECE: Piece is worked back and forth in parts and sewn together on the shoulders. The vest is held together with buttons in the sides. Then pick up stitches for neck edge. BACK PIECE: Cast on 129-139-157 stitches on circular needle size 4 mm with 1 strand in each quality (= 2 strands). Purl 1 row from wrong side. Then work rib as follows: 5 stitches in GARTER STITCH - read explanation above - * knit 1/purl 1 *, repeat from *-* until 6 stitches remain, knit 1 and 5 stitches in garter stitch. When rib measures 5 cm, knit 1 row from right side while at the same time decreasing 3 stitches evenly - read DECREASE TIP = 126-136-154 stitches. Purl 1 row from wrong side with 5 stitches in garter stitch in each side. Switch to circular needle size 5.5 mm. Now work pattern as follows: 5 stitches in garter stitch, 9-14-23 stitches in stocking stitch, A.1 over the next 28 stitches (= 2 repetitions of 14 stitches), A.2 over the next 42 stitches, work the last 12 stitches in A.1, work A.1 over the next 14 stitches, purl 2, 9-14-23 stitches in stocking stitch, 5 stitches in garter stitch. Continue back and forth like this. REMEMBER THE KNITTING TENSION! When piece measures 31-33-35 cm, work ridges over the outermost 9-11-17 stitches in each side. When 2 ridges have been worked over the outermost 9-11-17 stitches in each side, cast off 4-6-12 stitches for armholes at the beginning of the next 2 rows = 118-124-130 stitches. Then work pattern as before over the middle 98 stitches, and work 5-8-11 stitches in stocking stitch inside 5 stitches in garter stitch towards each side. Work until piece measures approx. 56-60-64 cm. Now slip the middle 24 stitches on a stitch holder for neck and finish each shoulder separately. Continue with as many stitches of the pattern that will fit towards the neck and work knit over knit and purl over purl over stitches in cable in A.2. Then cast off 1 stitch on next row from the neck = 46-49-52 stitches. When piece measures 60-64-68 cm, knit 1 row from right side while at the same time decreasing 17-17-17 stitches evenly = 29-32-35 stitches. Cast off. Work the other shoulder the same way. FRONT PIECE: Cast on 129-139-157 stitches on circular needle size 4 mm with 1 strand in each quality (= 2 strands). Purl 1 row from wrong side. Then work rib as follows: 5 stitches in GARTER STITCH - read explanation above - * knit 1/purl 1 *, repeat from *-* until 6 stitches remain, knit 1 and 5 stitches in garter stitch. When rib measures 5 cm, knit 1 row from right side while at the same time decreasing 3 stitches evenly - remember DECREASE TIP = 126-136-154 stitches. Purl 1 row from wrong side with 5 stitches in garter stitch in each side. Switch to circular needle size 5.5 mm. Now work pattern as follows: 5 stitches in garter stitch, 9-14-23 stitches in stocking stitch, A.1 over the next 28 stitches (= 2 repetitions of 14 stitches), A.2 over the next 42 stitches, work the last 12 stitches in A.1, work A.1 over the next 14 stitches, purl 2, 9-14-23 stitches in stocking stitch, 5 stitches in garter stitch. Continue back and forth like this. When piece measures 31-33-35 cm, work ridges over the outermost 9-11-17 stitches in each side. When 2 ridges have been worked over the outermost 9-11-17 stitches in each side, cast off 4-6-12 stitches for armholes at the beginning of the next 2 rows = 118-124-130 stitches. Then work pattern as before over the middle 98 stitches, and work 5-8-11 stitches in stocking stitch inside 5 stitches in garter stitch towards each side. Work until piece measures approx. 49-52-56 cm - to make the pattern at neck decrease the same as on picture, adjust so that A.2 has been worked vertically before continuing. Now slip the middle 14 stitches on a stitch holder for neck and finish each shoulder separately. Continue with as many stitches of the pattern that will fit towards the neck and work knit over knit and purl over purl over stitches in cable in A.2. Then cast off stitches on every row from neck as follows: Cast off 3 stitches 1 time, 2 stitches 1 time and 1 stitch 1 time = 46-49-52 stitches. When piece measures 60-64-68 cm, knit 1 row from right side while at the same time decreasing 17-17-17 stitches evenly = 29-32-35 stitches. Cast off. Work the other shoulder the same way. ASSEMBLY: Sew shoulder seams inside cast-off edge. Make sure that to avoid a tight seam. Sew vest together under sleeves in each side by sew on decorative buttons through the edges in garter stitch as follows: Place edge in garter stitch on back piece over edge in garter stitch on front piece. Sew a button through both layers approx. 3 cm down from where stitches for armholes where cast off. Sew another button approx. 7 cm further down than first button. Repeat in the other side. NECK EDGE: Begin mid on top of one shoulder and pick up 76 to 84 stitches inside 1 edge stitch on a short circular needle size 4 mm and with 1 strand of each quality. Work rib (= knit 1/purl 1) in the round for 3½ to 4 cm. Cast off stitches with knit over knit and purl over purl. |
||||||||||||||||||||||
Diagram explanations |
||||||||||||||||||||||
|
||||||||||||||||||||||
 |
||||||||||||||||||||||
 |
||||||||||||||||||||||
 |
||||||||||||||||||||||
Have you finished this pattern?Tag your pictures with #dropspattern #frozenintimeslipover or submit them to the #dropsfan gallery. Do you need help with this pattern?You'll find 25 tutorial videos, a Comments/Questions area and more by visiting the pattern on garnstudio.com. © 1982-2026 DROPS Design A/S. We reserve all rights. This document, including all its sub-sections, has copyrights. Read more about what you can do with our patterns at the bottom of each pattern on our site. |
||||||||||||||||||||||


With over 40 years in knitting and crochet design, DROPS Design offers one of the most extensive collections of free patterns on the internet - translated to 17 languages. As of today we count 324 catalogues and 12290 patterns translated into English (UK/cm). 12290
We work hard to bring you the best knitting and crochet have to offer, inspiration and advice as well as great quality yarns at incredible prices! Would you like to use our patterns for other than personal use? You can read what you are allowed to do in the Copyright text at the bottom of all our patterns. Happy crafting!
Post a comment to pattern DROPS 226-15
We would love to hear what you have to say about this pattern!
If you want to leave a question, please make sure you select the correct category in the form below, to speed up the answering process. Required fields are marked *.