
Popular categories
Looking for a yarn?


Comments / Questions (92)
![]() Lucie wrote:
Lucie wrote:
Bonjour, Je tricote ce pull en taille M et je suis bloquée à ce niveau : « continuer en point fantaisie mais sans augmenter : tricoter en Jersey les mailles des côtés qui ne peuvent plus se tricoter en point fantaisie. ». Quelles mailles exactement doivent être tricotées en jersey? Et surtout combien de mailles se tricotent ainsi?
20.04.2021 - 14:24DROPS Design answered:
Bonjour Lucie, si la hauteur de l'empiècement n'est pas atteinte à la fin des augmentations, vous continuez le point ajouré comme avant, mais côté raglan, tricotez en jersey les mailles du point ajouré qui ne peuvent être tricotées dans un motif complet pour éviter de modifier le nombre de mailles, autrement dit, chaque diminution doit être compensée par 1 jeté, si vous ne pouvez pas faire la diminution/le jeté, alors tricotez ces mailles en jersey. Bon tricot!
20.04.2021 - 15:11
![]() Fabienne wrote:
Fabienne wrote:
Si je peux me permettre, je conseillerais de mettre des marqueurs pour indiquer la transition des manches (raglan) et le dos/devant. Ce n'est qu'après avoir fait cela que je m'en suis sortie pour me rappeler si je dois faire deux fois A2 ou une fois. Merci pour ce magnifique modèle.
17.04.2021 - 15:54
![]() Hege Iren wrote:
Hege Iren wrote:
Eg ønsker å strikke denne genseren, men kommer ikke lenger en halskanten. Når eg skal begynne med rapportene har eg ikke nok masker til å fullføre. Strikker str L, kan eg få en forklaring på hvordan?
13.04.2021 - 23:03DROPS Design answered:
Hei Hege Iren, Du har 84 masker, og første omgang på bærestykke er: 1 maske glattstrikk, A.1 (4 masker), 18 masker med A.2, A.3 (3 masker), 2 masker glattstrikk, A.1, A.2, A.3 (13 masker), 2 masker glattstrikk, A.1 (4 masker), 18 masker med A.2, A.3 (3 masker), 2 masker glattstrikk, A.2, A.2, A.3 (13 masker) og 1 maske glattstrikk. Da har du strikket 84 masker. Håper dette hjelper og god fornøyelse!
14.04.2021 - 08:07
![]() Maria wrote:
Maria wrote:
Buen día, me podría explicar un poco mejor como seguir el patrón sin hacer aumentos cuando más bien estoy disminuyendo. Terminé con 312 puntos y al hacer la primera tanda de A1, A2(12 veces) y A3 sin aumentos son 79 puntos que terminan en 53 puntos por las disminuciones. Muy agradecida
12.04.2021 - 00:55DROPS Design answered:
Hola Maria. En este parte de canesú no hay disminuciones. Una vez llegado a 312 puntos, se trabaja según los diagramas A.1-A.3 pero sin aumentos ( hay una hebras al inicio de A.1 y al final de A.3, que no se trabajan). Siempre vas a tener el mismo número de puntos.
16.05.2021 - 18:24
![]() Anne wrote:
Anne wrote:
Bitte schicken Sie mir eine Musterzeichnung von 16 bzw 24 Zeilen, damit ich in der Passe die Zunahmen kapiere. Mir verrutscht das Muster komplett... was heißt zB " je 2 Rapporte A.2" zusätzlich einfügen..wo? Da wo schon 2 waren? Werden es dann 3 oder 4? Bleiben die glatt re gestrickten Maschen dazwischen als Säulen? Klappt bei mir nicht...
06.04.2021 - 23:46DROPS Design answered:
Liebe Anne, wenn die Diagramme 1x in der Höhe gestrickt sind, haben Sie je 6 Maschen in jedem A.1 + in jedem A.3 zugenommen; dann stricken Sie Diagramme von Anfang an so: A.1 über die 4 ersten M, A.2 über die nächsten 6 M, A.2 wie zuvor, dann A.2 über die ersten 6 M von den vorrigen A.3 unten, A.3 über die nächsten 3 M. Es sind jetzt 2Rapporte mehr von A.2 zwischen A.1 und A.3. Viel Spaß beim stricken!
07.04.2021 - 07:45
![]() Debora wrote:
Debora wrote:
Buonasera, vorrei segnalare un errore nella traduzione italiana dei simboli dei gettati, quello bianco nel giro successivo va lavorato a diritto per creare un buco, quello nero invece a diritto ritorto e non a rovescio, per non creare il buco. Bellissimo modello, grazie
06.04.2021 - 21:02DROPS Design answered:
Buongiorno Debora, grazie per la segnalazione, abbiamo corretto le spiegazioni della legenda. Buon lavoro!
07.04.2021 - 14:18
![]() Maria wrote:
Maria wrote:
Talla S, canesú, línea 3 por ejemplo, luego de seguir el patrón a1,a2(2),a3-a1,a2,a3-a1,a2(2),a3- a1,a2,a3 me quedan puntos sin tejer, debo comenzar con el mismo patrón de a1,a2,etc o debo completar solo con a2?
03.04.2021 - 23:09DROPS Design answered:
Hola María, tienes que trabajar como se explica para la primera vuelta con: A.1, 2 repeticiones A.2, e.t.c... Cuando trabajes una repetición en vertical de los diagramas, es decir, las 8 vueltas del diagrama, cuando vayas a trabajar la vuelta 9 en vez de trabajar 2 veces 2 repeticiones de A.2, trabajar 3 repeticiones de A.2 2 veces, que compensarán los puntos extra.
08.04.2021 - 00:04
![]() Maria wrote:
Maria wrote:
Buenas noches, a que se refiere exactamente con "Cada vez que A.1 y A.3 son completados en altura, habrá 2 repeticiones más de A.2 a lo ancho", específicamente la parte que dice 2 repeticiones más de A. 2 a lo ancho? Gracias
02.04.2021 - 04:23DROPS Design answered:
Hola María, lo que quiere decir es que, como tienes más puntos tras una repetición en vertical de los diagramas (es decir, tras trabajar 8 vueltas con los 3 diagramas) al trabajar la vuelta 9 y repetir los diagramas (la vuelta 1 de los 3 diagramas) vas a tener más puntos entre A.1 y A.2, que van a ser suficientes como para trabajar una repetición más de A.2 en cada uno de estos huecos.
08.04.2021 - 00:06
![]() Jane wrote:
Jane wrote:
Salve, ho capito dove avevo dubbi, adesso vorrei sapere come continuare lo sprone ( dopo aver ripetuto 20 volte gli aumenti ) senza aggiungere aumenti? Ho già 312 maglie. Grazie mille
31.03.2021 - 17:47DROPS Design answered:
Buonasera Jane, deve fare in modo di lavorare i diagrammi senza aumentare le maglie. Il n° di maglie deve rimanere lo stesso. Buon lavoro!
31.03.2021 - 23:37
![]() Josefine Eide wrote:
Josefine Eide wrote:
Hei, jeg forstår ikke hvordan man skal forsette etter å strikker første runde etter halskanten. Fordi hvordan vet man når man skal øke og skal man strikke diagrammene A1,A2,A3 etterhverande eller skal man strikke likt som i første runde?
31.03.2021 - 16:46
|
|||||||||||||||||||
Galatea#galateasweater |
|||||||||||||||||||
 |
 |
||||||||||||||||||
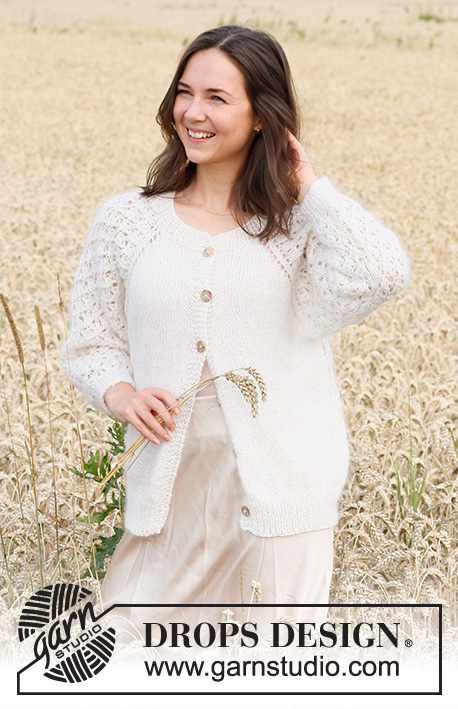
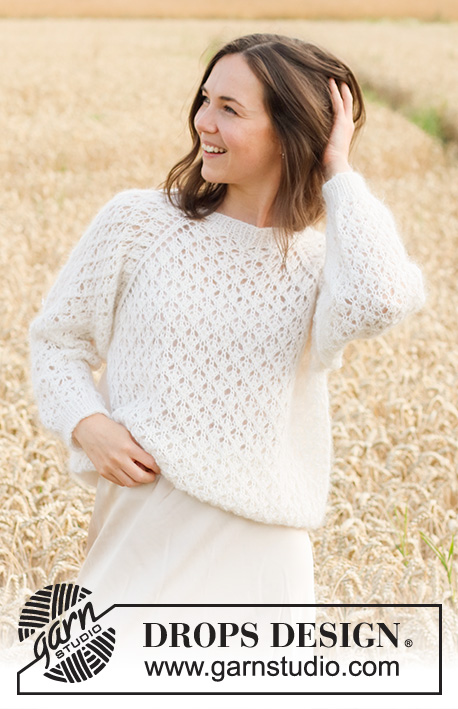
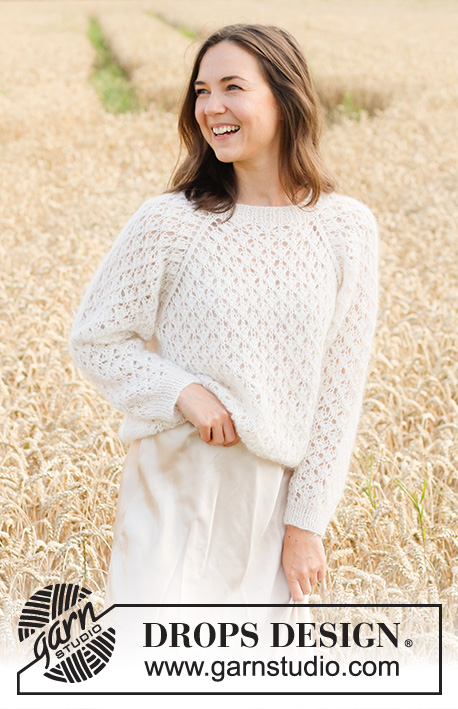
Knitted jumper in 1 strand DROPS Kid-Silk and 1 strand DROPS BabyAlpaca Silk. The piece is worked top down with raglan and lace pattern. Sizes S - XXXL.
DROPS 220-3 |
|||||||||||||||||||
|
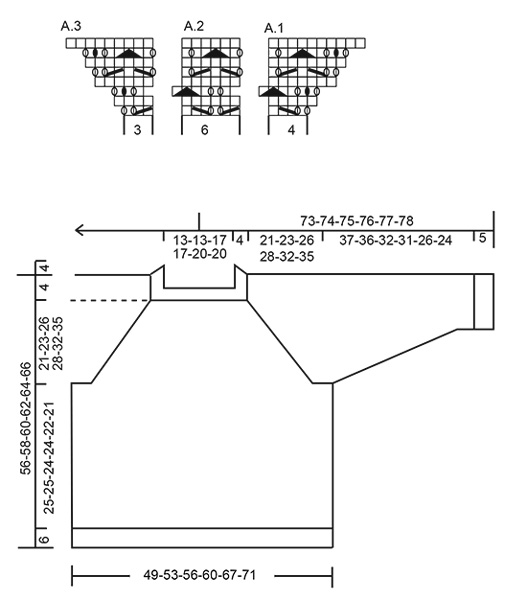
------------------------------------------------------- EXPLANATIONS FOR THE PATTERN: ------------------------------------------------------- PATTERN: See diagrams A.1 to A.3 DECREASE TIP-1 (for sleeves): Decrease 1 stitch on either side of the marker thread as follows: Work until there are 3 stitches left before the marker-stitch, knit 2 together, knit 3 (marker thread sits in the middle of these stitches), slip 1 stitch as if to knit, knit 1 and pass the slipped stitch over the knitted stitch (2 stitches decreased). DECREASE TIP-2 (evenly spaced): To work out how to decrease evenly, count the total number of stitches on the needle (e.g. 50 stitches) and divide by the number of decreases to be made (e.g. 8) = 6.25. In this example knit approx. each 5th and 6th stitch together. CASTING-OFF TIP: To avoid the cast-off edge being tight you can cast off with a larger size needle. If the edge is still tight, make 1 yarn over after approx. each 4th stitch at the same time as casting off; the yarn overs are cast off as normal stitches. ------------------------------------------------------- START THE PIECE HERE: ------------------------------------------------------- JUMPER – SHORT OVERVIEW OF THE PIECE: The neck and yoke are worked in the round with circular needle, top down. The round starts between the left sleeve and the back piece. The yoke is divided for body and sleeves and the body continued in the round with circular needle. The sleeves are worked in the round with short circular needle/double pointed needles, top down. The piece is worked with 1 strand Baby Alpaca Silk and 1 strand Kid-Silk (= 2 strands). NECK: Cast on 72-72-84-84-96-96 stitches with circular needle size 4 mm and 1 strand Kid-Silk and 1 strand Baby Alpaca Silk (= 2 strands). Knit 1 round. Then work rib (knit 1, purl 1) for 4 cm. Insert 1 marker at the beginning of the round. The yoke is measured from this marker. Change to circular needle size 5 mm. REMEMBER THE KNITTING TENSION! YOKE: Continue as follows: Work 1 stitch in stocking stitch, work A.1 (= 4 stitches), A.2 over the next 12-12-18-18-24-24 stitches (= 2-2-3-3-4-4 repeats of 6 stitches), A.3 (= 3 stitches), 2 stitches in stocking stitch, A.1, A.2, A.3, 2 stitches in stocking stitch, A.1, A.2 over the next 12-12-18-18-24-24 stitches (= 2-2-3-3-4-4 repeats of 6 stitches), A.3, 2 stitches in stocking stitch, A.1, A.2, A.3, 1 stitch in stocking stitch. Continue this pattern; all increases are drawn in A.1 and A.3. You increase 8 and 16 stitches alternately, every 2nd round. Each time A.1 and A.3 are completed in height, there will be 2 more repeats of A.2 in width. Increase every 2nd round a total of 18-20-20-22-24-26 times = 288-312-324-348-384-408 stitches. The piece measures approx. 16-18-19-20-21-24 cm. Continue the pattern but without further increases; stitches which do not fit into the pattern in the sides are worked in stocking stitch. Continue working until the piece measures 21-23-26-28-32-35 cm from the marker on the neck. Now divide the yoke for the body and sleeves on the next round as follows (continuing the pattern): Work 75-81-87-93-105-111 stitches (= back piece), place the next 69-75-75-81-87-93 stitches on 1 thread for the sleeve, cast on 9 stitches (in side under the sleeve), work 75-81-87-93-105-111 stitches as before (= front piece), place the next 69-75-75-81-87-93 stitches on 1 thread for the sleeve, cast on 9 stitches. Body and sleeves are finished separately. Cut the strand. BODY: = 168-180-192-204-228-240 stitches. Continue with A.2 over all stitches; make sure the pattern matches the pattern on the yoke. Continue working until the piece measures 25-25-24-24-22-21 cm from the division (there is approx. 6 cm left to finished length, you can try the jumper on and work to desired length). Change to circular needle size 4 mm and work rib (knit 1, purl 1) for 6 cm. Cast off with knit over knit and purl over purl – read CASTING-OFF TIP! The jumper measures approx. 56-58-60-62-64-66 cm from the shoulder down. SLEEVES: Place the 69-75-75-81-87-93 stitches from the thread on the one side of the piece on double pointed needles/short circular needle size 5 mm and knit up 1 stitch in each of the 9 stitches cast on under the sleeve = 78-84-84-90-96-102 stitches. Insert a marker in the middle of the 9 stitches under the sleeve. Allow the marker to follow your work onwards; it will be used when decreasing under the sleeve. Continue pattern A.2 in the round, making sure the pattern matches the pattern on the yoke. When the sleeve measures 3 cm from the division in all sizes, decrease 2 stitches under the sleeve – read DECREASE TIP-1. Decrease like this every 2½-2-1½-1½-1-1 cm a total of 14-16-16-17-19-20 times = 50-52-52-56-58-62 stitches; stitches which do not fit into the pattern under the sleeve are worked in stocking stitch. Continue working until the sleeve measures 37-36-32-31-26-24 cm from the division (there is approx. 5 cm left to finished length, you can try the jumper on and work to desired length). NOTE: Shorter measurements in larger sizes due to wider neck and longer yoke. Knit 1 round where you decrease 10 stitches evenly spaced in all sizes – read DECREASE TIP-2 = 40-42-42-46-48-52 stitches. Change to double pointed needles size 4 mm and work rib (knit 1, purl 1) for 5 cm. Cast off with knit over knit and purl over purl – remember CASTING-OFF TIP! The sleeve measures approx. 42-41-37-36-31-29 cm from the division. Work the other sleeve in the same way. |
|||||||||||||||||||
Diagram explanations |
|||||||||||||||||||
|
|||||||||||||||||||
 |
|||||||||||||||||||
Have you finished this pattern?Tag your pictures with #dropspattern #galateasweater or submit them to the #dropsfan gallery. Do you need help with this pattern?You'll find 29 tutorial videos, a Comments/Questions area and more by visiting the pattern on garnstudio.com. © 1982-2026 DROPS Design A/S. We reserve all rights. This document, including all its sub-sections, has copyrights. Read more about what you can do with our patterns at the bottom of each pattern on our site. |
|||||||||||||||||||


With over 40 years in knitting and crochet design, DROPS Design offers one of the most extensive collections of free patterns on the internet - translated to 17 languages. As of today we count 324 catalogues and 12290 patterns translated into English (UK/cm). 12290
We work hard to bring you the best knitting and crochet have to offer, inspiration and advice as well as great quality yarns at incredible prices! Would you like to use our patterns for other than personal use? You can read what you are allowed to do in the Copyright text at the bottom of all our patterns. Happy crafting!
Post a comment to pattern DROPS 220-3
We would love to hear what you have to say about this pattern!
If you want to leave a question, please make sure you select the correct category in the form below, to speed up the answering process. Required fields are marked *.