
Popular categories
Looking for a yarn?


Comments / Questions (92)
![]() Dagny Nielsen wrote:
Dagny Nielsen wrote:
Hej jeg sidder med garn og opskrift fra drops .på bluse drops220-3 men har opgivet ,at få diagramet til og passe vil rigtig gerne ha hjælp Hilsen Dagny
25.08.2021 - 16:51DROPS Design answered:
Hei Dagny. For at vi skal hjelpe deg, er det fint at du beskriver hva det er du trenger hjelp til, hvor går det galt for deg/hvor du mener det ikke stemmer. Og husk å skrive hvilken str. du strikker. mvh DROPS design
27.08.2021 - 11:22
![]() Rikke wrote:
Rikke wrote:
Jeg strikker str xl og er kommet til der hvor man skal øge med 2 stk A2. Jeg har strikket mønsteret i en højde. Jeg synes ikke man kan læse hvor man skal sætte øg ingen ind henne
25.08.2021 - 15:07
![]() Kirsi wrote:
Kirsi wrote:
S-kokoisessa paidassa Alpaca silk -langan menekki ohjeessa on merkitty virheellisesti olevan 150g. Norjaksi katsottuna oli 250g. Lanka loppui siksi kesken.
17.08.2021 - 10:02
![]() Rikke Richtendorff wrote:
Rikke Richtendorff wrote:
Det her afsnit i opskriften er ret forvirrende. Der står at udtagningerne er medregnet, men også at man skal øge med 2 A2 i bredden? Altså er det så på ryg og forstykke en gang hver eller er det for 2 ekstra for hver gang (mellem hver raglan udtagning = 8 ekstra A2 på en omgang)? Så er der nogle udtagninger på hver anden pind i siderne??? Hvor? Er der nogen der kan hjælpe med et svar.
12.08.2021 - 19:13DROPS Design answered:
Hej Rikke, hvilken størrelse strikker du, hvor er du i opskriften? Gælder det udtagningen til raglan, strikker du de nye masker løbende ind i mønsteret :)
25.08.2021 - 10:16
![]() Ela wrote:
Ela wrote:
Zrobilam flora i kid silk piękny polecam dziejcie ! Dziękuję za cudny wzór!
11.08.2021 - 14:45
![]() Claudia Göbel wrote:
Claudia Göbel wrote:
Guten Tag , meine Frage bezieht sich gleich auf den Anfang zur Passe. Und zwar soll man jede 2.Runde abwechselnd 8 und 16 Machen zunehmen . Wenn ich dies tue bleiben bei mir am Ende der darauffolgenden Runde genau diese 8 Maschen übrig , da diese bei der Abfolge von " 1 M re, A1,2xA2,A3, 2Mre usw" nicht reinpassen. Soll ich diese 8 Maschen glatt rechts stricken ? Oder nochmal ein A2 irgendwo mehr stricken ? Aber dann kommt das Muster doch durcheinander. Mfg
08.07.2021 - 11:02DROPS Design answered:
Liebe Frau Göbel, die Raglanzunahmen sind im Diagram gezeichnet, dh bei A.1 und A.3, 1. und 5. Reihe nehmen Sie je 1 Masche zu und bei 3. und 7. Reihe nehmen Sie je 2 Maschen zu. Die Zunahmen stricken Sie jeweils wie bei der nächsten Runde gezeigt (entwder rechts (= Löcher) oder rechts verschränkt (kein Loch)). Kann es Ihnen helfen? Viel Spaß beim stricken!
08.07.2021 - 13:38
![]() Jannie wrote:
Jannie wrote:
Kunne det ikke være muligt at få et diagram som viser hvorledes mønsteret strikkes efter man er færdig med udtagninger til bærestykke? Jeg har prøvet flere gange nu, og hver gang går jeg gal i det….
02.07.2021 - 17:51DROPS Design answered:
Hei Jannie. Det ville ha blitt et altfor stort diagram for å vise alle økningenefor deretter å få det tilpasset web vil det bli skalert ned slik at det vil være umulig å se. Anbefaler deg å bruke maskemarkør/merketråd mellom diagrammene. Da får man en bedre oversikt. mvh DROPS design
05.07.2021 - 12:58
![]() Fabienne Borel wrote:
Fabienne Borel wrote:
Bjr, j ai fait un document avec toutes les explications qui me permettront de refaire ce magnifique modèle à nouveau sans être dans le doute de faire juste au raglan et sous les manches. Si cela vous intéresse, je peux vous l envoyer. Il est en français et en taille S seulement. Je pense que c est surtout le principe à suivre pour garder le motif intact que c est important de donner une explication claire. Merci pour vos superbes créations.
28.05.2021 - 11:03
![]() Dorte Schou-Hansen wrote:
Dorte Schou-Hansen wrote:
Jeg har nu strikket A1 og A2 en gang i højden og skal strikke 2 rapporter mere af A2 i bredden. Jeg har nu 132 m. A2 vil nu med 2 rapporter mere øges fra 18 til at løbe over de næste 30m to gange i følge mønsteret. Det svarer i alt til 108m. Jeg har så 24m. På omgangen, der ikke er blevet strikket. Er det fordi, jeg skal øge med to rapporter hver gang, jeg i mønsteret strikker en A2? Altså også der hvor mønsteret skriver: A1, A2, A3?
25.05.2021 - 09:06
![]() Dorte Schou-Hanse wrote:
Dorte Schou-Hanse wrote:
Jeg har selv fundet svaret på mit spørgsmål. Udtagningerne ligger logisk som en del af mønsteret i omslagene i A1 og A2.
23.05.2021 - 07:03
|
|||||||||||||||||||
Galatea#galateasweater |
|||||||||||||||||||
 |
 |
||||||||||||||||||
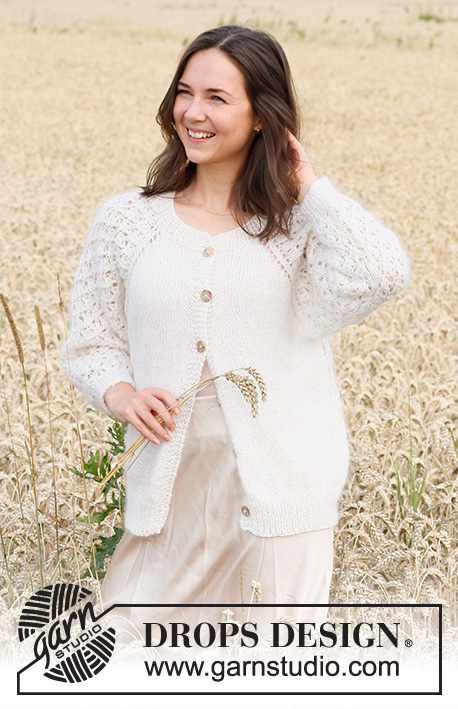
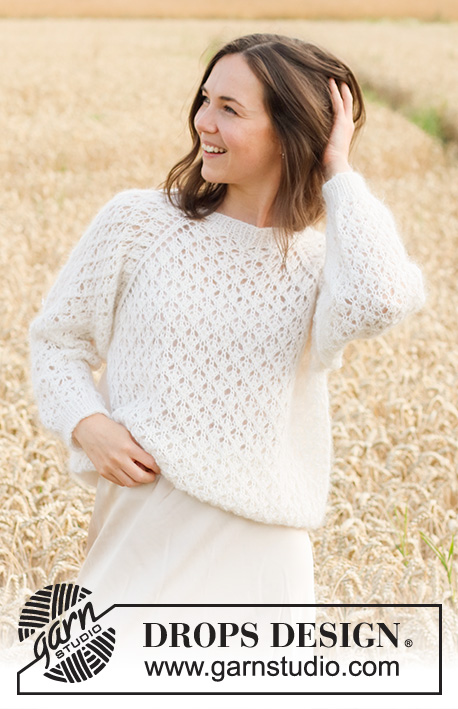
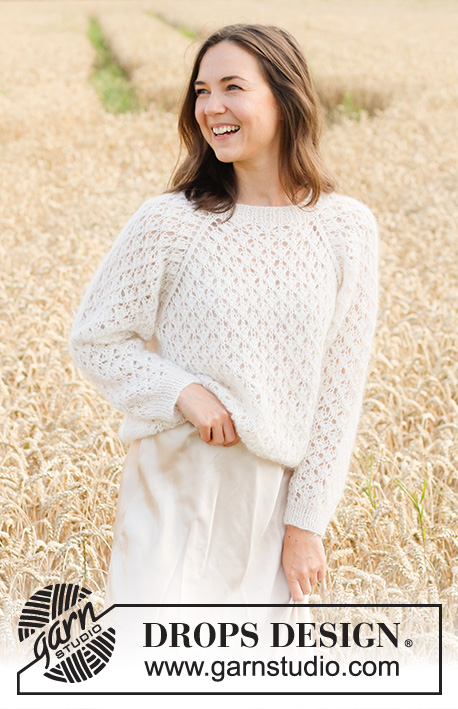
Knitted jumper in 1 strand DROPS Kid-Silk and 1 strand DROPS BabyAlpaca Silk. The piece is worked top down with raglan and lace pattern. Sizes S - XXXL.
DROPS 220-3 |
|||||||||||||||||||
|
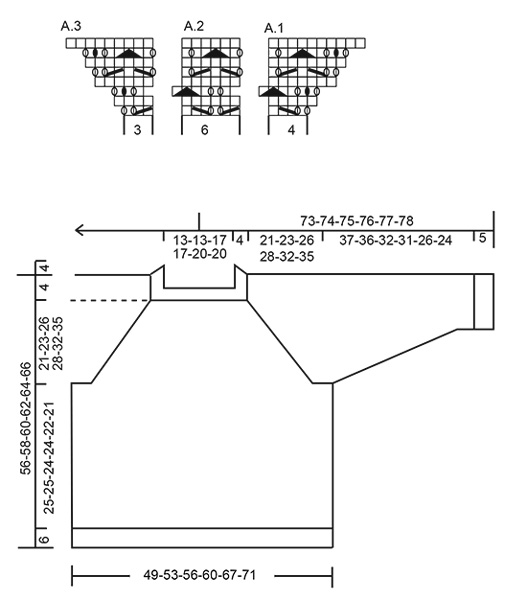
------------------------------------------------------- EXPLANATIONS FOR THE PATTERN: ------------------------------------------------------- PATTERN: See diagrams A.1 to A.3 DECREASE TIP-1 (for sleeves): Decrease 1 stitch on either side of the marker thread as follows: Work until there are 3 stitches left before the marker-stitch, knit 2 together, knit 3 (marker thread sits in the middle of these stitches), slip 1 stitch as if to knit, knit 1 and pass the slipped stitch over the knitted stitch (2 stitches decreased). DECREASE TIP-2 (evenly spaced): To work out how to decrease evenly, count the total number of stitches on the needle (e.g. 50 stitches) and divide by the number of decreases to be made (e.g. 8) = 6.25. In this example knit approx. each 5th and 6th stitch together. CASTING-OFF TIP: To avoid the cast-off edge being tight you can cast off with a larger size needle. If the edge is still tight, make 1 yarn over after approx. each 4th stitch at the same time as casting off; the yarn overs are cast off as normal stitches. ------------------------------------------------------- START THE PIECE HERE: ------------------------------------------------------- JUMPER – SHORT OVERVIEW OF THE PIECE: The neck and yoke are worked in the round with circular needle, top down. The round starts between the left sleeve and the back piece. The yoke is divided for body and sleeves and the body continued in the round with circular needle. The sleeves are worked in the round with short circular needle/double pointed needles, top down. The piece is worked with 1 strand Baby Alpaca Silk and 1 strand Kid-Silk (= 2 strands). NECK: Cast on 72-72-84-84-96-96 stitches with circular needle size 4 mm and 1 strand Kid-Silk and 1 strand Baby Alpaca Silk (= 2 strands). Knit 1 round. Then work rib (knit 1, purl 1) for 4 cm. Insert 1 marker at the beginning of the round. The yoke is measured from this marker. Change to circular needle size 5 mm. REMEMBER THE KNITTING TENSION! YOKE: Continue as follows: Work 1 stitch in stocking stitch, work A.1 (= 4 stitches), A.2 over the next 12-12-18-18-24-24 stitches (= 2-2-3-3-4-4 repeats of 6 stitches), A.3 (= 3 stitches), 2 stitches in stocking stitch, A.1, A.2, A.3, 2 stitches in stocking stitch, A.1, A.2 over the next 12-12-18-18-24-24 stitches (= 2-2-3-3-4-4 repeats of 6 stitches), A.3, 2 stitches in stocking stitch, A.1, A.2, A.3, 1 stitch in stocking stitch. Continue this pattern; all increases are drawn in A.1 and A.3. You increase 8 and 16 stitches alternately, every 2nd round. Each time A.1 and A.3 are completed in height, there will be 2 more repeats of A.2 in width. Increase every 2nd round a total of 18-20-20-22-24-26 times = 288-312-324-348-384-408 stitches. The piece measures approx. 16-18-19-20-21-24 cm. Continue the pattern but without further increases; stitches which do not fit into the pattern in the sides are worked in stocking stitch. Continue working until the piece measures 21-23-26-28-32-35 cm from the marker on the neck. Now divide the yoke for the body and sleeves on the next round as follows (continuing the pattern): Work 75-81-87-93-105-111 stitches (= back piece), place the next 69-75-75-81-87-93 stitches on 1 thread for the sleeve, cast on 9 stitches (in side under the sleeve), work 75-81-87-93-105-111 stitches as before (= front piece), place the next 69-75-75-81-87-93 stitches on 1 thread for the sleeve, cast on 9 stitches. Body and sleeves are finished separately. Cut the strand. BODY: = 168-180-192-204-228-240 stitches. Continue with A.2 over all stitches; make sure the pattern matches the pattern on the yoke. Continue working until the piece measures 25-25-24-24-22-21 cm from the division (there is approx. 6 cm left to finished length, you can try the jumper on and work to desired length). Change to circular needle size 4 mm and work rib (knit 1, purl 1) for 6 cm. Cast off with knit over knit and purl over purl – read CASTING-OFF TIP! The jumper measures approx. 56-58-60-62-64-66 cm from the shoulder down. SLEEVES: Place the 69-75-75-81-87-93 stitches from the thread on the one side of the piece on double pointed needles/short circular needle size 5 mm and knit up 1 stitch in each of the 9 stitches cast on under the sleeve = 78-84-84-90-96-102 stitches. Insert a marker in the middle of the 9 stitches under the sleeve. Allow the marker to follow your work onwards; it will be used when decreasing under the sleeve. Continue pattern A.2 in the round, making sure the pattern matches the pattern on the yoke. When the sleeve measures 3 cm from the division in all sizes, decrease 2 stitches under the sleeve – read DECREASE TIP-1. Decrease like this every 2½-2-1½-1½-1-1 cm a total of 14-16-16-17-19-20 times = 50-52-52-56-58-62 stitches; stitches which do not fit into the pattern under the sleeve are worked in stocking stitch. Continue working until the sleeve measures 37-36-32-31-26-24 cm from the division (there is approx. 5 cm left to finished length, you can try the jumper on and work to desired length). NOTE: Shorter measurements in larger sizes due to wider neck and longer yoke. Knit 1 round where you decrease 10 stitches evenly spaced in all sizes – read DECREASE TIP-2 = 40-42-42-46-48-52 stitches. Change to double pointed needles size 4 mm and work rib (knit 1, purl 1) for 5 cm. Cast off with knit over knit and purl over purl – remember CASTING-OFF TIP! The sleeve measures approx. 42-41-37-36-31-29 cm from the division. Work the other sleeve in the same way. |
|||||||||||||||||||
Diagram explanations |
|||||||||||||||||||
|
|||||||||||||||||||
 |
|||||||||||||||||||
Have you finished this pattern?Tag your pictures with #dropspattern #galateasweater or submit them to the #dropsfan gallery. Do you need help with this pattern?You'll find 29 tutorial videos, a Comments/Questions area and more by visiting the pattern on garnstudio.com. © 1982-2026 DROPS Design A/S. We reserve all rights. This document, including all its sub-sections, has copyrights. Read more about what you can do with our patterns at the bottom of each pattern on our site. |
|||||||||||||||||||


With over 40 years in knitting and crochet design, DROPS Design offers one of the most extensive collections of free patterns on the internet - translated to 17 languages. As of today we count 324 catalogues and 12290 patterns translated into English (UK/cm). 12290
We work hard to bring you the best knitting and crochet have to offer, inspiration and advice as well as great quality yarns at incredible prices! Would you like to use our patterns for other than personal use? You can read what you are allowed to do in the Copyright text at the bottom of all our patterns. Happy crafting!
Post a comment to pattern DROPS 220-3
We would love to hear what you have to say about this pattern!
If you want to leave a question, please make sure you select the correct category in the form below, to speed up the answering process. Required fields are marked *.