
Popular categories
Looking for a yarn?


Comments / Questions (92)
![]() JOELLE wrote:
JOELLE wrote:
Pour la taille L ,on monte 84 m pour le col et il nous en faut 108m pour commencer l'empiècement. Je les trouve où les mailles manquantes? Merci
21.03.2026 - 16:05DROPS Design answered:
Bonjour Joelle, tricotez ainsi le 1er tour de l'empiècement en taille L: 1 m jersey, 4 m (A.1), 18 m (A.2), 3 m (A.3), 2 m jersey, 4 m (A.1), 6 m (A.2), 3 m (A.3), 2 m jersey, 4 m (A.1), 18 m (A.2), 3 m (A.3), 2 m jersey, 4 m (A.1), 6 m (A.2), 3 m (A.3), 1 m jersey = 1+4+18+3+2+4+6+3+2+4+18+3+2+4+6+3+1=84. Bon tricot!
23.03.2026 - 08:26
![]() Carina Hellekant wrote:
Carina Hellekant wrote:
Vilka kroppsmått motsvarar redo storlek? M tex
17.02.2026 - 09:36DROPS Design answered:
Hej Catarina. På måttskissen längst ner på mönstret ser du plaggets mått i alla storlekar i cm. Det bästa är att du mäter ett plagg du redan har och så jämför du med måtten i måttskissen och väljer den storlek som passar bäst. Mvh DROPS Design
18.02.2026 - 08:13
![]() Wanya wrote:
Wanya wrote:
Úgy tűnik csak angolul írták le jól, de aki magyarul köti, annak szeretném jelezni, hogy csak a feketével jelölt szaporítást kötjük a következő sorban csavartan, hogy ne legyen lyuk! A többi szaporításnak épp az a lényege, hogy legyen LYUK! Szóval véletlenül se csavartan kössük le! Hibásan fordították!
05.11.2025 - 13:49
![]() Inger-Lise wrote:
Inger-Lise wrote:
Kommet til der jeg skal slutte med å øke på A1 og A3. Skal jeg kutte ut alle 3 kastene i A1 og A3? Og kun strikke glattstrikk?
01.06.2025 - 08:13
![]() Glucose wrote:
Glucose wrote:
Bonjour, où puis-je trouver le diagramme de ce point ? Merci
11.03.2025 - 15:33DROPS Design answered:
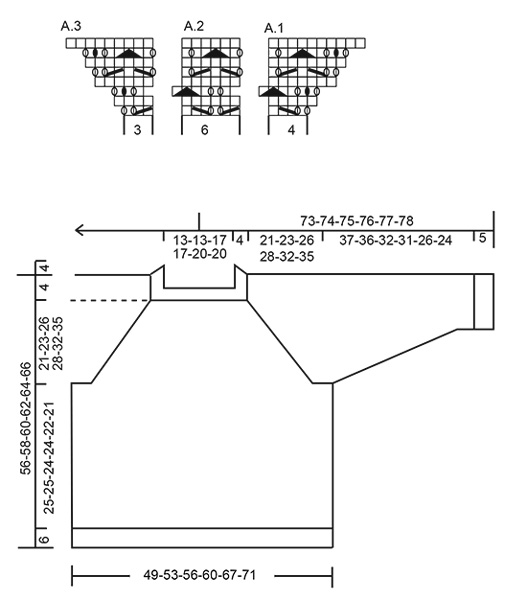
Bonjour Mme Glucose, vous trouverez les diagrammes du point ajouré de ce modèle en bas de page, entre la légende et le schéma des mesures. Bon tricot!
12.03.2025 - 09:19
![]() Sanna wrote:
Sanna wrote:
Hej! Stämmer antal maskor i detta mönstet eftersom jag inte får det att gå ihop med antal maskor när det skall delas till fram och bakstycke?
02.03.2025 - 20:41DROPS Design answered:
Maskantalen är korrekta. Innan du delar arb ska det vara 288-312-324-248-384-408 maskor på stickan. Då du delar arb enligt beskrivningen ska det stämma.
03.03.2025 - 18:21
![]() Fabienne wrote:
Fabienne wrote:
Bonjour, je ne trouve plus le fil BabyAlpaca silk est-ce que je peux systématiquement le remplacer par l'Alpaca simple ?
01.12.2024 - 17:15DROPS Design answered:
Bonjour Fabienne, tout à fait, retrouvez à chaque instant les alternatives possibles (et les quantités correspondantes) à l'aide de notre convertisseur. Bon tricot!
02.12.2024 - 10:09
![]() Betina Ellegaard wrote:
Betina Ellegaard wrote:
Hejsa Jeg kan ikke lige gennemskue det med at bytte garn og garnforbrug. Jeg vil gerne lave denne model i brushed alpaka silk, hvor mange nøgler af denne til en model størrelse M? Sindsyg flot bluse/ mønster 🥰🥰
31.10.2024 - 20:09DROPS Design answered:
Hej Betina, denne bluse er strikket i 2 tråde: 1 tråd DROPS Baby Alpaca Silk og 1 tråd DROPS Kid-Silk. Du kan strikke den i kun 1 tråd DROPS Brushed Alpaca Silk, da skal du bruge 200 g til str M :)
01.11.2024 - 11:56
![]() Sandrine wrote:
Sandrine wrote:
Bonjour. Pourriez-vous m'expliquer plus clairement le système des augmentations tous les 2 tours. Si je lis le diagramme on augmente au 3ème et au 7ème tour et uniquement 8 mailles par rang. Je ne saisis pas comment augmenter tous les 2 tours. Merci pour vos explications
08.04.2024 - 23:08DROPS Design answered:
Bonjour Sandrine, on va augmenter 1 maille au 1er rang + au 5ème rang au début de A.1 et à la fin de A.3 ; et on va augmenter 2 mailles au 3ème + au 7ème rang, au début de A.1 et à la fin de A.3. Quand les diagrammes sont terminés, on a augmenté 6 mailes dans A.1 et 6 mailles dans A.3 (= suffisamment de mailles pour 2 motifs supplémentaires de A.2 entre A.1 et A.3 quand on recommence les diagrammes en hauteur). Bon tricot!
09.04.2024 - 09:01
![]() Nicole wrote:
Nicole wrote:
Hallo, leider muss ich nochmals nachfragen, da ich die vorhergehende Erklärung nicht verstehe. Ich habe 324M und sollte nun ohne Zunahmen im Muster weiterarbeiten. Welche Umschläge werden weggelassen? Die Erklärungen scheinen sich von mal zu mal zu unterscheiden. In der 1. und 5.R lasse ich den 1. und letzten Umschlag von A.1 und A.3 weg, in der 3. und 7.R den 1., 2. und zweitletzten und letzten Umschlag von A.1 und A.3? Und wie stelle ich sicher, dass das Muster über das andere passt? Danke
08.04.2024 - 21:23DROPS Design answered:
Liebe Nicole, ja genauso stricken Sie, Sie könnne dann eine Markierung bei A.1/A.3 einsetzen, wo das Lochmuster beginnt/endet, die anderen Maschen stricken Sie einfach glatt rechts. Viel Spaß beim Stricken!
09.04.2024 - 08:39
|
|||||||||||||||||||
Galatea#galateasweater |
|||||||||||||||||||
 |
 |
||||||||||||||||||
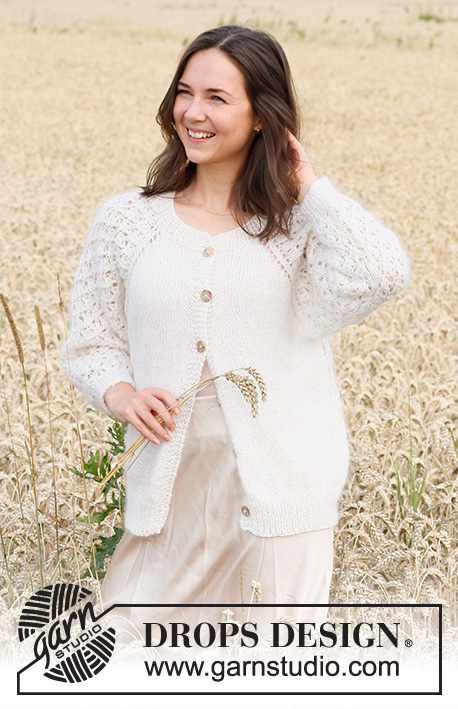
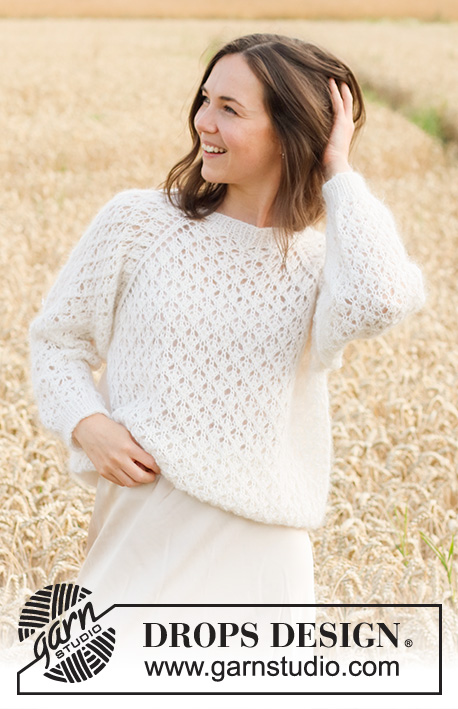
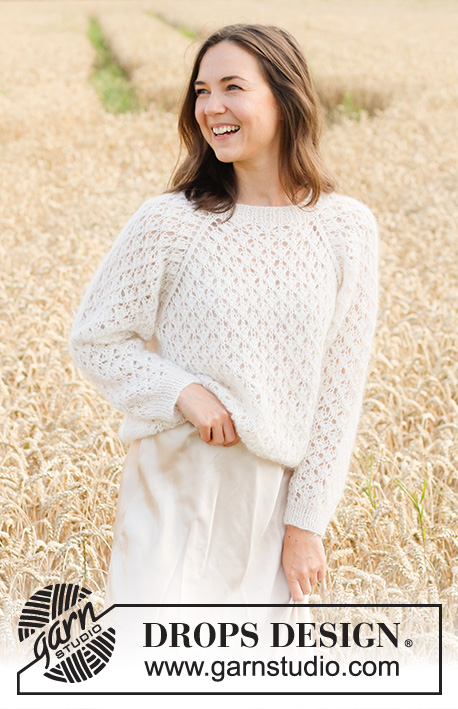
Knitted jumper in 1 strand DROPS Kid-Silk and 1 strand DROPS BabyAlpaca Silk. The piece is worked top down with raglan and lace pattern. Sizes S - XXXL.
DROPS 220-3 |
|||||||||||||||||||
|
------------------------------------------------------- EXPLANATIONS FOR THE PATTERN: ------------------------------------------------------- PATTERN: See diagrams A.1 to A.3 DECREASE TIP-1 (for sleeves): Decrease 1 stitch on either side of the marker thread as follows: Work until there are 3 stitches left before the marker-stitch, knit 2 together, knit 3 (marker thread sits in the middle of these stitches), slip 1 stitch as if to knit, knit 1 and pass the slipped stitch over the knitted stitch (2 stitches decreased). DECREASE TIP-2 (evenly spaced): To work out how to decrease evenly, count the total number of stitches on the needle (e.g. 50 stitches) and divide by the number of decreases to be made (e.g. 8) = 6.25. In this example knit approx. each 5th and 6th stitch together. CASTING-OFF TIP: To avoid the cast-off edge being tight you can cast off with a larger size needle. If the edge is still tight, make 1 yarn over after approx. each 4th stitch at the same time as casting off; the yarn overs are cast off as normal stitches. ------------------------------------------------------- START THE PIECE HERE: ------------------------------------------------------- JUMPER – SHORT OVERVIEW OF THE PIECE: The neck and yoke are worked in the round with circular needle, top down. The round starts between the left sleeve and the back piece. The yoke is divided for body and sleeves and the body continued in the round with circular needle. The sleeves are worked in the round with short circular needle/double pointed needles, top down. The piece is worked with 1 strand Baby Alpaca Silk and 1 strand Kid-Silk (= 2 strands). NECK: Cast on 72-72-84-84-96-96 stitches with circular needle size 4 mm and 1 strand Kid-Silk and 1 strand Baby Alpaca Silk (= 2 strands). Knit 1 round. Then work rib (knit 1, purl 1) for 4 cm. Insert 1 marker at the beginning of the round. The yoke is measured from this marker. Change to circular needle size 5 mm. REMEMBER THE KNITTING TENSION! YOKE: Continue as follows: Work 1 stitch in stocking stitch, work A.1 (= 4 stitches), A.2 over the next 12-12-18-18-24-24 stitches (= 2-2-3-3-4-4 repeats of 6 stitches), A.3 (= 3 stitches), 2 stitches in stocking stitch, A.1, A.2, A.3, 2 stitches in stocking stitch, A.1, A.2 over the next 12-12-18-18-24-24 stitches (= 2-2-3-3-4-4 repeats of 6 stitches), A.3, 2 stitches in stocking stitch, A.1, A.2, A.3, 1 stitch in stocking stitch. Continue this pattern; all increases are drawn in A.1 and A.3. You increase 8 and 16 stitches alternately, every 2nd round. Each time A.1 and A.3 are completed in height, there will be 2 more repeats of A.2 in width. Increase every 2nd round a total of 18-20-20-22-24-26 times = 288-312-324-348-384-408 stitches. The piece measures approx. 16-18-19-20-21-24 cm. Continue the pattern but without further increases; stitches which do not fit into the pattern in the sides are worked in stocking stitch. Continue working until the piece measures 21-23-26-28-32-35 cm from the marker on the neck. Now divide the yoke for the body and sleeves on the next round as follows (continuing the pattern): Work 75-81-87-93-105-111 stitches (= back piece), place the next 69-75-75-81-87-93 stitches on 1 thread for the sleeve, cast on 9 stitches (in side under the sleeve), work 75-81-87-93-105-111 stitches as before (= front piece), place the next 69-75-75-81-87-93 stitches on 1 thread for the sleeve, cast on 9 stitches. Body and sleeves are finished separately. Cut the strand. BODY: = 168-180-192-204-228-240 stitches. Continue with A.2 over all stitches; make sure the pattern matches the pattern on the yoke. Continue working until the piece measures 25-25-24-24-22-21 cm from the division (there is approx. 6 cm left to finished length, you can try the jumper on and work to desired length). Change to circular needle size 4 mm and work rib (knit 1, purl 1) for 6 cm. Cast off with knit over knit and purl over purl – read CASTING-OFF TIP! The jumper measures approx. 56-58-60-62-64-66 cm from the shoulder down. SLEEVES: Place the 69-75-75-81-87-93 stitches from the thread on the one side of the piece on double pointed needles/short circular needle size 5 mm and knit up 1 stitch in each of the 9 stitches cast on under the sleeve = 78-84-84-90-96-102 stitches. Insert a marker in the middle of the 9 stitches under the sleeve. Allow the marker to follow your work onwards; it will be used when decreasing under the sleeve. Continue pattern A.2 in the round, making sure the pattern matches the pattern on the yoke. When the sleeve measures 3 cm from the division in all sizes, decrease 2 stitches under the sleeve – read DECREASE TIP-1. Decrease like this every 2½-2-1½-1½-1-1 cm a total of 14-16-16-17-19-20 times = 50-52-52-56-58-62 stitches; stitches which do not fit into the pattern under the sleeve are worked in stocking stitch. Continue working until the sleeve measures 37-36-32-31-26-24 cm from the division (there is approx. 5 cm left to finished length, you can try the jumper on and work to desired length). NOTE: Shorter measurements in larger sizes due to wider neck and longer yoke. Knit 1 round where you decrease 10 stitches evenly spaced in all sizes – read DECREASE TIP-2 = 40-42-42-46-48-52 stitches. Change to double pointed needles size 4 mm and work rib (knit 1, purl 1) for 5 cm. Cast off with knit over knit and purl over purl – remember CASTING-OFF TIP! The sleeve measures approx. 42-41-37-36-31-29 cm from the division. Work the other sleeve in the same way. |
|||||||||||||||||||
Diagram explanations |
|||||||||||||||||||
|
|||||||||||||||||||
 |
|||||||||||||||||||
Have you finished this pattern?Tag your pictures with #dropspattern #galateasweater or submit them to the #dropsfan gallery. Do you need help with this pattern?You'll find 29 tutorial videos, a Comments/Questions area and more by visiting the pattern on garnstudio.com. © 1982-2026 DROPS Design A/S. We reserve all rights. This document, including all its sub-sections, has copyrights. Read more about what you can do with our patterns at the bottom of each pattern on our site. |
|||||||||||||||||||


With over 40 years in knitting and crochet design, DROPS Design offers one of the most extensive collections of free patterns on the internet - translated to 17 languages. As of today we count 324 catalogues and 12290 patterns translated into English (UK/cm). 12290
We work hard to bring you the best knitting and crochet have to offer, inspiration and advice as well as great quality yarns at incredible prices! Would you like to use our patterns for other than personal use? You can read what you are allowed to do in the Copyright text at the bottom of all our patterns. Happy crafting!
Post a comment to pattern DROPS 220-3
We would love to hear what you have to say about this pattern!
If you want to leave a question, please make sure you select the correct category in the form below, to speed up the answering process. Required fields are marked *.