
Categorías populares
¿Buscas un hilo?


Comentarios / Preguntas (78)
![]() Dominique escribió:
Dominique escribió:
On-dit. glisser attente 0 fois 0 mailles sur arrêt maille je ne comprends pas. Toute cette partie pour biais épaules est incompréhensible. "Rabattre une m au rg suivant à partir de l'encolure " on rabattre une seule fois? Merci de reformuler vos explications . Je suis en attente pour faire ce modèle. Merci
02.04.2025 - 19:31DROPS Design respondió:
Bonjour Dominique, s'il y a un 0 dans votre taille, vous n'êtes juste pas concernée par cette information; les m des épaules sont mises en attente en début de rg qui commence par l'emmanchure vers l'encolure (ex dos: sur l'end pour l'épaule droite / sur l'env pour l'épaule gauche); et on rabat les m de l'encolure en début de rg à partir de l'encolure vers l'emmanchure (ex dos: sur l'end pour l'épaule gauche, sur l'env pour l'épaule droite). Cette vidéo d'un autre modèle pourrait vous aider à visualiser comment faire. Bon tricot!
03.04.2025 - 08:35
![]() Sandra Schradiek escribió:
Sandra Schradiek escribió:
Wie werden am Ärmloch die Abnahmen gemacht
27.01.2025 - 18:42DROPS Design respondió:
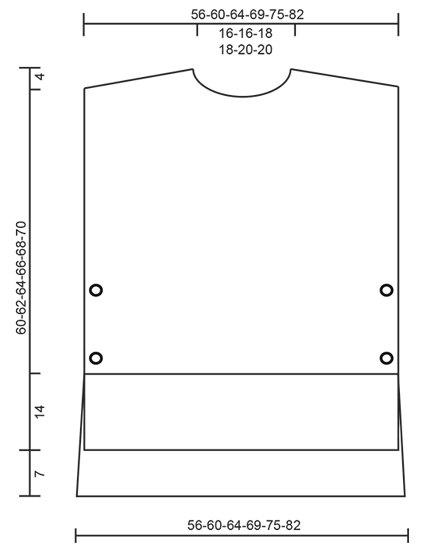
Liebe Frau Schradiek, es wird hier keine Maschen für die Armlöcher abgekettet - siehe Maßskizze. Viel Spaß beim Stricken!
28.01.2025 - 09:01
![]() Ann escribió:
Ann escribió:
Als ik 93 steken heb en voor de schouders 28 st. aan elke kant op een hulpdraad moet zetten, hoe kan het dan dat ik de middelste 18 st. moet afkanten voor de nek? Ik heb dan toch een oneven aantal steken over?
14.12.2024 - 15:38
![]() Christine DUPRE escribió:
Christine DUPRE escribió:
Pourquoi la plupart de vos modèles se tricote en aiguilles circulaires ? Pour ma part, je renonce à chaque fois pour réaliser vos modèles car je n'arrive pas à travailler en aiguille circulaire ? Il serait bien d'avoir plus de choix en aiguilles droites
04.12.2024 - 08:23DROPS Design respondió:
Bonjour Mme Dupre, les aiguilles circulaires en Scandinavie et en Europe du Nord sont très fréquemment utilisées, raison pour laquelle nombre de nos modèles en utilise, toutefois, vous pouvez souvent facilement adapter les explications sur aiguilles droites - cf cette leçon; pour ce modèle par ex, il suffit simplement de tricoter le devant et le dos comme indiqué (= séparément, en allers et retours), puis de coudre une seule des épaules pour relever les mailles du col, puis faire la couture de la 2ème épaule et du col. Bon tricot!
04.12.2024 - 16:03
![]() Marij escribió:
Marij escribió:
Beste mensen. Ik vind het erg moeilijk om met een rondbreinaald te werken. Hoe kan ik het patroon veranderen als ik gewoon 2 naalden gebruik??? Dat lukt mij het beste. Hopelijk kunt u mij helpen. Gr. Marij
06.11.2024 - 08:35DROPS Design respondió:
Dag Marij,
Om een patroon aan te passen om op rechte naalden te breien hebben we een instructie gemaakt. Deze vind je hier.
06.11.2024 - 13:44
![]() Cheryl Dillinger escribió:
Cheryl Dillinger escribió:
How many stitches and rows for the gauge?
29.10.2024 - 19:25DROPS Design respondió:
Dear Mrs Dillinger, you will find the tension for both needle size under header, together with needle size, sizes, amount of yarn and buttons. Happy knitting!
30.10.2024 - 08:08
![]() Ann Marie escribió:
Ann Marie escribió:
Vill ha beskrivningen till denna fina väst
24.10.2024 - 10:08
![]() Kirsten Sørensen escribió:
Kirsten Sørensen escribió:
Ønsker opskriften på den flotte vest
22.10.2024 - 15:14
![]() Paola escribió:
Paola escribió:
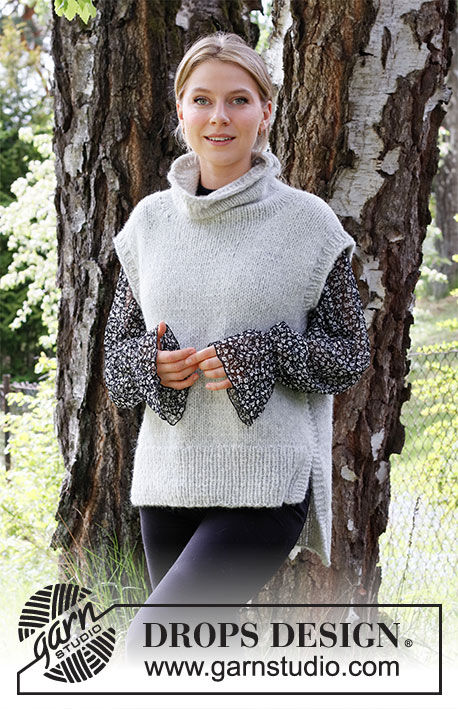
Buongiorno. Come faccio a fare questo modello con il collo alto. Grazie
13.09.2024 - 13:31DROPS Design respondió:
Buonasera Paola, per un aiuto così personalizzato può rivolgersi al suo rivenditore DROPS di fiducia. Buon lavoro!
13.09.2024 - 21:04
![]() Bec escribió:
Bec escribió:
Thank you so much for your recent feedback. I think I've done it correctly. The next step has me puzzled - I've just bound of my 1 stitch on the neck, my K1 row will be on the RS, not the WS, am I missing something? TIA
12.08.2024 - 04:33DROPS Design respondió:
Hi Bec, The knitted row after binding off the 1 stitch is from the wrong side (so work as normal from the right side before knitting from the wrong side if necessary). Regards, Drops Team.
12.08.2024 - 06:33
|
|
Winter is Coming#winteriscomingslipover |
|
 |
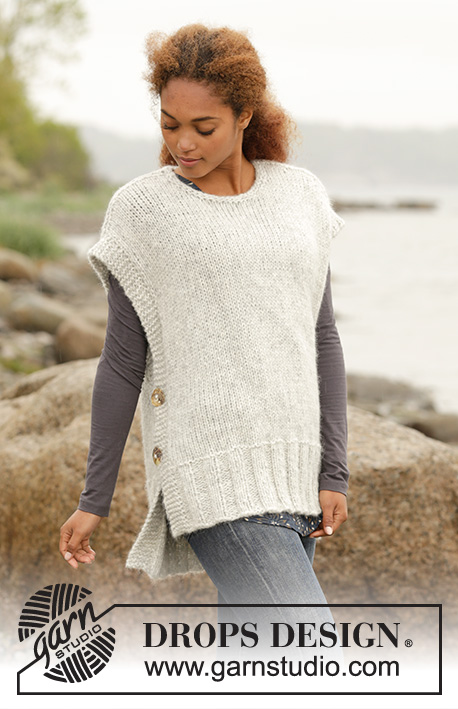 |
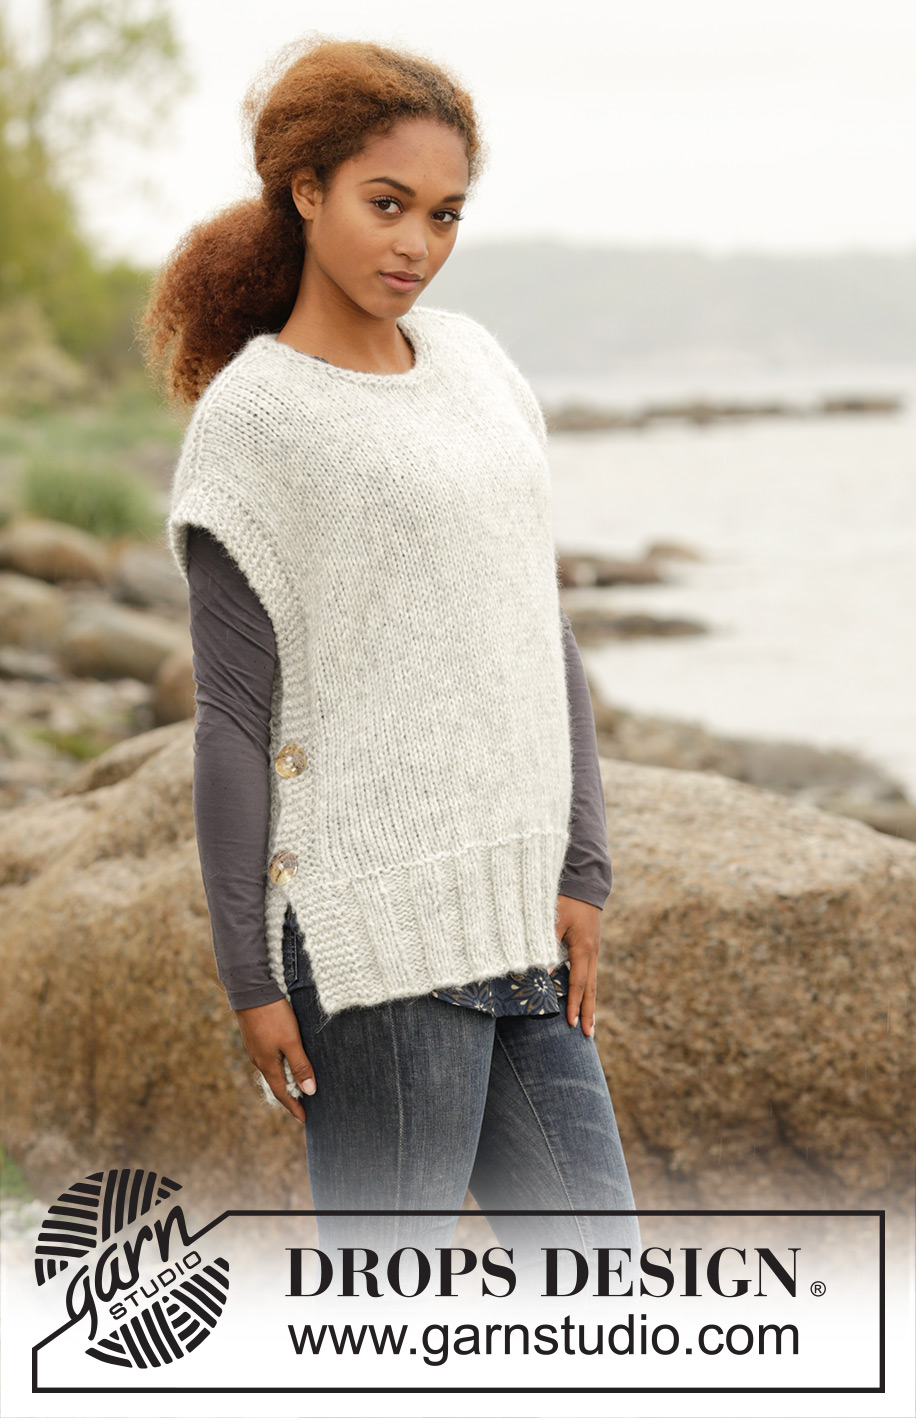
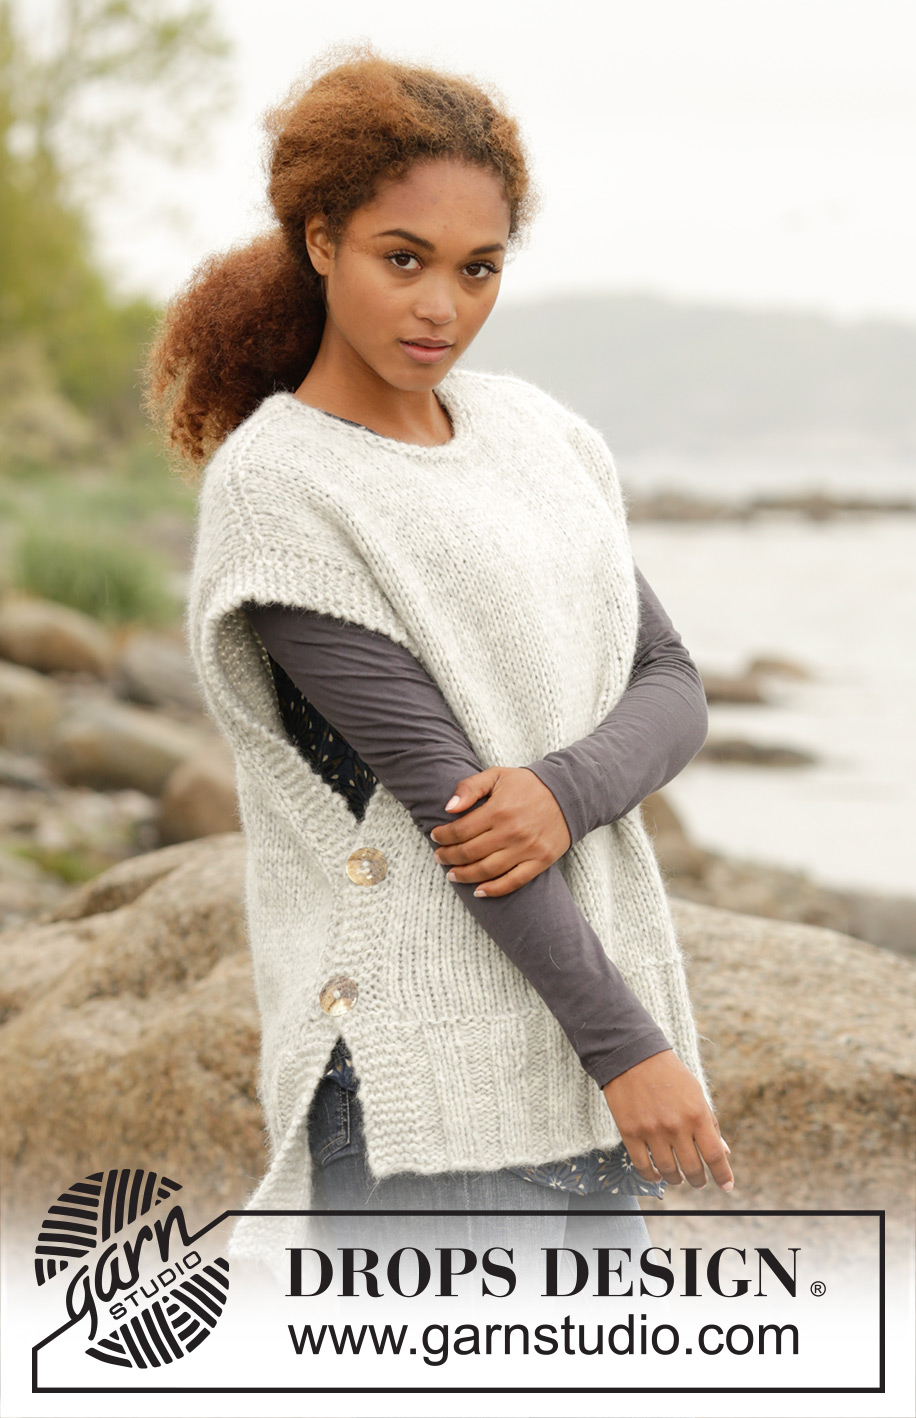
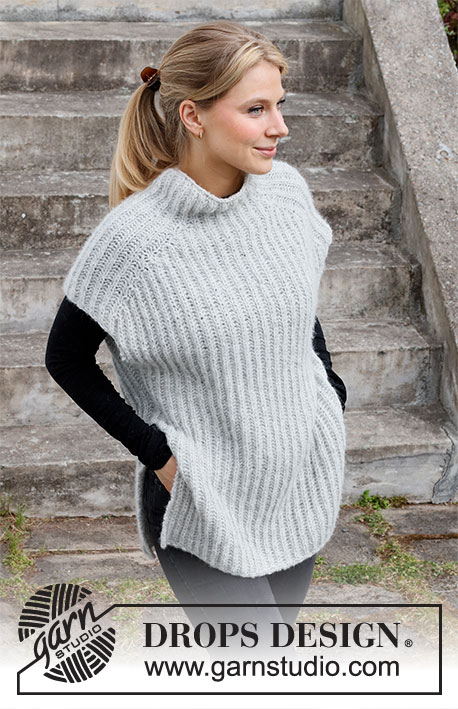
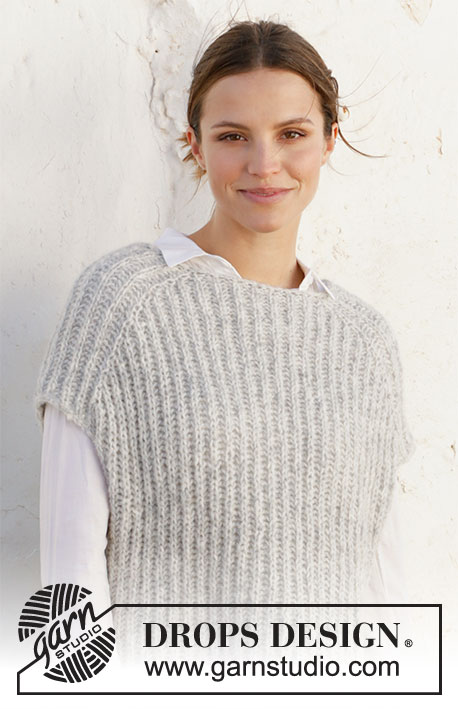
Chaleco de punto DROPS con aberturas en los lados y cuello redondo en ”Cloud”. Talla S-XXXL.
DROPS 173-47 |
|
|
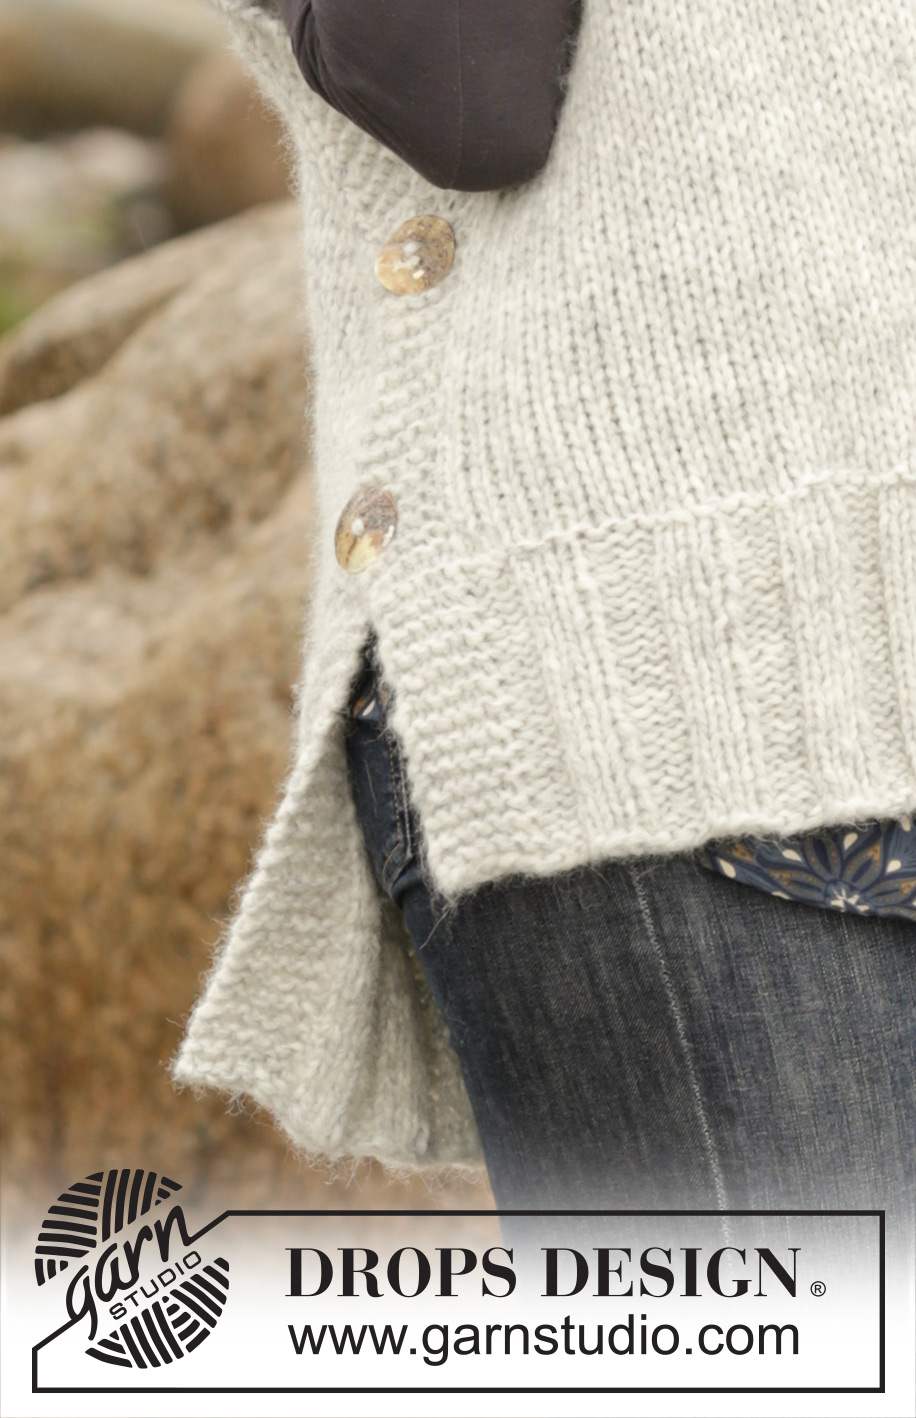
PUNTO MUSGO (de ida y vta): Trabajar todas las filas derecho. 1 pliegue = 2 filas de derecho. TIP PARA LAS DISMINUCIONES: Para calcular cada cuanto debemos hacer las dism, tomar el nº total de pts de la fila (por ej:75 pts) y restar los pts de la cenefa (por ej: 12 pts) ahora dividir este nº por el nº de pts que hay que dism en la vta (por ej: 13 pts) = 4.8., es decir, en este ejemplo trabajar aprox cada 4º/5º pt juntos (y no dism en los pts de la cenefa). OJALES: Cerrar para 2 ojales a cada lado del delantero. 1 ojal = cerrar el tercer y cuarto pt desde el borde y mont 2 pts nuevos en la sig fila sobre estos pts. Cerrar para los ojales cuando la labor mida 16 y 26 cm para todas las tallas (o la medida deseada). ----------------------------------------------------------------------- CHALECO: se trabaja de ida y vta con ag circular en 2 partes que se cosen en los hombros. ESPALDA: Mont 75-81-87-93-99-105 pts (incl 6 pts de la cenefa a cada lado) con ag circular tamaño 7 mm y con Cloud. Trabajar 1 fila de revés por el LR. Trabajar la sig fila como sigue por el LD: 6 pts de la cenefa en PT MUSGO - ver las explicaciones arriba - *3 r., 3 d*, repetir de * a * hasta que queden 9 pts en la ag y finalizar con 3 r. y 6 pts de la cenefa en pt musgo. Continuar con el pt elástico de esta manera hasta que la labor mida 21 cm. En la sig fila por el LD, dism 13-15-17-17-17-15 pts repartidos - LEER TIP PARA LAS DISMINUCIONES = 62-66-70-76-82-90 pts. Cambiar a ag circular tamaño 8 mm y trabajar en pt jersey con 6 pts de la cenefa en pt musgo a cada lado. RECUERDE MANTENER LA MISMA TENSIÓN DEL TEJIDO. Cuando la labor mida 63-65-67-69-71-73 cm desl los pts más externos al inicio de cada fila, a cada lado, a un gancho aux para la forma diagonal del hombro como sigue (ATENCIÓN: Para evitar cortar el hilo que está usando, trabajar los pts antes de deslizarlos a un gancho aux): Desl 7-8-8-9-10-11 pts un total 2-3-2-2-3-2 vcs y 8-0-9-10-0-12 pts un total de 1-0-1-1-0-1 vcs a un gancho aux a cada lado. AL MISMO TIEMPO cuando la labor mida 65-67-69-71-73-75 cm, cerrar los 16-16-18-18-20-20 pts centrales para el escote y finalizar cada hombro por separado. En la sig fila cerrar 1 pt para el escote. Cuando todos los pts se han disminuido/pasado a un gancho aux, hay 22-24-25-28-30-34 pts en el gancho aux para el hombro y la espalda mida aprox. 67-69-71-73-75-77 cm desde la parte superior del hombro hasta abajo. Desl los pts desde el gancho aux a la ag circular tamaño 7 mm. Trabajar 1 fila de derecho por el LR (para evitar que se formen agujeros en las transiciones al deslizar los pts del gancho aux de vta a la ag. Levantar el hilo entre dos pts y trabajarlo de derecho retorcido junto con el sig pt). Ahora rematar FLOJO con derecho por el LD. Repetir en el otro hombro. DELANTERO: Mont pts con ag circular tamaño 7 mm y trabajar como la espalda, pero cuando la labor mida 14 cm trabajar las dism repartidos como en la espalda (el delantero es 7 cm más corto) Cambiar a ag circular tamaño 8 mm y trabajar como la espalda pero cuando la labor mida 16 y 26 cm, cerrar para los OJALES a cada lado - ver las explicaciones arriba. Continuar trabajando hasta que la labor mida 53-55-57-58-60-62 cm. Ahora desl los 10-10-12-12-14-14 pts centrales a un gancho aux para el escote y finalizar cada hombro por separado. Continuar cerrando para el escote al inicio de cada fila desde el escote como sigue: cerrar 2 pts 1 vez, 1 pt 2 vcs. AL MISMO TIEMPO cuando la labor mida 56-58-60-62-64-66 cm, desl los pts a un gancho aux para la forma diagonal de los hombros como en la espalda. Cuando se han pasado todos los pts se han disminuido/pasado a un gancho aux hay 22-24-25-28-30-34 pts en el gancho aux para el hombro y el delantero mide aprox 60-62-64-66-68-70 cm desde la parte superior del hombro hacia abajo. Desl los pts desde el gancho aux a la ag circular tamaño 7 mm. Trabajar 1 fila de derecho por el LR como en la espalda antes de rematar con derecho por el LD. Repetir en el otro hombro. TERMINACIÓN: Hacer la costura de los hombros dentro del pt orillo - asegúrate de que la costura no queda tensa. Colocar la cenefa en pt musgo con los ojales (delantero) en un lado de la labor sobre la cenefa en pt musgo de la espalda y coser los botones. Repetir en el otro lado. CENEFA DEL ESCOTE: Recoger por el LD aprox 46-58 pts alrededor del escote (incl los pts en el gancho aux en el delantero) con ag circular corta tamaño 7 mm y con Cloud. Trabajar 1 vta de revés, 1 vta de derecho y 1 vta de revés antes de rematar FLOJO de derecho. |
|
 |
|
¿Terminaste este patrón?Entonces, etiqueta tus fotos con #dropspattern #winteriscomingslipover o envíalas a la galería #dropsfan. ¿Necesitas ayuda con este patrón?Encontrarás 21 videos tutoriales, un espacio para comentarios/preguntas y más visitando la página del patrón en garnstudio.com © 1982-2026 DROPS Design A/S. Todos los derechos reservados. Este documento, incluyendo todas sus sub-secciones, está protegido por los derechos de autor (copyright). Lee más acerca de lo que puedes hacer con nuestros patrones en la parte de abajo de cada patrón de nuestro sitio. |
|


Con más de 40 años en el diseño de modelos de punto y de ganchillo, DROPS Design ofrece una de las más vastas colecciones de patrones gratuitos en el internet - traducidos en 17 idiomas. Al día de hoy, contamos con 324 catálogos y 12290 patrones - de los cuales 11675 están traducidos en español.
Nosotros trabajamos con mucho esmero para brindarte lo mejor que las labores de punto y ganchillo tienen para ofrecer,inspiración y consejos, así como hilos de magnífica calidad a precios increíbles! Te gustaría usar nuestros patrones para otro fin además del uso personal? Puedes leer acerca de lo que estás permitida a hacer en el texto de Copyright en la parte de abajo de todos nuestros patrones. Felices labores!
Escribe un comentario sobre DROPS 173-47
¡Nos encantaría saber qué piensas acerca de este patrón!
Si quieres escribir una pregunta referente al patrón, por favor asegúrate de elegir la categoría correcta en el formulario debajo, para acelerar el proceso de respuesta. Los campos obligatorios están marcados con un *.