
Popular categories
Looking for a yarn?


Comments / Questions (150)
![]() Mona Någård wrote:
Mona Någård wrote:
Hej I beskrivningen till ärmen står det att man kan lägga upp och sticka med rundsticka 60 cm. Den var alldeles för lång så jag lyckades inte med detta. Hur gör jag? Efter resåren ska man minska 8 maskor. Blir inte ärmen för smal då? Tack!
01.10.2024 - 15:39DROPS Design answered:
Hej Mona. Om rundsticka 60 cm blir för lång så kan du sticka med strumpstickor istället. Ärmen ska inte bli för smal efter att man minskat 8 maskor, se bara till att hålla den stickfasthet som uppges i mönstret. Mvh DROPS Design
14.10.2024 - 14:23
![]() Michael Harish wrote:
Michael Harish wrote:
Hi, how many balls of Alpaca do I need for this pattern.
25.08.2024 - 13:44DROPS Design answered:
Dear Michael, DROPS Alpaca is a Group A yarn, while DROPS Air is a Group C yarn. You will need 2 threads of Alpaca to substitute 1 thread of Air. You can see how to calculate this in this lesson: https://www.garnstudio.com/lesson.php?id=14&cid=19. Happy knitting!
25.08.2024 - 23:37
![]() Mona Någård wrote:
Mona Någård wrote:
I mönstret står att bakstycket skall börja med avigt varv och sedan resår , medan ärmen skall börja med ett rätt varv och sedan resår. Skall det inte vara likt mellan bakstycke och ärm? Tack!
18.08.2024 - 16:51DROPS Design answered:
Hej Mona, bakstycket stickas första varv avigt från avigsidan. Ärmen stickas rät från rätsidan, så det blir likt :)
21.08.2024 - 10:13
![]() Celyne Ross wrote:
Celyne Ross wrote:
Sur mon aiguille circulaire? Vous dites en aller-retour, sur l’endroit puis sur l’envers? Donc sur des aiguilles droites?
29.07.2024 - 14:49DROPS Design answered:
Bonjour Mme Ross, dans ce modèle, on tricote le dos et le devant séparément, en allers et retours sur aiguille circulaire pour avoir suffisamment de place pour y loger toutes les mailles, vous pouvez donc tout à fait utiliser des aiguilles droites si vous préférez, vos mailles seront juste plus serrées. Bon tricot!
30.07.2024 - 08:29
![]() Célyne Ross wrote:
Célyne Ross wrote:
Bonjour, Ma question concerne la finition des manches. Je les ai tricotées avec une aiguille circulaire. Puis-je continuer jusqu’à la fin avec ces aiguilles, les mailles rabattues se faisant chaque côté du marqueur, au début et à la fin de chaque tour? Je fais la taille M, alors, je devrais rabattre en tout 16 mailles: 3 au début du tour et 3 à la fin du tour, ensuite 2 au début du tour suivant et 2 à la fin du tour et enfin 3 au début du tour suivant et 3 à la fin du tour?
17.07.2024 - 17:42DROPS Design answered:
Bonjour Mme Ross, lorsque vous avez rabattu les 6 mailles sous la manche, vous continuez en allers et retours (alternativement sur l'endroit et sur l'envers), en rabattant au début de chaque rang de chaque côté (au début de chaque rang sur l'endroit et sur l'envers) comme indiqué, autrement dit: 2 mailles au début des 2 rangs suivants et 3 mailles au début des 2 rangs suivants (vous avez rabattu 5 mailles de chaque côté en plus des 3 m du début). Bon tricot!
29.07.2024 - 10:26
![]() Martyna wrote:
Martyna wrote:
Mam pytanie, jak dokładnie zrobić tutaj bind off?:) robię rozmiar S, czyli muszę "bind off for the armholes on both sides at the beginning of each row as follows: Bind off 3 stitches 1-1-1-1-1-1 time, 2 stitches 1-1-1-1-1-1 time and 1 stitch 1-1-2-2-2-3 times = 64-70-74-82-92-100 stitches.". Czy możecie wytłumaczyć lub pokazać film, który to przedstawi? Dziękuję!
27.06.2024 - 15:22DROPS Design answered:
Witaj Martyno, w rozmiarze S zamykasz każdorazowo na początku 2 kolejnych rzędów (najpierw na prawej, a później na lewej stronie robótki) następująco: 1 raz 3 oczka - zamkniętych 6 oczek> zamykasz te oczka tak samo jak zakańczasz robótkę; następnie zamykasz 1 raz 2 oczka (przerabiając 3 oczka razem na prawo na prawej stronie/na lewo na lewej stronie robótki)> zamknięte 4 oczka; i wreszcie zamykasz 1 raz 1 oczko (przerabiając 2 oczka razem na prawo/na lewo) > zamknięte 2 oczka. Pozdrawiamy!
28.06.2024 - 14:54
![]() Maria wrote:
Maria wrote:
Hej. Blev precis klar med denna tröja. Men halskragen står upp, ligger inte ner som på bilden. Vad gjorde jag för fel?
16.06.2024 - 08:43DROPS Design answered:
Hei Maria. Husk for å unngå at halskanten strammer og vipper utover, er det viktig at sømmen er elastisk. Prøv å fell av halskanten på nytt, men løsere. Vi har flere hjelpevideo på hvordan felle av elastisk, se: Hur man maskar av elastiskt - 3 metoder, Hur man får en elastisk kant när man maskar av eller Hur man maskar av en elastisk kant med omslag. mvh DROPS Design
24.06.2024 - 13:17
![]() Aliza wrote:
Aliza wrote:
Bonjour J’en suis au manches. Je ne comprends pas les augmentations: Augmenter ainsi 12 fois ( taille M) au total 3 1/2 cm. Si j’augmente 12 fois de suite cela crée un espèce de ballonnement sous la manche. C’est pas joli. Dois-je augmenter chaque 3 1/2 cm? Merci de m’aider à comprendre. 🧶
28.02.2024 - 21:50DROPS Design answered:
Bonjour Aliza, il manquait "tous les" dans cette phrase, autrement dit, vous augmentez 12 fois tous les 3,5 cm, merci pour votre retour, la partie manquante a été ajoutée. Bonne continuation!
29.02.2024 - 08:15
![]() Lise wrote:
Lise wrote:
Hei! Skal denne genseren kun strikkes med en tråd? Skjønner ikke helt heller hvordan rillene skal strikkes.
21.02.2024 - 21:26DROPS Design answered:
Hei Lise, Ja, hvis du bruker Drops Air, eller et annet garn fra garngruppe C, bruker du 1 tråd. Rillestrikk (kantmaskene), når man strikker fram og tilbake, er strikket rett på alle pinner. God fornøyelse!
22.02.2024 - 06:43
![]() Celyne Ross wrote:
Celyne Ross wrote:
Bonjour! Une chance que vous êtes là! Voici ma question: je tricote le devant, j’ai fait les rangs de côtes, j’ai fait les diminutions indiquées et je tricote donc le dos comme tel. J’en suis à 25 cm de hauteur totale. Je mesure la largeur et j’ai 57 cm. Je suis de taille moyenne et la largeur indiquée est de 50 cm. J’ai utilisé les aiguilles 5,5 (et 4,5 pour les côtes ). Ça serait trop large de 7cm. Que faire?
31.01.2024 - 19:33DROPS Design answered:
Bonjour Mme Ross, avez-vous bien le bon échantillon/la bonne tension? Car les 82 mailles en taille M après les diminutions doivent vous donner 50 cm (soit 82 mailles - 2 mailles lisières sur la base de 16 mailles =10 cm). Pensez à bien vérifier votre échantillon - ajustez la taille des aiguilles si besoin, et à conserver la même tension pendant la réalisation. Bon tricot!
01.02.2024 - 08:23
|
|
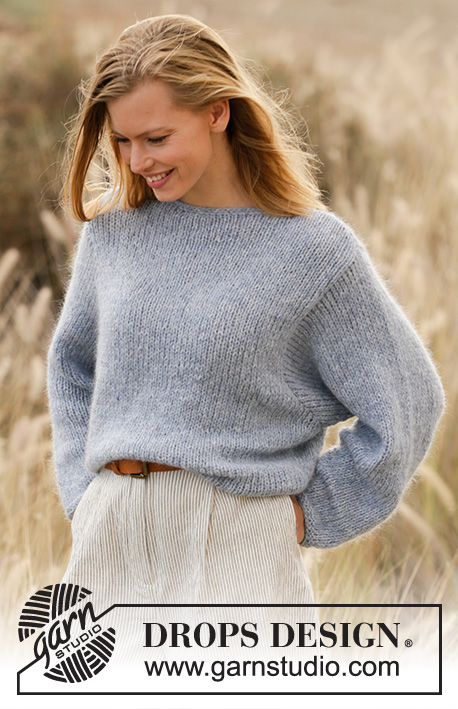
Grey Pearl#greypearlsweater |
|
 |
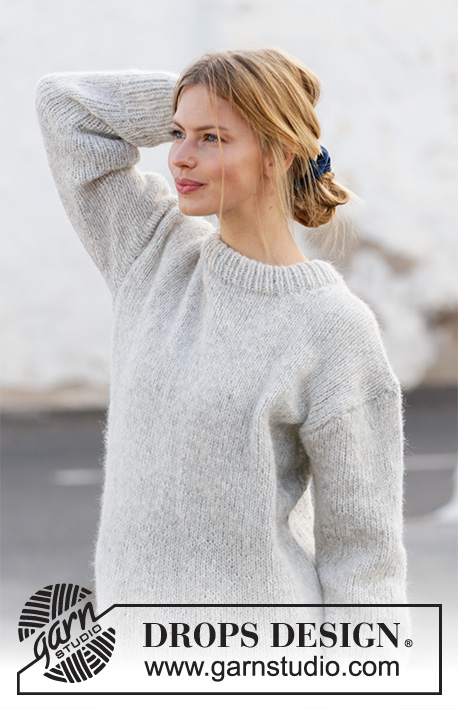 |
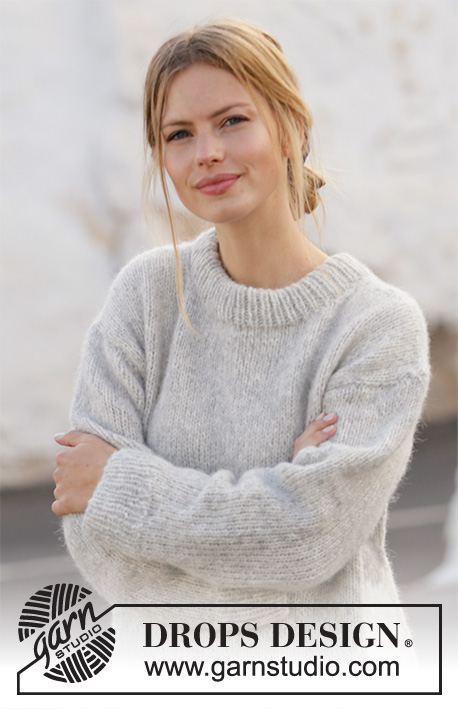
Knitted jumper in DROPS Air. Sizes S - XXXL.
DROPS 210-36 |
|
|
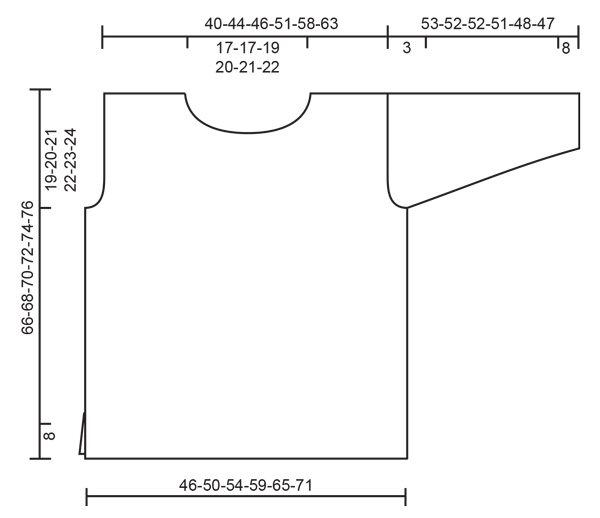
------------------------------------------------------- EXPLANATIONS FOR THE PATTERN: ------------------------------------------------------- RIDGE/GARTER STITCH (worked back and forth): Knit all rows. 1 ridge in height = Knit 2 rows. DECREASE TIP (evenly spaced): To work out how to decrease evenly, count the total number of stitches on needle (e.g. 89 stitches) and divide by number of decreases to be made (e.g. 13) = 6.8. In this example decrease by knitting together alternately each 5th and 6th stitch and each 6th and 7th stitch (approx.). INCREASE TIP (for sleeves): Start 1 stitch before the marker thread, 1 yarn over, work 2 stitches (marker thread sits between these 2 stitches), 1 yarn over. On the next round knit the yarn overs twisted to avoid holes. ------------------------------------------------------- START THE PIECE HERE: ------------------------------------------------------- JUMPER – SHORT OVERVIEW OF THE PIECE: The jumper is worked back and forth in 2 parts which are sewn together to finish. The sleeves are worked in the round with double pointed needles/short circular needle. BACK PIECE: Cast on 89-97-103-113-125-137 stitches with circular needle size 4.5 mm and Air. Purl 1 row from the wrong side then work as follows – from the right side: 2 edge stitches in GARTER STITCH – see description above, *knit 1, purl 1 *, work from *-* until there are 3 stitches left, knit 1 and 2 edge stitches in garter stitch. Continue like this until the piece measures 8 cm. Change to circular needle size 5.5 mm and knit 1 row from the right side where you decrease 13-15-15-17-19-21 stitches evenly spaced – read DECREASE TIP = 76-82-88-96-106-116 stitches. Continue with stocking stitch and 1 edge stitch in garter stitch on each side. When the piece measures 47-48-49-50-51-52 cm, cast off for the armholes on both sides at the beginning of each row as follows: Cast off 3 stitches 1-1-1-1-1-1 time, 2 stitches 1-1-1-1-1-1 time and 1 stitch 1-1-2-2-2-3 times = 64-70-74-82-92-100 stitches. Continue with stocking stitch until the piece measures 64-66-68-70-72-74 cm. Now cast off the middle 26-26-28-30-32-34 stitches for the neck and each shoulder is finished separately. Then cast off at the beginning of next row from the neck as follows: 1 stitch 1 time = 18-21-22-25-29-32 stitches on the shoulder. Continue working until the piece measures 66-68-70-72-74-76 cm and cast off. Work the other shoulder in the same way. FRONT PIECE: Cast on and work as for the back piece until the piece measures 60-62-64-66-68-70 cm. Now place the middle 20-20-22-24-26-28 stitches on 1 thread for the neck and finish each shoulder separately. Then cast off at the beginning of each row from the neck as follows: 2 stitches 1 time and 1 stitch 2 times = 18-21-22-25-29-32 stitches left on the shoulder. Continue working until the piece measures 66-68-70-72-74-76 cm, then cast off. Work the other shoulder in the same way. SLEEVE: The sleeves are worked bottom up, in the round, with double pointed needles/short circular needle. The piece is then divided and worked back and forth for the sleeve cap. Cast on 46-48-50-52-52-56 stitches with double pointed needles size 4.5 mm and Air. Knit 1 round, then work rib (knit 1 / purl 1) for 8 cm. Change to double pointed needles size 5.5 mm and continue with stocking stitch. On the first round decrease 8-8-8-8-8-10 stitches evenly spaced = 38-40-42-44-44-46 stitches. Insert a marker thread at the beginning of the round = mid under sleeve. Continue with stocking stitch, AT THE SAME TIME when the piece measures 10-10-10-10-12-12 cm, increase 1 stitch on each side of the marker thread – read INCREASE TIP. The yarn overs are worked twisted on the next round to avoid holes. Increase like this 3½-3½-3-3-2-2 cm a total of 11-12-13-13-15-15 times = 60-64-68-70-74-76 stitches. When the sleeve measures 50-49-49-48-45-44 cm, cast off 3 stitches on each side of the marker thread (= 6 stitches cast off mid under the sleeve), then continue working back and forth. Cast off for the sleeve cap at the beginning of each row on both sides as follows: 2 stitches 1 time, 3 stitches 1 time, then cast off the remaining stitches. Work the other sleeve in the same way. ASSEMBLY: Sew the shoulder seams. Sew in the sleeves and sew the side seams, inside the 1 edge stitch and until there is 8 cm left at the bottom = split. NECK: Knit up approx. 92-106 stitches with circular needle size 4,5 mm around the neck (including the stitches on the thread and the number divisible by 2). Work rib (knit 1 / purl 1) for 9 cm. Then cast off. Fold the rib at the top to the wrong side and fasten down. To avoid the neck being tight and turning outwards, make sure the seam is elastic. |
|
 |
|
Have you finished this pattern?Tag your pictures with #dropspattern #greypearlsweater or submit them to the #dropsfan gallery. Do you need help with this pattern?You'll find 30 tutorial videos, a Comments/Questions area and more by visiting the pattern on garnstudio.com. © 1982-2026 DROPS Design A/S. We reserve all rights. This document, including all its sub-sections, has copyrights. Read more about what you can do with our patterns at the bottom of each pattern on our site. |
|


With over 40 years in knitting and crochet design, DROPS Design offers one of the most extensive collections of free patterns on the internet - translated to 17 languages. As of today we count 324 catalogues and 12252 patterns translated into English (UK/cm).
We work hard to bring you the best knitting and crochet have to offer, inspiration and advice as well as great quality yarns at incredible prices! Would you like to use our patterns for other than personal use? You can read what you are allowed to do in the Copyright text at the bottom of all our patterns. Happy crafting!
Post a comment to pattern DROPS 210-36
We would love to hear what you have to say about this pattern!
If you want to leave a question, please make sure you select the correct category in the form below, to speed up the answering process. Required fields are marked *.